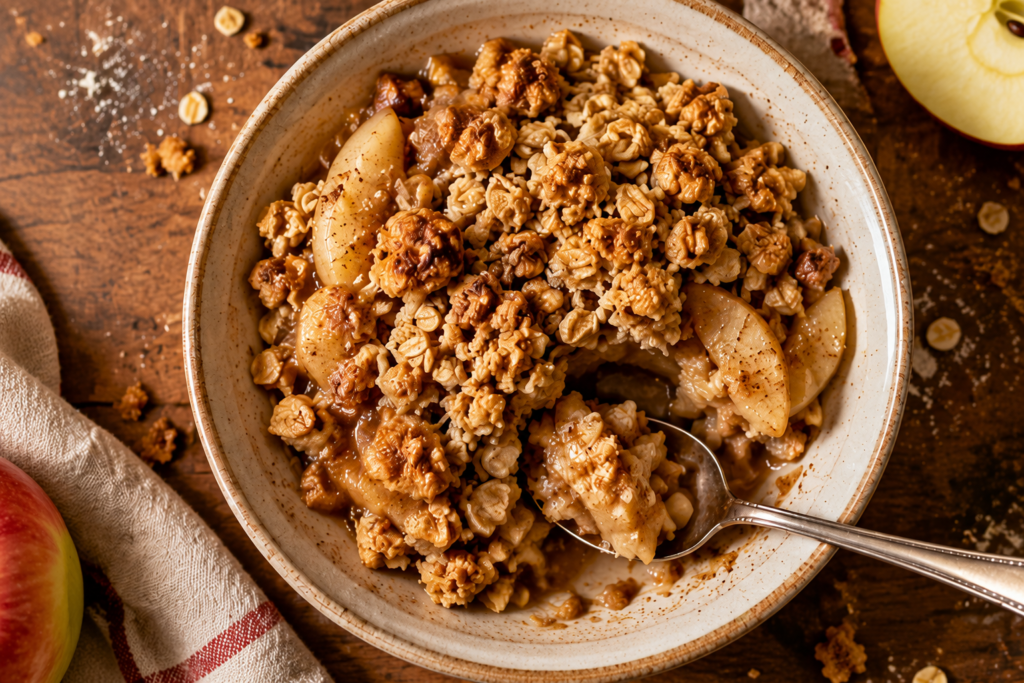
Apple crisp is one of those desserts that never goes out of style.
This high-protein version gives you the same warm, cinnamon-spiced flavor and crunchy oat topping you love, with an extra boost of protein to help keep you feeling full and satisfied.
It’s simple to make, uses everyday ingredients, and comes together with very little effort.
You’ll also learn the best apples to use, how to make a crisp topping that’s perfectly golden, and a few easy tips to help your apple crisp turn out great every time.
Why You’ll Love This High-Protein Apple Crisp
- Easy to make in under an hour – Simple steps and minimal prep make this a great recipe for busy days.
- Packed with protein for a more filling dessert – Added protein helps make each serving more satisfying than a traditional apple crisp.
- Naturally sweet and comforting – Fresh apples and warm cinnamon create classic homemade flavor without needing lots of added sugar.
- Great for breakfast, dessert, or meal prep – Enjoy it warm or cold any time of the day, and store leftovers for later.
- Uses simple pantry ingredients – Everything you need is easy to find and may already be in your kitchen.
- Family-friendly recipe – A healthier twist on a favorite dessert that both kids and adults can enjoy.
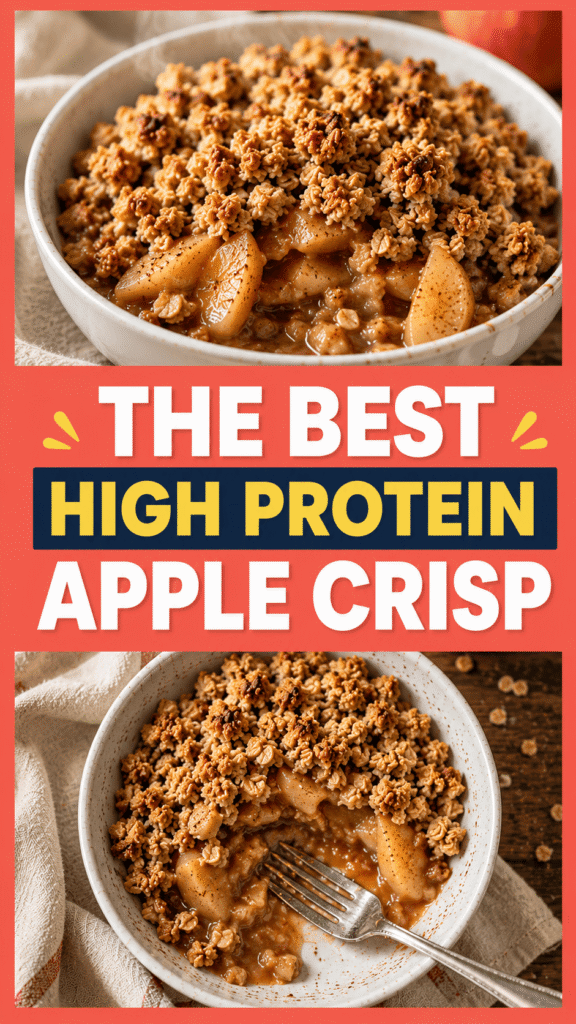
What Is High Protein Apple Crisp?
High-protein apple crisp is a healthier twist on the classic dessert that keeps everything people love, including tender baked apples, warm cinnamon, and a crisp, golden oat topping, while adding more protein to make it more satisfying.
A traditional apple crisp is usually made with apples, sugar, butter, flour, and oats, creating a sweet dessert that is rich in carbohydrates and fat but relatively low in protein.
The biggest difference is the topping, where ingredients like vanilla protein powder, Greek yogurt, almond flour, or other protein-rich ingredients are mixed in to boost the protein without changing the familiar texture too much.
Adding protein helps turn this dessert into something that can keep you feeling full for longer, making it a great option not only for dessert but also as a hearty snack or even a quick breakfast.
One of the best things about a high-protein apple crisp is that it still delivers the cozy flavors you expect, with juicy apples, sweet cinnamon, and a crunchy topping that tastes homemade and comforting.
Choosing a good-quality vanilla protein powder with a flavor you enjoy helps the topping blend naturally with the apples instead of overpowering them.
Many high-protein recipes also use less refined sugar because the natural sweetness of ripe apples, along with a small amount of maple syrup or honey, is often enough to create a delicious balance of flavors.
Reducing the amount of added sugar lets the apples shine while keeping the dessert sweet, warm, and satisfying without tasting overly rich.
The result is a wholesome dessert that feels just as comforting as the original version while offering more protein and a better balance of nutrients in every bite.
Ingredients You’ll Need
For the Apple Filling
- 6 medium apples, peeled, cored, and sliced (about 6 cups) – Honeycrisp, Fuji, Granny Smith, or Pink Lady work well.
- 2 teaspoons ground cinnamon – Adds warm, classic apple crisp flavor.
- ¼ teaspoon ground nutmeg – Brings extra warmth and depth.
- 1 teaspoon vanilla extract – Enhances the sweetness of the apples.
- 1 tablespoon fresh lemon juice – Brightens the flavor and helps prevent the apples from browning.
- 2 tablespoons maple syrup or honey – Provides natural sweetness.
- 1 tablespoon cornstarch or arrowroot powder – Thickens the apple juices as the crisp bakes.
For the High Protein Crisp Topping
- 1 cup old-fashioned rolled oats – Creates a hearty, crunchy topping.
- ½ cup vanilla protein powder – Adds protein while complementing the apple and cinnamon flavors.
- ½ cup almond flour or oat flour – Gives the topping a tender, crumbly texture.
- ⅓ cup chopped pecans or walnuts (optional) – Adds extra crunch and healthy fats.
- 1 teaspoon ground cinnamon – Brings warm spice to the topping.
- ¼ cup melted coconut oil or unsalted butter – Helps the topping become golden and crisp.
- ¼ cup plain Greek yogurt (optional) – Increases the protein content and adds moisture.
- ¼ teaspoon salt – Balances the sweetness and enhances the overall flavor.
Best Apples for Apple Crisp
Sweet Apples
Honeycrisp apples are one of the best choices for apple crisp because they stay firm while baking and have a naturally sweet, juicy flavor.
Their crisp texture helps the apple filling hold its shape instead of turning into applesauce, giving every bite a pleasant balance of soft fruit and a little bite.
Fuji apples are another excellent option if you enjoy a sweeter dessert.
They have a dense texture that holds up well in the oven, and their natural sugars become even richer as they bake, creating a caramel-like flavor with very little added sweetener.
Gala apples are soft, sweet, and easy to find in most grocery stores.
While they become more tender during baking than Honeycrisp or Fuji apples, they still make a delicious filling with a mild, classic apple flavor that many families enjoy.
Tart Apples
Granny Smith apples are a favorite for traditional apple crisp because their bright, tart flavor balances the sweetness of the topping.
They also stay firm throughout baking, so the filling keeps its texture instead of becoming overly soft.
Pink Lady apples offer the best of both worlds with a sweet-tart flavor that adds extra depth to every bite.
Their firm flesh bakes beautifully, making them a great choice if you want apples that stay juicy while still holding their shape.
Best Apple Combinations
Using just one type of apple makes a great crisp, but combining sweet and tart varieties creates an even better dessert.
A mix such as Honeycrisp and Granny Smith or Fuji and Pink Lady gives you a filling with more layers of flavor, as the sweetness and tartness balance each other naturally.
Blending different apples also improves the texture because each variety softens at a slightly different rate during baking.
The result is a filling that’s juicy, tender, and full of apple flavor, with pieces that keep their shape beneath the golden, crunchy protein topping.
How to Make High Protein Apple Crisp
Step 1: Prepare the Apples
Start by preheating your oven to 350°F (175°C) and lightly greasing an 8-inch or 9-inch baking dish to prevent sticking and make serving easier.
Peel, core, and slice the apples into evenly sized pieces about ¼ inch thick so they cook at the same rate and become perfectly tender without turning mushy.
If you’re using a mix of sweet and tart apples, combine them in a large mixing bowl before adding the remaining filling ingredients.
Step 2: Mix the Filling
Add the cinnamon, nutmeg, vanilla extract, lemon juice, maple syrup or honey, and cornstarch to the bowl with the apples.
Gently toss everything together until every apple slice is evenly coated with the spices and thickener.
The cornstarch helps thicken the juices released during baking, giving you a rich, syrupy filling instead of a watery one.
Spread the apple mixture into the prepared baking dish, arranging it in an even layer so it bakes evenly from edge to center.
Step 3: Make the Protein Topping
In a separate bowl, combine the rolled oats, vanilla protein powder, almond flour, cinnamon, salt, and chopped nuts if you’re using them.
Stir the dry ingredients well so the protein powder is evenly distributed throughout the mixture.
Pour in the melted coconut oil or butter and add the Greek yogurt if desired, then mix until the topping resembles coarse, slightly damp crumbs.
If the mixture seems too dry, add a teaspoon of milk at a time until it holds together when lightly squeezed without becoming wet.
Step 4: Assemble the Crisp
Sprinkle the protein topping evenly over the apples, making sure to cover the entire surface without pressing it down firmly.
Leaving the topping loose allows the heat to circulate, creating the crispy, golden texture that makes apple crisp so irresistible.
Step 5: Bake Until Golden
Place the baking dish on the center rack of the oven and bake for 35 to 45 minutes, or until the apples are fork-tender and the topping is golden brown.
You should see the apple filling gently bubbling around the edges, which is a good sign that the fruit is fully cooked and the juices have thickened.
If the topping starts browning too quickly, loosely cover the dish with aluminum foil for the last 10 to 15 minutes of baking.
Step 6: Cool and Serve
Remove the apple crisp from the oven and let it cool for about 10 to 15 minutes before serving.
This short resting time allows the filling to set, making it easier to scoop while keeping the juices thick and flavorful.
Enjoy it warm on its own, or serve it with a spoonful of Greek yogurt, cottage cheese, or a scoop of protein ice cream for an extra boost of protein.
Any leftovers can be covered and refrigerated, where they’ll stay delicious for several days and reheat beautifully for another cozy treat.
Tips for the Best High-Protein Apple Crisp
Choose Firm Apples
Firm apples are the key to a crisp with the perfect texture because they hold their shape while baking instead of breaking down into a soft puree.
Honeycrisp, Granny Smith, Fuji, and Pink Lady are all excellent choices since they stay tender while still giving you distinct apple slices in every bite.
If you have a few different apple varieties on hand, don’t be afraid to mix them, as combining sweet and tart apples creates a more balanced and flavorful filling.
Slice the apples into pieces that are about the same thickness so they cook evenly and are all perfectly tender when the crisp comes out of the oven.
Don’t Overmix the Topping
The topping should be mixed just until the ingredients come together into coarse crumbs.
Overmixing can make the oats and flour pack together too tightly, resulting in a topping that’s dense instead of light and crisp.
If you’re using Greek yogurt, stir it in gently with the melted butter or coconut oil until everything is evenly coated.
A crumbly topping may look a little dry before baking, but that’s exactly what helps it become golden and crunchy in the oven.
Balance Sweetness
The natural sweetness of fresh apples does most of the work in this recipe, so you don’t need a large amount of added sweetener.
Taste one of your apples before you begin baking to get an idea of how sweet it is.
If your apples are already very sweet, you can slightly reduce the maple syrup or honey without affecting the final result.
If you’re using tart apples like Granny Smith, adding the full amount of sweetener will create a well-balanced filling without making it overly sugary.
The cinnamon, vanilla, and nutmeg also help bring out the apples’ natural flavor, making the dessert taste rich without relying on extra sugar.
Let It Rest Before Serving
It can be tempting to dig in right away, but letting the apple crisp rest for 10 to 15 minutes makes a noticeable difference.
As it cools slightly, the bubbling juices thicken and settle, making each serving easier to scoop and keeping the filling from spreading across the plate.
The topping also becomes crispier as it rests, giving you a better contrast between the crunchy topping and the soft, warm apples.
A little patience rewards you with a dessert that’s easier to serve, looks more inviting, and tastes even better.
Recipe Variations
High Protein Apple Berry Crisp
Adding berries is an easy way to give this apple crisp a fresh burst of flavor and color.
Mix about 1 to 2 cups of fresh or frozen blueberries, raspberries, or blackberries with the sliced apples before adding the filling ingredients.
The berries become soft and juicy as they bake, creating a delicious combination of sweet apples and slightly tart fruit.
If you’re using frozen berries, there’s no need to thaw them first, but you may want to add an extra teaspoon of cornstarch to help absorb the additional juices.
Gluten-Free Version
Making this recipe gluten-free is simple with a few easy ingredient swaps.
Use certified gluten-free rolled oats to avoid any cross-contamination during processing.
Replace regular oat flour, if needed, with certified gluten-free oat flour or almond flour.
Before using your protein powder, check the label to make sure it is certified gluten-free, as some brands may contain gluten or be produced in facilities that process wheat.
The finished crisp will have the same warm flavor and crunchy topping while being suitable for anyone following a gluten-free diet.
Dairy-Free Version
A dairy-free apple crisp is just as delicious and requires only a couple of substitutions.
Use melted coconut oil instead of butter to keep the topping rich and crisp.
Skip the Greek yogurt or replace it with a thick dairy-free yogurt made from coconut, almond, or soy if you still want extra moisture.
Choose a dairy-free protein powder to maintain the high protein content without using milk-based ingredients.
The result is a dessert that’s just as cozy, flavorful, and satisfying as the original recipe.
Extra Crunchy Topping
If you enjoy plenty of crunch, there are several easy ways to make the topping even crispier.
Stir chopped pecans, walnuts, or sliced almonds into the oat mixture for added texture and a subtle nutty flavor.
You can also sprinkle a tablespoon or two of pumpkin seeds or sunflower seeds over the topping before baking for extra crunch and nutrition.
Be careful not to pack the topping down when spreading it over the apples, as a loose, crumbly layer browns more evenly and develops a crisp finish.
Lower Sugar Option
If you prefer a less sweet dessert, this recipe is easy to adjust without losing its comforting flavor.
Naturally sweet apples like Honeycrisp or Fuji allow you to reduce the maple syrup or honey while still creating a delicious filling.
The cinnamon, vanilla, and baked apples provide plenty of natural sweetness, so many people find they don’t miss the extra sugar.
Serving the crisp with plain Greek yogurt instead of sweetened toppings is another simple way to keep the overall sugar content lower while adding even more protein.
Serving Suggestions
- Greek yogurt – Add a spoonful on top for a creamy finish and an extra boost of protein.
- Cottage cheese – A surprisingly delicious pairing that makes the crisp even more filling.
- Vanilla protein ice cream – Enjoy a scoop for a high-protein dessert with a classic hot-and-cold contrast.
- Light whipped cream – A light, fluffy topping that complements the warm apple filling without overpowering it.
- Peanut butter drizzle – Drizzle warm peanut butter over the crisp for extra richness and protein.
- Warm with coffee or tea – Serve alongside your favorite cup of coffee or tea for a cozy breakfast, snack, or dessert.
How to Store Leftovers
Refrigerator
Allow the apple crisp to cool completely before storing it to prevent excess moisture from building up inside the container.
Transfer the leftovers to an airtight container or cover the baking dish tightly with plastic wrap or aluminum foil.
Store the apple crisp in the refrigerator for up to 4 days, where it will stay fresh and flavorful.
The topping may soften slightly during storage, but it will still taste delicious and can easily be crisped up again when reheated.
Freezer
If you’d like to save your apple crisp for later, it freezes very well.
Once completely cooled, place individual portions or the entire crisp in a freezer-safe airtight container or wrap the baking dish tightly with a layer of plastic wrap followed by aluminum foil.
Label the container with the date and freeze for up to 3 months for the best flavor and texture.
When you’re ready to enjoy it again, thaw the crisp overnight in the refrigerator before reheating.
Reheating Instructions
For the best texture, reheat the apple crisp in a 350°F (175°C) oven for 10 to 15 minutes, or until it’s warmed through and the topping becomes crisp again.
If you’re reheating a larger portion straight from the refrigerator, it may need a few extra minutes in the oven.
For a quicker option, microwave individual servings for 30 to 60 seconds until warm.
Keep in mind that the microwave is convenient, but the oven does a much better job of bringing back the crisp, crunchy topping.
If the topping seems a little dry after reheating, serve it with a spoonful of Greek yogurt or a drizzle of peanut butter to add extra creaminess and flavor.
Can You Make Apple Crisp Ahead of Time?
Yes, this high-protein apple crisp is an excellent make-ahead recipe, making it perfect for busy weekdays, holiday gatherings, or whenever you want a homemade dessert without doing all the work at the last minute.
You can prepare the apple filling up to 24 hours in advance by peeling and slicing the apples, then tossing them with the lemon juice, spices, sweetener, vanilla, and cornstarch before storing the mixture in an airtight container in the refrigerator.
Keeping the filling chilled helps the flavors blend together while the lemon juice slows the apples from browning, so they’ll still look fresh when it’s time to bake.
For the best texture, prepare the protein topping separately and store it in its own airtight container in the refrigerator until you’re ready to assemble the crisp.
Waiting to combine the topping with the apples just before baking helps keep the oats light and crumbly, which creates a crisp, golden finish instead of a soft topping.
If you’re meal prepping, you can assemble the entire crisp in the baking dish, cover it tightly, and refrigerate it for up to 24 hours before baking.
When baking a chilled apple crisp straight from the refrigerator, you may need to add an extra 5 to 10 minutes to the baking time so the center heats through completely.
You can also bake the crisp ahead of time, let it cool completely, and refrigerate it until you’re ready to serve.
To bring back its fresh-from-the-oven texture, reheat the crisp in a 350°F (175°C) oven for about 10 to 15 minutes, or until the filling is hot and the topping is crisp again.
If you’re only warming a single serving, the microwave works well for convenience, although the topping will stay crunchier if you use the oven or a toaster oven.
Nutrition Highlights
- High in protein – Protein powder and optional Greek yogurt help make each serving more filling and support muscle maintenance.
- Good source of fiber – Apples and rolled oats provide fiber that supports healthy digestion and helps keep you satisfied.
- Contains healthy fats – Ingredients like almonds, pecans, walnuts, or coconut oil add healthy fats that contribute to a balanced dessert.
- Rich in vitamins from apples – Fresh apples provide vitamin C, potassium, and antioxidants that support overall health.
- More satisfying than traditional apple crisp – The combination of protein, fiber, and healthy fats helps keep you fuller for longer compared to a classic apple crisp.
Common Mistakes to Avoid
Using Soft Apples
Choosing apples that are too soft can leave you with a filling that becomes mushy during baking instead of tender and juicy.
Firm varieties like Honeycrisp, Granny Smith, Fuji, and Pink Lady hold their shape much better and create the texture most people expect from a great apple crisp.
If your apples are very ripe, consider mixing them with firmer varieties to help the filling stay balanced.
Adding Too Much Liquid
It’s easy to think that extra maple syrup, honey, or vanilla will make the filling more flavorful, but too much liquid can create a runny crisp.
The apples naturally release plenty of juice as they bake, so it’s best to stick to the recipe measurements.
Using the recommended amount of cornstarch or arrowroot also helps thicken those juices into a rich, glossy filling instead of a watery one.
If you’re adding extra fruit such as berries, remember that they release additional moisture, so a small extra amount of thickener can help maintain the right consistency.
Overbaking
Leaving the crisp in the oven for too long can dry out both the apples and the protein topping.
Start checking for doneness near the end of the suggested baking time by looking for bubbling fruit around the edges and a lightly golden topping.
The apples should be soft enough to pierce easily with a fork while still holding their shape.
If the topping browns before the filling is fully cooked, loosely cover the dish with aluminum foil to prevent it from becoming too dark.
Using Too Much Protein Powder
Adding more protein powder than the recipe calls for might seem like an easy way to increase the protein, but it can make the topping dry, dense, and slightly chalky.
Protein powder absorbs moisture differently than flour, so even a small increase can noticeably change the texture.
For the best results, use the recommended amount and choose a protein powder with a flavor you enjoy, since it will be noticeable in the finished dessert.
If you’d like even more protein, it’s usually better to serve the apple crisp with Greek yogurt, cottage cheese, or protein ice cream rather than adding extra powder to the topping.
Final Thoughts
This high-protein apple crisp is a simple way to enjoy a classic comfort dessert while adding more protein, fiber, and wholesome ingredients to every bite.
It’s easy to make, full of warm cinnamon flavor, and satisfying enough for dessert, breakfast, or a snack.
Feel free to make it your own by trying different apples, adding berries, or choosing your favorite nuts and toppings. Small changes can create a whole new version you’ll love.
Happy baking!
FAQs
Can I use whey or plant-based protein powder?
Yes. Both whey and plant-based protein powders work well. Use a vanilla-flavored variety for the best taste.
Which apples work best?
Firm apples like Honeycrisp, Granny Smith, Fuji, and Pink Lady are excellent choices because they hold their shape during baking.
Can I make it without oats?
Yes. Replace the oats with extra almond flour, chopped nuts, or a gluten-free oat alternative for a different but still delicious topping.
How much protein is in one serving?
The exact amount depends on the protein powder and ingredients you use, but most servings contain 10 to 18 grams of protein.
Can I make it vegan?
Yes. Use a plant-based protein powder, coconut oil instead of butter, dairy-free yogurt, and maple syrup instead of honey.
Can I freeze apple crisp?
Absolutely. Let it cool completely, then freeze it in an airtight container for up to 3 months.
Can I make it in individual ramekins?
Yes. Divide the filling and topping between ramekins and reduce the baking time to about 25 to 30 minutes.
Why is my apple crisp watery?
Watery apple crisp is usually caused by overly juicy apples, too much liquid, or not using enough cornstarch or arrowroot. Letting the crisp rest for 10 to 15 minutes after baking also helps the filling thicken.
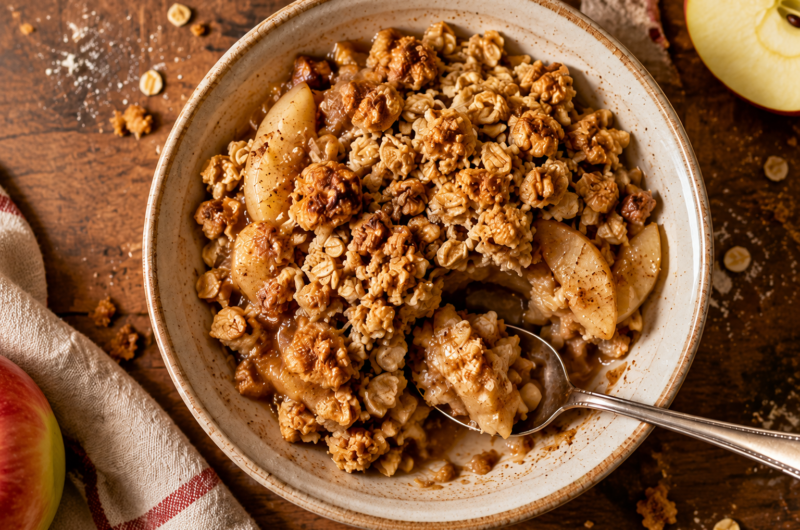
High Protein Apple Crisp (Healthy, Easy & Absolutely Delicious)
Difficulty: Easy8
servings15
minutes40
minutes55
minutesA warm, cozy high-protein apple crisp made with tender cinnamon apples and a crunchy oat topping. It’s an easy, healthier dessert that’s perfect for breakfast, a snack, or dessert.
Ingredients
- Apple Filling
6 medium apples, peeled, cored, and sliced
2 tsp ground cinnamon
¼ tsp ground nutmeg
1 tsp vanilla extract
1 tbsp lemon juice
2 tbsp maple syrup or honey
1 tbsp cornstarch
- Protein Topping
1 cup rolled oats
½ cup vanilla protein powder
½ cup almond flour
⅓ cup chopped pecans (optional)
1 tsp ground cinnamon
¼ cup melted coconut oil or butter
¼ cup plain Greek yogurt (optional)
¼ tsp salt
Directions
- Preheat the oven to 350°F (175°C) and lightly grease an 8-inch or 9-inch baking dish.
- Toss the apples with the filling ingredients and spread them evenly into the baking dish.
- In a separate bowl, mix all of the topping ingredients until crumbly.
- Sprinkle the topping evenly over the apples.
- Bake for 35–45 minutes, or until the topping is golden brown and the apples are tender.
- Let the crisp cool for 10–15 minutes before serving.
Notes
- Honeycrisp, Granny Smith, Fuji, and Pink Lady apples work best.
- For extra protein, serve with Greek yogurt or protein ice cream.
- Store leftovers in the refrigerator for up to 4 days or freeze for up to 3 months.

Hi, I’m Sorenna Blythe, the baker and writer behind Mix Whisk Bake. I share simple, reliable recipes and honest kitchen moments to help home bakers bake with confidence and joy. When I’m not testing new treats, you’ll find me sipping coffee and dreaming up my next bake.