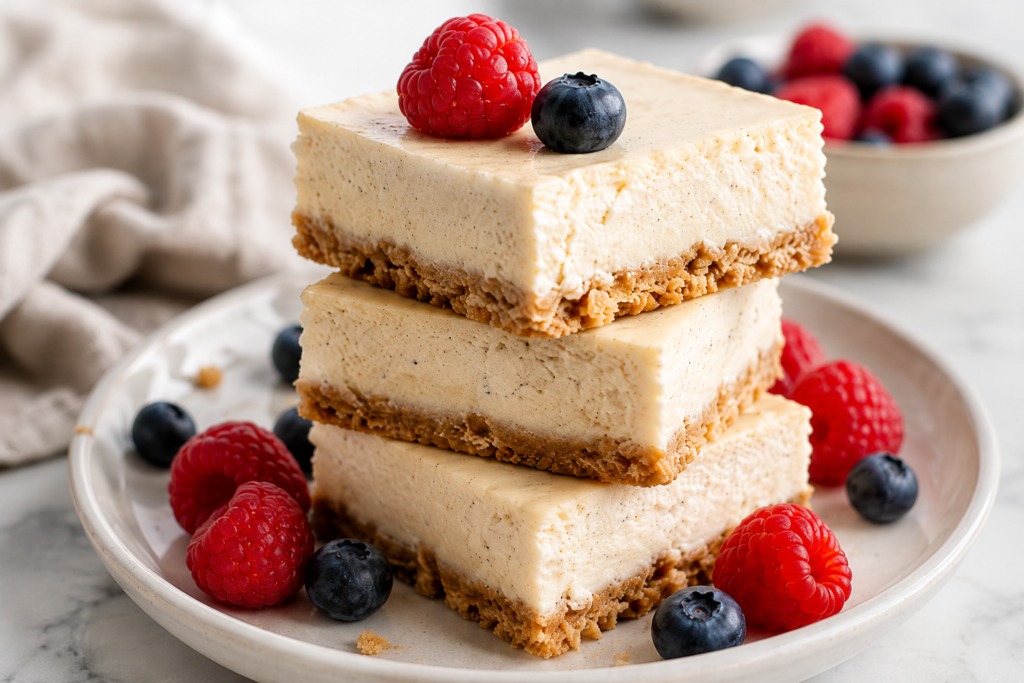
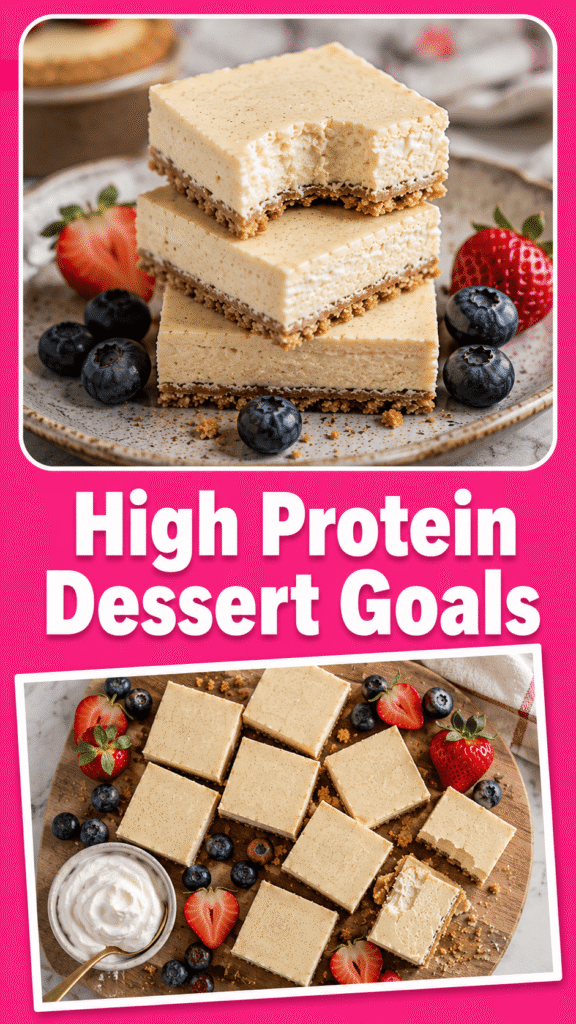
If you’re looking for a dessert that tastes rich and creamy while giving you an extra boost of protein, these high-protein cheesecake bars are a recipe you’ll want to keep on repeat.
They’re simple to make, satisfying, and a great way to enjoy a sweet treat without feeling like you’ve overdone it.
Made with wholesome, protein-packed ingredients, these bars are a lighter alternative to traditional cheesecake.
They’re perfect for meal prep, a post-workout snack, or an easy dessert whenever you’re craving something sweet.
In this recipe, you’ll learn exactly how to make smooth, creamy cheesecake bars with helpful tips, simple ingredient swaps, and easy variations so you can make them your own.
Why You’ll Love These High-Protein Cheesecake Bars
- High in protein without sacrificing flavor: Enjoy a delicious dessert that helps keep you full while tasting just as indulgent as classic cheesecake.
- Rich, creamy cheesecake texture: Every bite is smooth, velvety, and perfectly satisfying.
- Easy to make with simple ingredients: You only need a handful of everyday ingredients and a few easy steps.
- Lower in sugar than traditional cheesecake: Get all the creamy goodness with less added sugar.
- Great for meal prep: Make a batch ahead of time and enjoy ready-to-eat treats throughout the week.
- Kid-friendly and freezer-friendly: They’re a family favorite and freeze well for quick snacks whenever you need them.
- Perfect healthy dessert or snack: Enjoy them after dinner, as a post-workout bite, or whenever you’re craving something sweet.
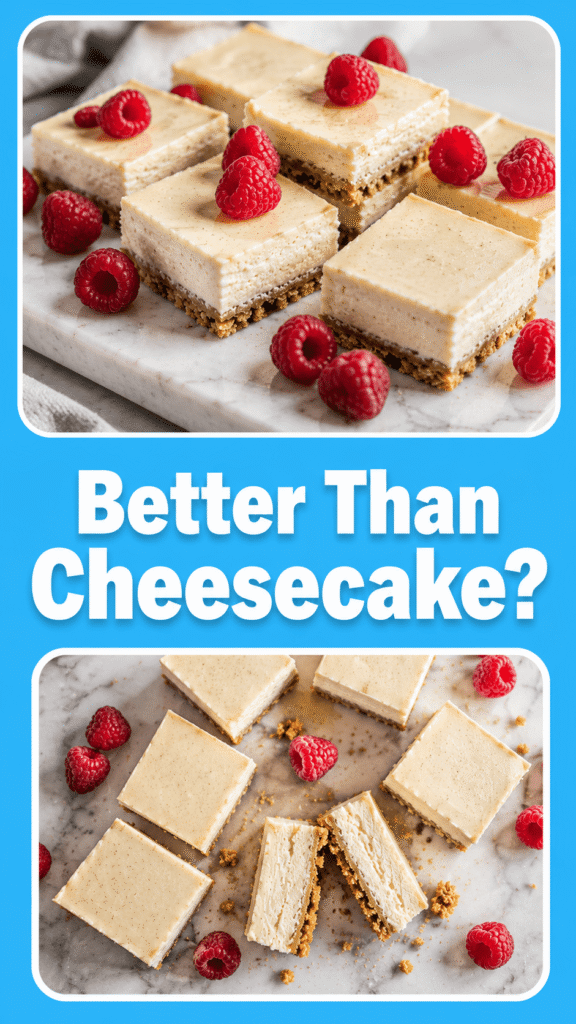
What Makes These Cheesecake Bars High in Protein?
Greek Yogurt
Greek yogurt is one of the biggest sources of protein in this recipe.
It has much more protein than regular yogurt while adding a smooth, creamy texture that blends perfectly with the cream cheese.
Plain Greek yogurt also adds a slight tang that gives these cheesecake bars their classic cheesecake flavor.
For the best results, use thick plain Greek yogurt instead of flavored varieties, which often contain extra sugar.
Cottage Cheese (Optional Variation)
If you’d like to boost the protein even more, cottage cheese is an excellent addition.
When blended until smooth, it becomes creamy and mixes easily into the filling without leaving a grainy texture.
It also adds extra protein while keeping the cheesecake light and moist.
If you’re not a fan of cottage cheese, don’t worry.
You can simply leave it out or replace it with a little more Greek yogurt.
Protein Powder
Protein powder is what gives these cheesecake bars their extra protein boost.
Vanilla protein powder is a popular choice because it adds sweetness and complements the cheesecake flavor without needing many extra ingredients.
If you’re using a flavored protein powder, you may want to reduce the amount of sweetener slightly.
Different protein powders absorb moisture differently, so if your batter seems too thick, simply stir in a tablespoon or two of milk until it reaches a smooth, creamy consistency.
Eggs
Eggs help hold everything together as the cheesecake bakes.
They also add high-quality protein while creating the rich, creamy texture that makes cheesecake so enjoyable.
For the smoothest filling, let your eggs come to room temperature before mixing them into the batter.
Reduced-Fat Cream Cheese
Cream cheese is what gives these bars their signature cheesecake taste.
Using reduced-fat cream cheese keeps the filling rich and creamy while lowering the overall fat compared to traditional recipes.
Make sure the cream cheese is softened before mixing.
Softened cream cheese blends much more easily and helps create a silky filling without lumps.
How They Compare to Traditional Cheesecake
Traditional cheesecake is usually made with full-fat cream cheese, heavy cream, or sour cream, and plenty of sugar.
While it’s undeniably delicious, it’s often lower in protein and much higher in calories and fat.
These high-protein cheesecake bars offer a lighter option without losing the creamy texture that makes cheesecake so satisfying.
Thanks to the Greek yogurt, protein powder, eggs, and reduced-fat cream cheese, every bite delivers more protein while keeping the dessert rich, flavorful, and perfect for everyday enjoyment.
Ingredients You’ll Need
For the Crust
- 1 cup oat flour: Creates a soft, slightly chewy crust with a mild flavor.
- ½ cup almond flour: Adds richness and helps give the crust a tender texture.
- ¼ cup melted butter or coconut oil: Binds the crust together and adds moisture.
- 2 tablespoons granulated sweetener of choice: Sweetens the crust without overpowering the filling.
- 1 teaspoon vanilla extract: Adds warm, classic flavor.
- ¼ teaspoon salt: Balances the sweetness and enhances the overall taste.
For the Cheesecake Filling
- 16 ounces (2 blocks) reduced-fat cream cheese, softened: The creamy base for the cheesecake filling.
- 1 cup plain Greek yogurt: Adds protein while keeping the filling smooth and light.
- 1 scoop (about 30 grams) vanilla protein powder: Boosts the protein content and adds vanilla flavor.
- 2 large eggs: Help set the cheesecake and create a creamy texture.
- ⅓ cup granulated sweetener of choice: Sweetens the filling without making it overly sugary.
- 1 teaspoon vanilla extract: Enhances the cheesecake flavor.
- 1 tablespoon fresh lemon juice: Brightens the flavor and adds a subtle tang.
- 1 tablespoon cornstarch (optional): Helps create a firmer texture and cleaner slices, especially if using a thinner Greek yogurt.
Ingredient Substitutions
Dairy-Free Options
If you need a dairy-free version, use your favorite plant-based cream cheese instead of reduced-fat cream cheese.
Choose a thick, unsweetened dairy-free Greek-style yogurt made from coconut, almond, or soy for a creamy filling.
Replace regular butter in the crust with melted coconut oil or a plant-based butter alternative.
If you’re using protein powder, pick a dairy-free variety made from pea, soy, or a plant-based protein blend.
Keep in mind that dairy-free ingredients can have slightly different textures, so the cheesecake may be a little softer after baking.
Gluten-Free Crust
This recipe is easy to make gluten-free with just a few changes.
Use certified gluten-free oat flour to avoid any cross-contamination if you’re sensitive to gluten.
Since almond flour is naturally gluten-free, it doesn’t need to be replaced.
Always double-check your protein powder, vanilla extract, and other packaged ingredients to make sure they are labeled gluten-free if needed.
Different Protein Powder Flavors
Vanilla protein powder gives these cheesecake bars a classic flavor that pairs well with almost any topping.
Chocolate protein powder creates a rich chocolate cheesecake that’s perfect for chocolate lovers.
Strawberry protein powder adds a fruity twist without needing fresh fruit in the batter.
Cookies and cream, cinnamon roll, or birthday cake protein powders can also be fun options if you enjoy experimenting with new flavors.
Because every protein powder absorbs liquid differently, don’t be afraid to adjust the batter with a splash of milk if it feels too thick.
Sweetener Alternatives
You can use the sweetener that best fits your taste and lifestyle.
Granulated monk fruit sweetener and erythritol are great low-sugar options that bake well.
Regular granulated sugar works perfectly if you aren’t concerned about reducing sugar.
Coconut sugar can also be used, although it will give the cheesecake a slightly darker color and a light caramel flavor.
If you’re using a liquid sweetener like maple syrup or honey, reduce the Greek yogurt slightly to help maintain a thick, creamy filling.
Low-Fat vs. Full-Fat Ingredients
Reduced-fat cream cheese and Greek yogurt create a lighter dessert while still delivering a rich cheesecake texture.
If you prefer an extra creamy and more traditional cheesecake, full-fat cream cheese and full-fat Greek yogurt work just as well.
The full-fat version will have a richer flavor and slightly softer texture, while the reduced-fat version offers a little more protein with fewer calories.
Whichever option you choose, allow the ingredients to come to room temperature before mixing to help create a smooth, lump-free batter.
Kitchen Equipment
- Mixing bowls: Use one bowl for the crust and another for the cheesecake filling to keep preparation organized.
- Electric mixer or blender: Helps create a smooth, creamy filling without lumps.
- 8×8-inch baking pan: The ideal size for evenly baked cheesecake bars with the perfect thickness.
- Parchment paper: Lines the pan for easy removal and hassle-free cleanup.
- Measuring cups and spoons: Ensure accurate measurements for consistent results every time.
- Cooling rack: Allows the cheesecake bars to cool evenly before chilling and slicing.
How to Make High Protein Cheesecake Bars
Step 1: Prepare the Pan
Preheat your oven to 325°F (163°C) so it’s fully heated before you begin baking.
Line an 8×8-inch baking pan with parchment paper, leaving a little overhang on the sides.
The extra parchment makes it much easier to lift the cheesecake out once it’s chilled.
Lightly grease any exposed areas of the pan to prevent sticking.
Step 2: Make the Crust
In a medium mixing bowl, combine the oat flour, almond flour, sweetener, salt, melted butter or coconut oil, and vanilla extract.
Stir until the mixture resembles damp sand and holds together when pressed between your fingers.
Transfer the mixture to the prepared baking pan.
Use the bottom of a measuring cup or a flat glass to press the crust into an even layer.
Press firmly, especially around the edges, so the crust stays together after baking.
Step 3: Bake the Crust
Bake the crust for 8 to 10 minutes, or until it looks lightly golden around the edges.
This short bake helps create a sturdy base that won’t become soggy once the filling is added.
Remove the pan from the oven and let the crust cool for a few minutes while you prepare the filling.
There’s no need for it to cool completely before moving on.
Step 4: Prepare the Cheesecake Filling
Place the softened cream cheese in a large mixing bowl and beat until completely smooth.
Add the Greek yogurt and continue mixing until no lumps remain.
Mix in the protein powder, sweetener, vanilla extract, lemon juice, and cornstarch if you’re using it.
Add the eggs one at a time, mixing on low speed just until each egg is incorporated.
Avoid overmixing once the eggs are added, as too much air can cause the cheesecake to crack while baking.
If your batter looks extra thick because of the protein powder, stir in a tablespoon of milk until it becomes smooth and easy to pour.
Step 5: Assemble the Bars
Pour the cheesecake filling over the partially cooled crust.
Use a spatula to spread the filling evenly into all four corners of the pan.
Gently tap the pan on the counter a few times to release any trapped air bubbles.
This simple step helps create a smoother surface after baking.
Step 6: Bake Until Set
Bake for 30 to 35 minutes, or until the edges are set and the center has a slight wobble when the pan is gently shaken.
The cheesecake will continue to firm up as it cools.
Try not to overbake it, as this can make the texture less creamy.
If you’re unsure, it’s better to remove it a minute early than a minute too late.
Step 7: Cool Completely
Place the pan on a cooling rack and let the cheesecake cool to room temperature.
Avoid moving it to the refrigerator while it’s still hot, as the sudden temperature change can cause cracks.
Cooling gradually also helps the texture stay smooth and creamy.
Step 8: Chill Before Slicing
Once the cheesecake has cooled completely, cover the pan and refrigerate it for at least 4 hours.
For the best flavor and cleanest slices, let it chill overnight.
When you’re ready to serve, lift the cheesecake out using the parchment paper and place it on a cutting board.
Use a sharp knife, wiping it clean between each cut, to create neat, bakery-style bars that look just as good as they taste.
Tips for the Best Cheesecake Bars
- Use room-temperature ingredients: They blend together more smoothly for a creamy, lump-free filling.
- Don’t overmix the batter: Mix just until combined to help prevent cracks and keep the texture light.
- Avoid overbaking: Remove the cheesecake when the center still has a slight jiggle, as it will continue to set while cooling.
- Chill overnight for clean slices: A longer chill gives the bars the best texture and makes them easier to cut neatly.
- Line the pan with parchment paper: This makes lifting the cheesecake out of the pan quick and mess-free.
- Use a sharp knife for cutting: Wipe the knife clean between slices for smooth, bakery-style bars.
Flavor Variations
Chocolate Protein Cheesecake Bars
For a rich chocolate version, replace the vanilla protein powder with chocolate protein powder.
Mix 2 tablespoons of unsweetened cocoa powder into the filling to deepen the chocolate flavor.
You can also fold in a handful of sugar-free chocolate chips before baking for little pockets of melted chocolate in every bite.
Finish the bars with a light drizzle of melted dark chocolate for an extra special treat.
Strawberry Cheesecake Bars
Fresh strawberries add natural sweetness and a bright, fruity flavor.
Gently fold ½ cup of diced strawberries into the cheesecake batter before pouring it over the crust.
You can also swirl a few tablespoons of strawberry puree into the top of the filling for a beautiful marbled effect.
Top each bar with fresh strawberry slices just before serving for a fresh finishing touch.
Blueberry Cheesecake Bars
Blueberries pair perfectly with creamy cheesecake and add a burst of juicy flavor.
Fold ½ cup of fresh or frozen blueberries into the batter just before baking.
If you’re using frozen blueberries, there’s no need to thaw them first.
A spoonful of homemade blueberry sauce or a handful of fresh berries makes a delicious topping after the bars have chilled.
Lemon Cheesecake Bars
If you enjoy bright, refreshing desserts, this variation is a great choice.
Add 1 tablespoon of finely grated lemon zest to the filling along with an extra tablespoon of fresh lemon juice.
The citrus flavor makes the cheesecake taste light and fresh without overpowering its creamy texture.
Serve with thin lemon slices or a few fresh berries for an elegant finish.
Peanut Butter Cheesecake Bars
Peanut butter creates a rich, nutty flavor that works wonderfully with vanilla cheesecake.
Stir ¼ cup of natural creamy peanut butter into the cheesecake filling until fully combined.
For even more peanut butter flavor, drizzle a little melted peanut butter over the chilled bars before serving.
A sprinkle of chopped roasted peanuts adds a satisfying crunch if you enjoy a little texture.
Cookies and Cream Version
This fun variation is always a crowd-pleaser.
Gently fold 6 to 8 crushed chocolate sandwich cookies into the filling after everything has been mixed together.
Save a few extra cookie crumbs to sprinkle over the top before chilling for a bakery-style finish.
Topping Ideas
- Fresh berries: Add natural sweetness, vibrant color, and a burst of fresh flavor.
- Sugar-free chocolate drizzle: Gives the bars a rich chocolate finish without adding much sugar.
- Crushed nuts: Sprinkle on chopped almonds, pecans, or walnuts for extra crunch and healthy fats.
- Whipped Greek yogurt: Adds a light, creamy topping while boosting the protein even more.
- Powdered peanut butter: Dust or drizzle mixed powdered peanut butter over the bars for a delicious nutty flavor.
- Fresh mint: Garnish with mint leaves for a fresh pop of color and a refreshing finish.
Storage Instructions
These high-protein cheesecake bars store beautifully, making them a great choice for meal prep or enjoying throughout the week.
Once the bars have chilled completely, transfer them to an airtight container or cover the baking pan tightly with plastic wrap or a lid to keep them fresh.
Store the bars in the refrigerator for up to 5 days, and keep them chilled until you’re ready to serve for the best texture and flavor.
If you’d like to keep them longer, wrap each bar individually in plastic wrap and place them in a freezer-safe container or zip-top freezer bag to help prevent freezer burn.
Freeze the cheesecake bars for up to 3 months, making it easy to grab a protein-packed dessert or snack whenever you need one.
When you’re ready to enjoy a frozen bar, move it to the refrigerator and let it thaw overnight for the creamiest texture.
If you’re short on time, you can let a bar sit at room temperature for 20 to 30 minutes until it softens enough to enjoy.
Avoid reheating the bars in the microwave, as the filling can become too soft and lose its smooth, creamy texture.
For the freshest flavor, add any toppings like fresh berries, whipped Greek yogurt, or chocolate drizzle just before serving rather than before storing.
Make-Ahead Tips
These high-protein cheesecake bars are perfect for making ahead because they taste even better after they’ve had time to chill in the refrigerator.
Preparing a batch at the beginning of the week gives you a ready-to-eat breakfast, snack, or healthier dessert whenever you need something quick.
For easy meal prep, let the cheesecake cool completely before chilling it for several hours or overnight, then slice it into individual bars.
Keeping the bars pre-portioned makes it simple to grab one on busy mornings, pack one in a lunchbox, or enjoy a post-workout snack without any extra prep.
If you want to make them last even longer, wrap each bar individually in plastic wrap or parchment paper before placing them in a freezer-safe container or zip-top freezer bag.
Freezing individual portions lets you thaw only what you need, so the remaining bars stay fresh until you’re ready to enjoy them.
Choose airtight glass containers or BPA-free plastic food storage containers for refrigerator storage to help keep the bars fresh and prevent them from absorbing other odors.
If you’re stacking the bars inside a container, place a small sheet of parchment paper between each layer to keep them from sticking together.
For the best flavor and texture, wait to add fresh fruit, whipped Greek yogurt, chocolate drizzle, or other toppings until just before serving.
Common Mistakes to Avoid
- Overbaking: Remove the cheesecake when the center still has a slight jiggle to keep it rich and creamy.
- Skipping the chilling time: Chilling allows the bars to fully set, making them easier to slice and improving the texture.
- Using cold cream cheese: Softened cream cheese blends smoothly and helps prevent a lumpy filling.
- Adding too much protein powder: Using more than the recipe calls for can make the cheesecake dense and dry.
- Not lining the baking pan: Parchment paper makes it easy to lift out the cheesecake and creates cleaner, neater slices.
Serving Suggestions
- Healthy dessert: Enjoy a chilled cheesecake bar after dinner for a satisfying treat with extra protein.
- Post-workout snack: Pair a bar with a glass of milk or a protein shake to help refuel after exercise.
- Breakfast with fruit: Serve with fresh berries or sliced banana for a quick, balanced morning meal.
- Afternoon protein snack: Enjoy one between meals to help keep you full and curb sweet cravings.
- Party dessert platter: Arrange the bars on a serving tray with fresh fruit and a drizzle of chocolate for an easy crowd-pleasing dessert.
Final Thoughts
These high-protein cheesecake bars are proof that you don’t have to choose between a delicious dessert and a nutritious snack.
They’re easy to make, packed with protein, and perfect for meal prep, sharing with family, or treating yourself any day of the week.
Don’t be afraid to make the recipe your own by trying different protein powder flavors, fresh fruit, or your favorite toppings.
FAQs
Are these cheesecake bars healthy?
Yes. They’re made with protein-rich ingredients like Greek yogurt, reduced-fat cream cheese, and protein powder, making them a lighter alternative to traditional cheesecake.
How much protein is in each bar?
The exact amount depends on the ingredients you use, but each bar typically contains 10–15 grams of protein when cut into 12 servings.
Can I make them without protein powder?
Yes. Simply leave out the protein powder and add a little extra Greek yogurt or cottage cheese if needed to maintain a smooth filling.
Can I use cottage cheese instead of Greek yogurt?
Absolutely. Blend the cottage cheese until smooth before mixing it into the filling for the creamiest texture.
Can I make these gluten-free?
Yes. Use certified gluten-free oat flour and make sure your protein powder and other packaged ingredients are labeled gluten-free.
Can I freeze cheesecake bars?
Yes. Wrap the bars individually and freeze them in an airtight container for up to 3 months.
Why did my cheesecake crack?
Cracks are usually caused by overmixing the batter, overbaking, or cooling the cheesecake too quickly. For the smoothest results, mix gently, avoid overbaking, and let the cheesecake cool gradually before chilling.
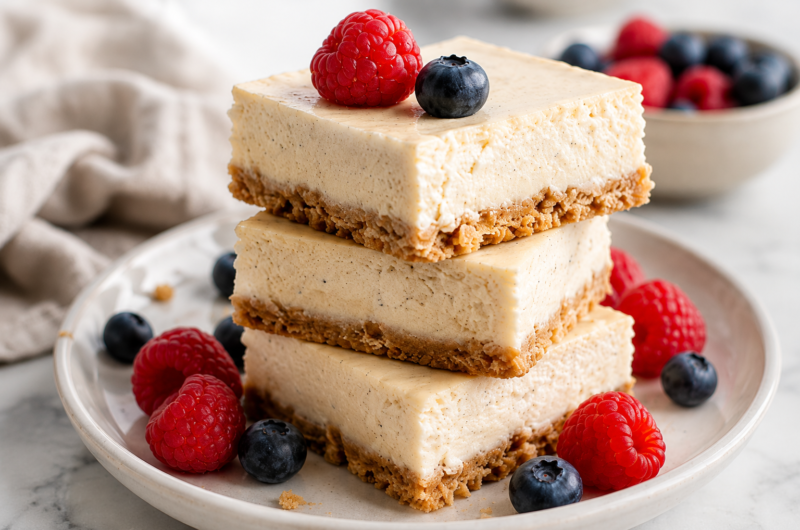
High Protein Cheesecake Bars Recipe (Easy, Creamy & Healthy)
Difficulty: Easy12
Bars15
minutes35
minutes4
hours50
minutesThese high-protein cheesecake bars are creamy, rich, and packed with protein. They’re perfect for meal prep, a healthy dessert, or a satisfying snack.
Ingredients
- For the Crust
1 cup oat flour
½ cup almond flour
¼ cup melted butter or coconut oil
2 tablespoons granulated sweetener
1 teaspoon vanilla extract
¼ teaspoon salt
- For the Filling
16 ounces reduced-fat cream cheese, softened
1 cup plain Greek yogurt
1 scoop (30 g) vanilla protein powder
2 large eggs
⅓ cup granulated sweetener
1 teaspoon vanilla extract
1 tablespoon fresh lemon juice
1 tablespoon cornstarch (optional)
Directions
- Preheat the oven to 325°F (163°C) and line an 8×8-inch baking pan with parchment paper.
- Mix the crust ingredients, press into the pan, and bake for 8–10 minutes.
- Beat the filling ingredients until smooth, then pour over the crust.
- Bake for 30–35 minutes, until the edges are set and the center slightly jiggles.
- Cool completely, then refrigerate for at least 4 hours before slicing into bars.
Notes
- Use room-temperature ingredients for the smoothest filling, and chill the bars overnight for the best texture and clean slices.

Hi, I’m Sorenna Blythe, the baker and writer behind Mix Whisk Bake. I share simple, reliable recipes and honest kitchen moments to help home bakers bake with confidence and joy. When I’m not testing new treats, you’ll find me sipping coffee and dreaming up my next bake.