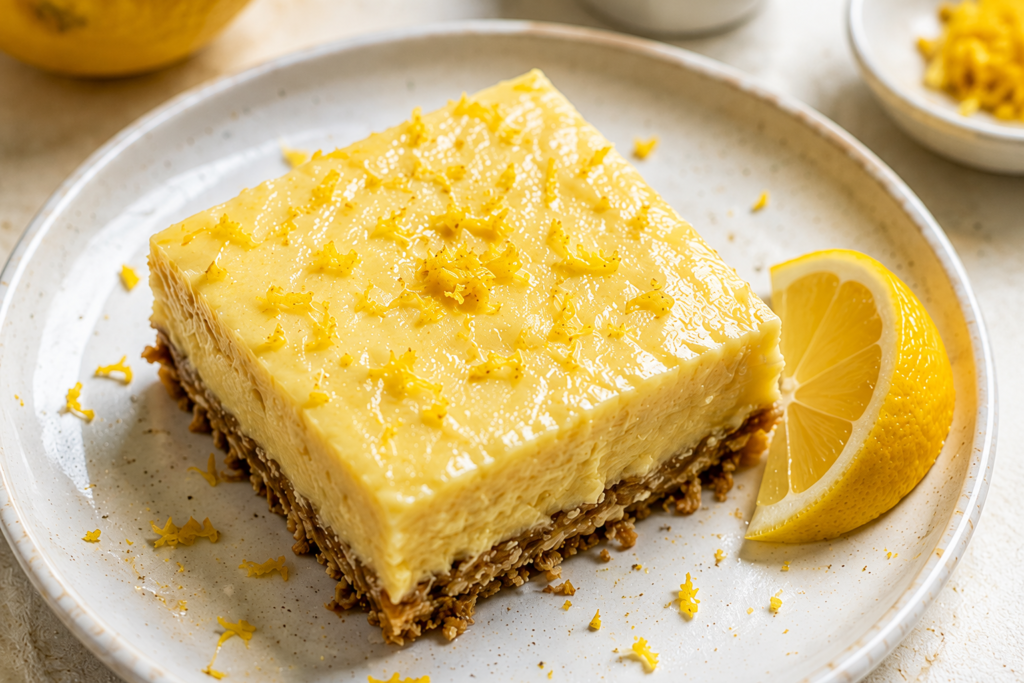
If you love the bright, fresh taste of lemon but want a dessert that’s a little more satisfying, these high-protein lemon bars are the perfect choice.
They have a buttery crust, a smooth and creamy lemon filling, and a boost of protein that makes every bite more filling than the classic version.
They’re great for meal prep, a post-workout snack, a healthier dessert, or an afternoon treat with a cup of coffee or tea.
Even if you’re new to baking, this recipe is simple to follow and comes together with everyday ingredients.
You’ll find everything you need to make perfect lemon bars, including the ingredient list, step-by-step instructions, helpful baking tips, easy variations, and the best ways to store them so you can enjoy them all week long.
Why You’ll Love These High-Protein Lemon Bars
Packed with Protein
These lemon bars give you more than just a delicious dessert because every serving includes a satisfying boost of protein.
The added protein helps you stay full for longer, making these bars a smart choice when you need a snack between meals or a healthier way to satisfy a sweet craving.
They’re also a great option after a workout when you’re looking for something that tastes like a treat while helping support your daily protein goals.
Even if you aren’t focused on fitness, the extra protein makes these bars more filling than traditional lemon bars, so you can enjoy one and feel satisfied.
Bright, Fresh Lemon Flavor
Fresh lemon juice and lemon zest give these bars their vibrant citrus flavor that tastes clean, light, and refreshing.
The filling has the perfect balance of sweet and tangy, so each bite is rich without feeling too heavy.
Using fresh lemons makes a noticeable difference, adding a natural brightness that bottled juice simply can’t match.
These bars are just as enjoyable on a warm summer afternoon as they are during the colder months when you’re craving something fresh and cheerful.
Easy to Make
You don’t need any special baking skills to make this recipe successfully.
Most of the ingredients are easy to find and may already be in your kitchen.
The steps are simple to follow, making this a great recipe for beginners and experienced bakers alike.
With only a little prep work, you’ll have the bars ready for the oven in no time.
If you’ve never made lemon bars before, don’t worry.
This recipe is straightforward, and the tips throughout the guide will help you get great results on your first try.
Meal Prep Friendly
These high-protein lemon bars are perfect for making ahead of time.
Once chilled, they slice neatly and store well in the refrigerator for several days without losing their texture or flavor.
You can prepare a batch at the beginning of the week and have a quick snack or healthy dessert ready whenever you need one.
They’re easy to pack in a lunchbox, enjoy after the gym, or grab before heading out the door on a busy day.
They also freeze well, making them a convenient option whenever you want a homemade treat without baking from scratch.
Lower in Sugar
Unlike many traditional lemon bars, this recipe uses less sugar while still delivering plenty of flavor.
You can use a natural sweetener or your favorite sugar substitute to suit your dietary needs and personal taste.
The bright lemon flavor shines through without being hidden by excessive sweetness.
That means you get a dessert that feels light, fresh, and satisfying while fitting more easily into a balanced lifestyle.
It’s a simple way to enjoy a classic favorite with a healthier twist, without giving up the creamy texture or delicious taste you expect from lemon bars.
Ingredients You’ll Need
For the High Protein Crust
- 1 cup oat flour – Creates a soft, tender crust with a mild, wholesome flavor.
- ½ cup vanilla protein powder – Adds protein and a hint of sweetness. A whey-casein blend or plant-based protein both work well.
- ½ cup almond flour – Keeps the crust moist and gives it a delicate, buttery texture.
- ¼ cup melted coconut oil or light butter – Helps bind the crust while adding richness.
- 2 tablespoons maple syrup or sugar-free maple syrup – Provides just enough sweetness without overpowering the lemon flavor.
- ¼ teaspoon salt – Balances the sweetness and enhances the overall flavor.
For the Lemon Filling
- 1½ cups plain non-fat Greek yogurt (or 1½ cups blended cottage cheese) – Creates a creamy, protein-rich filling.
- 2 large eggs – Help the filling set into smooth, sliceable bars.
- ⅓ cup fresh lemon juice – Gives the bars their bright, tangy flavor.
- 1 tablespoon finely grated lemon zest – Adds fresh citrus aroma and intensifies the lemon taste.
- 1 teaspoon vanilla extract – Softens the tartness and adds depth of flavor.
- ⅓ cup granulated sweetener of choice – Use regular sugar, monk fruit sweetener, erythritol, or another preferred sweetener.
- 1 tablespoon cornstarch or vanilla protein powder (optional) – Helps create a firmer filling if needed, especially when using a thinner yogurt.
Kitchen Equipment
- Mixing bowls – Use one bowl for the crust and another for the lemon filling.
- Whisk – Helps combine the filling until it’s smooth and lump-free.
- Blender or food processor (optional) – Perfect for blending cottage cheese into a silky, creamy texture before mixing it with the other filling ingredients.
- 8×8-inch baking pan – The ideal size for evenly baked lemon bars with the perfect thickness.
- Parchment paper – Lines the pan for easy removal and makes cleanup much easier.
- Measuring cups and measuring spoons – Ensure accurate measurements for the best texture and flavor.
- Citrus zester – Finely grates the lemon peel to add fresh, vibrant citrus flavor without the bitter white pith.
- Cooling rack – Allows the bars to cool evenly before chilling and slicing.
How to Make High Protein Lemon Bars
Step 1: Prepare the Pan
Preheat your oven to 350°F (175°C) so it’s fully heated before you begin baking.
Line an 8×8-inch baking pan with parchment paper, leaving a little overhang on two sides to make lifting the bars out much easier later.
If needed, lightly grease the parchment paper with cooking spray or a small amount of oil to prevent sticking.
Set the prepared pan aside while you make the crust.
Step 2: Make the Protein Crust
In a large mixing bowl, combine the oat flour, vanilla protein powder, almond flour, and salt until everything is evenly mixed.
Pour in the melted coconut oil (or light butter) and the maple syrup, then stir until the mixture comes together and resembles damp sand.
If the mixture seems too dry, add 1 to 2 teaspoons of milk until it holds together when pressed between your fingers.
Transfer the crust mixture to the prepared baking pan.
Use the back of a spoon, the bottom of a measuring cup, or your hands to press it firmly into an even layer.
Take a moment to smooth the edges so the crust bakes evenly and provides a sturdy base for the filling.
Step 3: Bake the Crust
Place the pan in the preheated oven and bake for 10 to 12 minutes, or until the edges are lightly golden.
The crust should look set but not overly browned.
Remove the pan from the oven and place it on a cooling rack.
Let the crust cool for about 10 minutes while you prepare the filling.
Allowing it to cool slightly helps keep the crust crisp once the filling is added.
Step 4: Prepare the Lemon Filling
In a large bowl, whisk together the Greek yogurt (or blended cottage cheese), eggs, fresh lemon juice, vanilla extract, and sweetener until completely smooth.
If you’re using cottage cheese, blend it first until creamy before mixing it with the remaining ingredients.
If you’re using cornstarch or additional protein powder for a firmer filling, whisk it in until no lumps remain.
Finally, gently fold in the fresh lemon zest.
Stir just until the zest is evenly distributed throughout the filling.
Step 5: Bake Again
Slowly pour the lemon filling over the slightly cooled crust.
Gently spread it into an even layer using a spatula if needed.
Return the pan to the oven and bake for 20 to 25 minutes.
The edges should look set, while the center should have a slight wobble when you gently shake the pan.
Avoid overbaking, as the filling will continue to firm up as it cools.
Step 6: Chill Before Slicing
Remove the lemon bars from the oven and place the pan on a cooling rack.
Allow them to cool completely at room temperature before moving them to the refrigerator.
Refrigerate the bars for at least 3 to 4 hours, or overnight for the cleanest slices and the best texture.
Once fully chilled, lift the bars out using the parchment paper overhang.
Slice into squares with a sharp knife, wiping the blade clean between cuts for neat, bakery-style edges.
Your high-protein lemon bars are now ready to enjoy, whether as a healthy dessert, a meal prep snack, or a refreshing treat any time of day.
Expert Tips for Perfect Lemon Bars
Use Fresh Lemons
Fresh lemons make a big difference in both flavor and aroma.
Freshly squeezed lemon juice has a brighter, cleaner taste than bottled juice, which can sometimes taste dull or slightly bitter.
Don’t skip the lemon zest, either.
The zest contains natural oils that add a fresh citrus flavor without making the filling more acidic.
Wash the lemons well before zesting, and only grate the bright yellow outer layer.
Avoid the white pith underneath, as it can add unwanted bitterness.
Don’t Overbake
Keep a close eye on the bars during the final bake.
The filling is done when the edges are set, but the center still has a slight jiggle when you gently move the pan.
It may seem a little underdone at first, but that’s exactly what you want.
The filling will continue to firm up as it cools and chills in the refrigerator.
Overbaking can make the filling dry, rubbery, or cause small cracks to form on the surface.
When in doubt, it’s better to take the bars out a minute early than leave them in too long.
Chill Completely
Be patient and let the lemon bars cool fully before slicing.
Cooling at room temperature first helps prevent condensation from forming once they go into the refrigerator.
After that, chill them for at least 3 to 4 hours, or overnight if you have the time.
A well-chilled filling becomes firmer, creamier, and much easier to cut into neat squares.
This extra waiting time is worth it because the flavors also become brighter and more balanced.
Line the Pan
Always line your baking pan with parchment paper before adding the crust.
Leave a little parchment hanging over two sides of the pan to create simple handles.
Once the bars have chilled, you can lift the entire batch out in one piece without breaking the crust.
This also makes slicing easier and helps keep the edges looking clean and tidy.
You’ll spend less time cleaning the pan, too.
Blend Cottage Cheese Well
If you’re using cottage cheese instead of Greek yogurt, blend it until it’s completely smooth before mixing in the remaining ingredients.
A blender or food processor quickly removes the small curds and creates a creamy texture that’s very similar to cheesecake.
Take an extra minute to scrape down the sides of the blender so everything mixes evenly.
The smoother the filling is before baking, the smoother and creamier your finished lemon bars will be.
Recipe Variations
Gluten-Free Version
Making these lemon bars gluten-free is simple with a few easy ingredient swaps.
Use certified gluten-free oat flour to make sure there is no cross-contamination from wheat during processing.
Double-check that your protein powder, vanilla extract, and any other packaged ingredients are also labeled gluten-free if you’re baking for someone with gluten sensitivity or celiac disease.
The finished bars will still have the same soft crust and creamy lemon filling you expect.
Low-Carb Lemon Bars
For a lower-carb version, replace the oat flour with almond flour to create a rich, tender crust.
Choose a granulated sugar-free sweetener, such as monk fruit or erythritol, for the filling and crust.
A low-carb vanilla protein powder also helps keep the carbohydrate content lower while maintaining a delicious flavor.
The result is a satisfying dessert that’s perfect for anyone watching their carb intake without giving up a bright, fresh lemon treat.
Extra Lemon Flavor
If you’re a true lemon lover, it’s easy to make these bars even more vibrant.
Add an extra 1 to 2 teaspoons of fresh lemon zest to the filling for a stronger citrus aroma.
You can also stir in ¼ teaspoon of lemon extract for an extra burst of lemon flavor without adding more liquid.
Be careful not to add too much extract, as a little goes a long way.
A small amount will enhance the fresh lemon taste without overpowering the other ingredients.
Dairy-Free Option
You can easily make these lemon bars dairy-free by swapping the Greek yogurt for your favorite plain dairy-free yogurt.
Choose a thick variety made from coconut, soy, or almond milk for the creamiest texture.
Replace the vanilla protein powder with a plant-based protein powder that blends smoothly into the filling.
The bars will still bake beautifully while keeping their creamy texture and refreshing lemon flavor.
High Fiber Version
Adding more fiber is an easy way to make these bars even more satisfying.
Mix 1 tablespoon of chia seeds or 1 tablespoon of ground flaxseed into the crust before adding the wet ingredients.
These ingredients add extra fiber while helping the crust hold together.
They also provide a mild nutty flavor that pairs nicely with the bright lemon filling.
It’s a simple upgrade that adds nutrition without changing the overall taste or texture of the bars.
What to Serve with High Protein Lemon Bars
- Fresh berries – Add natural sweetness and a burst of fresh flavor that pairs perfectly with the tangy lemon filling.
- Greek yogurt – A creamy, protein-rich side that makes the bars even more satisfying.
- Cottage cheese – Adds extra protein and complements the bright citrus flavor with its mild taste.
- Protein smoothie – Turn your lemon bar into a balanced breakfast or post-workout snack by serving it with your favorite smoothie.
- Herbal tea – Chamomile, peppermint, or green tea provides a light, refreshing drink alongside the bars.
- Iced coffee – The bold coffee flavor balances the sweet and tangy lemon for a delicious afternoon treat.
- Fresh mint garnish – A few mint leaves add a pop of color and a refreshing finish.
Storage Instructions
Refrigerator
Once the lemon bars have cooled completely and chilled, transfer them to an airtight container.
If you’re stacking multiple layers, place a sheet of parchment paper between them to prevent sticking.
Store the bars in the refrigerator for up to 5 days.
Keeping them chilled helps maintain their creamy texture and fresh lemon flavor.
For the best taste, enjoy them cold straight from the refrigerator.
Freezer
These lemon bars freeze surprisingly well, making them perfect for planning ahead.
Wrap each bar individually in plastic wrap or parchment paper, then place them in a freezer-safe container or zip-top freezer bag.
Freezing individual portions makes it easy to grab just the amount you need.
Store them in the freezer for up to 3 months.
When you’re ready to enjoy one, transfer it to the refrigerator for a few hours or let it sit at room temperature for about 20 to 30 minutes until thawed.
Meal Prep Tips
These bars are an excellent choice for weekly meal prep because they hold their texture and flavor for several days.
Slice the bars after they’ve fully chilled, then divide them into individual airtight containers.
Having pre-portioned servings ready makes healthy snacking quick and convenient.
Keep the containers refrigerated until you’re ready to enjoy them.
If you’re taking a bar to work, school, or the gym, use an insulated lunch bag with an ice pack to keep it cool until snack time.
Nutrition Highlights
- High in protein – Protein helps keep you feeling full and supports muscle maintenance and recovery.
- Lower in sugar than traditional lemon bars – Uses less added sugar or a sugar substitute for a lighter dessert option.
- Good source of calcium (when made with Greek yogurt) – Calcium supports strong bones and healthy teeth.
- Contains healthy fats – Ingredients like almond flour and coconut oil provide fats that add richness and help keep you satisfied.
- Provides lasting energy – The combination of protein, healthy fats, and complex carbohydrates delivers steady energy throughout the day.
Common Mistakes to Avoid
- Using bottled lemon juice instead of fresh – Fresh lemon juice and zest provide a brighter, more natural citrus flavor.
- Overbaking the filling – Remove the bars when the center still has a slight jiggle to keep the filling smooth and creamy.
- Skipping the chilling step – Chilling helps the filling firm up and makes the bars much easier to slice.
- Cutting before the bars are fully set – Wait until they’re completely chilled to get clean, neat squares.
- Using too much protein powder – Excess protein powder can absorb too much moisture and leave the bars dry or dense.
Final Thoughts
These high-protein lemon bars are a simple way to enjoy a classic dessert with a healthier twist.
They’re bright, creamy, satisfying, and easy to make, making them perfect for everything from meal prep to an afternoon treat.
Don’t be afraid to make the recipe your own by trying different protein powders, sweeteners, or a little extra lemon zest to match your taste.
Small changes can create a version you’ll want to bake again and again.
Share your favorite variations, enjoy every refreshing bite, and happy baking!
FAQs
How much protein is in each lemon bar?
The exact protein content depends on the ingredients you use, but most recipes provide 10 to 15 grams of protein per bar when cut into nine servings.
Can I use whey protein powder?
Yes. Whey protein works well in this recipe, although a whey-casein blend often gives the softest texture.
Can I substitute cottage cheese for Greek yogurt?
Absolutely. Blend the cottage cheese until smooth before mixing it into the filling for a creamy, lump-free texture.
Can I make these without eggs?
Yes. You can use your favorite egg replacer, but keep in mind that the texture may be slightly softer than the original recipe.
Why are my lemon bars runny?
Runny lemon bars are usually caused by underbaking or not chilling them long enough. Bake until the center is just set, then refrigerate for at least 3 to 4 hours before slicing.
Can I freeze high-protein lemon bars?
Yes. Wrap each bar individually and freeze them in an airtight container for up to 3 months. Thaw them in the refrigerator before serving.
Can I use bottled lemon juice?
You can, but fresh lemon juice and zest provide a brighter, fresher flavor and are highly recommended for the best results.
Are these lemon bars good for meal prep?
Yes. They store well in the refrigerator for up to 5 days, making them an easy grab-and-go breakfast, snack, or healthy dessert.
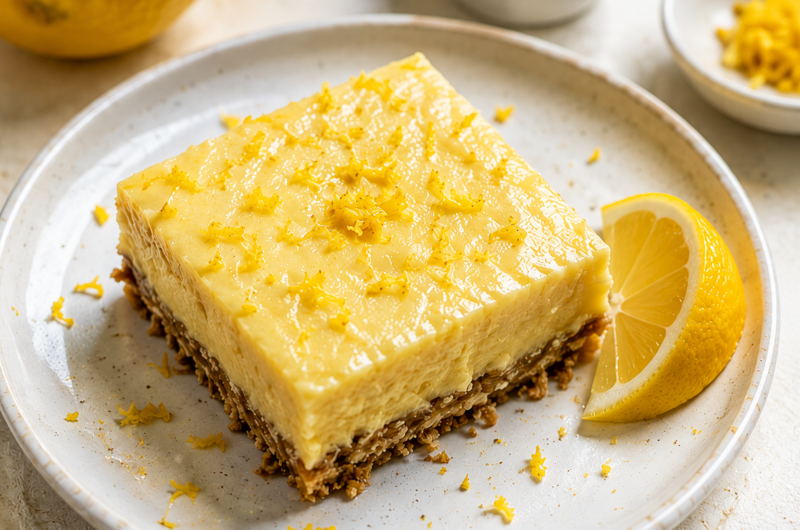
The Best High Protein Lemon Bars (Easy, Creamy & Healthy)
Difficulty: Easy9
Bars15
minutes35
minutes50
minutesThese High Protein Lemon Bars feature a buttery oat crust and a creamy, tangy lemon filling that’s packed with protein. They’re perfect for meal prep, healthy snacking, or a lighter dessert.
Ingredients
- For the Crust
1 cup oat flour
½ cup vanilla protein powder
½ cup almond flour
¼ cup melted coconut oil or light butter
2 tablespoons maple syrup or sugar-free syrup
¼ teaspoon salt
- For the Filling
1½ cups plain Greek yogurt (or blended cottage cheese)
2 large eggs
⅓ cup fresh lemon juice
1 tablespoon lemon zest
1 teaspoon vanilla extract
⅓ cup granulated sweetener
1 tablespoon cornstarch (optional)
Directions
- Preheat the oven to 350°F (175°C) and line an 8×8-inch baking pan with parchment paper.
- Mix the crust ingredients, press into the pan, and bake for 10–12 minutes.
- Whisk or blend the filling ingredients until smooth, then stir in the lemon zest.
- Pour the filling over the baked crust and bake for 20–25 minutes, until the center is just set.
- Cool completely, then refrigerate for 3–4 hours before slicing into bars.
Notes
- Fresh lemon juice and zest provide the best flavor.
- Blend cottage cheese until completely smooth for a creamy filling.
- Chill thoroughly before cutting for clean, neat slices.
- Store in the refrigerator for up to 5 days or freeze for up to 3 months.


Hi, I’m Sorenna Blythe, the baker and writer behind Mix Whisk Bake. I share simple, reliable recipes and honest kitchen moments to help home bakers bake with confidence and joy. When I’m not testing new treats, you’ll find me sipping coffee and dreaming up my next bake.