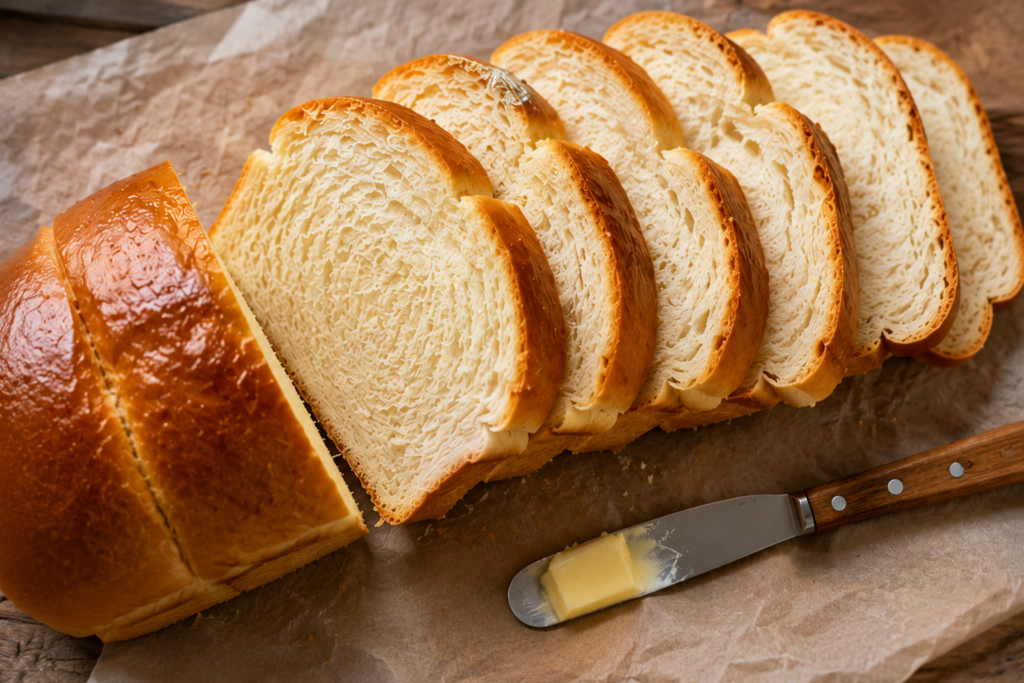
If you’ve never made milk bread before, you’re in for a treat.
This soft, fluffy loaf is loved around the world for its rich flavor, tender texture, and light, pillowy crumb that practically melts in your mouth.
The best part? It’s much easier to make than it looks.
With simple ingredients and clear steps, this beginner-friendly recipe will help you create bakery-style bread right in your own kitchen.
Why You’ll Love This Milk Bread Recipe
- Incredibly soft and fluffy texture – Every slice is light, tender, and wonderfully pillowy.
- Perfect for sandwiches, toast, and snacks – Its mild flavor pairs well with both sweet and savory toppings.
- Simple ingredients with bakery-quality results – Basic pantry staples come together to create a loaf that tastes professionally baked.
- Stays fresh longer than many homemade breads – The enriched dough helps keep the bread soft and moist for days.
What Is Milk Bread?
Milk bread is a soft, enriched bread made with ingredients like milk, butter, eggs, and sugar.
Unlike basic white bread, it has a richer taste and a much softer texture.
The loaf is known for its light, airy crumb and delicate sweetness, making it a favorite for both everyday meals and special treats.
One of the first things you’ll notice about milk bread is how easy it is to pull apart.
The slices are tender and fluffy, yet sturdy enough to hold fillings for sandwiches.
Its versatility is one reason so many home bakers keep coming back to this recipe.
The Origins of Milk Bread
Milk bread has strong roots in Asian baking and is especially popular in countries such as Japan, China, and South Korea.
Over the years, bakeries throughout Asia have become known for producing exceptionally soft breads that stay fresh for longer than traditional loaves.
Japanese milk bread, often called shokupan, is one of the most recognizable versions.
It gained popularity because of its incredibly light texture and slightly sweet flavor.
As people around the world discovered Asian-style baking, milk bread quickly earned a loyal following far beyond its place of origin.
Today, it can be found in bakeries, cafés, and home kitchens across many countries.
Its growing popularity comes from the fact that it offers something many bread lovers want: a loaf that is both rich and incredibly soft.
The good news is that you do not need professional baking experience to make it at home.
With a little patience and the right technique, anyone can enjoy fresh milk bread straight from the oven.
What Makes Milk Bread Different?
Many breads rely on a simple combination of flour, water, yeast, and salt.
Milk bread goes a step further by including milk, butter, eggs, and a small amount of sugar.
These ingredients create what bakers call an enriched dough.
In simple terms, an enriched dough contains added fats and dairy that improve both flavor and texture.
Milk adds richness and helps create a softer crumb.
Butter contributes tenderness and gives the bread a pleasant, buttery taste.
Eggs add structure while also helping the loaf stay soft and moist.
The small amount of sugar balances the flavors and enhances the bread’s gentle sweetness.
The result is a loaf that feels lighter and more delicate than many traditional breads.
Another feature that sets milk bread apart is its soft, slightly sweet flavor profile.
The sweetness is subtle rather than overpowering.
It complements savory ingredients like ham, cheese, and eggs just as well as sweet toppings such as jam, honey, or chocolate spread.
Because the flavor is mild, milk bread works for breakfast, lunch, snacks, and even desserts.
Ingredients You’ll Need
For the Dough
- 4 cups (500g) bread flour – Provides the structure needed for a soft, fluffy loaf.
- 1 cup (240ml) warm milk – Adds richness and helps create a tender crumb.
- 3 tablespoons (38g) granulated sugar – Gives the bread a subtle sweetness and helps feed the yeast.
- 2¼ teaspoons (7g or 1 packet) active dry yeast – Helps the dough rise and become light and airy.
- 1 large egg, room temperature – Adds richness, moisture, and structure.
- 4 tablespoons (56g) unsalted butter, softened – Creates a soft texture and buttery flavor.
- 1 teaspoon (6g) salt – Balances the sweetness and enhances the overall flavor.
Optional Toppings
- 1 egg beaten with 1 tablespoon milk (egg wash) – Brushed on top for a beautiful golden-brown finish.
- 1–2 teaspoons sesame seeds – Adds a light crunch and extra flavor.
- Other topping ideas: Poppy seeds, everything bagel seasoning, or a light sprinkle of coarse sugar for a sweeter loaf.
Essential Equipment
- Large mixing bowl – Used for combining the ingredients and allowing the dough to rise comfortably.
- Stand mixer (optional) – Makes kneading easier and faster, but the dough can also be kneaded by hand.
- 9×5-inch (23×13 cm) loaf pan – Helps shape the dough into a classic sandwich loaf while baking.
- Kitchen scale (recommended) – Provides the most accurate measurements for consistent baking results.
- Cooling rack – Allows air to circulate around the bread after baking, helping prevent a soggy bottom.
- Measuring cups and spoons – Useful for measuring ingredients if you are not using a kitchen scale.
- Clean kitchen towel or plastic wrap – Covers the dough during rising to keep it from drying out.
- Pastry brush (optional) – Makes it easy to apply an egg wash for a shiny, golden crust.
How to Make Milk Bread
Step 1: Activate the Yeast
Start by pouring the warm milk into a large mixing bowl.
The milk should feel warm to the touch but not hot, ideally around 100°F to 110°F (38°C to 43°C).
If the milk is too hot, it can damage the yeast and prevent the dough from rising properly.
Stir the sugar into the milk until it dissolves.
Sprinkle the yeast over the surface of the milk and let it sit for 5 to 10 minutes.
You should see a layer of foam forming on top.
This foam is a good sign that the yeast is active and ready to help your bread rise.
If nothing happens after 10 minutes, it is best to start over with fresh yeast before moving forward.
Step 2: Mix the Dough
Add the bread flour, egg, and salt to the bowl with the activated yeast mixture.
Mix everything together until a shaggy dough begins to form.
At this stage, the dough may look rough and slightly sticky.
That is completely normal.
Add the softened butter a little at a time while continuing to mix.
The dough will gradually become smoother as the butter is incorporated.
Keep mixing until there are no dry patches of flour left in the bowl.
Take your time with this step.
A well-mixed dough creates a better texture in the finished loaf.
Step 3: Knead Until Elastic
Transfer the dough to a lightly floured surface if kneading by hand.
Push the dough away from you with the heel of your hand, then fold it back over itself.
Turn the dough slightly and repeat the process.
Continue kneading for about 10 to 12 minutes.
If using a stand mixer fitted with a dough hook, knead on medium-low speed for about 8 to 10 minutes.
As you knead, the dough will become smoother, softer, and easier to handle.
Properly kneaded dough should feel elastic and slightly tacky but not overly sticky.
One simple test is to gently stretch a small piece of dough between your fingers.
If it stretches thin without tearing right away, the dough is ready for the next step.
Step 4: First Rise
Place the dough into a lightly greased bowl.
Turn it once so all sides are lightly coated.
Cover the bowl with a clean kitchen towel or plastic wrap.
Set it in a warm, draft-free spot in your kitchen.
A slightly warm oven that has been turned off or a sunny countertop often works well.
Allow the dough to rise for about 60 to 90 minutes.
The exact time will depend on the temperature of your kitchen.
The dough is ready when it has roughly doubled in size.
If your kitchen is cool, do not worry if it takes a little longer.
Bread dough often works on its own schedule.
Step 5: Shape the Dough
Gently press down on the risen dough to release excess air.
Transfer it to a lightly floured surface.
For a traditional milk bread loaf, divide the dough into three equal portions.
Shape each portion into a smooth ball.
Roll each ball into a small rectangle and then roll it up tightly like a jelly roll.
Place the rolls side by side in a greased loaf pan.
This shaping method helps create the beautiful pull-apart texture that milk bread is known for.
Try not to rush.
Neat shaping helps the loaf bake evenly.
Step 6: Second Rise
Cover the shaped dough loosely and let it rise again.
This second rise usually takes 30 to 45 minutes.
During this time, the dough relaxes and expands inside the loaf pan.
The second proof is important because it creates a lighter texture and better oven spring.
Oven spring refers to the final burst of rising that happens during the first few minutes of baking.
The dough is ready when it looks puffy and has risen close to the top edge of the pan.
Step 7: Bake to Perfection
Preheat your oven to 350°F (175°C).
If using an egg wash, gently brush it over the top of the loaf before baking.
This simple step gives the bread a beautiful golden shine.
Place the loaf pan in the center of the oven.
Bake for 30 to 35 minutes, or until the top is a rich golden brown.
If the bread starts browning too quickly, loosely cover it with aluminum foil during the final part of baking.
A fully baked loaf should sound slightly hollow when tapped on the bottom.
You can also check that the center has reached about 190°F to 200°F (88°C to 93°C) with an instant-read thermometer.
Step 8: Cool Before Slicing
Remove the bread from the oven and let it rest in the pan for about 5 minutes.
Carefully transfer it to a cooling rack.
Allow the loaf to cool completely before slicing.
This may require some patience, especially when your kitchen smells amazing.
Cooling gives the bread time to finish setting inside.
Cutting into it too soon can make the texture seem gummy or dense.
Once cooled, use a sharp serrated knife to slice the loaf.
You will be rewarded with soft, fluffy slices that are perfect for sandwiches, toast, or simply enjoying with a little butter.
Tips for the Softest Milk Bread
- Measure ingredients accurately – Precise measurements help create the right dough consistency and ensure reliable results every time.
- Don’t over-flour the dough – Adding too much flour can make the bread dense instead of soft and fluffy.
- Use room-temperature ingredients – Milk, eggs, and butter blend more easily into the dough and support even rising.
- Avoid overbaking – Removing the bread as soon as it’s fully baked helps preserve its soft texture and moisture.
Common Mistakes to Avoid
- Dense or Heavy Bread – This usually happens when the dough is under-kneaded or too much flour is added during mixing.
- Dough Not Rising Properly – Expired yeast, milk that is too hot or too cold, or a chilly proofing environment can prevent a good rise.
- Dry or Crumbly Texture – Overbaking or adding excess flour can cause the bread to lose its soft, moist crumb.
- Overproofing the Dough – Letting the dough rise for too long can weaken its structure and cause the loaf to collapse or bake unevenly.
Variations to Try
One of the best things about milk bread is how easy it is to customize.
Once you feel comfortable with the basic recipe, you can experiment with different flavors and ingredients to make it your own.
Honey Milk Bread
If you enjoy a slightly sweeter bread, honey milk bread is a wonderful option.
Replace some or all of the granulated sugar with honey for a richer, more natural sweetness.
Honey also helps the bread stay moist and soft.
The flavor is gentle and pairs beautifully with butter, jam, or fresh fruit.
This variation is especially delicious for breakfast or afternoon snacks.
Keep in mind that honey adds extra moisture to the dough.
If the dough feels slightly stickier than usual, resist the urge to add too much extra flour.
A soft dough often leads to a softer loaf.
Whole Wheat Milk Bread
For a heartier loaf, try replacing a portion of the bread flour with whole wheat flour.
A good starting point is to substitute about one-third of the flour while keeping the rest as bread flour.
This approach adds a mild nutty flavor without making the bread too dense.
Whole wheat flour absorbs more liquid than white flour.
If the dough feels dry, add a tablespoon or two of milk until it becomes soft and workable.
The finished loaf remains fluffy while offering a little extra texture and flavor.
It is an excellent choice for sandwiches and everyday toast.
Raisin Milk Bread
Raisins add natural sweetness and chewy bites throughout the loaf.
Simply knead about ¾ to 1 cup of raisins into the dough near the end of the kneading process.
Distributing them evenly helps ensure every slice contains a little fruit.
For even more flavor, soak the raisins in warm water for about 10 minutes before adding them.
Drain and pat them dry before mixing them into the dough.
This small step helps keep the raisins soft and juicy after baking.
Raisin milk bread is perfect for breakfast and tastes wonderful toasted with a little butter.
Milk Bread Rolls
Instead of shaping the dough into a loaf, divide it into individual portions to create soft dinner rolls.
Each piece should be roughly the same size so the rolls bake evenly.
Shape the portions into smooth balls and place them in a greased baking dish with a little space between each one.
As they rise and bake, the rolls will expand and touch each other, creating soft pull-apart sides.
These rolls are great for family dinners, holiday meals, or packed lunches.
The smaller portions also bake slightly faster than a full loaf.
Watch them closely during the final few minutes of baking.
Cinnamon Swirl Milk Bread
Cinnamon swirl milk bread transforms a simple loaf into a sweet treat.
After rolling the dough into a rectangle, sprinkle it with a mixture of cinnamon and sugar.
Carefully roll the dough into a log and place it in the loaf pan.
As the bread bakes, the cinnamon filling creates beautiful swirls throughout every slice.
The aroma alone makes this variation worth trying.
It is delicious on its own and even better lightly toasted.
For an extra special touch, spread a little butter over a warm slice and enjoy the soft, fragrant layers.
No matter which variation you choose, the same gentle dough and baking process will help you achieve a soft and fluffy result.
Feel free to experiment and discover your own favorite version.
Homemade bread is always more rewarding when you add a personal touch.
How to Store Milk Bread
Freshly baked milk bread is at its best when stored properly.
The good news is that this bread naturally stays soft longer than many homemade loaves thanks to its rich dough.
Room Temperature Storage
For everyday use, storing milk bread at room temperature is usually the best option.
Allow the loaf to cool completely before storing it.
Placing warm bread in a container can trap moisture and create a soggy texture.
Once cooled, place the bread in an airtight container, bread box, or resealable plastic bag.
Keeping air away from the bread helps prevent it from drying out.
Store it in a cool, dry place away from direct sunlight and heat sources.
When stored properly, milk bread will typically stay soft and fresh for about 3 to 4 days.
If you notice the bread beginning to firm up slightly, a quick toast can bring back some of its softness and flavor.
For the best eating experience, slice only what you need and keep the remaining loaf sealed.
Refrigeration Tips
While it may seem like a good idea, refrigeration is not usually recommended for milk bread.
The cold temperature can cause bread to become stale more quickly.
As a result, the loaf may lose some of its soft and fluffy texture.
If you live in a very warm or humid climate, refrigeration may be necessary to prevent spoilage.
If you choose to refrigerate the bread, wrap it tightly in plastic wrap or place it in an airtight container.
This extra protection helps reduce moisture loss.
Before serving, allow refrigerated slices to come to room temperature or warm them briefly in a toaster or oven.
This can help restore some of the bread’s softness.
Freezing Instructions
Freezing is the best option if you want to keep milk bread fresh for longer than a few days.
The bread freezes very well and retains much of its texture when thawed properly.
Allow the loaf to cool completely before freezing.
Wrap the whole loaf or individual slices tightly in plastic wrap.
For added protection, place the wrapped bread in a freezer-safe bag or airtight container.
Removing as much air as possible helps prevent freezer burn.
If you freeze individual slices, you can thaw only the amount you need.
This is especially convenient for quick breakfasts and snacks.
Milk bread can typically be frozen for up to 3 months.
When ready to enjoy, transfer the bread to the countertop and allow it to thaw at room temperature.
For warm bread, place slices in a toaster or heat the loaf briefly in the oven.
Serving Suggestions
- Breakfast toast – Toast a slice and top it with butter, jam, honey, or nut butter for a simple and satisfying breakfast.
- Sandwiches – The soft yet sturdy texture makes it ideal for both sweet and savory sandwich fillings.
- French toast – Its rich, fluffy crumb absorbs the custard beautifully, creating a tender and flavorful breakfast treat.
- Bread pudding – Use leftover slices to make a comforting dessert with a soft texture and rich flavor.
- Sweet and savory spreads – Enjoy milk bread with cream cheese, fruit preserves, chocolate spread, avocado, or your favorite sandwich spread.
Final Thoughts
Milk bread is a wonderful recipe to have in your baking collection because it delivers a soft texture, rich flavor, and reliable results with simple ingredients.
Don’t be afraid to experiment with different flavors, fillings, and shapes to make the recipe your own.
Every loaf is a chance to learn something new and create a bread your family will love.
FAQs
Can I Make Milk Bread Without a Stand Mixer?
Yes. You can knead the dough by hand for about 10–12 minutes until it becomes smooth, stretchy, and elastic.
Can I Use All-Purpose Flour Instead of Bread Flour?
Yes. All-purpose flour works well, though bread flour typically produces a slightly chewier texture and better rise.
Why Is My Milk Bread Not Fluffy?
Common causes include inactive yeast, under-kneading, insufficient rising time, or adding too much flour to the dough.
How Long Does Homemade Milk Bread Last?
When stored in an airtight container at room temperature, milk bread typically stays fresh and soft for 3–4 days.
Can I Freeze Milk Bread Dough?
Yes. After the first rise, shape the dough, wrap it well, and freeze it for up to 3 months. Thaw overnight in the refrigerator before baking.
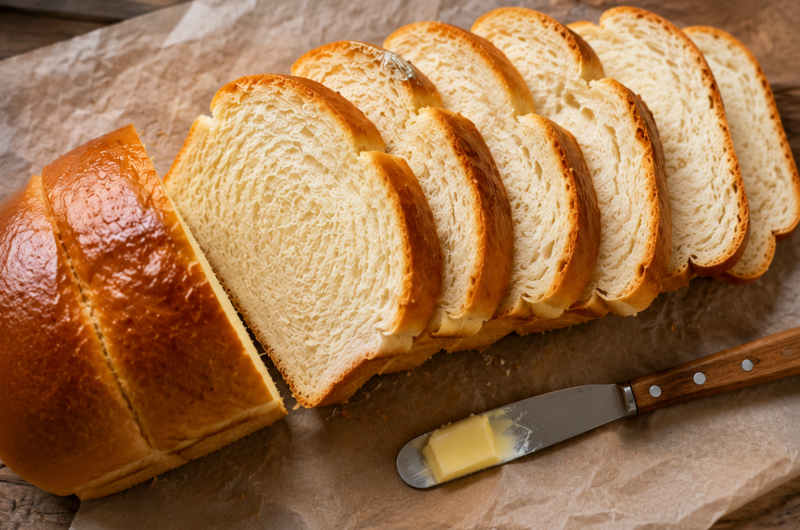
Milk Bread Recipe: Soft, Fluffy, and Easy Homemade Bread
Cuisine: JapaneseDifficulty: Easy12
Slices20
minutes35
minutes2
hours25
minutesThis soft and fluffy milk bread has a rich, buttery flavor and a light, pillowy texture that’s perfect for sandwiches, toast, or enjoying warm with butter.
Ingredients
4 cups (500g) bread flour
1 cup (240ml) warm milk
3 tablespoons sugar
2¼ teaspoons active dry yeast
1 large egg
4 tablespoons unsalted butter, softened
1 teaspoon salt
1 egg + 1 tablespoon milk (for egg wash, optional)
Directions
- Combine warm milk, sugar, and yeast in a bowl and let sit for 5–10 minutes until foamy.
- Add flour, egg, and salt, then mix until a dough forms.
- Knead in the softened butter and continue kneading until the dough is smooth and elastic.
- Cover and let the dough rise for 60–90 minutes, or until doubled in size.
- Divide and shape the dough into three rolls, then place them in a greased loaf pan.
- Let the dough rise again for 30–45 minutes until puffy.
- Brush with egg wash if desired and bake at 350°F (175°C) for 30–35 minutes.
- Cool completely on a wire rack before slicing and serving.
Notes
- For the softest texture, measure ingredients by weight when possible.
- Avoid adding too much extra flour during kneading.
- Store in an airtight container for up to 4 days or freeze for up to 3 months.

Hi, I’m Sorenna Blythe, the baker and writer behind Mix Whisk Bake. I share simple, reliable recipes and honest kitchen moments to help home bakers bake with confidence and joy. When I’m not testing new treats, you’ll find me sipping coffee and dreaming up my next bake.