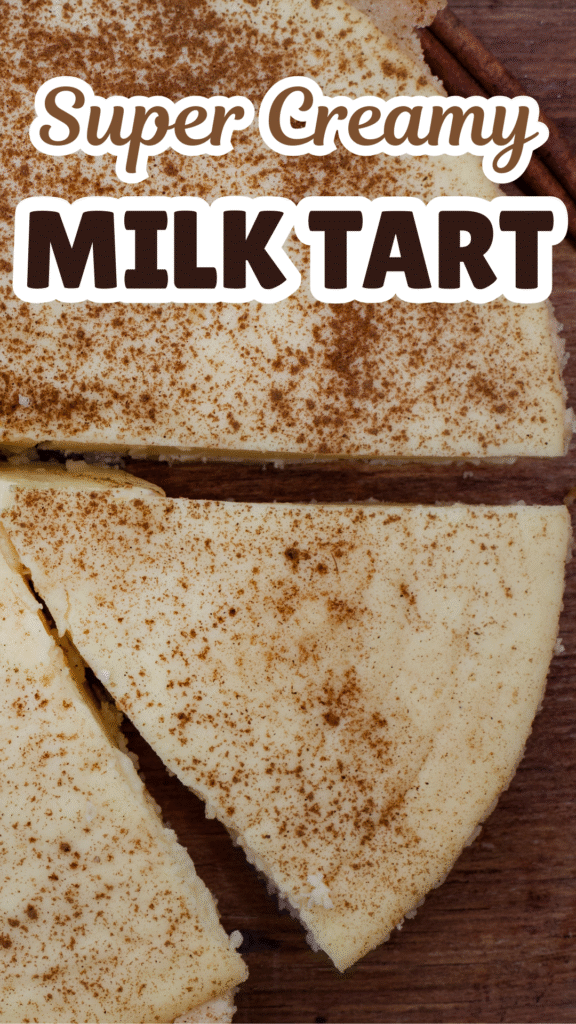
Milk tart, or melktert, is a beloved South African dessert made with a smooth, creamy milk custard nestled in a tender crust and finished with a light dusting of cinnamon.
It’s simple, comforting, and full of gentle sweetness.
This recipe stays true to tradition while giving you a perfectly silky filling and a flaky, buttery base that holds together beautifully.
The warm touch of cinnamon on top brings everything together without overpowering the custard.
If you’re baking for a holiday, hosting afternoon tea, or just want something special for your family, this milk tart fits the moment.
Follow the steps carefully, and you’ll have a classic dessert that tastes like home.
What Is Milk Tart?
Milk tart, or melktert, has roots in South Africa’s Dutch heritage, where early settlers adapted European custard tarts using simple, local ingredients like milk, eggs, sugar, and flour to create a dessert that was affordable, comforting, and easy to make for large families.
Over time, it became a staple in South African homes, often served at church gatherings, family celebrations, and Sunday lunches.
Traditionally, milk tart features a sweet pastry crust filled with a lightly cooked milk custard and topped with a generous sprinkle of ground cinnamon.
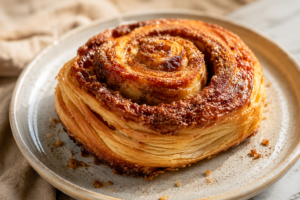
Still, modern versions now include crustless options, puff pastry bases, condensed milk fillings, or even coconut and almond twists for added flavor.
Despite these variations, the heart of milk tart remains the same: a soft, custard-like filling that is smooth and creamy without being heavy, gently sweet rather than rich, and delicately spiced on top.
The texture should be tender and slightly wobbly when set, not dense or rubbery, while the flavor is clean, milky, and comforting, with cinnamon adding warmth in every bite.
Why You’ll Love This Recipe
Simple Pantry Ingredients
You don’t need anything fancy to make this milk tart. The ingredients are basic and easy to find: milk, eggs, sugar, flour, butter, and cinnamon.
Most of these are likely already in your kitchen, which means you can make this dessert without a special trip to the store.
Using simple ingredients also lets the true flavor of the milk custard shine through. Each item plays a clear role, and when measured correctly, they come together beautifully.
Silky Smooth Filling
The filling is the heart of a good milk tart, and this recipe focuses on getting that texture just right.
By gently heating the milk and carefully thickening the custard, you create a smooth, creamy consistency that sets softly without becoming dense.
The key is steady whisking and not rushing the cooking process. When done properly, the result is a tender, custard-like center that slices cleanly yet melts in your mouth.
Make-Ahead Friendly
Milk tart tastes even better once it has had time to cool and fully set. That makes it perfect for preparing in advance. You can bake it the day before serving and let it chill in the fridge overnight.
This not only saves you time but also improves the texture, giving you neat slices and a deeper flavor. It’s a practical choice when you’re planning for guests or busy days.
Perfect Balance of Sweetness
This recipe keeps the sweetness gentle and balanced. The filling is lightly sweet, not overpowering, which allows the creamy milk flavor to stand out.
The cinnamon on top adds warmth without extra sugar. Every bite feels comforting rather than heavy, making it easy to enjoy a full slice without it feeling too rich.
Great for Special Occasions or Everyday Baking
Milk tart fits almost any moment. It looks elegant enough for holidays and celebrations, yet it’s simple enough for a relaxed weekend bake.
Serve it at tea time, family dinners, or even as a weekday treat. Once you make it, you’ll see how easily it becomes a go-to dessert you can rely on again and again.
Ingredients You’ll Need
For the Crust
- 1 ½ cups (190g) all-purpose flour
- ½ cup (113g) unsalted butter, softened
- ¼ cup (50g) granulated sugar
- 1 large egg
- 1 teaspoon baking powder
- ¼ teaspoon salt
For the Filling
- 4 cups (1 liter) full-cream milk
- ¾ cup (150g) granulated sugar
- 2 large eggs
- ¼ cup (30g) cornstarch
- 2 tablespoons all-purpose flour
- 1 tablespoon unsalted butter
- 1 teaspoon vanilla extract
- 1–2 teaspoons ground cinnamon, for topping
Step-by-Step Instructions
Step 1: Prepare the Crust
Start by preheating your oven to 180°C (350°F), so it’s ready when you are. In a mixing bowl, combine the flour, sugar, baking powder, and salt. Stir well to evenly distribute everything.
Add the softened butter and rub it into the dry ingredients using your fingertips until the mixture looks like fine crumbs.
This step creates a tender crust. Add the egg and mix gently until a soft dough forms. Do not overwork it; mix just until combined.
Press the dough evenly into a greased 9-inch (23cm) tart pan, making sure to press it up the sides and keep the thickness even. Use a fork to lightly prick the base to prevent bubbling.
Pre-bake the crust for 10–12 minutes, or until lightly golden. This helps prevent a soggy base once the filling is added.
Step 2: Make the Milk Filling
Pour the milk into a large saucepan and heat it over medium heat until it is hot but not boiling. Stir occasionally to prevent scorching.
While the milk heats, whisk together the eggs, sugar, cornstarch, and flour in a separate bowl until smooth and lump-free.
This ensures a silky filling later. Slowly pour a small amount of the hot milk into the egg mixture while whisking constantly. This tempers the eggs and prevents scrambling.
Gradually pour the tempered mixture back into the saucepan with the remaining milk. Cook over medium heat, whisking continuously, until the mixture thickens to a smooth custard.
This usually takes a few minutes. Once thick, remove from heat and stir in the butter and vanilla extract until fully melted and combined. The filling should be creamy and smooth.
Step 3: Assemble and Bake
Pour the warm custard filling into the pre-baked crust and smooth the top with a spatula. Gently tap the pan on the counter to release any air bubbles.
Return the tart to the oven and bake for 15–20 minutes, or until the edges are set and the center has a slight wobble.
It should not be fully firm in the oven, as it will continue setting while cooling. Remove from the oven and place on a wire rack.
Allow it to cool at room temperature without disturbing it. This helps the filling set evenly and prevents cracks.
Step 4: Finish and Serve
Once the tart has cooled, sprinkle a generous layer of ground cinnamon evenly over the top. Cover and refrigerate for at least 2 hours, or until fully chilled and set.
Chilling improves the texture and makes slicing easier. When ready to serve, use a sharp knife to cut clean slices.
Wipe the blade between cuts for neat edges. Serve cold and enjoy every creamy, lightly spiced bite.
Tips for the Perfect Milk Tart
Don’t Overbake (Look for a Slight Jiggle)
Milk tart should be gently set, not firm like a baked cheesecake. When you remove it from the oven, the edges should look stable while the center still has a slight jiggle when you gently move the pan.
That small wobble is a good sign. It means the custard will finish setting as it cools, giving you a soft and creamy texture.
If you bake it until completely firm in the oven, the filling can turn dense or slightly rubbery. Keep a close eye during the final minutes and trust the visual cues more than the clock.
Strain the Filling for an Extra Smooth Texture
If you want an especially silky finish, pour the cooked custard through a fine-mesh strainer before adding it to the crust.
This removes any tiny lumps or bits of cooked egg that may have formed while thickening. It only takes an extra minute, but it makes a noticeable difference in texture.
A smooth filling gives you cleaner slices and a more polished result. This step is optional, but it’s helpful if you want bakery-style smoothness.
Use Full-Cream Milk for Best Results
Full-cream milk gives the tart its rich, creamy flavor and soft texture. Lower-fat milk can work, but the filling may be thinner and less satisfying.
The fat in full-cream milk helps create a custard that feels smooth and balanced, not watery.
Since milk is the main ingredient, its quality matters. Choose fresh milk, and avoid overheating it to preserve its natural flavor.
Chill for Clean, Neat Slices
Patience makes a big difference here. Let the tart cool completely at room temperature first, then chill it in the fridge for at least two hours.
This allows the custard to fully set and makes slicing much easier. If you cut it too soon, the filling may look soft and messy. Use a sharp knife and wipe it clean between slices for neat edges.
A well-chilled milk tart not only looks better, but the flavor also deepens slightly as it rests.
Variations & Customizations
Crustless Milk Tart
If you prefer something lighter or want to save time, you can make this milk tart without a crust. Simply pour the prepared custard into a well-greased pie dish and bake until just set.
The result is softer and more delicate, almost like a baked pudding. It slices best after thorough chilling, so give it enough time in the fridge.
This version is perfect if you want to reduce prep steps while still enjoying the same creamy flavor.
Puff Pastry Base
For a flakier and slightly crisp base, use store-bought puff pastry instead of the traditional shortcrust. Roll it out gently and press it into your tart pan, trimming any excess around the edges.
Lightly prick the base with a fork and blind bake it until lightly golden before adding the filling. Puff pastry adds a buttery crunch that contrasts beautifully with the smooth custard.
It also gives the tart a slightly more elegant look, making it great for special gatherings.
Coconut Milk Version
To add a subtle twist, replace part or all of the full-cream milk with coconut milk. This gives the filling a gentle coconut flavor without overpowering the classic taste.
If using full coconut milk, expect a slightly richer texture. You can also sprinkle toasted coconut on top, along with cinnamon for added depth.
Keep the sugar level the same at first, then adjust slightly if needed after tasting the custard mixture before baking.
Almond or Nutmeg Flavor Twist
For a warm flavor change, stir in a small splash of almond extract along with the vanilla. Almond adds a soft, nutty note that pairs well with cinnamon.
Alternatively, replace or combine the cinnamon topping with freshly grated nutmeg for a deeper, spiced finish.
Start with a light hand, as both almond extract and nutmeg are strong. These small adjustments allow you to personalize the tart while keeping its creamy foundation intact.
Storage & Make-Ahead Tips
Milk tart stores well, which makes it a practical dessert for busy weeks or planned gatherings.
Once fully cooled, cover the tart tightly with plastic wrap or place it in an airtight container and store it in the fridge for up to 3–4 days; keeping it sealed prevents it from absorbing fridge odors and stops the surface from drying out.
Always refrigerate it, since the custard filling contains eggs and milk. If you’d like to freeze it, you can, but the texture may change slightly after thawing.
For best results, freeze the tart without the cinnamon topping, wrap it tightly in plastic wrap and a layer of foil, and freeze for up to one month.
Thaw it overnight in the fridge rather than at room temperature to keep the custard stable. When ready to serve again, give it a fresh dusting of cinnamon to brighten the flavor and appearance.
Serve it chilled for clean slices and the best texture, or let it sit at room temperature for about 15–20 minutes if you prefer a slightly softer, creamier bite.
Final Thoughts
Milk tart is simple to make, but the result feels truly special. Follow the steps carefully, take your time with the custard, and you’ll have a dessert you can be proud of.
I’d love to hear how yours turns out, so feel free to leave a comment or share your experience. Serve it with a warm cup of tea or coffee for the perfect pairing.
If you enjoyed this recipe, save it, print it, or share it with someone who loves a classic homemade treat.
FAQs
Can I make milk tart without eggs?
Yes, but the texture will be slightly different. Replace the eggs with an extra tablespoon of cornstarch and cook the custard until well thickened to help it set properly.
Why is my milk tart runny?
It’s usually undercooked or not chilled long enough. Make sure the custard thickens fully on the stove and allow the tart to cool completely, then chill for at least 2 hours before slicing.
Can I use condensed milk?
Yes, you can replace part of the sugar and milk with condensed milk for a sweeter, richer filling. Reduce the added sugar to avoid making it too sweet.
How long does milk tart last?
Stored in an airtight container in the fridge, milk tart stays fresh for up to 3–4 days. Always keep it refrigerated due to the custard filling.
South African Milk Tart (Melktert) – Creamy, Classic & Delicious
Difficulty: Easy8
Slices20
minutes30
minutes1
hourA classic South African milk tart with a smooth, creamy custard filling, tender crust, and a light dusting of cinnamon. Simple ingredients, comforting flavor, and perfect for any occasion.
Ingredients
- For the Crust:
1 ½ cups (190g) all-purpose flour
½ cup (113g) unsalted butter, softened
¼ cup (50g) sugar
1 large egg
1 teaspoon baking powder
¼ teaspoon salt
- For the Filling:
4 cups (1 liter) full-cream milk
¾ cup (150g) sugar
2 large eggs
¼ cup (30g) cornstarch
2 tablespoons flour
1 tablespoon butter
1 teaspoon vanilla extract
1–2 teaspoons ground cinnamon (for topping)
Directions
- Preheat oven to 180°C (350°F).
- Mix flour, sugar, baking powder, and salt. Rub in butter until crumbly. Add egg and mix into a soft dough.
- Press dough into a greased 9-inch (23cm) tart pan. Prick base and pre-bake for 10–12 minutes until lightly golden.
- Heat milk until hot (not boiling).
- Whisk eggs, sugar, cornstarch, and flour until smooth. Gradually whisk in hot milk, then return the mixture to the pot.
- Cook while whisking until thickened. Remove from heat and stir in butter and vanilla.
- Pour filling into crust. Bake 15–20 minutes until edges are set and center slightly jiggles.
- Cool completely, then chill at least 2 hours. Sprinkle with cinnamon before serving.
Notes
- Do not overbake; the center should have a slight wobble.
- Chill well for clean slices.
- Store covered in the fridge for up to 3–4 days.

Hi, I’m Sorenna Blythe, the baker and writer behind Mix Whisk Bake. I share simple, reliable recipes and honest kitchen moments to help home bakers bake with confidence and joy. When I’m not testing new treats, you’ll find me sipping coffee and dreaming up my next bake.