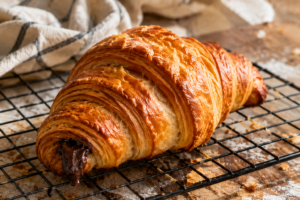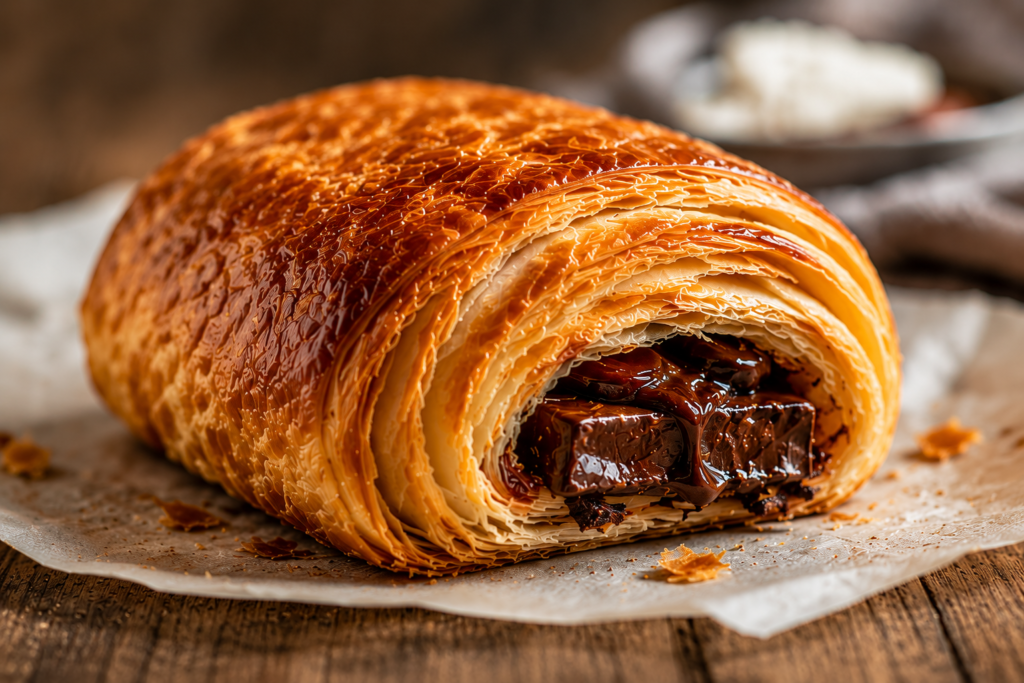
Few pastries feel as special as a warm Pain au Chocolat fresh from the oven.
This classic French treat is made with buttery, flaky layers of dough wrapped around rich chocolate, creating a bakery-style pastry that’s hard to resist.
While many people use the terms interchangeably, Pain au Chocolat is traditionally shaped as a rectangle with chocolate tucked inside, while a chocolate croissant is typically curved.
Both are delicious, but Pain au Chocolat has its own unique charm.
Making it at home takes a little patience, but the results are well worth it.
You’ll enjoy fresh, crisp layers, real butter flavor, and perfectly melted chocolate in every bite.
In this recipe, I’ll guide you through each step so you can confidently create beautiful homemade Pain au Chocolat in your own kitchen.

What Is Pain au Chocolat?
Pain au Chocolat is a beloved French pastry made from layers of laminated dough wrapped around pieces of chocolate, then baked until golden, crisp, and beautifully flaky.
It belongs to a category of baked goods known as viennoiseries, which are pastries made with yeast-leavened dough enriched with ingredients like butter, milk, eggs, or sugar, giving them a texture that falls somewhere between bread and pastry.
The name Pain au Chocolat translates to “chocolate bread” in French, although the finished pastry is much lighter, richer, and more delicate than what most people think of as bread.
Its roots can be traced back to France’s long tradition of pastry-making, where bakers perfected the art of laminating dough by folding butter between thin layers of dough to create the signature airy texture that makes each bite so satisfying.
Over time, Pain au Chocolat became a staple in French bakeries, often enjoyed as a breakfast pastry or afternoon treat alongside a cup of coffee, tea, or hot chocolate.
Today, it remains one of the most popular pastries found in bakeries around the world, loved for its simple combination of buttery layers and rich chocolate filling.
Traditional Pain au Chocolat is made with a handful of basic ingredients, but each one plays an important role in creating the pastry’s classic flavor and texture.
The dough is typically made with flour, yeast, milk, sugar, salt, and butter, creating a soft, elastic dough that can be rolled and folded without tearing.
A generous amount of high-quality butter is then layered into the dough during the lamination process, which creates the hundreds of thin, flaky layers that puff up beautifully in the oven.
The filling traditionally consists of dark chocolate batons, which are thin sticks of chocolate designed to hold their shape while melting just enough to create a rich center.
An egg wash brushed over the pastries before baking helps create the glossy, golden-brown finish that makes Pain au Chocolat look as good as it tastes.
While modern variations may include different types of chocolate or additional fillings, the traditional version relies on simple ingredients and careful technique, proving that sometimes the most memorable pastries come from the simplest combinations.
Why You’ll Love This Recipe
- Rich buttery layers – Every bite is filled with delicate, flaky layers that deliver the classic buttery flavor Pain au Chocolat is known for.
- Crisp exterior and soft interior – The pastry bakes up beautifully golden and crisp on the outside while staying light, tender, and airy inside.
- Perfect for breakfast, brunch, or dessert – Whether paired with morning coffee, served at a weekend brunch, or enjoyed as a sweet treat after dinner, this pastry fits any occasion.
Ingredients You’ll Need
For the Dough
- 4 cups (500g) bread flour – Provides the structure needed for strong, flaky layers.
- ¼ cup (50g) granulated sugar – Adds a touch of sweetness and helps the dough brown beautifully.
- 1½ teaspoons (9g) salt – Enhances the flavor and balances the richness of the butter.
- 2¼ teaspoons (7g) instant yeast – Helps the dough rise and develop a light, airy texture.
- 1 cup (240ml) whole milk, lukewarm – Brings the dough together and adds richness.
- 3 tablespoons (45g) unsalted butter, softened – Adds flavor and tenderness to the dough.
For the Butter Layer
- 1¼ cups (280g) European-style unsalted butter, cold – Creates the signature flaky layers and rich buttery taste.
For the Filling
- 16 dark chocolate batons or about 4 ounces (115g) dark chocolate sticks, cut into pieces – Provides the classic chocolate center in each pastry.
For the Egg Wash
- 1 large egg – Gives the pastries a glossy, golden finish.
- 1 tablespoon milk or water – Helps thin the egg wash for even brushing.
Essential Equipment
- Rolling pin – Used to roll the dough evenly and create the thin layers needed for proper lamination.
- Mixing bowls – Helpful for mixing the dough ingredients and allowing the dough to rise comfortably.
- Bench scraper – Makes it easier to lift, divide, and handle the dough without stretching or tearing it.
- Baking sheet – Provides a sturdy surface for baking the pastries until golden and flaky.
- Parchment paper – Prevents sticking and makes cleanup much easier after baking.
- Pastry brush – Used to apply the egg wash evenly, giving the pastries their beautiful golden finish.
How to Make Pain au Chocolat
Step 1: Prepare the Dough
In a large mixing bowl, combine the bread flour, sugar, salt, and instant yeast until evenly distributed.
Pour in the lukewarm milk and softened butter, then mix until a rough dough begins to form.
Transfer the dough to a lightly floured surface and knead for about 8 to 10 minutes, or until it becomes smooth, soft, and elastic.
If the dough feels sticky, add only a small amount of flour at a time, as too much extra flour can make the finished pastries less tender.
Shape the dough into a ball and place it in a lightly greased bowl.
Cover the bowl and let the dough rise in a warm spot for about 1 to 1½ hours, or until it has nearly doubled in size.
A properly risen dough should look puffy and spring back slowly when gently pressed with a fingertip.
Step 2: Create the Butter Block
While the dough is rising, place the cold European-style butter between two sheets of parchment paper.
Use a rolling pin to gently flatten and shape the butter into a neat square or rectangle about ½ inch thick.
Try to keep the edges as straight as possible, as an even butter block will make the lamination process much easier.
Place the butter block in the refrigerator until firm but still flexible.
The butter should be cold enough to hold its shape but not so hard that it cracks when rolled inside the dough.
Step 3: Laminate the Dough
Once the dough has completed its first rise, gently press out the air and roll it into a rectangle large enough to completely enclose the butter block.
Place the chilled butter in the center of the dough and fold the dough over it like an envelope, making sure all edges are sealed.
Turn the dough so the seam side is facing down before rolling.
Roll the dough into a long rectangle using steady, even pressure.
Fold the rectangle into thirds, similar to folding a business letter.
This first fold begins creating the thin layers that give Pain au Chocolat its signature texture.
Wrap the dough tightly and chill it in the refrigerator for at least 30 minutes.
The resting time allows the gluten to relax and keeps the butter cold between folds.
Step 4: Complete the Remaining Folds
Remove the chilled dough from the refrigerator and place it on a lightly floured surface.
Roll it into another long rectangle, keeping the edges as even as possible.
Fold the dough into thirds again to complete the second fold.
Return the dough to the refrigerator for another 30 minutes.
Repeat the rolling and folding process one final time to create the third fold.
After the third fold, chill the dough for at least 1 hour before shaping.
Keeping the dough cold throughout this process is one of the most important parts of successful lamination.
Cold butter stays in distinct layers, while warm butter can melt into the dough and reduce flakiness.
If the dough ever becomes soft or difficult to handle, simply return it to the refrigerator before continuing.
Step 5: Roll and Cut the Dough
After the final chill, roll the dough into a large rectangle about ¼ inch thick.
Try to maintain an even thickness across the entire sheet so all pastries bake consistently.
Use a sharp knife or bench scraper to trim the edges if needed.
Cut the dough into evenly sized rectangles, approximately 4 inches by 6 inches.
Uniform pieces help ensure that every Pain au Chocolat bakes at the same rate.
Step 6: Add the Chocolate
Place one chocolate baton near one short edge of each rectangle.
Roll the dough over the first baton once.
Place a second chocolate baton slightly farther along the dough and continue rolling until the seam rests underneath the pastry.
This traditional method helps distribute the chocolate evenly throughout the center.
Avoid rolling too tightly, as the dough needs space to expand during proofing and baking.
Place the shaped pastries seam-side down on a parchment-lined baking sheet.
Step 7: Proof the Pastries
Cover the pastries loosely with plastic wrap or a clean kitchen towel.
Allow them to proof in a slightly warm, draft-free area for about 2 to 3 hours.
Patience is important during this stage because properly proofed pastries develop a lighter texture and better rise.
The pastries are ready when they appear noticeably larger, slightly puffy, and gently wobble when the baking sheet is moved.
If they still feel dense or firm, give them additional time.
Avoid proofing in a very hot location, as excessive heat can cause the butter layers to melt before baking.
Step 8: Apply Egg Wash and Bake
Preheat the oven to 400°F (200°C) while the pastries finish proofing.
Whisk together the egg and milk or water until smooth.
Using a pastry brush, lightly coat the tops of the pastries with the egg wash.
Be careful not to let excess egg wash drip onto the cut edges, as this can prevent the layers from rising properly.
Bake for 18 to 22 minutes, or until the pastries are deeply golden and beautifully puffed.
The finished Pain au Chocolat should feel light for its size and have crisp, flaky layers on the outside.
Allow the pastries to cool for a few minutes before serving so the chocolate can settle slightly inside.
Enjoy them warm for the best texture, flavor, and melt-in-your-mouth experience.
Tips for Perfect Pain au Chocolat
Keep Everything Cold
Cold butter is the secret behind the beautiful flaky layers that make Pain au Chocolat so special.
The goal is to keep the butter in thin sheets between the dough rather than allowing it to melt into the dough itself.
If the butter becomes too warm while rolling, place the dough back in the refrigerator for 20 to 30 minutes before continuing.
Working in a cool kitchen can also make the lamination process much easier.
Even if you’re eager to move forward, chilling the dough when needed will reward you with lighter, flakier pastries.
Avoid Overworking the Dough
Gentle handling helps preserve the layers you worked hard to create.
When rolling the dough, use steady and even pressure instead of pressing down aggressively.
Overworking the dough can make it shrink, become difficult to roll, and produce a tougher final texture.
If you notice the dough resisting or springing back, give it time to rest in the refrigerator before trying again.
Remember that the dough does not need to be perfect at every stage.
Small imperfections often disappear as the pastry rises and bakes.
Use High-Quality Butter
Because butter is one of the main ingredients in Pain au Chocolat, its quality has a noticeable impact on the final result.
European-style butter is often preferred because it contains less water and more butterfat than standard butter.
This higher butterfat content helps create richer flavor and more defined layers.
Choose unsalted butter whenever possible so you have full control over the seasoning in the dough.
Good butter may seem like a small detail, but it can make the difference between a good pastry and an exceptional one.
Don’t Rush the Proofing Process
Proofing is the final rise that allows the pastries to become light and airy before they enter the oven.
If the pastries are baked too soon, they may turn out dense and heavy instead of soft and flaky.
Properly proofed Pain au Chocolat should look slightly puffed and feel lighter than when they were first shaped.
The dough should respond gently when touched without immediately springing back.
Temperature plays an important role during proofing, so aim for a warm but not hot environment.
Patience during this stage is one of the easiest ways to improve your results.
Giving the dough enough time to rise allows all the layers to expand properly, creating the bakery-style texture that makes homemade Pain au Chocolat so rewarding.
Common Mistakes to Avoid
Butter Breaking Through the Dough
One of the most common challenges when making Pain au Chocolat is butter pushing through the dough during rolling.
This usually happens when the butter is either too cold and brittle or too warm and soft.
If the butter is too cold, it can crack into pieces that tear through the dough instead of forming smooth layers.
If it becomes too warm, it may soften excessively and start leaking out during lamination.
The best approach is to keep the butter cold but flexible enough to bend without breaking.
If you notice butter starting to peek through the dough, stop rolling and chill the dough before continuing.
A short rest in the refrigerator can often prevent a small issue from becoming a much larger one.
Dough Shrinking While Rolling
Dough that constantly shrinks back can make shaping Pain au Chocolat frustrating.
This usually happens when the gluten in the dough becomes too tight from rolling and handling.
Rather than forcing the dough to stay stretched, allow it to rest in the refrigerator for 20 to 30 minutes.
The resting period relaxes the dough and makes it much easier to roll evenly.
Trying to push through resistance often results in uneven thickness and distorted pastry shapes.
Working patiently produces cleaner rectangles and more consistent results.
Underproofed Pastries
Underproofing occurs when the shaped pastries have not been given enough time to rise before baking.
This mistake often leads to pastries that feel dense, heavy, and less flaky than they should be.
Many beginners rush this step because the pastries may appear ready before they have fully proofed.
A properly proofed Pain au Chocolat should look noticeably puffed and feel light when gently lifted.
The dough should have a slight wobble and a soft appearance rather than looking tight and compact.
Giving the pastries enough time to rise allows the layers to expand properly in the oven.
Overbaking
Pain au Chocolat can go from perfectly golden to overly dark faster than many people expect.
Leaving the pastries in the oven too long can dry out the interior and reduce their delicate texture.
Start checking for doneness near the lower end of the recommended baking time.
The pastries should have a rich golden-brown color across the surface and feel crisp on the outside.
Remember that they will continue to set slightly as they cool on the baking sheet.
Removing them at the right moment helps preserve the contrast between the flaky exterior, tender layers, and melted chocolate center.
A few minutes of careful attention at the end of baking can make a noticeable difference in the final result.
Variations to Try
Pain au Chocolat with Almond Cream
If you enjoy the flavor of almond pastries, adding almond cream is a delicious way to customize your Pain au Chocolat.
Almond cream, often called frangipane, is a simple mixture made from butter, sugar, eggs, and ground almonds.
Spread a thin layer of almond cream on the dough before placing the chocolate batons inside.
The almond filling adds richness, moisture, and a subtle nutty flavor that pairs beautifully with dark chocolate.
For an extra-special finish, sprinkle a few sliced almonds on top after applying the egg wash.
The almonds toast as the pastries bake, adding both flavor and a pleasant crunch.
Double Chocolate Pain au Chocolat
Chocolate lovers can easily take this pastry to the next level with a double chocolate version.
Before adding the chocolate batons, lightly spread a thin layer of chocolate hazelnut spread or chocolate pastry cream onto the dough.
You can also sprinkle a small amount of finely chopped dark chocolate around the batons for extra chocolate flavor.
Be careful not to overfill the pastries, as too much filling can leak during baking.
The result is a richer chocolate center that makes every bite even more indulgent.
This variation is especially popular for dessert or special occasions when you want something a little more decadent.
Hazelnut Chocolate Version
Hazelnut and chocolate are a classic combination that works wonderfully in Pain au Chocolat.
Place a small spoonful of hazelnut spread alongside the chocolate batons before rolling the pastries.
Another option is to sprinkle finely chopped toasted hazelnuts around the chocolate for added texture.
The nuts provide a gentle crunch that contrasts nicely with the flaky pastry layers.
Using toasted hazelnuts enhances their flavor and creates a deeper, more aromatic filling.
This variation tastes especially good when served warm with a cup of coffee or hot chocolate.
Mini Pain au Chocolat Bites
Mini Pain au Chocolat bites are perfect when you want smaller portions for brunches, parties, or afternoon snacks.
Simply cut the laminated dough into smaller rectangles before adding the chocolate.
Use one small chocolate baton or a few pieces of chopped chocolate in each pastry.
Because the pastries are smaller, they will bake faster than full-sized versions.
Keep a close eye on them during the final minutes of baking to prevent overbrowning.
These bite-sized pastries are easy to serve, simple to share, and make a beautiful addition to any breakfast or dessert table.
They are also a great choice for beginners who want to practice shaping laminated dough before making larger pastries.
How to Store Pain au Chocolat
At Room Temperature
Freshly baked Pain au Chocolat is best enjoyed on the day it is baked, when the layers are at their crispiest, and the chocolate center is still rich and flavorful.
If you have leftovers, allow the pastries to cool completely before storing them.
Place them in an airtight container or wrap them loosely in foil to help prevent them from drying out.
Store the pastries at room temperature for up to 2 days.
Avoid sealing warm pastries in a container, as trapped moisture can soften the flaky exterior.
A quick reheating before serving can help restore some of the crispness that naturally fades over time.
Refrigerating
Refrigeration is not usually the best option for Pain au Chocolat because cold temperatures can cause the pastry layers to become firm and lose some of their delicate texture.
However, if your kitchen is very warm or you need to keep the pastries for a little longer, refrigeration can be useful.
Place the cooled pastries in an airtight container before refrigerating.
They can be stored in the refrigerator for up to 5 days.
For the best texture, allow the pastries to come to room temperature and then warm them in the oven before serving.
This simple step helps revive the flaky layers and improves the overall eating experience.
Freezing Before Baking
Freezing unbaked Pain au Chocolat is a great way to prepare pastries ahead of time.
After shaping the pastries, place them on a baking sheet and freeze them until firm.
Once frozen, transfer them to a freezer-safe container or freezer bag.
This method prevents the pastries from sticking together and makes it easy to bake only the amount you need.
Unbaked pastries can be frozen for up to 2 months.
When ready to bake, place the frozen pastries on a lined baking sheet and allow them to thaw and proof until puffy.
After proofing, apply the egg wash and bake as directed.
This make-ahead option is perfect for busy mornings, holidays, or weekend brunches.
Freezing After Baking
Baked Pain au Chocolat also freezes well when stored properly.
Allow the pastries to cool completely before wrapping them individually.
Wrap each pastry tightly in plastic wrap and place them in a freezer-safe bag or container.
Proper wrapping helps protect the pastries from freezer burn and preserves their flavor.
Store them in the freezer for up to 2 months.
When you’re ready to enjoy them, thaw the pastries at room temperature for about an hour.
A short warm-up in the oven will help restore their flaky texture and bring the chocolate filling back to life.
Freezing baked pastries is an easy way to keep a homemade treat on hand whenever a craving strikes.
Reheating Instructions
Oven Method
The oven is the best way to reheat Pain au Chocolat because it helps restore the crisp, flaky layers that make the pastry so enjoyable.
Preheat your oven to 350°F (175°C).
Place the pastries on a baking sheet and heat them for 5 to 8 minutes if they have been stored at room temperature.
If the pastries are coming from the refrigerator, they may need a few extra minutes.
Keep an eye on them during the final minutes to prevent overbrowning.
The pastries are ready when they feel warm throughout, and the outer layers have become crisp again.
Allow them to cool for a minute or two before serving, as the chocolate filling can become very hot.
This method delivers the closest result to freshly baked Pain au Chocolat.
Air Fryer Method
An air fryer is a quick and convenient option when you want to reheat a pastry without turning on the oven.
Preheat the air fryer to 325°F (160°C) if your model requires preheating.
Place the pastries in the basket in a single layer, leaving a little space around each one.
Heat them for 3 to 5 minutes, checking frequently during the last minute.
Because air fryers can vary in strength, it is better to start with less time and add more if needed.
The pastry should be warm, crisp, and lightly refreshed without becoming too dark.
This method works especially well for smaller batches and individual servings.
Why Microwaving Is Not Recommended
While a microwave is the fastest reheating option, it is usually not the best choice for laminated pastries like Pain au Chocolat.
Microwaves heat moisture inside the pastry, which softens the flaky layers instead of crisping them.
As a result, the exterior can become chewy or slightly soggy within minutes.
The chocolate filling may warm nicely, but the pastry itself often loses much of its signature texture.
If a microwave is your only option, use short bursts of 10 to 15 seconds to avoid overheating.
For the best flavor and texture, the oven or air fryer will almost always produce better results.
What to Serve with Pain au Chocolat
- Coffee Pairings – A freshly brewed coffee, cappuccino, latte, or espresso complements the rich chocolate and buttery pastry layers perfectly.
- Tea Pairings – Black tea, Earl Grey, chai, or a mild green tea provides a warm, balanced pairing that doesn’t overpower the pastry’s flavor.
- Fresh Fruit and Yogurt – Fresh berries, sliced fruit, and creamy yogurt add a light, refreshing contrast to the richness of the Pain au Chocolat.
Final Thoughts
Making Pain au Chocolat at home may take a little time, but the reward is a tray of beautifully flaky pastries filled with rich, melted chocolate.
By keeping the dough and butter cold, handling the dough gently, and allowing enough time for proofing, you’ll create the light, buttery layers that make this French classic so special.
If this is your first time working with laminated dough, don’t worry about making everything perfect.
Each batch is a chance to build confidence and improve your technique, and even imperfect pastries are usually delicious.
Once you’ve mastered the basics, have fun experimenting with different fillings like almond cream, hazelnut spread, or your favorite chocolate varieties.
FAQs
Is Pain au Chocolat the Same as a Chocolate Croissant?
Not exactly. Pain au Chocolat is traditionally rectangular with chocolate batons rolled inside, while chocolate croissants are usually crescent-shaped.
Can I Use Puff Pastry Instead?
Yes, but the texture will be different. Traditional Pain au Chocolat uses laminated yeast dough, which creates a lighter and more airy pastry than standard puff pastry.
What Type of Chocolate Works Best?
Dark chocolate batons are the traditional choice because they provide rich flavor and hold their shape well during baking.
Can I Make the Dough Ahead of Time?
Yes. The laminated dough can be prepared and refrigerated overnight, making it easier to split the process over two days.
Why Didn’t My Pastries Rise Properly?
Common causes include inactive yeast, underproofing, or proofing in a room that is too cold. Make sure the dough has enough time to become puffy before baking.
Can I Freeze Unbaked Pain au Chocolat?
Yes. Shape the pastries, freeze them until firm, then store them in a freezer-safe container for up to 2 months. Thaw and proof before baking.
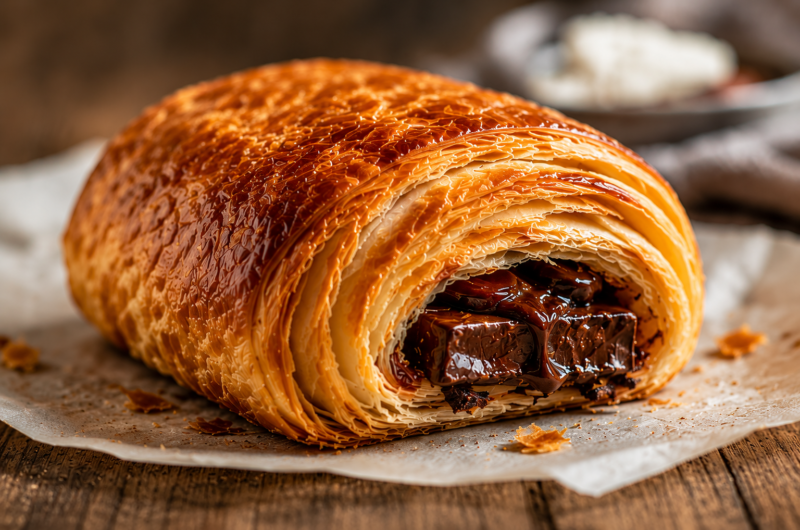
Pain au Chocolat Recipe: Buttery, Flaky French Chocolate Pastries
Cuisine: FrenchDifficulty: Medium8
Pastries45
minutes20
minutes5
hours5
minutesButtery, flaky French pastries filled with rich dark chocolate and baked until golden and crisp.
Ingredients
4 cups (500g) bread flour
¼ cup (50g) granulated sugar
1½ tsp salt
2¼ tsp instant yeast
1 cup (240ml) warm milk
3 tbsp (45g) unsalted butter, softened
1¼ cups (280g) cold European-style butter
16 dark chocolate batons
1 egg
1 tbsp milk
Directions
- Mix the dough ingredients and knead until smooth, then let rise until doubled.
- Shape the butter into a flat block and chill.
- Enclose the butter in the dough and perform three folds, chilling between each fold.
- Roll the dough into a large rectangle and cut into 8 equal rectangles.
- Place chocolate batons on each piece and roll into pastries.
- Proof until puffy, about 2 to 3 hours.
- Brush with egg wash and bake at 400°F (200°C) for 18–22 minutes until golden brown.
- Cool slightly and serve warm.
Notes
- Keep the dough and butter cold throughout the lamination process.
- Use high-quality dark chocolate for the best flavor.
- Unbaked pastries can be frozen for up to 2 months.
- Reheat in the oven for the crispiest texture.


Hi, I’m Sorenna Blythe, the baker and writer behind Mix Whisk Bake. I share simple, reliable recipes and honest kitchen moments to help home bakers bake with confidence and joy. When I’m not testing new treats, you’ll find me sipping coffee and dreaming up my next bake.