Some days, you just want dessert without spending hours in the kitchen.
These quick 20-minute desserts are perfect for busy weeknights, last-minute guests, or those moments when a sweet craving hits fast.
The best part? Most of these recipes use simple ingredients you may already have at home.
They’re easy to make, beginner-friendly, and still taste like something special.
From creamy no-bake treats to warm chocolate desserts and fresh fruity favorites, this list is packed with quick recipes anyone can make with confidence.
Grab your ingredients, have fun with it, and enjoy every sweet bite.
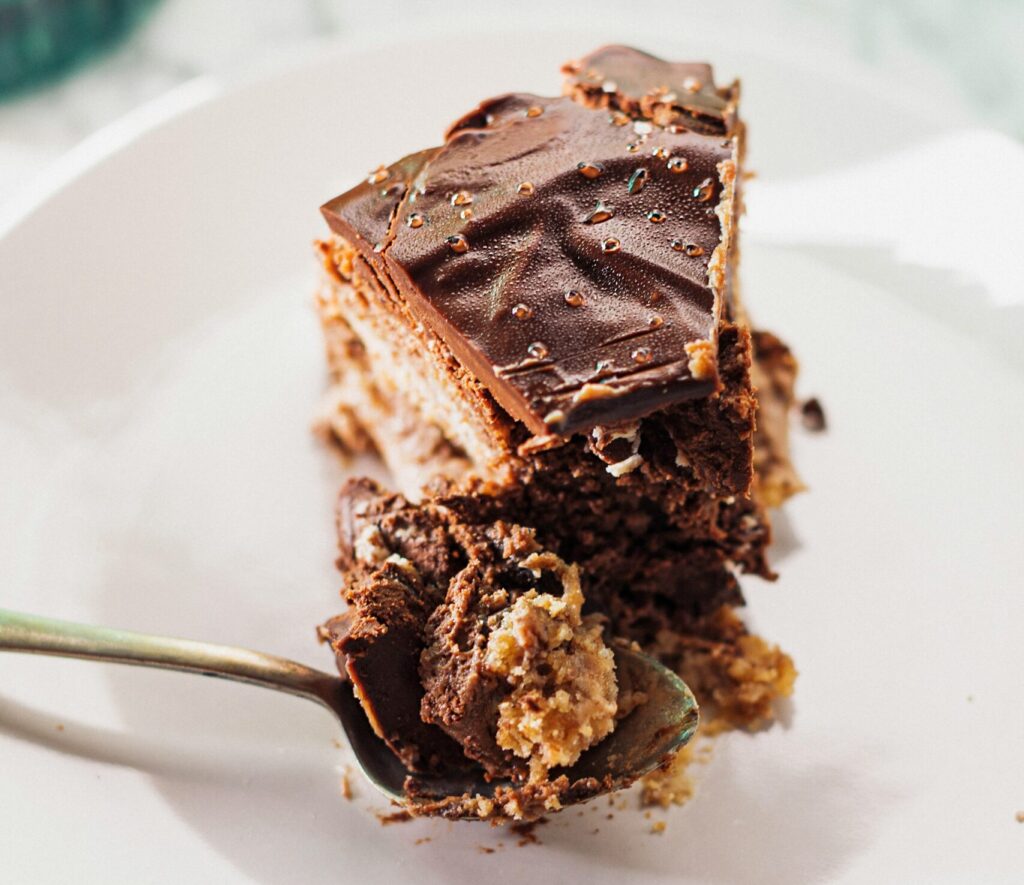
1. No-Bake Chocolate Peanut Butter Bars
These no-bake chocolate peanut butter bars are the kind of dessert you make once and immediately want the next day again.
They’re rich, creamy, and packed with chocolate-peanut butter flavor in every bite.
Even better, you don’t need to turn on the oven.
This recipe is great for busy days because the prep is simple and the ingredients are easy to find.
The bars also store well, which makes them perfect for making ahead of time before parties, holidays, or weekend cravings.
Why You’ll Love This Recipe
- Rich chocolate and creamy peanut butter flavor
- No baking required
- Easy enough for beginners
- Great make-ahead dessert
- Perfect for sharing
Ingredients
For the Peanut Butter Layer
- 1 cup creamy peanut butter
- ½ cup unsalted butter, melted
- 1 teaspoon vanilla extract
- 2 cups powdered sugar
- 1½ cups graham cracker crumbs
For the Chocolate Topping
- 1½ cups chocolate chips
- 2 tablespoons peanut butter
Step-by-Step Instructions
- Line an 8×8-inch baking dish or container with parchment paper. This makes removing the bars much easier later.
- In a large mixing bowl, stir together the melted butter, peanut butter, and vanilla extract until smooth.
- Add the powdered sugar and graham cracker crumbs. Mix until a thick dough forms. It should hold together when pressed.
- Press the mixture evenly into the prepared pan. Use the back of a spoon or a flat glass to smooth the top.
- In a microwave-safe bowl, melt the chocolate chips and peanut butter together in 20-second intervals. Stir between each round until smooth and glossy.
- Pour the melted chocolate over the peanut butter layer and spread evenly.
- Refrigerate for about 1 hour or until firm enough to slice.
- Cut into squares and serve chilled or slightly softened at room temperature.
Easy Variations
- Use crunchy peanut butter for extra texture.
- Swap graham cracker crumbs for crushed vanilla cookies.
- Add chopped peanuts on top for a salty crunch.
- Drizzle melted white chocolate over the bars for a bakery-style finish.
Serving Tips
These bars taste amazing straight from the fridge because the layers stay firm and creamy.
If you prefer a softer texture, let them sit at room temperature for 5 to 10 minutes before serving.
For clean slices, wipe your knife between cuts. Small squares work best since the bars are rich and satisfying.
2. Strawberry Cheesecake Cups
If you want a dessert that feels fancy without extra work, these strawberry cheesecake cups are a great choice.
They have creamy cheesecake filling, sweet strawberries, and buttery cookie crumbs layered into individual cups.
They’re light, fresh, and perfect for warm days, parties, or quick family desserts.
Since everything is served in small cups, there’s no slicing or messy serving involved.
Why This Dessert Works
- Creamy and refreshing
- Easy no-bake dessert
- Individual servings are party-friendly
- Uses simple ingredients
- Ready in minutes
Ingredients
For the Cheesecake Filling
- 8 ounces cream cheese, softened
- ½ cup powdered sugar
- 1 teaspoon vanilla extract
- 1 cup whipped topping or whipped cream
For the Layers
- 1½ cups crushed graham crackers or vanilla cookies
- 2 tablespoons melted butter
- 1½ cups diced fresh strawberries
Step-by-Step Instructions
- In a small bowl, mix the crushed graham crackers with melted butter until the crumbs are coated.
- In a separate bowl, beat the softened cream cheese, powdered sugar, and vanilla extract until smooth.
- Fold in the whipped topping gently until the mixture becomes light and creamy.
- Add a spoonful of cookie crumbs to the bottom of each dessert cup or jar.
- Spoon in a layer of cheesecake filling.
- Add diced strawberries on top.
- Repeat the layers until the cups are full.
- Chill for 10 to 15 minutes before serving for the best texture.
Optional Toppings
- Fresh whipped cream
- Crushed cookies
- Chocolate shavings
- Strawberry sauce
- Mint leaves for a fresh finish
Storage Tips
Store the cups covered in the refrigerator for up to 2 days.
For the freshest texture, add extra toppings right before serving.
If making ahead, keep the strawberries dry so the layers stay neat and creamy.
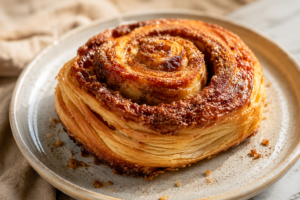
3. Air Fryer Cinnamon Sugar Donuts
These air fryer cinnamon sugar donuts are warm, fluffy, and coated in sweet cinnamon goodness.
They taste like a homemade bakery treat but come together surprisingly fast.
Using the air fryer keeps the donuts light while still giving them a slightly crisp outside.
This recipe is perfect when you want a cozy dessert without deep frying or complicated steps.
Why You’ll Love These Donuts
- Quick homemade dessert
- Crispy outside and soft center
- No deep frying needed
- Perfect for breakfast or dessert
- Beginner-friendly recipe
Ingredients
- 1 can refrigerated biscuit dough
- 3 tablespoons melted butter
- ½ cup granulated sugar
- 1½ teaspoons ground cinnamon
Step-by-Step Instructions
- Preheat your air fryer to 350°F.
- Separate the biscuit dough and use a small round cutter or bottle cap to cut holes in the center of each biscuit.
- Lightly spray the air fryer basket with cooking spray.
- Place the donuts in the basket in a single layer. Cook for 4 to 5 minutes, flipping halfway through, until golden brown.
- Brush the warm donuts with melted butter.
- In a shallow bowl, mix the sugar and cinnamon together.
- Roll each donut in the cinnamon sugar mixture until fully coated.
- Serve warm for the best flavor and texture.
Flavor Variations
- Add pumpkin spice for a fall version.
- Drizzle with chocolate sauce or caramel.
- Fill the centers with jam or Nutella.
- Use powdered sugar instead of cinnamon sugar for a lighter coating.
Best Serving Ideas
These donuts are best enjoyed warm right after cooking.
Serve them with coffee, hot chocolate, or cold milk for an easy treat everyone will love.
If you’re making them for guests, stack them on a serving plate with extra cinnamon sugar sprinkled over the top for a cozy bakery-style look.
4. Lemon Mug Cake
This lemon mug cake is one of the easiest desserts you can make when you want something sweet fast.
It’s soft, fluffy, and filled with fresh lemon flavor that makes every bite taste bright and refreshing.
Best of all, it cooks right in the microwave, so there’s almost no cleanup.
This recipe is perfect for beginners because the steps are simple and the ingredients are easy to work with.
If you’ve never made a mug cake before, don’t worry.
It comes together quickly and feels surprisingly homemade for a dessert made in minutes.
Why This Mug Cake Is a Favorite
- Ready in just a few minutes
- Perfect single-serve dessert
- Bright citrus flavor
- Microwave-friendly and beginner-friendly
- Great when you want dessert without leftovers
Ingredients
- 4 tablespoons all-purpose flour
- 2 tablespoons granulated sugar
- ¼ teaspoon baking powder
- Pinch of salt
- 3 tablespoons milk
- 2 tablespoons vegetable oil or melted butter
- 1 tablespoon fresh lemon juice
- 1 teaspoon lemon zest
- ¼ teaspoon vanilla extract
Step-by-Step Instructions
- In a microwave-safe mug, whisk together the flour, sugar, baking powder, and salt until combined.
- Add the milk, oil, lemon juice, lemon zest, and vanilla extract. Stir gently until smooth. Make sure there are no dry flour spots at the bottom of the mug.
- Microwave the mug cake for 60 to 90 seconds. Cooking times can vary slightly depending on your microwave, so start checking around the 60-second mark.
- The cake should look set on top but still soft in the center. Avoid overcooking, or the texture may turn dry.
- Let the mug cake cool for 1 to 2 minutes before eating. The cake continues to cook slightly as it rests.
Tips for Perfect Texture
- Use fresh lemon juice for the best flavor.
- Do not overmix the batter. Stir just until smooth.
- Microwave in short bursts if needed to prevent overcooking.
- A larger mug works best because the cake rises while cooking.
Add-In Ideas
- White chocolate chips
- Fresh blueberries
- A spoonful of lemon curd in the center
- Powdered sugar sprinkled on top
- Whipped cream for extra richness
5. Chocolate-Dipped Strawberry Bites
Chocolate-dipped strawberry bites are simple, beautiful, and always a crowd favorite.
The fresh strawberries balance perfectly with the rich chocolate coating, creating a dessert that feels special without requiring much effort.
These are great for parties, holidays, date nights, or quick sweet snacks.
Since they only use a few ingredients, they’re also one of the easiest desserts on this list for beginners to make confidently.
What Makes These So Easy
- Only a few ingredients are needed
- No baking required
- Elegant but simple
- Easy to customize
- Perfect for parties and celebrations
Ingredients
- 1 pound fresh strawberries
- 1½ cups semi-sweet chocolate chips
- 1 teaspoon coconut oil or vegetable oil
Step-by-Step Instructions
- Wash the strawberries and dry them very well with paper towels. Dry strawberries help the chocolate stick better.
- Line a tray or plate with parchment paper.
- Add the chocolate chips and oil to a microwave-safe bowl.
- Microwave in 20-second intervals, stirring after each round, until the chocolate is smooth and melted.
- Hold each strawberry by the stem and dip it into the melted chocolate. Twist slightly as you lift it out to remove extra chocolate.
- Place the dipped strawberries onto the prepared tray.
- Let the chocolate set at room temperature or refrigerate for 10 to 15 minutes for faster results.
Decoration Ideas
- Drizzle with melted white chocolate
- Roll in crushed nuts or cookie crumbs
- Add colorful sprinkles
- Use dark chocolate and milk chocolate together for variety
Storage Instructions
Store chocolate-dipped strawberries in the refrigerator for up to 2 days.
For the best texture and flavor, enjoy them the same day if possible.
Keep them in a single layer so the chocolate coating stays smooth and neat.
6. Banana Pudding Parfaits
Banana pudding parfaits are creamy, comforting, and incredibly easy to put together.
The layers of pudding, bananas, and crunchy cookies create a dessert that tastes classic and homemade with very little effort.
This recipe is especially great for family gatherings because it can be made ahead and served in individual cups.
The texture gets even better as the cookies soften slightly in the pudding.
Why Readers Will Love It
- Creamy and satisfying
- No baking needed
- Kid-friendly and beginner-friendly
- Easy to prepare ahead of time
- Perfect balance of soft and crunchy textures
Ingredients
- 2 cups cold milk
- 1 package instant vanilla pudding mix
- 1 cup whipped topping or whipped cream
- 2 ripe bananas, sliced
- 1½ cups vanilla wafer cookies
Step-by-Step Instructions
- In a large bowl, whisk the cold milk and pudding mix together for about 2 minutes until thickened.
- Fold the whipped topping into the pudding mixture until smooth and creamy.
- Add a few vanilla wafer cookies to the bottom of each serving glass or jar.
- Spoon a layer of pudding over the cookies.
- Add banana slices on top.
- Repeat the layers until the cups are filled.
- Chill the parfaits for at least 10 minutes before serving so the flavors can come together.
Easy Customizations
- Add caramel sauce between layers
- Use chocolate pudding instead of vanilla
- Add crushed peanut butter cookies for extra flavor
- Top with whipped cream and banana slices before serving
Make-Ahead Tips
These parfaits can be made a few hours in advance and stored in the refrigerator until ready to serve.
If making them ahead of time for a party, wait to add the final cookie topping until serving time so it stays crunchy.
7. Blueberry Yogurt Bark
Blueberry yogurt bark is one of those desserts that feels refreshing from the very first bite.
It’s creamy, fruity, slightly crunchy, and incredibly easy to make.
Since it freezes into slices, it’s also a great grab-and-go treat for warm days or afternoon cravings.
This recipe works well for beginners because there’s no baking involved and very little prep.
You simply mix, spread, freeze, and enjoy.
It’s the kind of dessert you can keep in the freezer whenever you want something sweet without too much effort.
Why This Dessert Is Popular
- Light and refreshing
- Great freezer treat
- Easy healthy dessert option
- No baking needed
- Perfect for warm weather
Ingredients
- 2 cups plain or vanilla Greek yogurt
- 2 tablespoons honey or maple syrup
- 1 teaspoon vanilla extract
- 1 cup fresh blueberries
- ¼ cup granola
- 2 tablespoons sliced almonds or chopped nuts
Step-by-Step Instructions
- Line a small baking tray or plate with parchment paper.
- In a mixing bowl, stir together the yogurt, honey, and vanilla extract until smooth.
- Spread the yogurt mixture evenly onto the prepared tray. Aim for about a ½-inch thickness so the bark freezes evenly.
- Scatter the blueberries across the top.
- Sprinkle the granola and nuts over the yogurt mixture.
- Freeze for 2 to 3 hours or until fully firm.
- Break or slice the frozen bark into pieces and serve immediately.
Healthy Additions
- Chia seeds
- Strawberries or raspberries
- Coconut flakes
- Dark chocolate chips
- Pumpkin seeds
Freezing Tips
Store the bark in an airtight container in the freezer for up to 2 weeks.
Place parchment paper between layers to keep the pieces from sticking together.
Let the bark sit at room temperature for 1 to 2 minutes before eating so it softens slightly for the best texture.
8. Apple Cinnamon Nachos
Apple cinnamon nachos are a fun dessert that turns simple fruit into something exciting and shareable.
Crisp apple slices are layered with sweet toppings, creating the perfect mix of crunchy, creamy, and cozy flavors.
This recipe is especially great for kids because it feels playful while still being quick and easy to prepare.
It also works well for parties, movie nights, or after-school snacks when you want something sweet without a lot of baking.
Why This Recipe Stands Out
- Fun twist on fruit desserts
- Sweet and crunchy texture
- Kid-friendly and easy to customize
- Ready in minutes
- Great for sharing
Ingredients
- 2 large apples, sliced thinly
- 2 tablespoons peanut butter or caramel sauce
- ¼ cup mini chocolate chips
- ¼ cup granola
- 1 teaspoon ground cinnamon
- 1 tablespoon honey or maple syrup
Step-by-Step Instructions
- Wash and slice the apples into thin wedges. Arrange them on a serving plate in overlapping layers.
- Warm the peanut butter slightly in the microwave for easier drizzling.
- Drizzle the peanut butter or caramel sauce over the apples.
- Sprinkle the chocolate chips, granola, and cinnamon evenly across the top.
- Finish with a light drizzle of honey or maple syrup.
- Serve immediately while the apples are fresh and crisp.
Topping Ideas
- Crushed cookies
- Chopped pecans or walnuts
- Coconut flakes
- White chocolate drizzle
- Raisins or dried cranberries
Serving Suggestions
These apple nachos are best served right after assembling, so the apples stay crisp.
For parties, place extra toppings in small bowls and let everyone build their own dessert plate.
It makes the recipe even more fun and interactive.
9. Coconut Mango Mousse
Coconut mango mousse tastes bright, creamy, and tropical all at once.
The smooth mango flavor pairs perfectly with the rich coconut, creating a dessert that feels light but still satisfying.
Even though it looks elegant, this recipe is surprisingly simple to make.
It’s a great choice for summer dinners, celebrations, or anytime you want a quick dessert that feels a little extra special.
Why It’s Perfect for Summer
- Tropical and refreshing flavors
- Creamy but light texture
- No complicated baking steps
- Looks beautiful served in cups or glasses
- Perfect chilled dessert for hot days
Ingredients
- 1 cup mango chunks
- 1 cup coconut cream
- 2 tablespoons powdered sugar
- ½ teaspoon vanilla extract
- 1 cup whipped cream or whipped topping
Step-by-Step Instructions
- Add the mango chunks to a blender and blend until smooth.
- In a mixing bowl, whisk together the coconut cream, powdered sugar, and vanilla extract until creamy.
- Fold the mango puree into the coconut mixture gently.
- Fold in the whipped cream until the mousse becomes light and airy.
- Spoon the mousse into serving glasses or small bowls.
- Chill for at least 15 minutes before serving for the best flavor and texture.
Garnish Ideas
- Fresh mango cubes
- Toasted coconut flakes
- Lime zest
- Mint leaves
- Crushed graham crackers
Storage Tips
Store the mousse covered in the refrigerator for up to 2 days.
If the mousse separates slightly after chilling, give it a gentle stir before serving.
For the creamiest texture, serve cold straight from the fridge.
10. Oreo Icebox Dessert Cups
Oreo icebox dessert cups are creamy, chocolatey, and incredibly easy to make.
The layers soften slightly as they chill, creating a cookies-and-cream dessert that tastes rich without feeling heavy.
This recipe is perfect for quick gatherings because you can prepare everything ahead of time.
It also works well for beginner bakers since there’s no baking involved, and the layers come together fast.
Why Everyone Loves This Recipe
- Classic cookies-and-cream flavor
- No oven needed
- Great make-ahead dessert
- Easy to customize
- Perfect for parties and family nights
Ingredients
- 12 Oreo cookies, crushed
- 1 cup whipped topping or whipped cream
- 8 ounces cream cheese, softened
- ¼ cup powdered sugar
- 1 teaspoon vanilla extract
Step-by-Step Instructions
- In a bowl, beat the softened cream cheese, powdered sugar, and vanilla extract until smooth.
- Fold in the whipped topping gently until creamy and fluffy.
- Add a spoonful of crushed Oreos to the bottom of each dessert cup.
- Spoon a layer of the cream mixture over the cookies.
- Repeat the layers until the cups are filled.
- Top with extra crushed Oreos for added crunch.
- Refrigerate for at least 15 to 20 minutes before serving.
Easy Variations
- Use golden sandwich cookies instead of chocolate Oreos
- Add chocolate pudding between layers
- Mix mini chocolate chips into the filling
- Drizzle caramel or chocolate sauce on top
Chilling Tips
The dessert cups taste even better after chilling because the cookie layers soften slightly and blend into the creamy filling.
If you want a little crunch left in the cookies, serve them after about 15 minutes of chilling.
For a softer icebox-style texture, chill for 1 hour or longer.
Tips for Making Fast Desserts Successfully
Quick desserts become even easier when you keep a few basics ready in your kitchen.
Simple ingredients and helpful tools can save time, reduce stress, and make dessert-making feel more fun and manageable.
Keep Simple Pantry Staples Ready
- Chocolate chips — Perfect for melting, mixing into batters, or adding quick chocolate flavor to almost any dessert.
- Whipped cream — Adds an easy creamy topping that instantly makes desserts look and taste more special.
- Fresh fruit — Great for adding natural sweetness, color, and freshness to quick treats.
- Cookies and crackers — Useful for crusts, layers, toppings, and no-bake desserts when you need something fast.
Time-Saving Kitchen Tools
- Microwave — Ideal for mug cakes, melting chocolate, and making desserts in minutes.
- Air fryer — Helps create warm, crispy desserts quickly without heating the whole oven.
- Hand mixer — Makes whipping cream, mixing fillings, and blending batters much easier and faster.
- Food processor — Quickly crushes cookies, blends fillings, and saves prep time in the kitchen.
Quick Dessert Presentation Ideas
- Dessert cups — Easy to fill, simple to serve, and perfect for layered desserts.
- Mason jars — Give quick desserts a cozy homemade look while making them portable and party-friendly.
- Fresh fruit garnish — Adds color and makes simple desserts feel brighter and fresher.
- Chocolate drizzle — A quick finishing touch that makes desserts look bakery-style with very little effort.
Final Thoughts
Quick desserts make it easy to enjoy something homemade even on the busiest days.
With simple ingredients, fast prep, and beginner-friendly steps, these recipes prove that you don’t need hours in the kitchen to make something delicious.
Try a few favorites, mix in your own toppings, and have fun experimenting along the way.
Even the fastest desserts can look impressive and taste special when made with care.
FAQs
What desserts can be made in 20 minutes?
Many simple desserts can be ready in 20 minutes or less, including mug cakes, parfaits, no-bake bars, fruit desserts, mousse cups, and air fryer treats.
Are no-bake desserts faster?
Yes, no-bake desserts are usually faster because they skip the baking and cooling time. They’re great for quick treats and beginner-friendly recipes.
Can these desserts be made ahead of time?
Many of these desserts can be prepared ahead and stored in the refrigerator or freezer until ready to serve. Parfaits, dessert cups, and no-bake bars work especially well.
What are the easiest desserts for beginners?
Mug cakes, chocolate-dipped strawberries, yogurt bark, and no-bake parfaits are some of the easiest desserts because they use simple ingredients and minimal steps.
How do I store quick desserts?
Most quick desserts should be stored in an airtight container in the refrigerator. Frozen desserts like yogurt bark should stay in the freezer until serving time.

Hi, I’m Sorenna Blythe, the baker and writer behind Mix Whisk Bake. I share simple, reliable recipes and honest kitchen moments to help home bakers bake with confidence and joy. When I’m not testing new treats, you’ll find me sipping coffee and dreaming up my next bake.