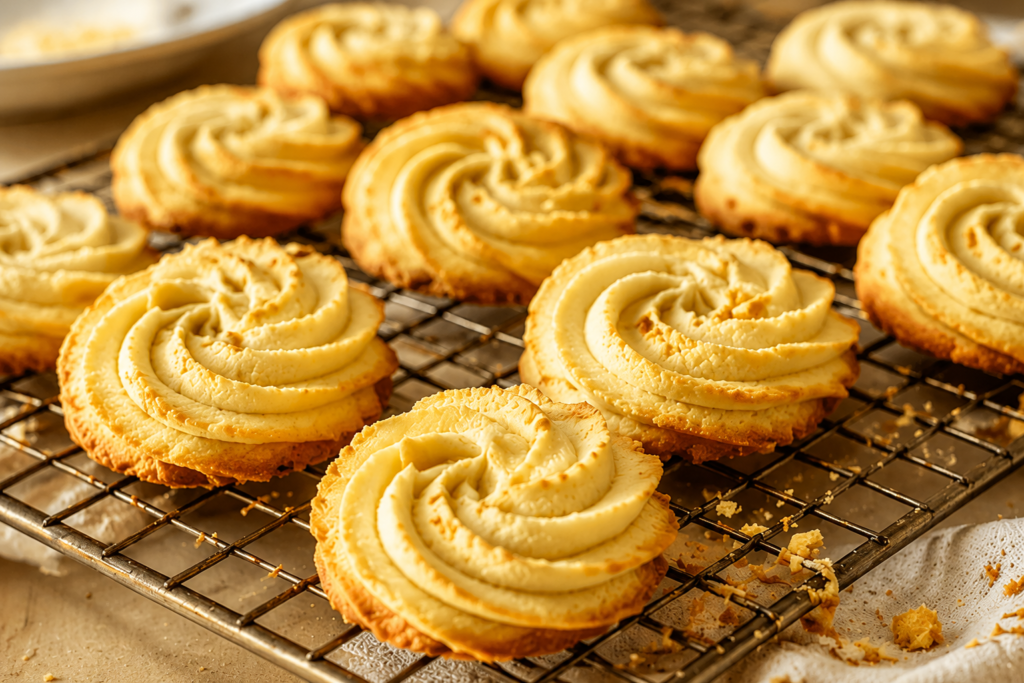
Butter cookies have been a favorite for generations, and it’s easy to see why.
They’re rich, buttery, lightly crisp around the edges, and wonderfully tender in every bite.
With just a handful of simple ingredients, you can create bakery-style cookies right in your own kitchen.
If you’ve ever wondered how butter cookies compare to sugar cookies or shortbread, the biggest difference is texture.
Butter cookies are lighter and more delicate than shortbread, while also being richer and more buttery than classic sugar cookies.
The result is a cookie that feels special without requiring extra effort.
This easy homemade butter cookie recipe is perfect for holidays, family gatherings, gift boxes, or simply enjoying with a cup of coffee or tea.
Why You’ll Love This Butter Cookies Recipe
- Rich buttery flavor – Every bite is packed with a delicious buttery taste that makes these cookies hard to resist.
- Crisp edges with a tender center – The cookies bake up perfectly crisp on the outside while staying soft and delicate inside.
- Simple pantry ingredients – You only need a few everyday baking staples to make a batch from scratch.
- Perfect for gifting and holiday cookie trays – Their beautiful appearance and classic flavor make them ideal for sharing with family and friends.
- Easy to customize with flavors and decorations – Add chocolate, citrus zest, sprinkles, or your favorite extracts to make them your own.

What Are Butter Cookies?
Butter cookies are classic cookies made with a simple combination of butter, sugar, flour, and a few basic baking ingredients.
They are known for their rich flavor, delicate texture, and beautiful shapes that often come from piping the dough through a pastry bag.
Unlike many other cookies that rely on mix-ins or toppings for flavor, butter cookies let the butter take center stage.
The high butter content creates a tender crumb and a melt-in-your-mouth texture that makes these cookies instantly recognizable.
Many butter cookies have a light crispness around the edges while remaining soft and delicate in the center.
They can be enjoyed plain, dipped in chocolate, decorated with sprinkles, or flavored with ingredients like vanilla, almond extract, or citrus zest.
Their versatility and simple preparation have helped them remain a favorite in home kitchens for generations.
The History of Butter Cookies
Butter cookies have roots in Northern Europe, where butter was widely available and commonly used in baking.
Many food historians trace the popularity of butter cookies to countries such as Denmark, Germany, and Sweden.
Danish butter cookies, in particular, became famous around the world because of their rich flavor and decorative shapes.
Traditional recipes were often passed down through families and baked for holidays, celebrations, and special gatherings.
Because the ingredients were simple and easy to find, butter cookies became a practical treat that could be made throughout the year.
As baking techniques spread across different regions, local bakers adapted recipes to match their own tastes and traditions.
Over time, butter cookies evolved into the many versions we enjoy today, from classic piped swirls to festive holiday cookies decorated with sugar and chocolate.
Even with modern variations, the heart of the recipe remains unchanged: good butter, simple ingredients, and careful baking.
Traditional Butter Cookies Around the World
Many countries have their own version of butter cookies, each with unique shapes, flavors, and traditions.
In Denmark, butter cookies are often piped into rings, pretzels, and swirls before baking.
These cookies are commonly served during holidays and are frequently packaged in decorative tins that have become recognizable around the world.
German butter cookies, sometimes known as butterplätzchen, are especially popular during Christmas celebrations.
These cookies are often cut into festive shapes and decorated with icing, sugar, or chocolate.
In Sweden, buttery cookies are a common part of coffee gatherings and family celebrations.
Many Swedish recipes focus on simple ingredients that highlight the natural flavor of the butter.
Across Europe and beyond, bakers continue to create their own versions using local ingredients and family traditions.
Despite their differences, most traditional butter cookies share the same qualities: a rich buttery taste, a delicate texture, and a comforting homemade feel.
Why Butter Is the Star Ingredient
Butter is the ingredient that gives these cookies their signature flavor and texture.
Because the recipe contains only a few ingredients, the quality of the butter has a noticeable impact on the final result.
Good butter provides richness that cannot be fully replicated with substitutes.
As the cookies bake, the butter helps create crisp edges while keeping the interior tender and delicate.
It also contributes to the beautiful golden color that makes freshly baked butter cookies so appealing.
Using real butter helps create a smooth dough that pipes easily and holds decorative shapes well during baking.
For the best flavor, many bakers prefer using high-quality unsalted butter so they can control the amount of salt in the recipe.
While every ingredient plays an important role, butter is what transforms a simple dough into a cookie that feels rich, comforting, and special.
Ingredients You’ll Need
- 1 cup (226g) unsalted butter, softened – The main ingredient that gives the cookies their rich flavor and tender texture.
- ⅔ cup (135g) granulated sugar – Adds sweetness while helping create a light, crisp finish.
- 2 large egg yolks – Provide richness and help bind the dough together.
- 2 teaspoons vanilla extract – Enhances the buttery flavor and adds a warm, classic aroma.
- 2 cups (250g) all-purpose flour – Forms the structure of the cookies while keeping them soft and delicate.
- ¼ teaspoon salt – Balances the sweetness and brings out the flavor of the butter and vanilla.
Equipment Needed
- Mixing bowls – Use these to combine and mix your ingredients comfortably without making a mess.
- Electric mixer – Helps cream the butter and sugar until light and fluffy, which is key to achieving the perfect texture.
- Measuring cups and spoons – Accurate measurements ensure consistent results every time you bake.
- Piping bag with star tip (optional) – Ideal for creating the classic swirls and decorative shapes often seen in traditional butter cookies.
- Baking sheets – Provide a sturdy surface for baking the cookies evenly.
- Parchment paper or silicone baking mat – Prevents sticking, promotes even baking, and makes cleanup much easier.
How to Make Butter Cookies Step-by-Step
Step 1: Prepare the Dough
Begin by placing the softened butter and granulated sugar into a large mixing bowl.
Using an electric mixer, beat the butter and sugar together for 2 to 3 minutes until the mixture becomes light, creamy, and fluffy.
This process, known as creaming, helps incorporate air into the dough and creates a lighter cookie texture.
Scrape down the sides of the bowl as needed to ensure everything mixes evenly.
Add the egg yolks and vanilla extract to the bowl.
Mix until the ingredients are fully combined and the mixture looks smooth.
The egg yolks add richness, while the vanilla enhances the buttery flavor.
In a separate bowl, whisk together the all-purpose flour and salt.
Gradually add the dry ingredients to the butter mixture.
Mix on low speed just until a soft dough forms.
Avoid overmixing at this stage, as too much mixing can make the cookies less tender.
The finished dough should be soft, smooth, and easy to handle.
Step 2: Shape the Cookies
One of the best things about butter cookies is how versatile they are when it comes to shaping.
For classic bakery-style butter cookies, transfer the dough to a piping bag fitted with a large star tip.
Pipe swirls, rosettes, rings, or other decorative shapes directly onto a parchment-lined baking sheet.
If you prefer cut-out cookies, lightly flour your work surface and roll the dough to about ¼ inch thick.
Use your favorite cookie cutters to create shapes for holidays, birthdays, or everyday baking.
You can also keep things simple by scooping small portions of dough and placing them directly onto the baking sheet.
These easy drop cookies require no special tools and still bake up beautifully.
Leave about 2 inches of space between each cookie to allow for slight spreading during baking.
Step 3: Chill the Dough
Once the cookies are shaped, place the baking sheet in the refrigerator for 20 to 30 minutes.
While it may be tempting to skip this step, chilling makes a noticeable difference.
Cold dough spreads less in the oven, helping the cookies maintain their shape.
This is especially important for piped swirls and decorative designs.
Chilling also allows the butter to firm up, which contributes to a better texture after baking.
The result is a cookie with cleaner edges, a more delicate crumb, and a more professional appearance.
A little patience here goes a long way.
Step 4: Bake Until Golden
Preheat your oven to 350°F (175°C) while the dough chills.
Place the baking sheets in the center of the oven for the most even baking.
Bake the cookies for 10 to 12 minutes, depending on their size and thickness.
Keep a close eye on them during the final few minutes.
Butter cookies can go from perfectly baked to overbaked quite quickly.
You’ll know they’re ready when the edges turn a light golden brown while the centers remain pale.
The cookies should look set and no longer appear shiny or wet on top.
Avoid waiting for the entire cookie to become deeply golden, as this can result in a drier texture.
Step 5: Cool and Enjoy
Remove the baking sheets from the oven and allow the cookies to rest on the pan for about 5 minutes.
This brief resting period helps them firm up without breaking apart.
Carefully transfer the cookies to a wire cooling rack.
Allow them to cool completely before decorating, dipping in chocolate, or storing.
Proper cooling helps preserve their crisp edges and delicate texture.
Once cooled, enjoy them as they are or pair them with coffee, tea, or a cold glass of milk.
Take a moment to appreciate your work!
Tips for Perfect Butter Cookies Every Time
Use Room Temperature Butter
One of the most important steps is starting with properly softened butter.
Room temperature butter blends more easily with sugar, creating a smooth and fluffy mixture.
This trapped air helps give the cookies a lighter texture after baking.
If the butter is too cold, it won’t cream properly and can leave lumps in the dough.
If the butter is too warm or partially melted, the dough may become greasy and spread too much in the oven.
A good test is to gently press the butter with your finger.
It should give slightly without feeling oily or overly soft.
Allowing the butter to sit at room temperature for about 30 to 60 minutes before baking is usually enough.
Measure Flour Correctly
Accurate flour measurement can make the difference between tender cookies and dense ones.
Adding too much flour creates a dry dough that can result in crumbly cookies.
Instead of scooping directly into the flour container, use a spoon to lightly fill your measuring cup.
Level the top with a straight edge for the most accurate measurement.
If you have a kitchen scale, weighing the flour is even better.
This simple step helps ensure your cookies have the soft, delicate texture that butter cookies are known for.
Avoid Overmixing the Dough
Once the flour is added, mix only until the ingredients are combined.
Overmixing develops the gluten in the flour, which can make cookies tougher than intended.
Butter cookies should be tender and delicate, not chewy.
The dough does not need to be perfectly smooth.
As soon as you no longer see dry streaks of flour, it’s time to stop mixing.
A gentle hand during this stage helps preserve the light texture you’re aiming for.
Chill Before Baking
Chilling the dough is one of the easiest ways to improve your cookies.
Cold dough holds its shape better during baking.
This is especially helpful if you’ve piped decorative swirls or cut out detailed shapes.
Chilling also allows the ingredients to firm up and blend together more fully.
The result is cleaner edges, less spreading, and a more consistent texture.
Even a short chilling period of 20 to 30 minutes can make a noticeable difference.
If your kitchen is warm, this step becomes even more important.
Watch Baking Time Carefully
Butter cookies bake quickly, so keeping an eye on the oven is essential.
A few extra minutes can turn a perfectly tender cookie into one that is overly crisp.
Start checking the cookies near the lower end of the recommended baking time.
Look for lightly golden edges and centers that appear set.
The cookies will continue to firm up slightly as they cool on the baking sheet.
It’s usually better to remove them a little early than a little late.
With practice, you’ll quickly learn the perfect baking time for your oven and preferred cookie texture.
Common Mistakes to Avoid
- Using melted butter – Melted butter can cause the dough to spread too much, resulting in flat cookies that lose their shape.
- Adding too much flour – Excess flour can make the cookies dry, dense, and less tender than intended.
- Overbaking – Leaving the cookies in the oven too long can make them hard and overly crisp instead of delicate and buttery.
- Skipping the chilling step – Chilling helps the cookies hold their shape and prevents excessive spreading during baking.
- Crowding the baking sheet – Placing cookies too close together can cause them to bake unevenly and stick to one another as they spread.
Delicious Variations to Try
Chocolate-Dipped Butter Cookies
Chocolate and butter cookies are a classic pairing.
Once the cookies have cooled completely, dip half of each cookie into melted chocolate.
Dark, milk, or white chocolate all work well, so choose your favorite.
Place the dipped cookies on parchment paper and allow the chocolate to set before serving.
For extra texture, sprinkle chopped nuts, crushed toffee, or festive sprinkles over the chocolate while it’s still soft.
The chocolate adds a rich contrast to the delicate buttery flavor of the cookies.
These cookies also look beautiful on dessert trays and gift platters.
Almond Butter Cookies
Almond flavor pairs wonderfully with butter cookies.
Replace the vanilla extract with almond extract or use a combination of both for a more complex flavor.
A little almond extract goes a long way, so start with a small amount.
You can also sprinkle sliced almonds over the cookies before baking.
The almonds add a pleasant crunch and a subtle nutty flavor.
These cookies are elegant enough for special occasions while still being simple to make.
Lemon Butter Cookies
If you enjoy bright, fresh flavors, lemon butter cookies are an excellent choice.
Add freshly grated lemon zest to the dough before mixing.
The zest contains natural oils that provide a vibrant citrus flavor without making the dough too wet.
For even more lemon flavor, drizzle the cooled cookies with a simple lemon glaze made from powdered sugar and lemon juice.
The combination of buttery richness and fresh citrus creates a balanced and refreshing treat.
These cookies are especially popular during spring and summer gatherings.
Spritz Butter Cookies
Spritz cookies are a traditional variation made using a cookie press.
The dough is pressed into decorative shapes such as flowers, stars, or holiday designs.
Because the dough is rich and smooth, it works perfectly in a cookie press.
Spritz cookies often require very little decoration because the shapes are already beautiful.
You can add colored sugar, chocolate drizzles, or festive sprinkles if desired.
They are a fun way to create bakery-style cookies with minimal effort.
Holiday Butter Cookies with Sprinkles
Butter cookies are a favorite during the holiday season because they are easy to decorate.
Before baking, add colored sugar or seasonal sprinkles to the tops of the cookies.
Choose colors that match the occasion, such as red and green for Christmas or pastel shades for spring celebrations.
The decorations add color and a slight crunch without changing the classic flavor.
This variation is especially fun for baking with children.
Simple decorations can transform an everyday cookie into a festive treat.
Jam-Filled Butter Cookies
Jam-filled butter cookies offer a delicious surprise in every bite.
To make them, shape the dough into small balls and gently press a thumbprint into the center of each one.
Fill each indentation with a small spoonful of your favorite jam.
Raspberry, strawberry, apricot, and blackberry jams all work beautifully.
As the cookies bake, the jam becomes slightly thickened and intensely flavorful.
The sweet fruit filling complements the rich buttery cookie perfectly.
These cookies look impressive, but they’re easy enough for bakers of any skill level to make.
Don’t be afraid to experiment with your own flavor combinations.
Once you’ve mastered the basic recipe, you can create countless variations that suit your tastes and the occasion.
That’s part of the fun of baking butter cookies from scratch.
How to Store Butter Cookies
Proper storage helps butter cookies stay fresh, flavorful, and crisp for as long as possible.
Taking a few extra moments to store them correctly can make a noticeable difference in their texture and taste.
Room Temperature Storage
For most situations, room temperature storage is the best option for butter cookies.
Allow the cookies to cool completely before storing them.
Even a small amount of trapped heat can create moisture inside the container, which may soften the cookies.
Place the cooled cookies in an airtight container.
A container with a secure lid helps keep air and humidity away from the cookies.
If you’re stacking multiple layers, place a sheet of parchment paper between them.
This prevents the cookies from sticking together and helps protect decorative toppings.
When stored properly at room temperature, butter cookies typically stay fresh for up to one week.
Keep the container in a cool, dry place away from direct sunlight and heat sources.
This simple method is perfect for everyday storage and keeps the cookies ready whenever you’re craving a sweet treat.
Refrigerating Butter Cookies
Refrigeration is usually not necessary for plain butter cookies.
However, it can be helpful if your kitchen is very warm or if the cookies contain fillings, glazes, or decorations that require cooler temperatures.
Store the cookies in an airtight container before placing them in the refrigerator.
This helps prevent them from absorbing odors from other foods.
Butter cookies can remain fresh in the refrigerator for up to two weeks.
Before serving, allow the cookies to sit at room temperature for a few minutes.
This helps restore some of their natural texture and flavor.
While refrigeration can extend freshness, room temperature storage often provides the best overall texture for traditional butter cookies.
Freezing Baked Cookies
Freezing is an excellent option if you want to make butter cookies ahead of time.
Once the cookies have cooled completely, arrange them in a freezer-safe container or bag.
If stacking the cookies, place parchment paper between the layers to prevent sticking.
Remove as much excess air as possible from freezer bags before sealing them.
Properly stored butter cookies can be frozen for up to three months.
When you’re ready to enjoy them, transfer the cookies to the countertop and let them thaw at room temperature.
Most cookies will be ready to eat within 30 to 60 minutes.
Freezing helps preserve both flavor and texture, making it a convenient choice for holiday baking, gift-giving, and advance meal planning.
Can You Freeze Butter Cookie Dough?
Yes, butter cookie dough freezes exceptionally well, making it a great option for planning ahead and baking fresh cookies whenever the craving strikes.
Freezing the dough allows you to prepare a batch in advance without sacrificing flavor or texture.
For the best results, shape the dough before freezing whenever possible.
If you’re making cut-out cookies, flatten the dough into a disc, wrap it tightly in plastic wrap, and place it in a freezer-safe bag or container.
For piped or drop cookies, shape the cookies on a parchment-lined baking sheet and freeze them until firm before transferring them to a freezer-safe container.
This method prevents the cookies from sticking together and allows you to bake only as many as you need.
Properly wrapped butter cookie dough can be stored in the freezer for up to three months.
When you’re ready to use the dough, there are a couple of easy options.
If the dough was frozen as a disc, transfer it to the refrigerator and allow it to thaw overnight.
Once softened, it can be rolled, cut, shaped, and baked as usual.
If the cookies were frozen in individual portions, you can often bake them directly from frozen without thawing.
Simply place the frozen cookie dough on a prepared baking sheet and add an extra 1 to 3 minutes to the baking time.
Keep an eye on the cookies near the end of baking and look for lightly golden edges and set centers.
Baking directly from frozen is convenient and helps the cookies hold their shape beautifully.
Serving Suggestions
- With Coffee or Tea – The rich buttery flavor pairs perfectly with a warm cup of coffee or tea for a simple and satisfying treat.
- As Holiday Gifts – Package the cookies in decorative tins or gift boxes for a thoughtful homemade gift that friends and family will appreciate.
- Cookie Platters for Parties – Add them to a cookie assortment to provide a classic option that complements a variety of flavors and textures.
- Dessert Table Favorites – Their elegant appearance and delicious taste make them a welcome addition to dessert tables for celebrations and special occasions.
Final Thoughts
Homemade butter cookies are proof that a few simple ingredients can create something truly special.
They’re rich, buttery, easy to make, and perfect for everything from everyday treats to holiday celebrations.
Once you’ve mastered the basic recipe, don’t hesitate to experiment with different flavors, decorations, and fillings to make them your own.
Every batch is a chance to get creative and discover a new favorite variation.
Happy baking!
FAQs
Why Are My Butter Cookies Spreading Too Much?
Butter cookies often spread too much if the butter is too warm, the dough wasn’t chilled, or too little flour was used. Chilling the dough before baking usually helps them hold their shape.
Can I Make Butter Cookies Without a Piping Bag?
Yes, you can. Simply roll the dough and use cookie cutters, or scoop small portions onto the baking sheet to make drop-style butter cookies.
What Is the Difference Between Butter Cookies and Shortbread?
Butter cookies typically contain egg yolks, which create a lighter texture. Shortbread usually contains only butter, sugar, and flour, resulting in a denser, more crumbly cookie.
Can I Use Salted Butter?
Yes, but it’s best to reduce or omit the added salt in the recipe. This helps prevent the cookies from becoming overly salty.
How Long Do Homemade Butter Cookies Last?
When stored in an airtight container at room temperature, homemade butter cookies typically stay fresh for up to one week.
Can I Freeze the Dough?
Absolutely. Butter cookie dough freezes well for up to three months. Thaw it in the refrigerator before shaping, or bake portioned dough directly from frozen with a few extra minutes of baking time.
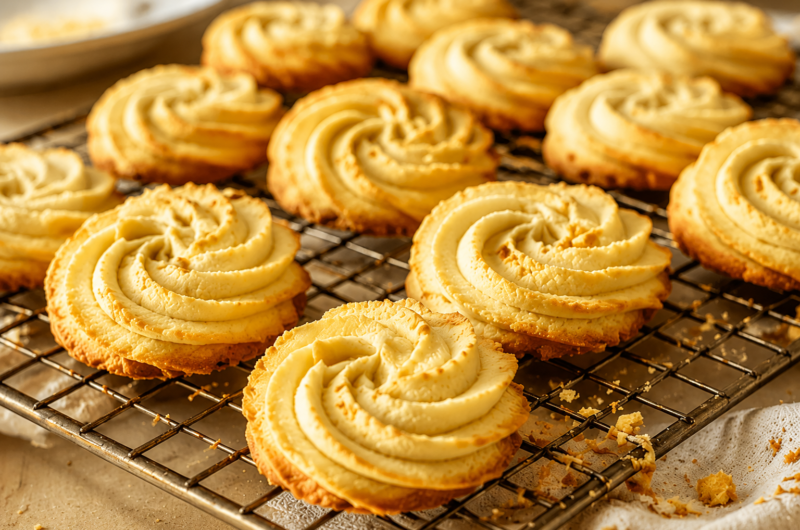
Butter Cookies: Easy, Buttery, and Melt-in-Your-Mouth Delicious
Difficulty: Easy24
Cookies15
minutes10
minutes30
minutesThese classic butter cookies are rich, buttery, and perfectly crisp around the edges with a tender, melt-in-your-mouth center. They’re simple to make and perfect for holidays, gifting, or everyday baking.
Ingredients
1 cup (226g) unsalted butter, softened
⅔ cup (135g) granulated sugar
2 large egg yolks
2 teaspoons vanilla extract
2 cups (250g) all-purpose flour
¼ teaspoon salt
Directions
- Preheat the oven to 350°F (175°C) and line baking sheets with parchment paper.
- Beat the butter and sugar until light and fluffy.
- Mix in the egg yolks and vanilla extract until combined.
- Add the flour and salt, mixing until a soft dough forms.
- Pipe or shape the dough onto the prepared baking sheets.
- Chill the shaped cookies for 20 minutes.
- Bake for 10–12 minutes, or until the edges are lightly golden.
- Cool on the baking sheet for 5 minutes, then transfer to a wire rack to cool completely.
Notes
- Chill the dough before baking to help the cookies hold their shape.
- Do not overbake; the cookies should be lightly golden around the edges.
- Store in an airtight container for up to 1 week or freeze for up to 3 months.


Hi, I’m Sorenna Blythe, the baker and writer behind Mix Whisk Bake. I share simple, reliable recipes and honest kitchen moments to help home bakers bake with confidence and joy. When I’m not testing new treats, you’ll find me sipping coffee and dreaming up my next bake.


