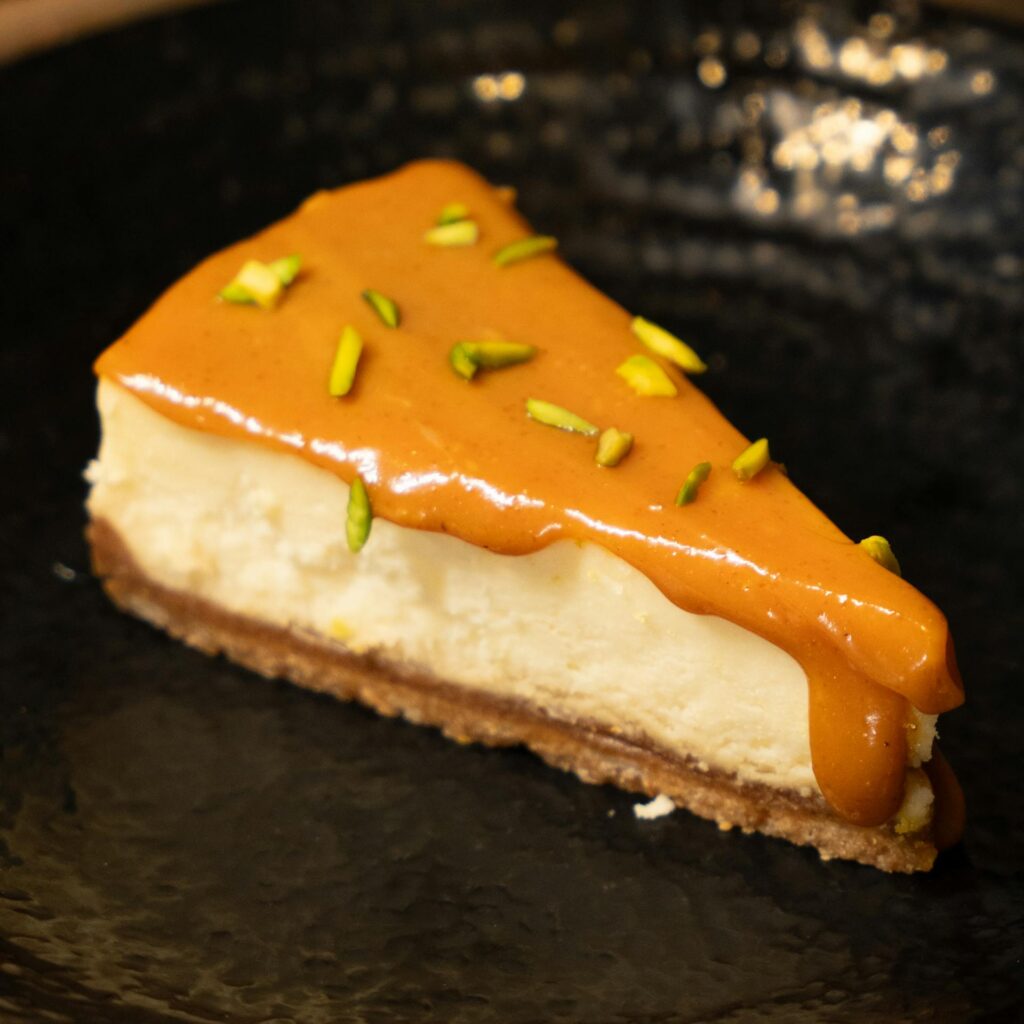
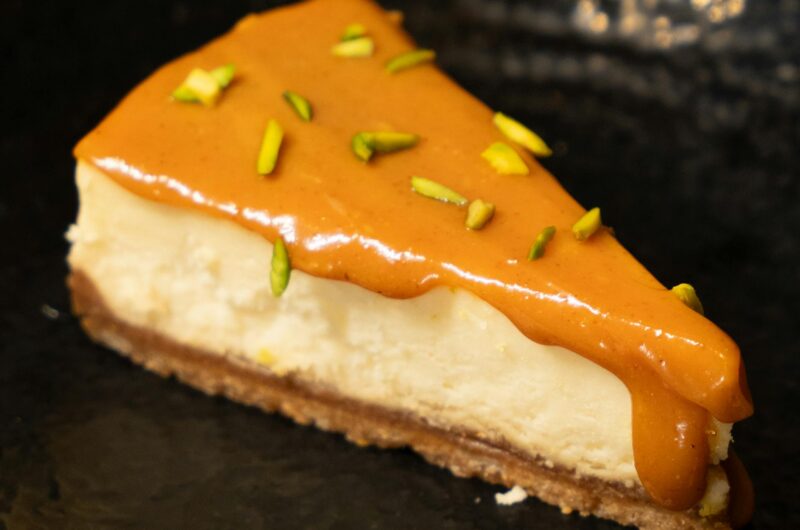
Caramel cheesecake is one of those desserts that instantly feels special. It’s rich, creamy, and layered with smooth caramel that melts into every bite.
This recipe keeps things simple while giving you that bakery-style result at home.
You’ll get a silky texture, a deep caramel flavor, and clear steps that guide you the whole way.
Don’t worry if you’re new to baking; I’ll walk you through it so you can feel confident from start to finish.
It’s the kind of dessert that fits any moment. Serve it at birthdays, holidays, or when you just want to treat yourself.
Why You’ll Love This Recipe
Rich and Creamy Texture
This cheesecake is all about that smooth, melt-in-your-mouth texture. Each bite is soft, dense, and incredibly satisfying without feeling heavy.
You’ll notice how the filling turns silky as it bakes. That comes from using full-fat cream cheese and mixing it just enough to keep it smooth.
Don’t worry if you’re new to cheesecakes because this recipe is designed to help you get that creamy finish without overthinking it.
Perfect Balance of Sweet Caramel and Tangy Cheesecake
The flavor is where this dessert really shines. The caramel adds a deep, buttery sweetness, while the cheesecake brings a light tang that keeps everything balanced.
It’s not overly sweet, which makes it easy to go back for another slice. You’ll taste both flavors in every bite, and they work together instead of competing.
If you enjoy desserts that feel rich but not overwhelming, this one hits the mark.
Make-Ahead Friendly
This is a great dessert to prepare in advance. In fact, it tastes even better after chilling for a few hours or overnight.
That resting time helps the texture set properly and allows the flavors to come together.
So if you’re planning for a special occasion, you can make it the day before and keep things stress-free.
Simple Ingredients, Bakery-Style Results
You don’t need anything fancy to make this cheesecake. The ingredients are easy to find, and you may already have most of them in your kitchen.
With a few simple steps, you’ll end up with a dessert that looks and tastes like it came from a bakery. Just follow along, take your time, and you’ll be surprised at how professional the final result feels.
Ingredients Needed
Let’s keep this simple and clear so you can prep everything with confidence before you start.
For the Crust
- 200g graham crackers or digestive biscuits (finely crushed)
- 100g unsalted butter, melted
- 2 tablespoons granulated sugar (optional, for a slightly sweeter crust)
For the Cheesecake Filling
- 680g full-fat cream cheese, softened (about 3 standard blocks)
- 150g (¾ cup) granulated sugar
- 3 large eggs, room temperature
- 120ml (½ cup) sour cream
- 120ml (½ cup) heavy cream
- 1 teaspoon vanilla extract
- 120ml (½ cup) caramel sauce (plus extra if you like a stronger flavor)
For the Caramel Topping
- 120–180ml (½–¾ cup) caramel sauce, for drizzling
- ½ teaspoon sea salt (optional, for a salted caramel finish)
- Whipped cream (optional, for serving)
Equipment Needed
Before you start, it helps to have everything ready. This keeps the process smooth and stress-free.
- Springform pan (20–23 cm / 8–9 inch)
This makes removing the cheesecake much easier. The sides release cleanly, so you don’t have to flip or struggle to get it out. - Mixing bowls (at least 2–3 sizes)
You’ll need separate bowls for the crust and filling. Having a few on hand keeps things organized and easier to manage. - Electric mixer (hand or stand mixer)
This helps you get a smooth, lump-free filling. If you’re using a hand mixer, take your time and scrape down the sides as you go. - Baking tray or roasting pan (for the water bath)
The cheesecake sits in this tray while baking. It holds hot water, which helps the cheesecake bake gently and evenly. - Aluminum foil
Wrap the outside of your springform pan to prevent water from leaking in during the water bath. It really helps avoid a soggy crust.
How to Make Caramel Cheesecake (Step-by-Step)
Let’s take this one step at a time. Don’t rush, though, because cheesecake rewards patience, and each step helps build that smooth, creamy result.
Step 1: Prepare the Crust
Start by crushing your biscuits into fine crumbs. You can use a food processor or place them in a bag and crush with a rolling pin. You’re looking for a sand-like texture with no large pieces.
Mix the crumbs with melted butter (and sugar, if using) until everything is evenly coated. The mixture should feel like damp sand and hold together when pressed.
Press it firmly into the base of your springform pan. Use the back of a spoon or a flat glass to smooth it out. Try to keep the layer even so it bakes nicely.
Bake the crust at 180°C (350°F) for about 8–10 minutes. This helps it set and keeps it from becoming soggy later. Let it cool while you prepare the filling.
Step 2: Make the Cheesecake Filling
In a large bowl, beat the softened cream cheese and sugar until smooth. Take your time here. You want a creamy, lump-free mixture.
Add the eggs one at a time, mixing on low speed after each addition. Don’t rush this step. Overmixing can add too much air, which may cause cracks later.
Next, mix in the sour cream, heavy cream, vanilla extract, and caramel sauce. Blend just until everything is smooth and combined. You’ll notice the batter becomes silky and slightly glossy.
Step 3: Assemble the Cheesecake
Pour the filling over your cooled crust. Spread it gently so the top is even.
Give the pan a few light taps on the counter. This helps release any trapped air bubbles, which keeps the texture smooth after baking.
Don’t worry if you see a few bubbles rise because that’s exactly what you want.
Step 4: Bake the Cheesecake
Wrap the outside of your pan with aluminum foil, then place it in a larger baking tray. Pour hot water into the tray until it reaches about halfway up the sides of the pan.
This is called a water bath, and it helps the cheesecake bake evenly.
Bake at 160°C (320°F) for about 50–60 minutes. The edges should look set, while the center still has a slight jiggle when you gently shake the pan.
Don’t worry if it looks a little soft in the middle because it will firm up as it cools.
Step 5: Cool and Chill
Turn off the oven and crack the door open slightly. Let the cheesecake cool inside for about 1 hour. This slow cooling helps prevent cracks.
After that, remove it from the oven and let it cool completely at room temperature. Then transfer it to the fridge.
Chill for at least 4 hours, but overnight is even better. You’ll notice the texture becomes firmer and creamier as it sets.
Step 6: Add Caramel Topping
Once the cheesecake is fully chilled, pour or drizzle caramel sauce over the top. Spread it gently if needed.
If you like, sprinkle a little sea salt for a salted caramel finish or add whipped cream for extra richness.
Slice, serve, and enjoy. You’ve just made a beautiful caramel cheesecake. Take a moment to appreciate it before the first bite!
Tips for the Perfect Cheesecake
A few small details can make a big difference with cheesecake. These tips will help you get that smooth texture and clean finish without stress.
Use Room Temperature Ingredients
Start with cream cheese, eggs, and dairy that are at room temperature. This helps everything mix together smoothly without lumps.
Cold ingredients don’t blend well and can leave small chunks in your batter. If you forgot to take them out early, let them sit on the counter for 20–30 minutes before you begin.
You’ll notice the batter comes together much more easily.
Don’t Overmix the Batter
Mix just until everything is combined and smooth. That’s enough.
Overmixing adds too much air into the batter, which can cause the cheesecake to rise too much in the oven and then sink or crack as it cools.
Keep your mixer on a low speed and take your time. A gentle mix gives you a better texture in the end.
Avoid Opening the Oven Door While Baking
It’s tempting to check on your cheesecake, but try to resist.
Opening the oven door lets heat escape and can cause sudden temperature changes.
This can lead to uneven baking or cracks on the surface. Instead, rely on the baking time and check through the oven window if you can.
Use a Water Bath to Prevent Cracks
A water bath (placing your pan in hot water while baking) helps the cheesecake bake slowly and evenly.
The steam keeps the oven environment moist, which reduces the chances of the top drying out and cracking. Make sure your pan is wrapped well in foil so no water leaks in.
It may seem like an extra step, but it’s one of the easiest ways to get a smooth, bakery-style finish.
Variations & Flavor Ideas
Once you’ve made the classic version, it’s easy to switch things up. These ideas let you adjust the flavor without changing the whole process.
Salted Caramel Cheesecake
If you enjoy a balance of sweet and slightly salty, this is a great option. Simply add a light sprinkle of sea salt over the caramel topping before serving.
You can also mix a small pinch of salt into the caramel sauce itself. You’ll notice how it deepens the flavor and keeps the sweetness from feeling too heavy.
Start with a little because you can always add more to taste.
Chocolate Caramel Cheesecake
For a richer twist, add chocolate to the mix. You can melt about 100–150g of dark or milk chocolate and fold it into the filling before baking.
Another easy option is to drizzle chocolate over the finished cheesecake along with the caramel.
The combination is smooth, rich, and slightly indulgent without being overwhelming. If you love chocolate desserts, this one is hard to beat.
No-Bake Caramel Cheesecake
If you prefer to skip the oven, this version works well. Instead of eggs, the filling is usually set with whipped cream or a stabilizer like gelatin.
You’ll still get a creamy texture, just a bit lighter and softer than the baked version. Let it chill in the fridge for several hours until firm.
Don’t worry if it feels delicate at first because it will set as it rests.
Caramel Pecan Cheesecake
For added crunch and flavor, try topping your cheesecake with toasted pecans. You can scatter them over the caramel or mix some into the topping.
The nuts add texture and a slightly nutty taste that pairs well with the caramel. Toasting them briefly in a pan brings out more flavor, so it’s worth the extra minute.
How to Store & Freeze
Once your cheesecake is fully chilled and set, store it in the fridge, covered tightly with plastic wrap or in an airtight container, for up to 4–5 days to keep it fresh and prevent it from drying out or absorbing other fridge smells.
If you’d like to keep it longer, freezing works really well.
Just place the whole cheesecake or individual slices in the freezer, making sure they are wrapped securely in plastic wrap and then foil, or stored in a freezer-safe container, and they’ll keep for up to 2 months without losing their texture.
Slicing before freezing can make things easier later, especially if you want to enjoy one piece at a time.
When you’re ready to serve, transfer the cheesecake to the fridge and let it thaw slowly overnight; this helps it keep its creamy texture.
If you’re short on time, you can let a slice sit at room temperature for about 30–60 minutes, but avoid microwaving, as it can make the texture uneven.
You’ll notice that once properly thawed, it tastes just as smooth and rich as when it was freshly made.
Common Mistakes to Avoid
- Overbaking (leads to cracks)
It’s easy to leave the cheesecake in the oven too long. The edges should be set, but the center should still have a slight jiggle when you gently shake the pan. It will firm up as it cools. If it looks completely firm in the oven, it’s likely overbaked. - Skipping the water bath
The water bath helps the cheesecake bake evenly and keeps the texture smooth. Without it, the heat can be too harsh, which often leads to cracks or a dry texture. It may feel like an extra step, but it really makes a difference. - Using cold ingredients
Cold cream cheese and eggs don’t mix well and can leave lumps in your batter. Let them sit at room temperature before you start. You’ll notice the mixture becomes much smoother and easier to work with. - Not chilling long enough
Cheesecake needs time to set properly. Cutting into it too soon can make it soft and messy. Aim for at least 4 hours in the fridge, but overnight is best for clean slices and the right texture.
Serving Suggestions
For the best texture and flavor, serve your cheesecake well chilled. You’ll notice it slices more cleanly and feels extra creamy with each bite.
Just before serving, drizzle a little extra caramel sauce over the top of each slice for a richer finish and a more polished look.
If you’re enjoying it as a dessert after a meal, pairing it with coffee or espresso works beautifully, as the slight bitterness balances the sweetness of the caramel.
To add a bit of texture, you can top each slice with a swirl of whipped cream or a sprinkle of chopped nuts like pecans or walnuts.
Don’t worry about keeping it perfect because simple touches go a long way here, and even a small garnish can make each slice feel special and complete.
Final Thoughts
This caramel cheesecake may look impressive, but you’ll see how simple it is once you take it step by step. Don’t worry if it’s your first time. Just follow along and trust the process.
Give it a try, make it your own, and enjoy every slice!
FAQs
Yes, store-bought works perfectly. Choose a good-quality one for better flavor, or use homemade if you prefer.
Cracks usually come from overbaking, overmixing, or sudden temperature changes. A water bath and gentle cooling help prevent this.
You can, but the texture may be less smooth, and cracks are more likely. If skipping it, bake at a lower temperature and keep a close eye on it.
The edges should be set, and the center should still have a slight jiggle when gently shaken. It will firm up as it cools.
Yes, and it’s actually better that way. Make it a day in advance so it has enough time to chill and fully set.
Caramel Cheesecake Recipe (Rich, Creamy & Irresistible)
Difficulty: Intermediate10
Slices20
minutes1
hour6
hoursA rich and creamy baked cheesecake with a smooth caramel flavor and buttery biscuit base, finished with a glossy caramel topping.
Ingredients
- Crust:
200g graham crackers or digestive biscuits, crushed
100g unsalted butter, melted
2 tbsp sugar (optional)
- Filling:
680g cream cheese, softened
150g (¾ cup) sugar
3 eggs
120ml (½ cup) sour cream
120ml (½ cup) heavy cream
1 tsp vanilla extract
120ml (½ cup) caramel sauce
- Topping:
120–180ml caramel sauce
Sea salt (optional)
Directions
- Preheat oven to 180°C (350°F). Mix crushed biscuits with melted butter and press into a springform pan. Bake for 8–10 minutes, then cool.
- Beat cream cheese and sugar until smooth. Add eggs one at a time, mixing gently. Stir in sour cream, cream, vanilla, and caramel.
- Pour filling over crust and tap lightly to remove air bubbles.
- Place the pan in a water bath and bake at 160°C (320°F) for 50–60 minutes, until the center is slightly jiggly.
- Turn off the oven, let the cheesecake cool inside for 1 hour, then chill in the fridge for at least 4 hours or overnight.
- Top with caramel sauce (and sea salt if using), slice, and serve.
Notes
- Use room temperature ingredients for a smooth batter.
- Don’t overmix to avoid cracks.
- The cheesecake will firm up as it chills, so don’t overbake.
- For clean slices, wipe your knife between cuts.

Hi, I’m Sorenna Blythe, the baker and writer behind Mix Whisk Bake. I share simple, reliable recipes and honest kitchen moments to help home bakers bake with confidence and joy. When I’m not testing new treats, you’ll find me sipping coffee and dreaming up my next bake.


