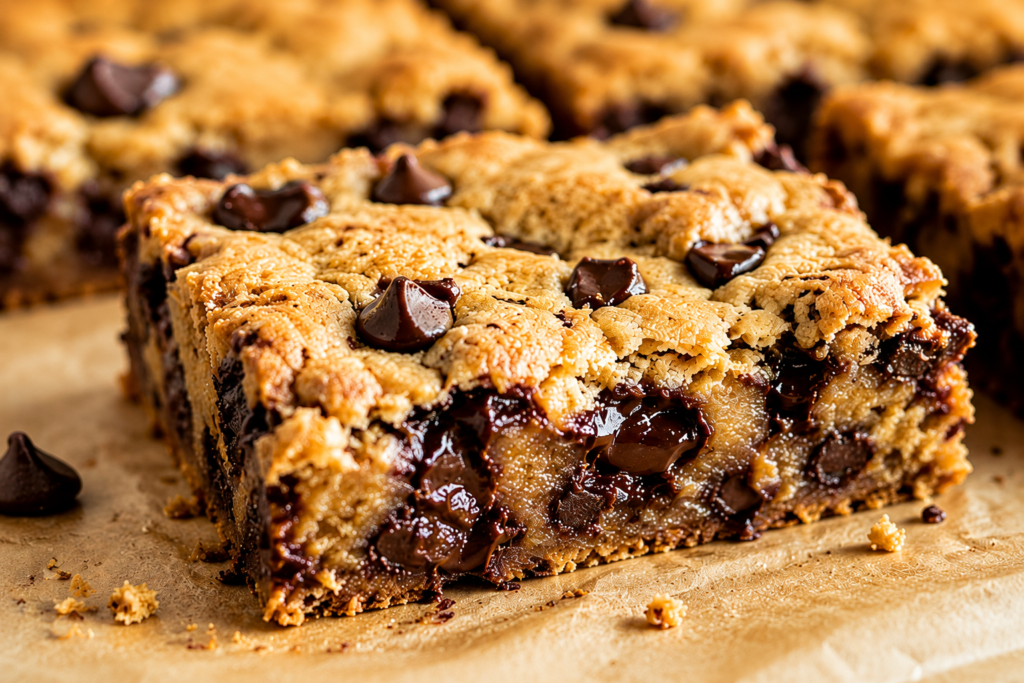
Chocolate chip cookie bars are the kind of dessert that everyone loves.
They have all the rich, buttery flavor of classic chocolate chip cookies, but are much quicker and easier to make.
Instead of scooping and baking multiple batches, you simply spread the dough into a pan and bake.
This recipe creates soft, chewy bars loaded with melty chocolate in every bite.
You’ll learn exactly how to make them, along with helpful tips for getting the perfect texture every time.
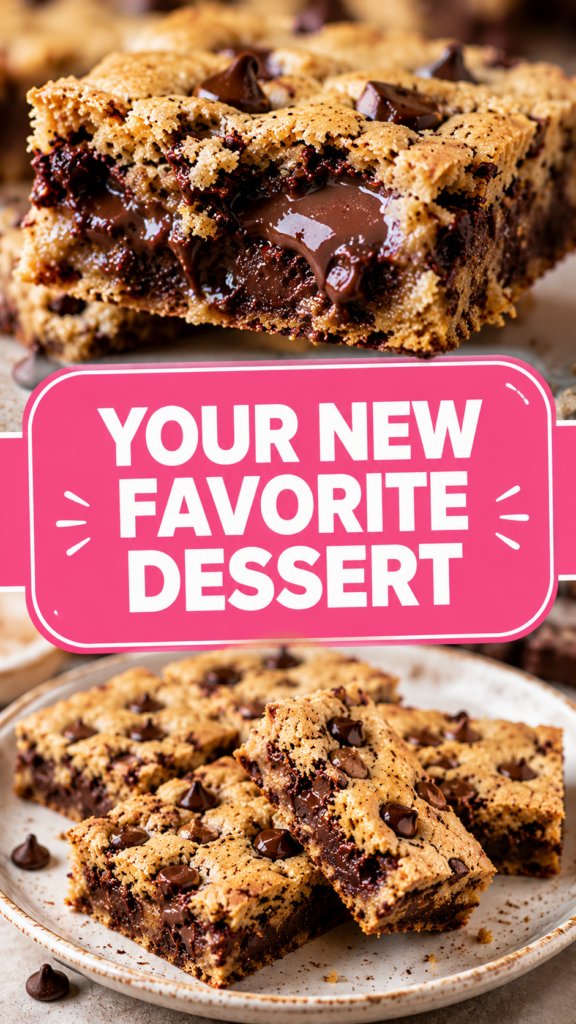
What Are Chocolate Chip Cookie Bars?
Chocolate chip cookie bars are a simple dessert made by baking chocolate chip cookie dough in a single pan instead of shaping it into individual cookies.
They have the same classic flavors people love in traditional chocolate chip cookies, including buttery dough, sweet brown sugar, and plenty of chocolate chips.
Once baked, the dough is sliced into squares or rectangles, making it easy to serve and share.
Cookie bars are a great choice when you want a homemade dessert without spending extra time scooping and baking multiple trays of cookies.
They are soft, satisfying, and perfect for everything from casual family desserts to special celebrations.
Cookie Bars vs. Traditional Chocolate Chip Cookies
At first glance, cookie bars and chocolate chip cookies may seem very similar because they use nearly the same ingredients.
The biggest difference is how they are prepared and baked.
Traditional cookies are scooped into individual portions and spaced apart on a baking sheet.
Cookie bars are spread into one baking pan and baked as a single layer.
This simple change creates a slightly different texture.
Chocolate chip cookie bars are often thicker and softer in the center than regular cookies.
The edges become lightly golden while the middle stays tender and chewy.
Many people enjoy this texture because every bite feels rich and satisfying.
Another advantage is consistency.
Since all the dough bakes together, you do not have to worry about some cookies baking faster than others.
You get an entire pan of evenly baked dessert that can be sliced into as many servings as you need.
Cookie bars are also much faster to prepare.
There is no need to scoop dough into dozens of portions.
You simply press the dough into a pan and place it in the oven.
This saves time and reduces cleanup, which is always a bonus on busy days.
For beginner bakers, cookie bars can feel less intimidating than making individual cookies.
There are fewer steps involved, and the process is very forgiving.
Even if the dough is not spread perfectly, the bars will still bake beautifully.
Why You’ll Love This Recipe
One of the best things about this recipe is its simplicity.
The ingredients are pantry staples that many home bakers already have on hand.
You do not need any fancy equipment or hard-to-find ingredients to achieve great results.
The dough comes together quickly, making it perfect when you need a last-minute dessert.
Using just one bowl also means less cleanup afterward.
That gives you more time to enjoy baking and less time standing at the sink.
These chocolate chip cookie bars are ideal for sharing.
They travel well, slice neatly, and can easily feed a crowd.
Whether you are bringing dessert to a party, packing treats for a bake sale, or serving a family gathering, they are always a welcome addition.
Another reason this recipe stands out is how easy it is to customize.
You can add chopped nuts for extra crunch.
You can mix in white chocolate chips, peanut butter chips, or toffee bits for a different flavor.
A handful of colorful candies or festive sprinkles can quickly turn these bars into a holiday treat.
The recipe is flexible enough to suit your personal preferences while still delivering soft, chewy results every time.
Most importantly, these cookie bars are dependable.
They are simple enough for beginners and delicious enough to impress experienced bakers.
With minimal effort and maximum flavor, they are the kind of recipe you’ll want to make again and again.
Ingredients You’ll Need
Essential Ingredients
- 1 cup (226g) unsalted butter, melted – Adds richness, moisture, and a soft texture.
- 1 cup (220g) packed brown sugar – Provides sweetness and helps create a chewy texture.
- ½ cup (100g) granulated sugar – Balances the flavor and helps the bars develop lightly crisp edges.
- 2 large eggs – Bind the ingredients together and add structure.
- 2 teaspoons vanilla extract – Enhances the overall flavor and complements the chocolate.
- 2½ cups (312g) all-purpose flour – Forms the base of the dough and gives the bars their shape.
- 1 teaspoon baking soda – Helps the bars rise slightly and keeps them soft.
- ½ teaspoon salt – Balances the sweetness and brings out the chocolate flavor.
- 2 cups (340g) semi-sweet chocolate chips – Adds plenty of chocolate throughout the bars.
Optional Add-Ins
These mix-ins can be used to customize the recipe and create different flavor combinations.
- ½ cup (60g) chopped walnuts – Adds a crunchy texture and nutty flavor.
- ½ cup (60g) chopped pecans – A buttery alternative to walnuts.
- ½ cup (85g) white chocolate chips – Adds extra sweetness and visual contrast.
- ½ cup (85g) peanut butter chips – Creates a delicious chocolate-peanut butter combination.
- ½ cup (75g) toffee bits – Adds a rich caramel-like flavor and slight crunch.
- ½ cup (85g) mini M&Ms – Great for birthdays, holidays, and colorful dessert trays.
Feel free to use one add-in or combine several together.
Just keep the total amount of additional mix-ins to about 1 cup so the bars stay soft and bake evenly.
Kitchen Tools Required
- 9×13-inch baking pan – This is the ideal size for thick, evenly baked cookie bars. Using a different size pan may affect the baking time and texture.
- Large mixing bowl – Used to combine the wet and dry ingredients into a smooth cookie dough.
- Electric mixer (optional) – Helpful for mixing the ingredients quickly, but not required. A sturdy spoon or spatula works just as well.
- Measuring cups and spoons – Accurate measurements help ensure the bars bake properly and have the right texture.
- Rubber spatula – Perfect for scraping down the sides of the bowl and folding in the chocolate chips without overmixing the dough.
- Parchment paper – Makes it easy to lift the cookie bars out of the pan after baking and helps prevent sticking.
How to Make Chocolate Chip Cookie Bars
Step 1 – Prepare the Baking Pan
Start by preheating your oven to 350°F (175°C).
This ensures the oven is fully heated and ready when the dough is mixed.
Lightly grease a 9×13-inch baking pan with butter or nonstick cooking spray.
Greasing helps prevent the bars from sticking to the pan after baking.
Next, line the pan with parchment paper.
Leave a little extra parchment hanging over the sides of the pan.
These overhanging edges act as handles and make it much easier to lift the bars out later.
Using parchment paper also helps the bars bake more evenly and reduces cleanup.
Taking a minute to prepare the pan properly will make serving and slicing much easier once the bars are baked.
Step 2 – Mix the Wet Ingredients
Place the melted butter, brown sugar, and granulated sugar into a large mixing bowl.
Stir or mix until the ingredients are smooth and well combined.
The mixture should look glossy and thick.
Mixing the butter and sugars thoroughly helps create the soft, chewy texture that makes these bars so good.
Add the eggs one at a time.
Mix well after each addition so everything blends evenly.
Pour in the vanilla extract and stir until fully incorporated.
The vanilla enhances the flavor of both the dough and the chocolate chips.
At this stage, the mixture should be smooth, creamy, and free of lumps.
Step 3 – Add the Dry Ingredients
Add the all-purpose flour, baking soda, and salt directly to the bowl.
Stir gently until the dry ingredients are fully incorporated.
You should no longer see streaks of flour in the dough.
Be careful not to overmix.
Overmixing happens when the dough is stirred more than necessary after adding the flour.
This can make the finished bars denser and less tender.
Once the flour disappears into the dough, stop mixing.
The dough should be thick and soft.
Step 4 – Fold in Chocolate Chips
Add the chocolate chips to the bowl.
Use a rubber spatula or large spoon to gently fold them into the dough.
Folding means carefully turning the dough over itself rather than aggressively stirring.
This method helps distribute the chocolate evenly throughout the batter.
Take your time and scrape the bottom of the bowl to make sure the chips are spread evenly.
Every slice should have plenty of chocolate.
If you are using any optional add-ins, such as nuts or toffee bits, fold them in at this stage as well.
Step 5 – Spread and Bake
Transfer the dough to the prepared baking pan.
Use a spatula to spread it evenly from corner to corner.
Try to keep the surface as level as possible.
An even layer helps the bars bake uniformly.
If the dough feels sticky, lightly grease the spatula or your fingertips to make spreading easier.
Place the pan in the preheated oven.
Bake for 25 to 30 minutes, or until the edges are lightly golden brown.
The center should look set but still slightly soft.
Avoid waiting until the entire surface becomes dark golden.
The bars will continue cooking slightly as they cool.
Removing them from the oven at the right time helps keep them soft and chewy.
Step 6 – Cool and Slice
Place the pan on a wire rack and allow the bars to cool completely.
This step requires patience, but it is worth it.
Cooling allows the bars to finish setting and develop their final texture.
If you cut them while they are still hot, they may fall apart and seem underbaked.
Once cooled, use the parchment paper handles to lift the bars out of the pan.
Place them on a cutting board for easier slicing.
For clean, neat cuts, use a sharp knife.
Wiping the knife clean between cuts can help create smooth edges.
Slice into squares or rectangles, depending on your preferred serving size.
Now they are ready to enjoy.
You will be rewarded with thick, chewy cookie bars filled with rich chocolate flavor and a soft, buttery texture.
Tips for Perfect Cookie Bars Every Time
Use Room Temperature Ingredients
Whenever possible, use room temperature eggs before mixing your dough.
Room temperature eggs blend more easily into the batter.
This helps create a smoother mixture and a more even texture throughout the bars.
If you forget to take your eggs out ahead of time, place them in a bowl of warm water for about 5 to 10 minutes.
This quick trick brings them closer to room temperature without affecting their quality.
If your recipe uses softened butter instead of melted butter, make sure it feels soft when pressed but is not greasy or fully melted.
Properly softened butter mixes more evenly with the sugars and helps create a better texture.
Starting with ingredients that are at a similar temperature can make the mixing process easier and more consistent.
Don’t Overbake
One of the easiest ways to keep cookie bars soft and chewy is to avoid overbaking them.
Many bakers wait until the entire surface looks fully baked before removing the pan from the oven.
This often results in dry or crumbly bars.
Instead, watch the edges closely.
The edges should be lightly golden brown while the center still looks slightly soft.
The middle may seem a little underdone when you first remove the pan.
That is completely normal.
The bars continue to cook from the residual heat trapped inside the pan.
This extra cooking time helps them finish setting without becoming dry.
If you’re unsure, it’s usually better to remove the bars a minute early rather than a minute late.
A slightly underbaked cookie bar will stay soft and chewy.
An overbaked one can be difficult to fix.
Measure Flour Correctly
Flour is one of the most important ingredients in this recipe.
Using too much can quickly change the texture of your cookie bars.
Extra flour often leads to bars that are dense, dry, or cakey instead of soft and chewy.
For the most accurate measurement, fluff the flour with a spoon before measuring.
Then lightly spoon it into your measuring cup.
Use a flat edge, such as a knife, to level off the top.
Avoid scooping the measuring cup directly into the flour bag.
Scooping packs the flour tightly into the cup, and can add more flour than the recipe calls for.
If you have a kitchen scale, weighing the flour is even more accurate.
A little extra care during this step can have a big impact on the final result.
Let the Bars Cool Completely
It can be tempting to cut into the bars while they are still warm.
The smell alone makes waiting difficult.
However, allowing the bars to cool completely is one of the best things you can do for their texture.
As the bars cool, they continue to set and firm up.
This helps them hold their shape when sliced.
Cutting too early can cause the bars to crumble or fall apart.
Cooling also allows the flavors to develop fully.
The chocolate settles into the dough, and the texture becomes perfectly chewy.
For the cleanest slices, wait until the bars have completely cooled in the pan.
Then lift them out using the parchment paper and transfer them to a cutting board.
A little patience at the end of the baking process will reward you with neat, bakery-style cookie bars that look just as good as they taste.
Delicious Variations to Try
Double Chocolate Cookie Bars
If you’re a chocolate lover, this variation is hard to resist.
Replace ¼ cup of the all-purpose flour with ¼ cup of unsweetened cocoa powder.
The cocoa powder gives the bars a rich chocolate flavor from the very first bite.
Keep the chocolate chips in the recipe for extra pockets of melted chocolate throughout the bars.
You can even use a mix of semi-sweet and dark chocolate chips for a deeper flavor.
The result is a fudgy, brownie-like cookie bar that feels extra indulgent.
For an even richer finish, sprinkle a handful of chocolate chips over the top of the dough before baking.
Salted Caramel Chocolate Chip Bars
Sweet and salty flavors work beautifully together in these cookie bars.
Stir ½ cup of caramel bits into the dough along with the chocolate chips.
As the bars bake, the caramel melts into small pockets of sweetness.
Once the bars come out of the oven, lightly sprinkle flaky sea salt over the top.
The salt helps balance the sweetness and makes the caramel flavor stand out.
This variation tastes especially delicious when served slightly warm.
Each bite offers chewy cookie dough, melted chocolate, and rich caramel flavor.
Peanut Butter Chocolate Chip Bars
Chocolate and peanut butter are a classic combination for a reason.
Replace ½ cup of the chocolate chips with peanut butter chips.
This simple change adds a creamy peanut butter flavor throughout the bars.
For even more peanut butter goodness, drizzle melted peanut butter over the cooled bars.
You can also gently swirl a few spoonfuls of peanut butter into the dough before baking.
The swirls create pockets of peanut butter that make every slice a little different.
Oatmeal Chocolate Chip Cookie Bars
Adding oats creates a heartier texture and a slightly nutty flavor.
Replace ½ cup of the flour with 1 cup of old-fashioned rolled oats.
The oats add chewiness while still allowing the bars to stay soft.
They also pair perfectly with the chocolate chips.
For extra flavor, consider adding a small pinch of cinnamon to the dough.
The cinnamon complements the oats without overpowering the chocolate.
Holiday Sprinkle Cookie Bars
These colorful bars are a fun way to celebrate birthdays, holidays, and special occasions.
Simply stir ½ cup of festive sprinkles into the dough along with the chocolate chips.
The sprinkles add bright pops of color throughout the bars.
You can match the sprinkle colors to any season or event.
Red and green work well for Christmas.
Pastel colors are perfect for spring celebrations.
Red, white, and blue make a festive choice for summer gatherings.
For an extra cheerful look, sprinkle a few more decorations on top of the dough before baking.
These bars are easy to make, fun to serve, and always a hit with both kids and adults.
Common Mistakes to Avoid
- Using too much flour – Too much flour can make the bars dry, dense, and less chewy, so measure carefully for the best texture.
- Overmixing the batter – Mixing the dough longer than necessary can lead to tougher bars instead of soft and tender ones.
- Overbaking – Baking the bars for too long can dry them out, so remove them when the edges are golden, and the center is just set.
- Cutting while still warm – Warm bars are more likely to crumble or fall apart, so allow them to cool completely before slicing.
- Using the wrong pan size – A different pan size can affect baking time and texture, resulting in bars that are underbaked or overbaked.
How to Store Chocolate Chip Cookie Bars
Room Temperature Storage
Room temperature storage is the best option if you plan to enjoy the bars within a few days.
Make sure the cookie bars have cooled completely before storing them.
Storing warm bars can trap moisture inside the container and make them soggy.
Place the bars in an airtight container.
You can stack them if needed, but placing a sheet of parchment paper between layers helps prevent sticking.
Keep the container in a cool, dry place away from direct sunlight and heat sources.
When stored properly, chocolate chip cookie bars will stay fresh for about 3 to 5 days.
They will remain soft and chewy, especially during the first few days after baking.
If you notice the bars starting to dry out, placing a small piece of bread inside the container can help.
The bread releases moisture that helps keep the bars soft without affecting their flavor.
Refrigerating for Longer Freshness
If you need the bars to last a little longer, refrigeration is a good option.
Place the cooled bars in an airtight container before refrigerating.
This helps prevent them from absorbing odors from other foods in the refrigerator.
Properly stored cookie bars can stay fresh in the refrigerator for up to one week.
Keep in mind that refrigeration may make the bars slightly firmer.
This is completely normal.
If you prefer a softer texture, let a bar sit at room temperature for 15 to 20 minutes before serving.
You can also warm an individual bar in the microwave for a few seconds.
A quick warm-up helps restore the soft texture and makes the chocolate chips slightly melty again.
Freezing Instructions
Chocolate chip cookie bars freeze beautifully, making them a great make-ahead dessert.
Freezing is especially useful when you want to prepare treats in advance for busy weeks or special occasions.
Begin by allowing the bars to cool completely.
Cut them into individual portions before freezing.
Wrapping individual bars makes it easy to grab a single serving whenever you want one.
Wrap each bar tightly in plastic wrap or parchment paper.
Place the wrapped bars inside a freezer-safe container or zip-top freezer bag.
Label the container with the date so you can keep track of freshness.
The bars can be frozen for up to 3 months.
When you’re ready to enjoy them, remove the desired number of bars from the freezer.
Let them thaw at room temperature for about 30 to 60 minutes.
For a freshly baked taste, warm a thawed bar in the microwave for 10 to 15 seconds.
The result is a soft, chewy treat that tastes remarkably close to the day it was baked.
What to Serve with Chocolate Chip Cookie Bars
- Vanilla ice cream – The cold, creamy texture pairs perfectly with warm, chewy cookie bars.
- Whipped cream – A light topping that adds extra sweetness without overpowering the bars.
- Caramel sauce – A drizzle of caramel adds rich flavor and complements the chocolate beautifully.
- Fresh berries – Strawberries, raspberries, or blueberries add a fresh, slightly tart contrast to the sweet cookie bars.
- Coffee, tea, or milk – These classic drinks balance the sweetness and make a perfect accompaniment for dessert or an afternoon snack.
Make-Ahead and Freezing Tips
Preparing the Dough Ahead of Time
If you’d like to get a head start, the cookie dough can be prepared before you plan to bake it.
Simply make the dough as directed and cover the bowl tightly with plastic wrap or transfer it to an airtight container.
Store the dough in the refrigerator for up to 48 hours.
Chilling the dough can actually improve the flavor because it gives the ingredients more time to blend together.
When you’re ready to bake, remove the dough from the refrigerator and let it sit at room temperature for about 15 to 20 minutes.
This makes it easier to spread evenly into the baking pan.
If the dough still feels very firm, give it a few extra minutes to soften slightly.
Once spread into the pan, bake as directed in the recipe.
This make-ahead option is especially helpful when you’re preparing for holidays, parties, or busy weekends.
Freezing Baked Cookie Bars
Baked cookie bars freeze exceptionally well.
This allows you to enjoy homemade treats without needing to bake a fresh batch every time a craving strikes.
Begin by letting the bars cool completely.
Warm bars can create excess moisture inside the packaging, which may affect their texture during storage.
Once cooled, slice the bars into individual servings.
Wrapping portions separately makes thawing and serving much more convenient later.
Wrap each bar tightly in plastic wrap or parchment paper.
Place the wrapped bars in a freezer-safe container or resealable freezer bag.
Removing as much air as possible helps prevent freezer burn.
Label the container with the date before placing it in the freezer.
The bars will maintain their best quality for up to 3 months.
When you’re ready to enjoy them, simply thaw the desired number of bars at room temperature.
Most bars will be ready to eat within about 30 to 60 minutes.
Best Reheating Methods
A quick warm-up can make stored cookie bars taste freshly baked again.
The microwave is the fastest option.
Place a cookie bar on a microwave-safe plate and heat it for 10 to 15 seconds.
This softens the texture and gently melts the chocolate chips.
Be careful not to overheat the bars.
Too much time in the microwave can make them tough instead of soft.
If you’re warming several bars at once, the oven works well.
Place the bars on a baking sheet and warm them in a 300°F (150°C) oven for about 5 to 7 minutes.
This method helps restore their freshly baked texture without drying them out.
For an extra-special treat, serve a warm cookie bar with a scoop of vanilla ice cream.
Final Thoughts
Chocolate chip cookie bars are a simple, crowd-pleasing dessert that delivers all the flavor of classic chocolate chip cookies with less effort and fewer steps.
Their soft, chewy texture and easy preparation make them a recipe you’ll want to keep coming back to.
Don’t be afraid to experiment with different mix-ins, flavors, and toppings to make the recipe your own.
FAQs
Can I use milk chocolate chips instead of semi-sweet?
Yes, you can substitute milk chocolate chips for semi-sweet chocolate chips.
Keep in mind that milk chocolate is sweeter, so the bars will have a slightly sweeter flavor overall.
Why are my cookie bars dry?
Dry cookie bars are usually caused by using too much flour or baking them for too long.
Measure your flour carefully and remove the bars from the oven as soon as the edges are golden and the center is set.
Can I make these cookie bars gluten-free?
Yes, you can use a gluten-free all-purpose flour blend designed for baking.
For best results, choose a blend that contains xanthan gum or a similar binding ingredient.
How do I know when cookie bars are done baking?
The edges should be lightly golden brown, and the center should look set but still slightly soft. The bars will continue to firm up as they cool.
Can I double the recipe?
Yes, this recipe can be doubled for larger gatherings. Use a larger baking pan or divide the dough between two 9×13-inch pans and adjust the baking time as needed.
Can I freeze the cookie dough?
Yes, the dough freezes well for up to 3 months. Store it in an airtight container or freezer bag, then thaw it in the refrigerator before baking.
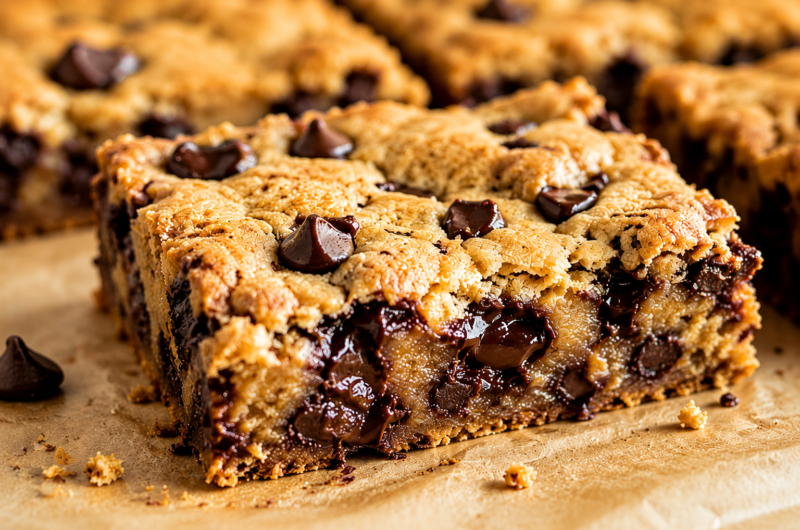
Chocolate Chip Cookie Bars: Soft, Chewy, and Easy to Make
Difficulty: Easy24
Bars15
minutes30
minutes45
minutesThese Chocolate Chip Cookie Bars are soft, chewy, and loaded with melty chocolate chips. Made in one pan, they’re quicker and easier than traditional cookies.
Ingredients
1 cup (226g) unsalted butter, melted
1 cup (220g) brown sugar
½ cup (100g) granulated sugar
2 large eggs
2 teaspoons vanilla extract
2½ cups (312g) all-purpose flour
1 teaspoon baking soda
½ teaspoon salt
2 cups (340g) semi-sweet chocolate chips
Directions
- Preheat oven to 350°F (175°C) and line a 9×13-inch baking pan with parchment paper.
- Mix melted butter, brown sugar, and granulated sugar until smooth.
- Add eggs and vanilla, then mix well.
- Stir in flour, baking soda, and salt until just combined.
- Fold in the chocolate chips.
- Spread the dough evenly into the prepared pan.
- Bake for 25–30 minutes, or until the edges are golden and the center is set.
- Cool completely before slicing into bars.
Notes
- Do not overbake for the softest, chewiest texture.
- Let the bars cool fully before cutting for clean slices.
- Store in an airtight container for up to 5 days or freeze for up to 3 months.

Hi, I’m Sorenna Blythe, the baker and writer behind Mix Whisk Bake. I share simple, reliable recipes and honest kitchen moments to help home bakers bake with confidence and joy. When I’m not testing new treats, you’ll find me sipping coffee and dreaming up my next bake.


