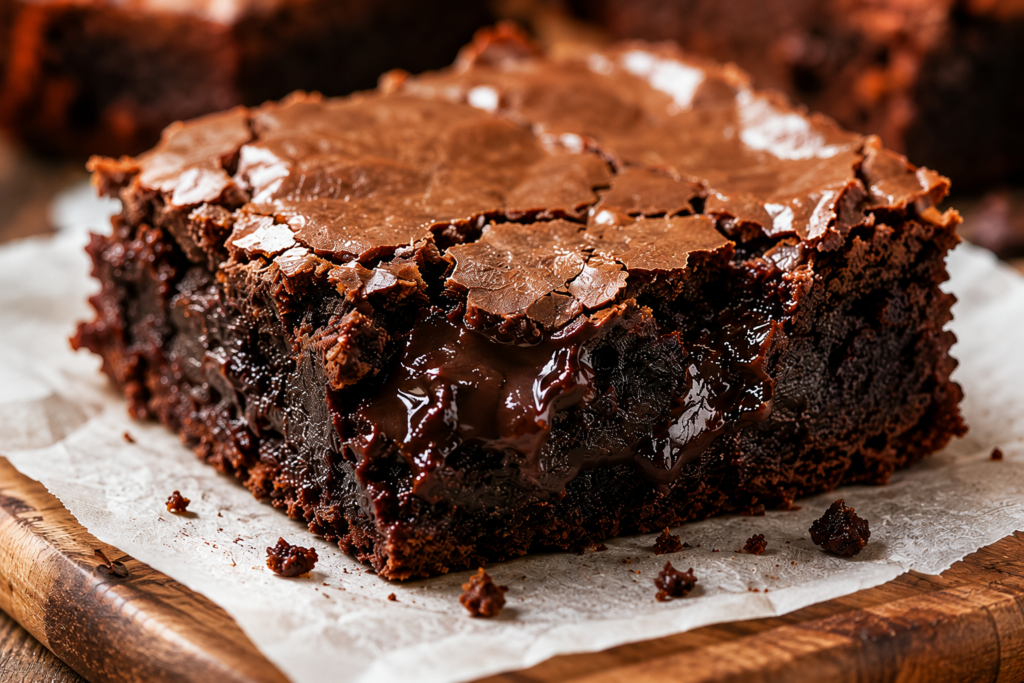
There’s a reason classic fudge brownies never go out of style.
They’re rich, deeply chocolatey, and have that perfect dense, chewy texture that keeps everyone reaching for another piece.
What makes a brownie fudgy instead of cakey comes down to the balance of ingredients.
More butter and chocolate, along with less flour, create a moist, decadent center that melts in your mouth.
The good news? You don’t need any special baking skills to get great results.
Follow along, and you’ll have a pan of irresistible fudge brownies ready to enjoy in no time.
Why You’ll Love This Classic Fudge Brownies Recipe
- Rich Chocolate Flavor – Every bite is packed with deep, satisfying chocolate goodness that chocolate lovers will appreciate.
- Dense and Chewy Texture – These brownies have a soft, fudgy center with the perfect chewy bite instead of a light, cakey crumb.
- Simple Pantry Ingredients – Made with everyday baking staples you likely already have in your kitchen.
- Easy One-Bowl Preparation – Everything comes together in a single bowl, making prep quick and cleanup easy.
- Perfect for Any Occasion – Great for parties, holiday dessert tables, lunchbox treats, or whenever a chocolate craving strikes.
What Makes a Brownie Fudgy?
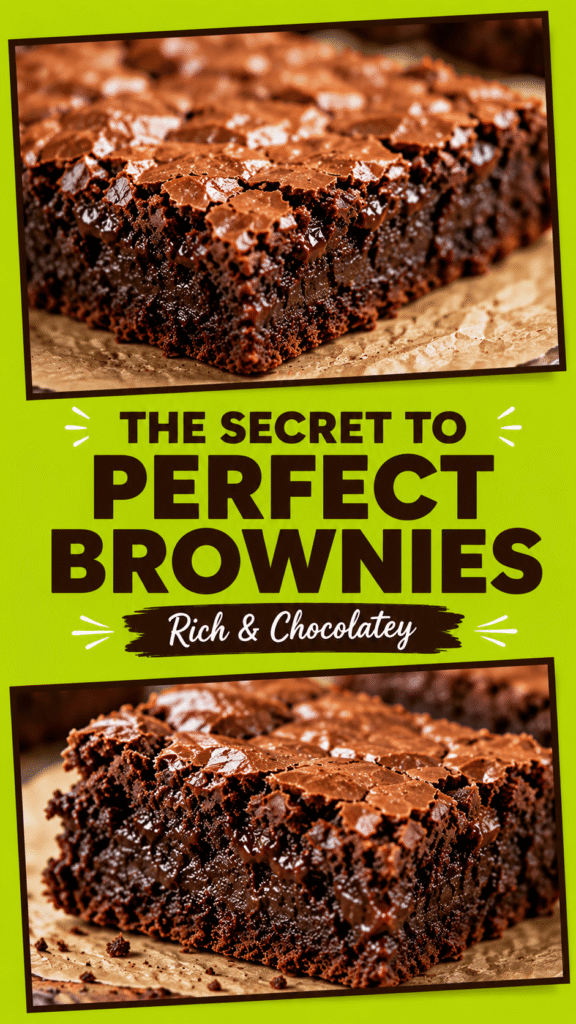
A truly fudgy brownie is rich, moist, and dense with a soft center that almost melts in your mouth.
Unlike cakey brownies, which are lighter and more airy, fudgy brownies have a tighter crumb and a more intense chocolate flavor.
The secret comes down to the balance of ingredients.
The amount of fat, flour, and eggs used in the batter all work together to create that classic texture brownie lovers crave.
The Role of Fat and Chocolate
Fat is one of the most important ingredients in a fudgy brownie recipe.
It adds moisture, richness, and that smooth texture that makes every bite feel indulgent.
A higher fat-to-flour ratio is what separates a fudgy brownie from a cakey one.
When there is more fat and less flour in the batter, the brownies stay dense and moist instead of becoming light and bread-like.
Butter is a key source of fat in classic brownies.
It not only adds richness but also contributes to the chewy texture that makes brownies so satisfying.
Chocolate plays an equally important role.
Whether you use cocoa powder, melted chocolate, or a combination of both, chocolate adds flavor, color, and structure to the batter.
Using quality chocolate ingredients can make a noticeable difference in the final taste.
The rich chocolate flavor becomes deeper and more balanced, creating brownies that taste homemade in the best possible way.
Less Flour, More Moisture
Flour provides structure in baked goods.
While structure is important, too much flour can quickly turn a brownie from fudgy to cakey.
A smaller amount of flour allows the moisture from the butter, eggs, and chocolate to shine through.
This creates the dense texture that makes fudge brownies so appealing.
When measuring flour, accuracy matters.
Adding even a little extra can make the brownies drier and less rich.
For best results, spoon the flour into your measuring cup and level it off rather than scooping directly from the bag.
This simple step helps prevent using more flour than the recipe calls for.
The combination of less flour and plenty of moisture creates a soft, tender crumb that stays delicious for days.
It also helps the brownies maintain that irresistible fudgy center after they cool.
Importance of Eggs
Eggs do much more than hold brownie batter together.
They provide structure while also adding richness and moisture.
As the brownies bake, the eggs help set the batter so the brownies hold their shape when sliced.
At the same time, the yolks add fat, which contributes to a softer and richer texture.
Eggs are also responsible for much of the brownie’s signature chewiness.
When mixed into the batter, they help create the slightly dense, chewy bite that many people look for in a classic fudge brownie.
Using the right number of eggs is important.
Too few can result in brownies that fall apart, while too many can make them firmer than intended.
When balanced correctly with butter, chocolate, and flour, eggs help create brownies that are rich, chewy, and perfectly fudgy from edge to center.
Ingredients You’ll Need
Dry Ingredients
- 1 cup all-purpose flour – Provides structure while keeping the brownies soft and fudgy.
- ¾ cup unsweetened cocoa powder – Delivers a deep, rich chocolate flavor.
- ½ teaspoon salt – Balances the sweetness and enhances the chocolate taste.
Wet Ingredients
- 1 cup (226g) unsalted butter, melted – Adds richness and helps create the signature fudgy texture.
- 2 cups granulated sugar – Sweetens the brownies and contributes to their chewy consistency.
- 4 large eggs – Provide structure, moisture, and chewiness.
- 2 teaspoons vanilla extract – Adds warmth and depth of flavor.
Optional Add-Ins
- 1 cup semi-sweet chocolate chips – For extra pockets of melted chocolate throughout the brownies.
- ½ cup chopped walnuts or pecans – Add a delicious crunch and nutty flavor.
- 1 teaspoon espresso powder – Enhances the chocolate flavor without making the brownies taste like coffee.
Kitchen Tools Required
- Large Mixing Bowl – Gives you plenty of room to combine the ingredients without making a mess.
- Whisk – Helps blend the wet ingredients smoothly and evenly.
- Rubber Spatula – Perfect for folding the batter together and scraping every bit from the bowl.
- 8×8-Inch or 9×9-Inch Baking Pan – An 8×8-inch pan creates slightly thicker brownies, while a 9×9-inch pan produces slightly thinner brownies.
- Parchment Paper – Makes it easy to lift the brownies out of the pan and ensures clean, effortless slicing.
How to Make Classic Fudge Brownies
Step 1: Prepare the Baking Pan
Start by preheating your oven to 350°F (175°C).
This ensures the brownies begin baking evenly as soon as they go into the oven.
Lightly grease an 8×8-inch or 9×9-inch baking pan with butter or nonstick spray.
Next, line the pan with parchment paper.
Leave a little overhang on two sides so you can easily lift the brownies out after they have cooled.
This simple step helps prevent sticking and makes cleanup much easier.
Step 2: Melt the Butter
Place the butter in a microwave-safe bowl or small saucepan.
Heat it gently until completely melted.
If using a microwave, warm it in short intervals and stir between each one.
Avoid letting the butter boil or become extremely hot.
Overheated butter can affect the texture of the batter and may partially cook the eggs when they are added later.
Once melted, allow the butter to cool for a minute or two before moving to the next step.
Step 3: Mix the Wet Ingredients
Pour the melted butter into a large mixing bowl.
Add the granulated sugar and whisk until well combined.
The mixture should look smooth and glossy.
Add the eggs one at a time, whisking well after each addition.
This helps create an even batter and contributes to the brownies’ chewy texture.
Stir in the vanilla extract.
Mix until everything is fully incorporated and the batter looks rich and uniform.
Step 4: Add the Dry Ingredients
Add the flour, cocoa powder, and salt directly to the bowl.
Using a rubber spatula, gently fold the dry ingredients into the wet mixture.
Folding means stirring slowly and carefully rather than beating the batter vigorously.
Continue mixing until no dry streaks remain.
Be careful not to overmix.
Stopping as soon as the ingredients are combined helps keep the brownies soft and fudgy.
Step 5: Stir in Optional Mix-Ins
If you are using chocolate chips, nuts, or espresso powder, now is the time to add them.
Fold them gently into the batter until evenly distributed.
Chocolate chips create extra pockets of melted chocolate throughout the brownies.
Walnuts and pecans add a satisfying crunch that pairs beautifully with the rich chocolate flavor.
A small amount of espresso powder can make the chocolate taste even deeper and more intense.
Step 6: Bake to Perfection
Pour the batter into the prepared baking pan.
Use a spatula to spread it evenly into the corners.
Place the pan in the preheated oven and bake for 30 to 35 minutes.
Baking times can vary slightly depending on your oven and the size of your pan.
Begin checking for doneness near the end of the baking time.
Insert a toothpick into the center of the brownies.
A few moist crumbs attached to the toothpick are exactly what you want.
If the toothpick comes out with wet batter, bake for a few more minutes and test again.
Avoid waiting until the toothpick comes out completely clean.
That often means the brownies have baked too long and may lose some of their fudgy texture.
Step 7: Cool Before Slicing
Remove the brownies from the oven and place the pan on a wire rack.
Allow them to cool completely before cutting.
This step can be difficult because the brownies smell amazing, but it is worth the wait.
As the brownies cool, they continue to set and develop their signature dense texture.
Cutting them too early can cause them to fall apart and become messy.
Once fully cooled, use the parchment paper overhang to lift the brownies from the pan.
For clean slices, use a sharp knife and wipe the blade clean between cuts.
You can also chill the brownies for a short time before slicing if you want extra neat edges.
Now all that’s left is to serve, share, and enjoy every rich, chocolatey bite.
Tips for Perfect Fudge Brownies Every Time
- Measure Ingredients Accurately – Using the correct amounts helps create the ideal balance of moisture, richness, and texture.
- Avoid Overmixing – Mix the batter just until the ingredients are combined to keep the brownies soft and tender.
- Don’t Overbake – Remove the brownies when a toothpick comes out with a few moist crumbs for the best fudgy texture.
- Use Quality Cocoa Powder – Good-quality cocoa powder provides a deeper chocolate flavor and richer taste.
- Let Brownies Cool Completely – Cooling allows the brownies to set properly, making them easier to slice and even more fudgy.
Common Brownie Baking Mistakes to Avoid
| Mistake | Result | Solution |
|---|---|---|
| Overbaking | Dry brownies | Check early and remove promptly |
| Too much flour | Cakey texture | Measure carefully |
| Cutting too soon | Crumbly slices | Cool completely |
| Overmixing | Tough brownies | Mix just until combined |
Delicious Variations to Try
- Double Chocolate Fudge Brownies – Stir chocolate chips into the batter for extra bursts of rich chocolate in every bite.
- Walnut Fudge Brownies – Add chopped walnuts for a crunchy texture that pairs perfectly with the fudgy center.
- Salted Caramel Brownies – Swirl caramel sauce into the batter and finish with a sprinkle of sea salt for a sweet-and-salty treat.
- Espresso Brownies – Mix in a little espresso powder to enhance the chocolate flavor and add extra depth.
- Peanut Butter Swirl Brownies – Swirl creamy peanut butter through the batter for a delicious chocolate and peanut butter combination.
How to Store Brownies
Room Temperature Storage
For the freshest texture, store brownies at room temperature in an airtight container.
Allow the brownies to cool completely before placing them in the container.
Trapping heat inside can create excess moisture, which may affect the texture.
If you’re stacking multiple layers of brownies, place a sheet of parchment paper between each layer.
This helps prevent them from sticking together.
Stored properly, brownies will stay fresh at room temperature for up to 4 days.
Keeping them sealed is important because exposure to air can cause them to dry out more quickly.
For the best flavor and texture, keep the container in a cool, dry place away from direct sunlight and heat sources.
Refrigerating Brownies
If you need to keep brownies fresh for a longer period, the refrigerator is a good option.
Place the brownies in an airtight container or wrap them tightly with plastic wrap.
This helps prevent them from absorbing odors from other foods in the refrigerator.
Refrigerated brownies can stay fresh for up to one week.
Keep in mind that cold brownies will become firmer than brownies stored at room temperature.
Some people enjoy this denser texture, especially with extra-fudgy recipes.
If you prefer a softer brownie, let it sit at room temperature for about 15 to 20 minutes before serving.
This short wait allows the texture to soften and the chocolate flavor to become more pronounced.
Freezing for Longer Storage
Brownies freeze beautifully and are perfect for saving leftovers for later.
Start by allowing the brownies to cool completely.
Cut them into individual squares if desired.
Wrapping individual portions makes it easy to grab a single serving whenever a chocolate craving strikes.
Wrap each brownie tightly in plastic wrap.
For extra protection against freezer burn, place the wrapped brownies in a freezer-safe bag or airtight container.
Label the container with the date before freezing.
Brownies can be stored in the freezer for up to 3 months.
When you’re ready to enjoy them, transfer the brownies to the refrigerator or leave them at room temperature until fully thawed.
You can also warm a brownie in the microwave for a few seconds to bring back that fresh-from-the-oven taste.
Having homemade brownies waiting in the freezer is a simple way to enjoy a chocolate treat whenever the mood strikes.
What to Serve with Fudge Brownies
- Vanilla Ice Cream – The cool, creamy texture pairs perfectly with warm, rich brownies.
- Fresh Berries – Strawberries, raspberries, or blueberries add a bright, fresh contrast to the deep chocolate flavor.
- Whipped Cream – A light and fluffy topping that balances the brownies’ dense, fudgy texture.
- Chocolate Sauce – Drizzle over brownies for an extra layer of chocolate indulgence.
- Coffee or Milk – Both make excellent companions, with coffee enhancing the chocolate flavor and milk providing a classic, comforting pairing.
Final Thoughts
These classic fudge brownies are everything a great brownie should be—rich, chocolatey, chewy, and wonderfully fudgy in every bite.
The simple ingredients and easy steps make this recipe approachable for beginners while delivering results that taste like they came from a bakery.
Feel free to make the recipe your own by adding chocolate chips, nuts, caramel, or any favorite mix-ins.
Once you take that first bite, you’ll see just how easy it is to create a homemade chocolate dessert that everyone will love.
FAQs
Why are my brownies cakey instead of fudgy?
Using too much flour or baking the brownies for too long can create a cakier texture instead of a dense, fudgy center.
Can I use melted chocolate instead of cocoa powder?
Yes, melted chocolate can be used, but it may slightly change the texture and richness of the brownies.
How do I know when brownies are fully baked?
Insert a toothpick into the center; it should come out with a few moist crumbs but no wet batter.
Can I make these brownies ahead of time?
Absolutely. Brownies can be baked a day or two in advance and stored in an airtight container until ready to serve.
Can I freeze baked brownies?
Yes, baked brownies freeze well for up to 3 months when wrapped tightly and stored in a freezer-safe container.
What’s the best pan size for fudge brownies?
An 8×8-inch pan is ideal for thicker, fudgier brownies, while a 9×9-inch pan will produce slightly thinner brownies.
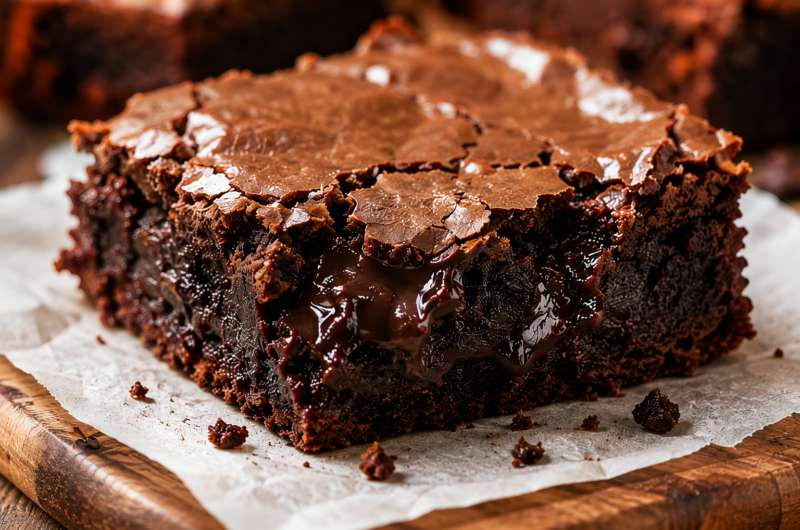
Classic Fudge Brownies: Rich, Chewy, and Irresistibly Chocolatey
Difficulty: Easy16
Brownies15
minutes30
minutes45
minutesThese classic fudge brownies are rich, chewy, and packed with deep chocolate flavor. Made with simple ingredients, they’re the perfect homemade dessert for any occasion.
Ingredients
1 cup unsalted butter, melted
2 cups granulated sugar
4 large eggs
2 teaspoons vanilla extract
1 cup all-purpose flour
¾ cup unsweetened cocoa powder
½ teaspoon salt
1 cup chocolate chips (optional)
Directions
- Preheat the oven to 350°F (175°C) and line an 8×8-inch baking pan with parchment paper.
- Whisk together the melted butter and sugar in a large bowl.
- Add the eggs and vanilla extract, mixing until smooth.
- Fold in the flour, cocoa powder, and salt until just combined.
- Stir in the chocolate chips, if using.
- Spread the batter evenly into the prepared pan.
- Bake for 30–35 minutes, or until a toothpick inserted in the center comes out with a few moist crumbs.
- Cool completely before slicing and serving.
Notes
- Do not overbake for the best fudgy texture.
- Let the brownies cool fully before cutting for cleaner slices.
- Store in an airtight container for up to 4 days.

Hi, I’m Sorenna Blythe, the baker and writer behind Mix Whisk Bake. I share simple, reliable recipes and honest kitchen moments to help home bakers bake with confidence and joy. When I’m not testing new treats, you’ll find me sipping coffee and dreaming up my next bake.


