There’s something special about sharing dessert with the people you love.
Whether it’s a cozy movie night, a holiday dinner, or a simple weekend treat, homemade desserts always make the moment feel warmer and more fun.
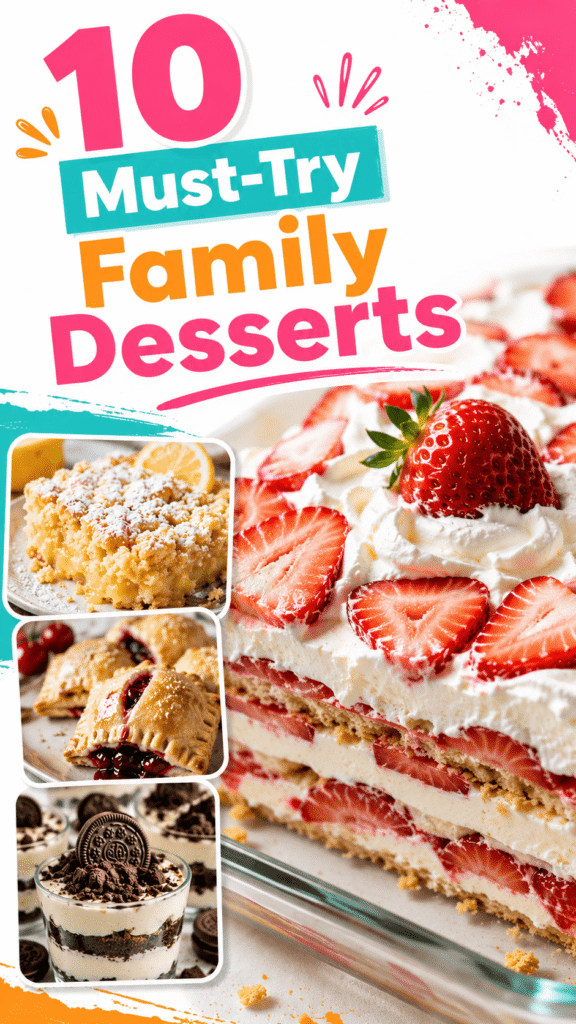
This list is packed with easy family desserts that anyone can make.
You’ll find comforting baked classics, quick no-bake treats, fruity favorites, and plenty of chocolate-filled recipes everyone will want seconds of.
Best of all, these desserts use simple ingredients and beginner-friendly steps, so you can spend less time stressing and more time enjoying every bite together.
1. Classic Chocolate Chip Cookie Bars
Why Families Love It
Chocolate chip cookie bars give you everything people love about classic cookies without the extra work of scooping and baking multiple batches.
They’re soft in the center, slightly chewy around the edges, and perfect for sharing after dinner, during movie nights, or at birthday parties.
This recipe is simple enough for beginner bakers and comes together with basic pantry ingredients.
Ingredients
- 1 cup unsalted butter, melted
- 1 cup brown sugar
- ½ cup granulated sugar
- 2 large eggs
- 2 teaspoons vanilla extract
- 2 ½ cups all-purpose flour
- 1 teaspoon baking soda
- ½ teaspoon salt
- 2 cups semi-sweet chocolate chips
Step-by-Step Instructions
Prepare the Pan
Preheat your oven to 350°F (175°C). Grease a 9×13-inch baking dish or line it with parchment paper for easier cleanup.
Mix the Wet Ingredients
In a large bowl, whisk together the melted butter, brown sugar, and granulated sugar until smooth. Add the eggs and vanilla extract, then whisk again until fully combined.
Add the Dry Ingredients
Stir in the flour, baking soda, and salt. Mix until no dry streaks remain. Fold in the chocolate chips evenly throughout the dough.
Bake the Cookie Bars
Spread the dough evenly into the prepared baking dish. Bake for 25–30 minutes, or until the edges are golden brown and the center looks set.
Cool and Slice
Let the bars cool for at least 20 minutes before slicing. This helps them hold their shape and stay soft inside.
Easy Variations
- Add chopped walnuts or pecans for extra crunch.
- Use milk chocolate or white chocolate chips instead.
- Stir in crushed pretzels for a sweet-and-salty twist.
- Add a drizzle of caramel sauce before serving.
Serving Tips
Serve warm with a scoop of vanilla ice cream for an easy dessert everyone loves. These bars also pack well for lunchboxes, picnics, and bake sales.
2. No-Bake Oreo Cheesecake Cups
Why Families Love It
These Oreo cheesecake cups are creamy, rich, and incredibly easy to make.
Since there’s no baking involved, they’re great for warm days, busy schedules, or when you need a quick dessert for guests.
Kids also love helping crush the cookies and layer the cups.
Ingredients
- 24 Oreo cookies
- 4 tablespoons unsalted butter, melted
- 8 ounces cream cheese, softened
- 1 cup powdered sugar
- 1 teaspoon vanilla extract
- 1 ½ cups whipped topping
- Extra crushed Oreos for garnish
Step-by-Step Instructions
Make the Oreo Crust
Crush the Oreo cookies into fine crumbs using a food processor or sealed bag with a rolling pin. Reserve about ½ cup for topping.
Mix the remaining crumbs with melted butter until combined.
Prepare the Cheesecake Filling
In a medium bowl, beat the cream cheese until smooth. Add powdered sugar and vanilla extract, then mix until creamy.
Fold in the whipped topping gently until the mixture becomes light and fluffy.
Assemble the Dessert Cups
Spoon a layer of Oreo crumbs into small serving cups. Add a layer of cheesecake filling, then repeat the layers until the cups are full.
Chill Before Serving
Refrigerate for at least 1 hour so the dessert can firm up slightly.
Easy Variations
- Add peanut butter to the cheesecake filling for a richer flavor.
- Use golden Oreos instead of classic chocolate cookies.
- Layer in chocolate pudding or sliced strawberries.
- Top with mini chocolate chips or whipped cream.
Serving Tips
Serve chilled straight from the fridge. These cups are perfect for parties because they can be made ahead and stored until ready to serve.
3. Warm Apple Crumble
Why Families Love It
Apple crumble is one of those comforting desserts that makes the whole kitchen smell amazing.
The soft-baked apples and buttery crumble topping create a cozy dessert that feels perfect during cooler months, holidays, or relaxed family dinners.
Ingredients
For the Apple Filling
- 6 cups apples, peeled and sliced
- ⅓ cup brown sugar
- 1 teaspoon cinnamon
- 1 tablespoon lemon juice
- 1 tablespoon cornstarch
For the Crumble Topping
- 1 cup all-purpose flour
- ¾ cup rolled oats
- ¾ cup brown sugar
- ½ teaspoon cinnamon
- ½ cup unsalted butter, melted
Step-by-Step Instructions
Prepare the Apples
Preheat your oven to 350°F (175°C).
Place the sliced apples into a greased baking dish. Add brown sugar, cinnamon, lemon juice, and cornstarch. Toss everything together until the apples are evenly coated.
Make the Crumble Topping
In a separate bowl, combine flour, oats, brown sugar, and cinnamon. Pour in the melted butter and stir until crumbly.
Assemble the Crumble
Sprinkle the crumble topping evenly over the apples, covering the entire surface.
Bake Until Golden
Bake for 40–45 minutes, or until the apples are soft and bubbling and the topping is golden brown.
Cool Slightly Before Serving
Let the crumble rest for about 10 minutes before serving so the filling thickens slightly.
Easy Variations
- Mix pears with the apples for extra flavor.
- Add chopped pecans or walnuts to the topping.
- Use pumpkin spice instead of cinnamon during fall.
- Drizzle caramel sauce over the finished dessert.
Serving Tips
Serve warm with vanilla ice cream or whipped cream. Leftovers taste delicious reheated the next day for an easy dessert or sweet afternoon snack.
4. Easy Banana Pudding
Why Families Love It
Banana pudding is a classic dessert that always disappears quickly at family gatherings.
The creamy pudding, soft bananas, and layered cookies create a comforting dessert that feels nostalgic and homemade without requiring much effort.
It’s simple, budget-friendly, and easy enough for anyone to make.
Ingredients
- 1 box (5 ounces) instant vanilla pudding mix
- 2 cups cold milk
- 1 can (14 ounces) sweetened condensed milk
- 1 teaspoon vanilla extract
- 1 ½ cups whipped topping
- 4 bananas, sliced
- 1 box vanilla wafers
Step-by-Step Instructions
Make the Pudding Mixture
In a large bowl, whisk together the vanilla pudding mix and cold milk for about 2 minutes until slightly thickened.
Add the sweetened condensed milk and vanilla extract. Stir until smooth, then gently fold in the whipped topping.
Layer the Dessert
In a large serving dish or trifle bowl, add a layer of vanilla wafers followed by sliced bananas and pudding mixture.
Repeat the layers until all ingredients are used, finishing with pudding on top.
Chill Before Serving
Cover and refrigerate for at least 3 hours so the cookies soften slightly and the flavors blend together.
Easy Variations
- Use banana pudding mix for even more banana flavor.
- Add crushed shortbread cookies instead of vanilla wafers.
- Layer in caramel sauce for extra sweetness.
- Top with chopped nuts or mini chocolate chips.
Serving Tips
Serve cold straight from the fridge. For the best texture, add fresh banana slices on top right before serving to keep them from browning.
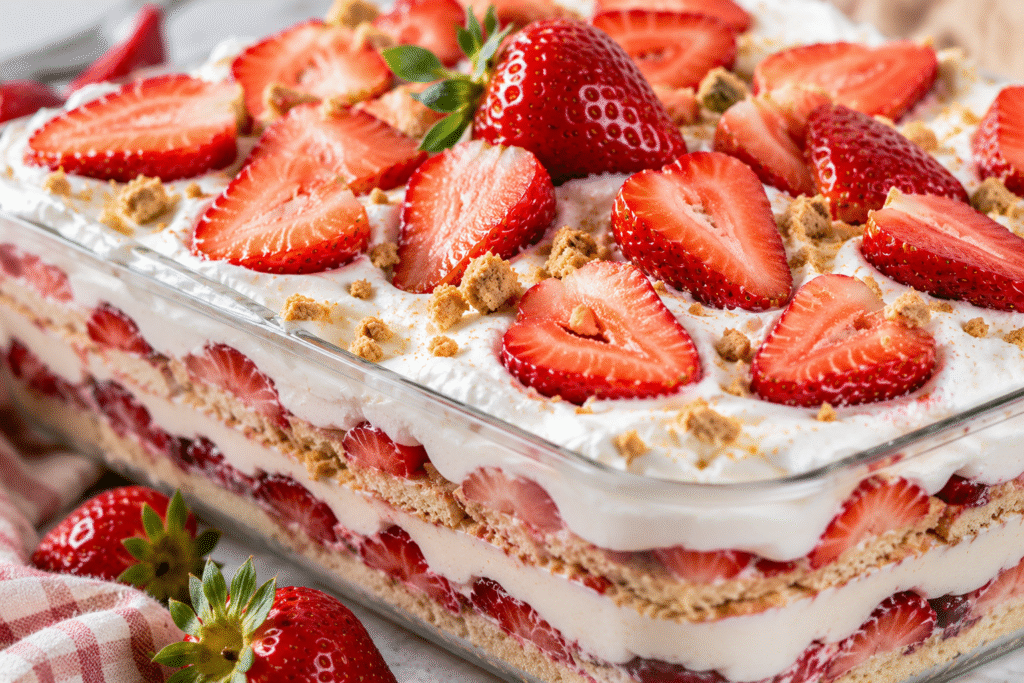
5. Strawberry Icebox Cake
Why Families Love It
This strawberry icebox cake is cool, creamy, and perfect for warm weather.
It requires very little prep and no baking, making it ideal for busy weekends, summer parties, or simple family desserts after dinner.
Ingredients
- 2 pounds fresh strawberries, sliced
- 3 cups heavy whipping cream
- ¼ cup powdered sugar
- 1 teaspoon vanilla extract
- 1 box graham crackers
Step-by-Step Instructions
Prepare the Whipped Cream
In a large mixing bowl, beat the heavy whipping cream, powdered sugar, and vanilla extract until stiff peaks form.
Start Layering
Spread a thin layer of whipped cream on the bottom of a 9×13-inch dish.
Add a layer of graham crackers, followed by whipped cream and sliced strawberries.
Repeat the Layers
Continue layering graham crackers, whipped cream, and strawberries until the dish is full. Finish with whipped cream and extra strawberries on top.
Chill Overnight
Cover and refrigerate overnight. This allows the graham crackers to soften into a cake-like texture.
Easy Variations
- Use blueberries or raspberries with the strawberries.
- Add a layer of cheesecake filling for a richer dessert.
- Drizzle melted chocolate over the top before serving.
- Use chocolate graham crackers for a different flavor.
Serving Tips
Serve chilled for the best texture and flavor. This dessert is especially refreshing during summer gatherings and backyard cookouts.
6. Homemade Brownie Sundaes
Why Families Love It
Brownie sundaes combine two favorite desserts into one easy treat.
Warm fudgy brownies paired with cold ice cream create the perfect balance of rich and creamy flavors.
Families love how customizable they are, especially for parties and movie nights.
Ingredients
For the Brownies
- 1 cup unsalted butter, melted
- 2 cups granulated sugar
- 4 large eggs
- 1 teaspoon vanilla extract
- 1 cup cocoa powder
- 1 cup all-purpose flour
- ½ teaspoon salt
- ½ teaspoon baking powder
For the Sundaes
- Vanilla ice cream
- Chocolate syrup
- Whipped cream
- Sprinkles
- Cherries
Step-by-Step Instructions
Prepare the Brownie Batter
Preheat your oven to 350°F (175°C). Grease an 8×8-inch baking pan.
In a large bowl, whisk together melted butter and sugar. Add eggs and vanilla extract, mixing until smooth.
Stir in cocoa powder, flour, salt, and baking powder until combined.
Bake the Brownies
Spread the batter evenly into the prepared pan. Bake for 30–35 minutes, or until a toothpick inserted near the center comes out with a few moist crumbs.
Allow the brownies to cool slightly before slicing.
Assemble the Sundaes
Place a warm brownie in a bowl. Top with a scoop of vanilla ice cream, then drizzle with chocolate syrup.
Finish with whipped cream, sprinkles, and a cherry on top.
Easy Variations
- Use chocolate or cookies-and-cream ice cream.
- Add chopped peanuts or walnuts for crunch.
- Drizzle caramel sauce alongside the chocolate syrup.
- Turn them into brownie waffle sundaes using a waffle iron.
Serving Tips
Serve the brownies slightly warm so the ice cream melts just enough over the top. Set out different toppings and let everyone build their own sundae for a fun family dessert night.
7. Lemon Dump Cake
Why Families Love It
Lemon dump cake is one of those simple desserts that feels almost too easy to make.
Everything comes together in one dish with very little prep, yet the result is warm, buttery, and packed with bright lemon flavor.
It’s perfect for busy nights, last-minute guests, or when you want a dessert without spending hours in the kitchen.
Ingredients
- 1 can (21 ounces) lemon pie filling
- 1 box yellow cake mix
- ½ cup unsalted butter, melted
- 8 ounces cream cheese, softened
- ½ cup powdered sugar
Step-by-Step Instructions
Prepare the Baking Dish
Preheat your oven to 350°F (175°C). Lightly grease a 9×13-inch baking dish.
Add the Lemon Filling
Spread the lemon pie filling evenly across the bottom of the dish.
Make the Cream Cheese Layer
In a small bowl, mix the softened cream cheese and powdered sugar until smooth. Drop spoonfuls over the lemon filling.
Add the Cake Mix
Sprinkle the dry cake mix evenly over the top. Drizzle the melted butter across the surface as evenly as possible.
Bake Until Golden
Bake for 40–45 minutes, or until the top is golden brown and bubbly around the edges.
Cool Slightly Before Serving
Let the cake cool for about 10–15 minutes before serving.
Easy Variations
- Add blueberries for a lemon-blueberry version.
- Use white cake mix instead of yellow cake mix.
- Top with shredded coconut for extra texture.
- Add a light dusting of powdered sugar before serving.
Serving Tips
Serve warm with whipped cream or vanilla ice cream. This dessert also tastes great chilled straight from the fridge the next day.
8. Peanut Butter Rice Krispie Treats
Why Families Love It
These peanut butter Rice Krispie treats are soft, chewy, and incredibly fun to make with kids.
They come together quickly with just a few ingredients and don’t require any baking.
The peanut butter adds extra richness that makes them even harder to resist.
Ingredients
- 6 cups Rice Krispies cereal
- 1 package (10 ounces) mini marshmallows
- ½ cup creamy peanut butter
- ¼ cup unsalted butter
- 1 teaspoon vanilla extract
Step-by-Step Instructions
Melt the Marshmallow Mixture
In a large pot over low heat, melt the butter and marshmallows together, stirring frequently.
Once smooth, stir in the peanut butter and vanilla extract until fully combined.
Add the Cereal
Remove the pot from the heat and gently stir in the Rice Krispies cereal until evenly coated.
Press Into the Pan
Transfer the mixture into a greased 9×13-inch pan. Lightly press it down using a buttered spatula or wax paper. Avoid pressing too firmly so the treats stay soft.
Let Them Set
Allow the treats to cool for about 30 minutes before cutting into squares.
Easy Variations
- Drizzle melted chocolate over the top.
- Mix in mini chocolate chips after the mixture cools slightly.
- Use crunchy peanut butter for extra texture.
- Add colorful sprinkles for birthday parties or holidays.
Serving Tips
Store the treats in an airtight container to keep them soft and chewy. They’re great for lunchboxes, bake sales, and quick after-school snacks.
9. Mini Cherry Hand Pies
Why Families Love It
Mini cherry hand pies are flaky, fruity, and easy to grab on the go.
They feel special without requiring complicated baking skills, which makes them perfect for beginner bakers and busy families alike.
Ingredients
- 2 refrigerated pie crusts
- 1 can (21 ounces) cherry pie filling
- 1 large egg
- 1 tablespoon water
- 1 tablespoon coarse sugar (optional)
Step-by-Step Instructions
Prepare the Dough
Preheat your oven to 375°F (190°C). Line a baking sheet with parchment paper.
Roll out the pie crusts and cut circles using a round cookie cutter or drinking glass.
Fill the Pies
Place a spoonful of cherry pie filling in the center of half the circles. Avoid overfilling so the pies seal properly.
Seal the Hand Pies
Place another dough circle on top and press the edges together with a fork.
Add the Egg Wash
Whisk together the egg and water. Brush the tops of the pies with the egg wash and sprinkle with coarse sugar if desired.
Bake Until Golden
Bake for 18–22 minutes, or until golden brown and flaky.
Allow the pies to cool slightly before serving.
Easy Variations
- Use apple, blueberry, or peach pie filling.
- Drizzle icing over the cooled pies.
- Sprinkle cinnamon sugar on top before baking.
- Add cream cheese filling for extra richness.
Serving Tips
Serve warm or at room temperature. These hand pies travel well, making them perfect for picnics, parties, and lunchbox treats.
10. Easy Chocolate Lasagna
Why Families Love It
Chocolate lasagna is rich, creamy, and layered with plenty of chocolate flavor in every bite.
Since it’s a no-bake dessert, it’s simple to prepare ahead of time for family gatherings, birthdays, and holidays.
The layers look impressive, but the recipe is surprisingly easy to make.
Ingredients
For the Crust
- 36 Oreo cookies, crushed
- 6 tablespoons unsalted butter, melted
For the Cream Cheese Layer
- 8 ounces cream cheese, softened
- ¼ cup granulated sugar
- 2 tablespoons milk
- 1 cup whipped topping
For the Chocolate Layer
- 2 boxes (3.9 ounces each) instant chocolate pudding mix
- 3 cups cold milk
For the Topping
- 2 cups whipped topping
- Chocolate shavings or mini chocolate chips
Step-by-Step Instructions
Make the Oreo Crust
Mix the crushed Oreo cookies with melted butter until combined. Press the mixture firmly into the bottom of a 9×13-inch dish.
Place the dish in the refrigerator while preparing the next layer.
Prepare the Cream Cheese Layer
In a medium bowl, beat the cream cheese, sugar, and milk until smooth. Fold in the whipped topping.
Spread the mixture evenly over the Oreo crust.
Make the Chocolate Pudding
In another bowl, whisk together the chocolate pudding mix and cold milk for about 2 minutes until thickened.
Spread the pudding layer evenly over the cream cheese layer.
Add the Final Topping
Spread whipped topping across the top of the dessert. Sprinkle with chocolate shavings or mini chocolate chips.
Chill Before Serving
Refrigerate for at least 4 hours so the layers can fully set.
Easy Variations
- Use peanut butter Oreos for the crust.
- Add crushed candy bars between the layers.
- Swap chocolate pudding for cookies-and-cream pudding.
- Drizzle caramel or hot fudge sauce on top.
Serving Tips
Serve cold for the best texture. This dessert slices more cleanly after chilling overnight, making it a great make-ahead option for parties and holidays.
Tips for Making Family Desserts Easier
- Use store-bought shortcuts when needed — Cake mixes, pie crusts, whipped topping, and pudding mixes can save time without sacrificing flavor.
- Prep ingredients ahead of time — Measuring ingredients before you start makes baking smoother, faster, and less stressful.
- Let kids help with simple tasks — Stirring, layering desserts, or adding toppings keeps baking fun and creates special family memories.
- Keep freezer-friendly desserts on hand for busy days — Brownies, cookie bars, and hand pies freeze well and make quick, last-minute treats easy.
Final Thoughts
These easy family desserts prove that homemade treats do not need complicated ingredients or hours in the kitchen to feel special.
A simple pan of cookie bars, a creamy pudding, or a warm fruit crumble can turn an ordinary evening into something everyone remembers.
Try a few of these recipes throughout the month and have fun making them your own.
Which dessert do you think your family will want to try first?


Hi, I’m Sorenna Blythe, the baker and writer behind Mix Whisk Bake. I share simple, reliable recipes and honest kitchen moments to help home bakers bake with confidence and joy. When I’m not testing new treats, you’ll find me sipping coffee and dreaming up my next bake.