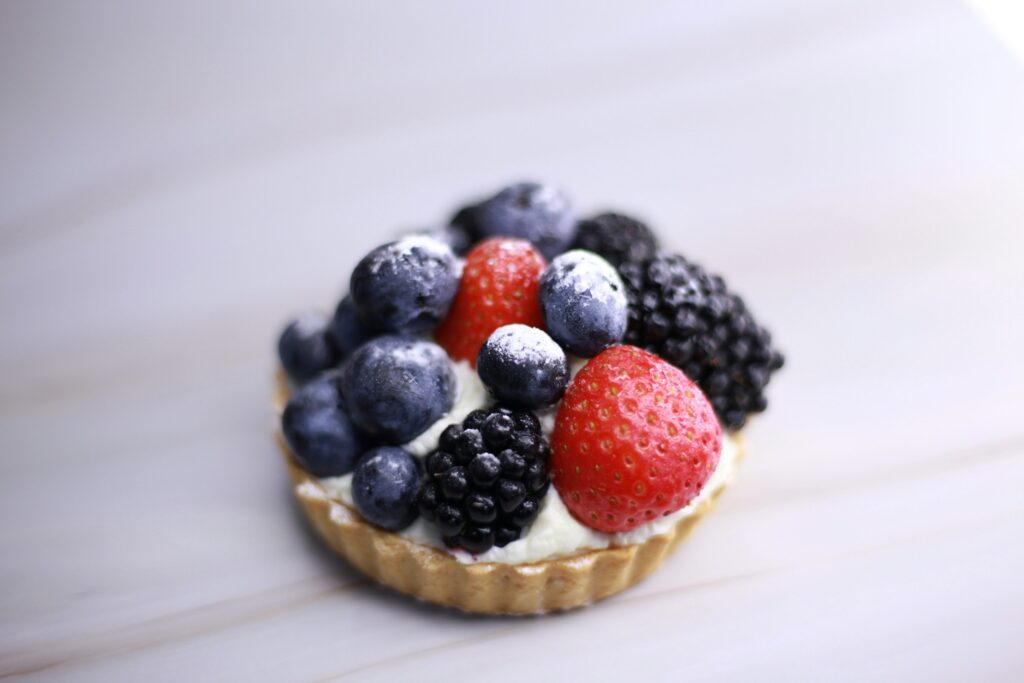
Tartlets are one of the easiest ways to make homemade desserts look extra special without spending hours in the kitchen.
They’re small, fun to make, and perfect for everything from family desserts to brunch tables, parties, and holiday gatherings.
The best part? You don’t need advanced baking skills or fancy ingredients to make them.
Many of these beginner-friendly tartlets use simple shortcuts, easy fillings, and basic techniques that anyone can follow with confidence.
If you’ve ever thought homemade tartlets looked too difficult, you’re in for a surprise.
These recipes are simple, approachable, and honestly so much fun to bake.
Grab your favorite ingredients, take it one step at a time, and enjoy creating beautiful little desserts right at home.

1. Mini Strawberry Cheesecake Tartlets
Why You’ll Love It
These mini strawberry cheesecake tartlets are creamy, fresh, and incredibly simple to make.
They look bakery-worthy but use easy ingredients and beginner-friendly steps, making them perfect for parties, holidays, or an easy weekend dessert.
Ingredients
For the Tartlets
- 12 mini tartlet shells (store-bought or homemade)
For the Cheesecake Filling
- 8 oz (225 g) cream cheese, softened
- 1/3 cup powdered sugar
- 1 teaspoon vanilla extract
- 1/2 cup whipped cream or whipped topping
For the Topping
- 1 cup fresh strawberries, sliced
Instructions
Prepare the Tartlet Shells
Place the tartlet shells on a serving tray or plate.
Make the Cheesecake Filling
In a mixing bowl, beat the cream cheese, powdered sugar, and vanilla extract until smooth and creamy. Fold in the whipped cream until light and fluffy.
Fill and Chill
Spoon or pipe the cheesecake filling into each tartlet shell. Refrigerate for at least 1 hour to help the filling set.
Add the Strawberries
Top each tartlet with sliced fresh strawberries before serving.
Beginner Tip
Store-bought tartlet shells make this recipe much quicker and easier for first-time bakers.
2. Lemon Curd Tartlets
Why Beginners Love This Recipe
These tartlets are bright, creamy, and full of fresh lemon flavor.
They come together quickly with minimal prep and look elegant enough for brunches, tea parties, or spring gatherings.
Ingredients
For the Tartlets
- 12 mini tartlet shells
For the Filling
- 1 cup lemon curd
- 1/2 cup whipped cream
For Garnish
- 1 teaspoon lemon zest
Instructions
Fill the Tartlet Shells
Spoon lemon curd evenly into each tartlet shell.
Chill the Tartlets
Place the tartlets in the refrigerator for 20–30 minutes to firm up slightly.
Garnish and Serve
Top with whipped cream and a sprinkle of fresh lemon zest before serving.
Beginner Tip
Good-quality store-bought lemon curd works perfectly and saves a lot of time.
3. Chocolate Ganache Tartlets
What Makes These Easy
These rich chocolate tartlets need only a handful of ingredients and require very little effort.
The smooth ganache filling gives them a fancy bakery-style look without complicated decorating.
Ingredients
For the Tartlets
- 12 mini tartlet shells
For the Ganache
- 1 cup semi-sweet chocolate chips
- 1/2 cup heavy cream
Optional Toppings
- Fresh raspberries or strawberries
- Chocolate shavings
Instructions
Make the Ganache
Place the chocolate chips in a bowl. Heat the heavy cream until hot but not boiling, then pour it over the chocolate. Let sit for 2 minutes, then stir until smooth.
Fill the Tartlet Shells
Spoon the chocolate ganache into each tart shell.
Let the Ganache Set
Refrigerate for 30–45 minutes until firm.
Decorate if Desired
Top with berries or chocolate shavings before serving.
Beginner Tip
Using good-quality chocolate makes a big difference in flavor and texture.
4. Fresh Fruit Custard Tartlets
Why They’re Perfect for Beginners
These tartlets are colorful, fresh, and surprisingly simple to assemble.
They’re great for spring and summer desserts and can easily be customized with your favorite fruits.
Ingredients
For the Tartlets
- 12 mini tartlet shells
For the Filling
- 1 1/2 cups vanilla custard or vanilla pudding
For the Fruit Topping
- 1 kiwi, sliced
- 1/2 cup strawberries, sliced
- 1/2 cup blueberries
- 1/2 cup mandarin orange segments
For the Glaze
- 2 tablespoons apricot jam
- 1 teaspoon water
Instructions
Fill the Tartlet Shells
Spoon vanilla custard evenly into each tartlet shell.
Arrange the Fruit
Decorate the tops with fresh fruit in any pattern you like.
Add the Glaze
Warm the apricot jam with water until smooth. Lightly brush over the fruit for shine.
Beginner Tip
Pat the fruit dry before adding it to the tartlets to prevent soggy shells.
5. No-Bake Oreo Tartlets
Why This Recipe Is So Simple
These creamy Oreo tartlets are rich, easy, and completely no-bake.
They’re perfect for beginners, kids, or anyone looking for a quick dessert without turning on the oven.
Ingredients
For the Crust
- 20 Oreo cookies, crushed
- 4 tablespoons melted butter
For the Filling
- 8 oz (225 g) cream cheese, softened
- 1/3 cup powdered sugar
- 1 cup whipped topping
Optional Topping
- Crushed Oreo cookies
- Mini chocolate chips
Instructions
Make the Crust
Mix the crushed Oreo cookies with melted butter until combined. Press the mixture into mini tartlet pans or liners. Chill for 15 minutes.
Prepare the Filling
Beat the cream cheese and powdered sugar until smooth. Fold in the whipped topping.
Fill and Chill
Spoon the filling into the crusts and refrigerate for at least 2 hours until firm.
Decorate Before Serving
Top with crushed Oreos or mini chocolate chips if desired.
Beginner Tip
Allow enough chilling time so the tartlets hold their shape nicely when served.
6. Mini Apple Cinnamon Tartlets
Why Beginners Should Try These
These mini apple cinnamon tartlets are warm, cozy, and packed with classic fall flavor.
They use simple pantry ingredients and are a great starting point for beginner bakers who want an easy homemade dessert.
Ingredients
For the Tartlets
- 12 mini tart shells
For the Apple Filling
- 2 medium apples, peeled and diced
- 2 tablespoons butter
- 1/4 cup brown sugar
- 1 teaspoon ground cinnamon
- 1 teaspoon cornstarch
- 1 tablespoon water
Instructions
Cook the Apple Filling
Melt the butter in a saucepan over medium heat. Add the diced apples, brown sugar, and cinnamon. Cook for 5–7 minutes until the apples soften.
Mix the cornstarch with water, then stir it into the apples. Cook for another 1–2 minutes until slightly thickened.
Fill the Tart Shells
Spoon the apple mixture evenly into the tart shells.
Bake Until Golden
Bake at 350°F (175°C) for 10–12 minutes until the shells are lightly golden and crisp.
Beginner Tip
Dice the apples into small, even pieces so they cook quickly and evenly.
7. Nutella Banana Tartlets
What Makes Them Beginner-Friendly
These tartlets come together in minutes and use only a few simple ingredients.
The Nutella and banana combination is always a crowd favorite and makes an easy no-fuss dessert.
Ingredients
For the Tartlets
- 12 mini tartlet shells
For the Filling
- 3/4 cup Nutella
- 2 bananas, sliced
For Topping
- 1/2 cup whipped cream
- Chocolate shavings (optional)
Instructions
Spread the Nutella
Fill each tartlet shell with a spoonful of Nutella and spread evenly.
Add the Banana Slices
Top with fresh banana slices.
Finish Before Serving
Add whipped cream and optional chocolate shavings right before serving.
Beginner Tip
Add the banana slices shortly before serving to keep them fresh and prevent browning.
8. Coconut Cream Tartlets
Why You’ll Love These
These coconut cream tartlets are light, creamy, and full of tropical flavor.
They’re simple to prepare and make a refreshing chilled dessert for warm days.
Ingredients
For the Tartlets
- 12 mini tart shells
For the Filling
- 1 1/2 cups coconut pudding or coconut cream pudding
- 1/2 teaspoon vanilla extract
For Topping
- 1 cup whipped cream
- 1/3 cup toasted shredded coconut
Instructions
Fill the Tartlet Shells
Spoon the coconut pudding evenly into the tart shells.
Chill Thoroughly
Refrigerate the tartlets for at least 1 hour until cold and set.
Add the Toppings
Top with whipped cream and toasted coconut before serving.
Beginner Tip
Toasting the coconut adds extra crunch and brings out even more coconut flavor.
9. Raspberry Jam Almond Tartlets
Why They’re Great for New Bakers
These tartlets have a simple bakery-style look with very little effort.
The sweet raspberry jam and soft almond filling create a rich and delicious dessert that feels extra special.
Ingredients
For the Tartlets
- 12 mini tartlet shells
For the Filling
- 1/3 cup raspberry jam
- 1/2 cup almond flour
- 1/4 cup sugar
- 3 tablespoons butter, softened
- 1 egg
- 1/2 teaspoon vanilla extract
Instructions
Add the Jam Layer
Spoon a small amount of raspberry jam into the bottom of each tart shell.
Prepare the Almond Filling
In a bowl, mix the almond flour, sugar, butter, egg, and vanilla extract until smooth.
Fill and Bake
Spoon the almond mixture over the jam layer. Bake at 350°F (175°C) for 12–15 minutes until lightly golden.
Beginner Tip
Avoid overfilling the tart shells since the filling expands slightly while baking.
10. Mini Key Lime Pie Tartlets
Why This Recipe Is Easy
These mini key lime pie tartlets are creamy, refreshing, and perfect for summer gatherings.
The filling comes together quickly and delivers a bright citrus flavor with very little effort.
Ingredients
For the Tartlets
- 12 mini graham cracker tart shells
For the Filling
- 1 can (14 oz) sweetened condensed milk
- 1/3 cup fresh lime juice
- 1 teaspoon lime zest
For Topping
- 1 cup whipped cream
- Extra lime zest or lime slices
Instructions
Mix the Filling
In a bowl, whisk together the sweetened condensed milk, lime juice, and lime zest until smooth.
Fill the Tartlet Shells
Pour the filling evenly into the graham cracker tart shells.
Chill or Bake Lightly
For a no-bake version, chill for at least 2 hours. For a firmer texture, bake at 350°F (175°C) for 8 minutes, then cool completely before chilling.
Garnish Before Serving
Top with whipped cream and extra lime zest or lime slices.
Beginner Tip
Fresh lime juice gives these tartlets the brightest and freshest flavor.
Tips for Making Tartlets at Home
- Use pre-made tartlet shells for convenience
Store-bought shells save time and make the baking process much easier for beginners. - Chill the dough before baking
Cold dough helps tartlet shells keep their shape and prevents shrinking in the oven. - Avoid overfilling tartlets
Too much filling can spill over during baking or make tartlets difficult to serve neatly. - Let the fillings cool before assembling
Warm fillings can soften the shells and make the tartlets soggy. - Store tartlets in the fridge for freshness
Keeping tartlets chilled helps maintain their texture and keeps creamy fillings fresh longer.
Common Tartlet Mistakes to Avoid
- Soggy crusts
Avoid adding wet fillings too early, especially if the tartlets will sit for a while before serving. - Overbaked shells
Bake tartlet shells just until lightly golden to keep them crisp without becoming too hard or dry. - Filling tartlets while hot
Let shells and fillings cool completely before assembling to prevent melting or softening. - Using overly watery fruit toppings
Excess moisture from fruit can make tartlets soggy, so always pat fruit dry before using.
Final Thoughts
Tartlets are one of those desserts that look impressive but are surprisingly simple once you get started.
From fruity favorites to rich chocolate fillings, there are so many fun flavors to try, and each one brings something different to the table.
They’re perfect for holidays, brunches, birthday parties, or even a simple weekend treat at home.
Don’t be afraid to mix and match fillings, toppings, and crusts to create your own favorite combinations.
Save this post for later, pick a recipe that sounds fun, and enjoy the process of baking something homemade and delicious.
FAQs
Can beginners make tartlets?
Yes, tartlets are one of the easiest elegant desserts to make at home.
Can I use store-bought tart shells?
Absolutely. They save time and still taste delicious.
How do I keep tartlets crispy?
Fill them shortly before serving and store them properly in the fridge.
Can tartlets be made ahead?
Yes, most tartlets can be prepared 1–2 days in advance.


Hi, I’m Sorenna Blythe, the baker and writer behind Mix Whisk Bake. I share simple, reliable recipes and honest kitchen moments to help home bakers bake with confidence and joy. When I’m not testing new treats, you’ll find me sipping coffee and dreaming up my next bake.


