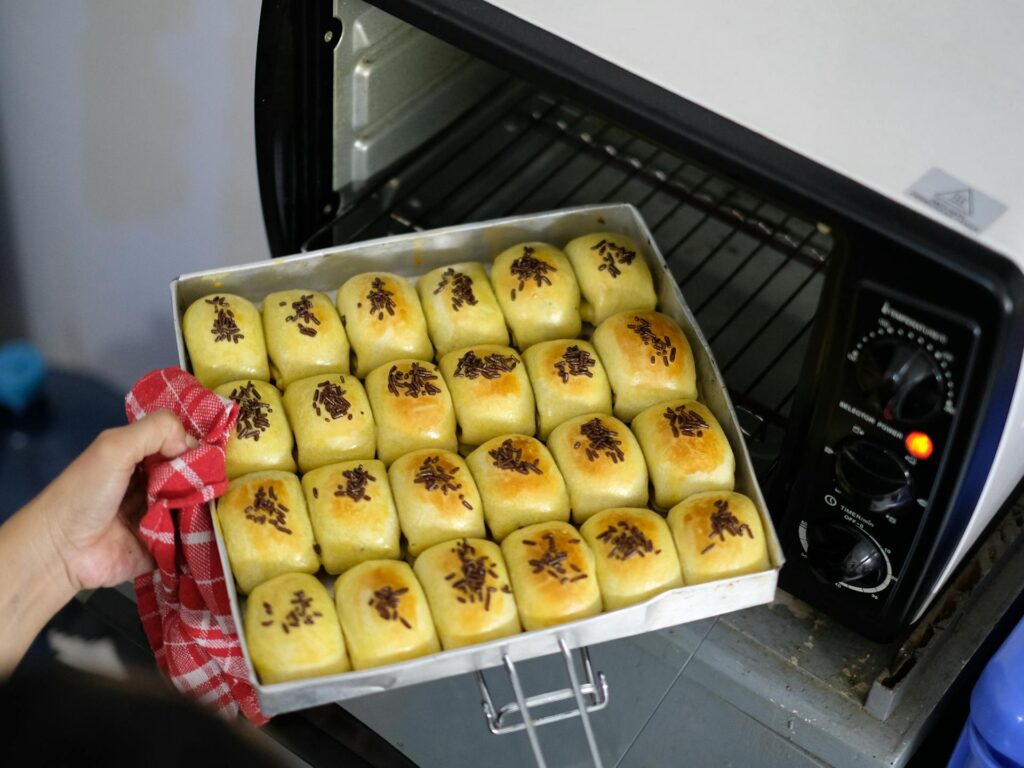
Some days, you want a homemade dessert without spending hours in the kitchen.
That’s exactly why tray bakes are so popular.
They’re simple to make, easy to serve, and perfect for busy days when you still want something fresh and delicious.
Most tray bake recipes use everyday ingredients and come together with very little prep.
You mix, bake, slice, and enjoy with fewer dishes to wash afterward.
They’re great for family desserts, parties, lunchboxes, bake sales, or casual weekend treats.
This collection is packed with easy recipes that are full of flavor and beginner-friendly too.
From rich chocolate bakes to fruity favorites and soft buttery cakes, there’s something here for every sweet craving.
1. Classic Chocolate Brownie Tray Bake
If you love rich chocolate desserts, this brownie tray bake is hard to beat.
The center stays soft and fudgy while the top turns beautifully crackly as it bakes.
Everything comes together in one bowl, which makes this recipe perfect for beginners or busy days when you want something homemade without a lot of effort.
These brownies are easy to slice, easy to share, and even better the next day.
A small square goes a long way because the chocolate flavor is deep and satisfying.
Why You’ll Love It
- Simple one-bowl recipe
- Rich chocolate flavor
- Soft gooey center
- Great for parties and lunchboxes
- Freezes well for later
Ingredients
- 1 cup (225g) unsalted butter, melted
- 1 ¼ cups (250g) granulated sugar
- 1 cup (200g) brown sugar
- 4 large eggs
- 2 teaspoons vanilla extract
- 1 cup (90g) unsweetened cocoa powder
- 1 cup (125g) all-purpose flour
- ½ teaspoon salt
- 1 cup (175g) chocolate chips
Instructions
- Preheat your oven to 350°F (175°C). Line a 9×13-inch baking tray with parchment paper for easy removal.
- In a large bowl, whisk the melted butter, granulated sugar, and brown sugar until smooth and glossy.
- Add the eggs one at a time, mixing well after each addition. Stir in the vanilla extract.
- Add the cocoa powder, flour, and salt. Gently fold everything together until no dry streaks remain. Try not to overmix, or the brownies can become cakier instead of fudgy.
- Fold in the chocolate chips.
- Spread the batter evenly into the prepared tray. The batter will be thick, so use a spatula to smooth the top.
- Bake for 28–32 minutes. The edges should look set while the center stays slightly soft.
- Let the brownies cool before slicing. This helps them firm up and gives cleaner squares.
Helpful Tips
- Slightly underbaking gives brownies a softer texture.
- Use good-quality cocoa powder for a deeper flavor.
- Chill the brownies for 30 minutes before slicing if you want neat edges.
- A plastic knife works surprisingly well for clean brownie cuts.
Optional Variations
- Stir in chopped walnuts or pecans for crunch.
- Swirl peanut butter into the batter before baking.
- Sprinkle flaky sea salt on top for extra flavor.
- Add crushed cookies or caramel pieces for a fun twist.
2. Lemon Drizzle Tray Bake
This lemon drizzle tray bake is light, soft, and packed with fresh citrus flavor.
The warm cake soaks up the sweet lemon glaze, giving every bite a bright and tangy finish.
It’s the kind of simple homemade cake that works for almost any occasion.
The texture stays moist for days, making it perfect for make-ahead baking.
It also slices beautifully for lunchboxes, gatherings, or afternoon coffee breaks.
Why You’ll Love It
- Fresh lemon flavor in every bite
- Soft fluffy sponge
- Easy to make with basic ingredients
- Perfect balance of sweet and tangy
Ingredients
For the Cake
- 1 cup (225g) unsalted butter, softened
- 1 cup (200g) granulated sugar
- 4 large eggs
- 2 cups (250g) all-purpose flour
- 2 teaspoons baking powder
- ¼ teaspoon salt
- Zest of 2 lemons
- 3 tablespoons fresh lemon juice
- ¼ cup (60ml) milk
For the Lemon Drizzle
- 1 cup (120g) powdered sugar
- 3–4 tablespoons fresh lemon juice
Instructions
- Preheat the oven to 350°F (175°C). Grease and line a 9×13-inch tray.
- In a large bowl, beat the butter and sugar until pale and fluffy. This helps create a light cake texture.
- Add the eggs one at a time, mixing well after each addition.
- Stir in the lemon zest and lemon juice.
- Add the flour, baking powder, and salt. Pour in the milk and gently mix until smooth.
- Spread the batter evenly into the tray.
- Bake for 30–35 minutes or until a toothpick inserted into the center comes out clean.
- While the cake is still warm, whisk together the powdered sugar and lemon juice for the glaze.
- Poke small holes across the cake with a skewer or fork, then slowly pour the glaze over the top. Let it soak in fully before slicing.
Helpful Tips
- Fresh lemon juice gives the best flavor.
- Don’t skip poking holes in the cake. It helps the glaze soak through evenly.
- Let the cake cool slightly before cutting for cleaner slices.
- Store in an airtight container to keep the sponge soft.
Optional Variations
- Add 1 tablespoon of poppy seeds to the batter.
- Swap lemon for orange for a sweeter citrus flavor.
- Top with thin lemon slices for decoration.
- Add a light cream cheese frosting for a richer version.
3. Peanut Butter Blondie Tray Bake
These peanut butter blondies are soft, chewy, and packed with rich peanut butter flavor.
The brown sugar gives them a warm caramel-like sweetness, while chocolate chunks melt into every bite.
They’re simple to make and incredibly satisfying.
This recipe is especially great for beginner bakers because the batter comes together quickly and doesn’t require any special equipment.
Why You’ll Love It
- Sweet and salty flavor combination
- Thick chewy texture
- Quick and beginner-friendly
- Perfect for peanut butter lovers
Ingredients
- ¾ cup (170g) unsalted butter, melted
- 1 cup (200g) brown sugar
- ½ cup (120g) creamy peanut butter
- 2 large eggs
- 2 teaspoons vanilla extract
- 1 ½ cups (190g) all-purpose flour
- 1 teaspoon baking powder
- ¼ teaspoon salt
- 1 cup (175g) chocolate chunks or chocolate chips
Instructions
- Preheat the oven to 350°F (175°C). Line a 9×13-inch tray with parchment paper.
- In a large bowl, whisk together the melted butter, brown sugar, and peanut butter until smooth.
- Add the eggs and vanilla extract. Mix until fully combined.
- Stir in the flour, baking powder, and salt. Fold gently until the batter comes together.
- Add the chocolate chunks and mix lightly.
- Spread the batter evenly into the tray. Use a spatula to smooth the top.
- Bake for 25–30 minutes until the edges are lightly golden, and the center is just set.
- Allow the blondies to cool before slicing. They continue to firm up as they cool.
Helpful Tips
- Don’t overbake if you want soft, chewy blondies.
- Creamy peanut butter works best for a smooth texture.
- Let the blondies cool completely before cutting to avoid crumbling.
- Warm a slice slightly before serving for extra gooey chocolate.
Optional Variations
- Add crushed pretzels for crunch.
- Swirl strawberry jam into the batter before baking.
- Mix in chopped peanuts for extra texture.
- Drizzle melted chocolate over the top after cooling.
4. Easy Jam Coconut Tray Bake
This jam coconut tray bake is one of those simple homemade treats that never goes out of style.
The soft buttery sponge pairs perfectly with sweet fruity jam and a lightly chewy coconut topping.
It’s comforting, easy to make, and perfect for sharing with family or friends over tea or coffee.
The ingredients are simple and affordable, which makes this recipe great for beginner bakers or anyone wanting an easy dessert without a long shopping list.
Why You’ll Love It
- Classic homemade flavor
- Budget-friendly ingredients
- Soft sponge with sweet coconut topping
- Great for afternoon snacks or lunchboxes
Ingredients
For the Sponge
- 1 cup (225g) unsalted butter, softened
- 1 cup (200g) granulated sugar
- 3 large eggs
- 2 cups (250g) all-purpose flour
- 2 teaspoons baking powder
- ¼ teaspoon salt
- ½ cup (120ml) milk
- 1 teaspoon vanilla extract
For the Topping
- ¾ cup (240g) raspberry or strawberry jam
- 1 ½ cups (120g) desiccated coconut
- ⅓ cup (65g) granulated sugar
- 1 egg white
Instructions
- Preheat your oven to 350°F (175°C). Grease and line a 9×13-inch baking tray.
- In a large bowl, beat the butter and sugar until light and creamy.
- Add the eggs one at a time, mixing well after each addition.
- Stir in the vanilla extract.
- Add the flour, baking powder, and salt. Pour in the milk and gently mix until smooth.
- Spread the batter evenly into the prepared tray.
- Bake for 15 minutes until the sponge is lightly set but not fully baked.
- Carefully spread the jam over the warm sponge.
- In a small bowl, mix the coconut, sugar, and egg white until combined. Sprinkle the mixture evenly over the jam layer.
- Return the tray to the oven and bake for another 15–20 minutes until golden on top.
- Let the tray bake cool before slicing into squares.
Helpful Tips
- Warm the jam slightly if it feels too thick to spread.
- Don’t overbake the sponge during the first bake, or the final texture can become dry.
- Use parchment paper to make lifting and slicing easier.
- This tray bake tastes even better the next day, once the flavors have settled together.
Optional Variations
- Use apricot jam for a different flavor.
- Add ½ teaspoon almond extract to the sponge batter.
- Sprinkle sliced almonds over the coconut topping.
- Drizzle melted white chocolate over cooled slices.
5. Cinnamon Roll Tray Bake
If you love soft cinnamon rolls but don’t want the extra work of shaping individual buns, this tray bake version is a great shortcut.
The rolls bake together in one pan, creating soft fluffy layers filled with buttery cinnamon sugar and topped with creamy icing.
The smell alone makes the kitchen feel warm and cozy.
This recipe is perfect for weekend baking, brunch tables, or comforting desserts after dinner.
Why You’ll Love It
- Warm cinnamon flavor in every bite
- Easier than making individual rolls
- Soft fluffy texture
- Perfect for breakfast or dessert
Ingredients
For the Dough
- 4 cups (500g) all-purpose flour
- 2 ¼ teaspoons instant yeast
- ¼ cup (50g) granulated sugar
- 1 teaspoon salt
- 1 cup (240ml) warm milk
- ¼ cup (55g) unsalted butter, melted
- 2 large eggs
For the Filling
- ½ cup (115g) softened butter
- ¾ cup (150g) brown sugar
- 2 tablespoons ground cinnamon
For the Cream Cheese Icing
- 4 ounces (115g) cream cheese, softened
- 2 tablespoons butter, softened
- 1 cup (120g) powdered sugar
- 1–2 tablespoons milk
Instructions
- In a large bowl, mix the flour, yeast, sugar, and salt.
- Add the warm milk, melted butter, and eggs. Mix until a dough forms.
- Knead the dough for about 8 minutes until smooth and soft. If it feels sticky, lightly dust with flour.
- Cover the dough and let it rise for 1 hour or until doubled in size.
- Roll the dough into a large rectangle on a lightly floured surface.
- Spread the softened butter over the dough.
- Mix the brown sugar and cinnamon together, then sprinkle evenly over the butter.
- Roll the dough tightly into a log and cut into even slices.
- Arrange the rolls in a greased 9×13-inch tray. Leave a little space between them.
- Cover and let rise for another 30 minutes.
- Bake at 350°F (175°C) for 25–30 minutes until golden brown.
- While the rolls cool slightly, beat together the cream cheese, butter, powdered sugar, and milk until smooth.
- Spread the icing over the warm rolls before serving.
Helpful Tips
- Warm milk helps activate the yeast properly. It should feel warm, not hot.
- Don’t add too much extra flour while kneading, or the rolls may become dense.
- Slice the rolls with unflavored dental floss for neat cuts without squishing the dough.
- Slightly warm leftovers before serving for extra softness.
Optional Variations
- Add chopped pecans or walnuts to the filling.
- Use maple syrup in the icing for extra flavor.
- Add raisins for a classic cinnamon roll twist.
- Sprinkle extra cinnamon sugar over the icing.
6. Oreo Cookie Tray Bake
This Oreo cookie tray bake is rich, chocolatey, and packed with crunchy cookie pieces in every bite.
It has the soft, chewy texture of a cookie bar with the familiar cookies-and-cream flavor that so many people love.
It’s also one of the quickest recipes in this collection.
The batter comes together fast, and the crushed Oreos make it feel extra fun and indulgent without requiring complicated steps.
Why You’ll Love It
- Quick and easy to make
- Loaded with Oreo flavor
- Soft chewy texture
- Perfect for parties and kids’ treats
Ingredients
- 1 cup (225g) unsalted butter, softened
- 1 cup (200g) brown sugar
- ½ cup (100g) granulated sugar
- 2 large eggs
- 2 teaspoons vanilla extract
- 2 cups (250g) all-purpose flour
- ¼ cup (25g) cocoa powder
- 1 teaspoon baking soda
- ½ teaspoon salt
- 15 Oreo cookies, roughly crushed
- 1 cup (175g) chocolate chips
Instructions
- Preheat the oven to 350°F (175°C). Line a 9×13-inch tray with parchment paper.
- In a large bowl, beat the butter, brown sugar, and granulated sugar until creamy.
- Add the eggs and vanilla extract. Mix until smooth.
- Stir in the flour, cocoa powder, baking soda, and salt until a soft dough forms.
- Fold in the crushed Oreo cookies and chocolate chips.
- Press the dough evenly into the prepared tray. Gently press a few extra Oreo pieces on top for a nicer finish.
- Bake for 22–26 minutes until the edges are set, and the center looks slightly soft.
- Let the tray bake cool before slicing into bars.
Helpful Tips
- Don’t crush the Oreos too finely. Bigger chunks give better texture.
- Slightly underbaking keeps the bars soft and chewy.
- Use a sharp knife and wipe it clean between cuts for neat slices.
- Store leftovers in an airtight container to keep them soft.
Optional Variations
- Add white chocolate chips for extra sweetness.
- Drizzle melted chocolate over cooled bars.
- Mix in mini marshmallows for a cookies-and-cream twist.
- Use golden sandwich cookies for a different flavor variation.
7. Sticky Toffee Tray Bake
This sticky toffee tray bake is rich, soft, and packed with deep caramel flavor.
The sponge is made with softened dates, which give the cake its incredibly moist texture without making it overly sweet.
Once the warm toffee sauce soaks into the cake, every bite becomes soft, sticky, and comforting.
It’s the kind of dessert that feels extra special but is surprisingly simple to make.
Serve it warm for the best texture, especially with a scoop of vanilla ice cream on the side.
Why You’ll Love It
- Soft and extra moist sponge
- Rich buttery toffee flavor
- Great for family gatherings
- Easy to make ahead
Ingredients
For the Sponge
- 1 cup (175g) chopped dates
- 1 teaspoon baking soda
- 1 cup (240ml) boiling water
- ½ cup (115g) unsalted butter, softened
- ¾ cup (150g) brown sugar
- 2 large eggs
- 1 ½ cups (190g) all-purpose flour
- 1 teaspoon baking powder
- ½ teaspoon salt
- 1 teaspoon vanilla extract
For the Toffee Sauce
- ½ cup (115g) unsalted butter
- ¾ cup (150g) brown sugar
- 1 cup (240ml) heavy cream
- 1 teaspoon vanilla extract
Instructions
- Preheat your oven to 350°F (175°C). Grease and line a 9×13-inch tray.
- Place the chopped dates in a bowl. Pour over the boiling water and stir in the baking soda. Let the mixture sit for 10 minutes to soften.
- In a large bowl, beat the butter and brown sugar until creamy.
- Add the eggs one at a time, mixing well after each addition. Stir in the vanilla extract.
- Add the flour, baking powder, and salt. Mix gently.
- Stir in the softened date mixture. The batter will look soft and slightly loose, which is completely normal.
- Spread the batter evenly into the tray and bake for 30–35 minutes until the center springs back lightly when touched.
- While the cake bakes, make the sauce. In a saucepan over medium heat, melt the butter with the brown sugar. Stir in the cream and simmer gently for 3–4 minutes until smooth and glossy.
- Pour some of the warm sauce over the baked cake while it’s still warm. Let it soak in for a few minutes before serving.
- Serve extra sauce on the side.
Helpful Tips
- Don’t skip soaking the dates. This helps create the soft texture.
- Simmer the sauce gently instead of boiling it hard to keep it smooth.
- Warm leftovers slightly before serving for the best flavor and texture.
- The cake becomes even softer after resting for a few hours.
Optional Variations
- Add chopped walnuts or pecans to the batter.
- Serve with vanilla ice cream or whipped cream.
- Sprinkle a little sea salt into the sauce for a salted caramel flavor.
- Add a pinch of cinnamon for extra warmth.
8. Funfetti Vanilla Tray Bake
This funfetti vanilla tray bake is bright, cheerful, and perfect for celebrations.
The soft vanilla sponge is filled with colorful sprinkles that stay scattered throughout the cake, making every slice look fun and festive.
It’s a great option for birthdays, school parties, or anytime you want an easy cake that feels happy and homemade.
The tray bake style also makes decorating much simpler than layering a traditional cake.
Why You’ll Love It
- Soft fluffy vanilla cake
- Fun colorful sprinkles
- Easy party dessert
- Beginner-friendly recipe
Ingredients
For the Cake
- 1 cup (225g) unsalted butter, softened
- 1 ½ cups (300g) granulated sugar
- 4 large eggs
- 2 teaspoons vanilla extract
- 2 ½ cups (315g) all-purpose flour
- 2 teaspoons baking powder
- ½ teaspoon salt
- 1 cup (240ml) milk
- ¾ cup rainbow sprinkles
For the Frosting
- 1 cup (225g) unsalted butter, softened
- 3 cups (360g) powdered sugar
- 2 tablespoons milk
- 1 teaspoon vanilla extract
- Extra sprinkles for decorating
Instructions
- Preheat the oven to 350°F (175°C). Grease and line a 9×13-inch tray.
- In a large bowl, beat the butter and sugar until light and fluffy.
- Add the eggs one at a time, mixing well after each addition. Stir in the vanilla extract.
- Add the flour, baking powder, and salt. Pour in the milk and mix until smooth.
- Fold in the rainbow sprinkles gently to avoid the colors bleeding too much into the batter.
- Spread the batter evenly into the tray.
- Bake for 30–35 minutes until golden and fully baked through.
- Let the cake cool completely before frosting.
- For the frosting, beat the butter until creamy. Add the powdered sugar, milk, and vanilla extract. Beat until smooth and fluffy.
- Spread the frosting over the cooled cake and top with extra sprinkles.
Helpful Tips
- Use jimmies-style sprinkles for the best color results.
- Avoid overmixing once the sprinkles are added.
- Let the cake cool fully before frosting so the icing stays smooth.
- Use an offset spatula or the back of a spoon for easy frosting.
Optional Variations
- Use chocolate frosting instead of vanilla.
- Match the sprinkle colors to birthdays or holidays.
- Add white chocolate chips to the batter.
- Top with mini candies for extra fun.
9. Apple Crumble Tray Bake
This apple crumble tray bake combines soft buttery cake, cinnamon apples, and a crisp crumble topping in one easy dessert.
It has all the cozy flavors of a classic apple crumble, but in a simple sliceable tray bake form.
The apples become soft and sweet as they bake, while the crumb topping adds just the right crunch.
It’s especially delicious served warm with cream or ice cream.
Why You’ll Love It
- Warm cozy flavor
- Crunchy crumble topping
- Great for fall baking
- Delicious warm or cold
Ingredients
For the Cake Base
- 1 cup (225g) unsalted butter, softened
- 1 cup (200g) granulated sugar
- 3 large eggs
- 2 cups (250g) all-purpose flour
- 2 teaspoons baking powder
- ½ teaspoon cinnamon
- ½ cup (120ml) milk
For the Apple Layer
- 3 medium apples, peeled and sliced
- 2 tablespoons brown sugar
- 1 teaspoon cinnamon
For the Crumble Topping
- ¾ cup (95g) all-purpose flour
- ½ cup (100g) brown sugar
- ½ teaspoon cinnamon
- ⅓ cup (75g) cold butter, cubed
Instructions
- Preheat the oven to 350°F (175°C). Grease and line a 9×13-inch tray.
- In a large bowl, beat the butter and sugar until fluffy.
- Add the eggs one at a time.
- Stir in the flour, baking powder, cinnamon, and milk until smooth.
- Spread the batter evenly into the tray.
- Toss the sliced apples with brown sugar and cinnamon, then arrange them over the batter.
- In another bowl, rub the crumble ingredients together with your fingertips until crumbly.
- Sprinkle the crumble topping evenly over the apples.
- Bake for 35–40 minutes until golden and fully baked.
- Let cool slightly before slicing.
Helpful Tips
- Firm apples like Granny Smith or Honeycrisp work well.
- Keep the crumble butter cold for the best crunchy texture.
- Don’t slice the apples too thick or they may stay firm after baking.
- Warm slices slightly before serving for extra comfort.
Optional Variations
- Add oats to the crumble topping.
- Swap apples for pears.
- Drizzle caramel sauce over the top.
- Add chopped pecans for crunch.
10. Chocolate Chip Cookie Tray Bake
This chocolate chip cookie tray bake is everything people love about classic cookies, just baked in one easy pan.
The center stays soft and chewy while the edges turn lightly golden and slightly crisp.
It’s fast, simple, and perfect when you want homemade cookies without scooping individual dough balls.
Slice it into bars for parties, lunchboxes, or casual desserts.
Why You’ll Love It
- Quick and easy dessert
- Soft chewy texture
- Loaded with chocolate chips
- Perfect for sharing
Ingredients
- 1 cup (225g) unsalted butter, softened
- 1 cup (200g) brown sugar
- ½ cup (100g) granulated sugar
- 2 large eggs
- 2 teaspoons vanilla extract
- 2 ½ cups (315g) all-purpose flour
- 1 teaspoon baking soda
- ½ teaspoon salt
- 2 cups (350g) chocolate chips
Instructions
- Preheat the oven to 350°F (175°C). Line a 9×13-inch tray with parchment paper.
- In a large bowl, beat the butter, brown sugar, and granulated sugar until creamy.
- Add the eggs and vanilla extract. Mix until smooth.
- Stir in the flour, baking soda, and salt until a soft dough forms.
- Fold in the chocolate chips.
- Press the dough evenly into the prepared tray.
- Bake for 25–30 minutes until the edges are golden, and the center looks just set.
- Let the tray bake cool before slicing into bars.
Helpful Tips
- Slightly underbake for softer cookie bars.
- Press a few extra chocolate chips on top before baking for a bakery-style look.
- Let the bars cool fully before cutting for cleaner slices.
- Store in an airtight container to keep them chewy.
Optional Variations
- Add caramel pieces or toffee bits.
- Sprinkle flaky sea salt on top after baking.
- Mix in chopped nuts for extra texture.
- Use dark chocolate chunks for a richer flavor.
Tips for Perfect Tray Bakes
- Line your baking tray with parchment paper
This makes cleanup much easier and helps lift the tray bake out neatly without sticking or breaking apart. - Avoid overbaking
Tray bakes continue to firm up as they cool, so taking them out when the center is just set helps keep the texture soft and moist. - Let tray bakes cool before slicing
Cooling gives the dessert time to settle properly, which helps create cleaner slices and better texture. - Store leftovers properly
Keep tray bakes in an airtight container at room temperature or in the fridge, depending on the recipe, to help them stay fresh longer.
Final Thoughts
Tray bakes are one of the easiest ways to make homemade desserts without a lot of stress or cleanup.
With simple ingredients, easy steps, and plenty of flavor options, they’re perfect for both beginner bakers and anyone wanting a quick sweet treat.
Whether you’re craving rich chocolate, fresh fruit flavors, or soft buttery cakes, there’s a tray bake here for every occasion.
Don’t be afraid to try different toppings, fillings, and mix-ins to make each recipe your own.
If you give any of these tray bakes a try, share your favorite in the comments. Happy baking!
FAQs
What size tray is best for tray bakes?
A 9×13-inch tray is the most common size for tray bake recipes because it gives even baking and easy slicing. Smaller trays make thicker bakes, while larger trays create thinner layers and may bake faster.
Can tray bakes be frozen?
Yes, most tray bakes freeze very well. Let them cool completely, then store slices in an airtight container or freezer bag for up to 3 months. Thaw at room temperature before serving.
How do I keep tray bakes moist?
Avoid overbaking and measure ingredients carefully for the best texture. Storing tray bakes in an airtight container also helps keep them soft and fresh longer.
Can I make tray bakes ahead of time?
Absolutely. Many tray bakes taste even better the next day as the flavors settle. Bake them ahead, cool completely, and store covered until ready to serve.

Hi, I’m Sorenna Blythe, the baker and writer behind Mix Whisk Bake. I share simple, reliable recipes and honest kitchen moments to help home bakers bake with confidence and joy. When I’m not testing new treats, you’ll find me sipping coffee and dreaming up my next bake.