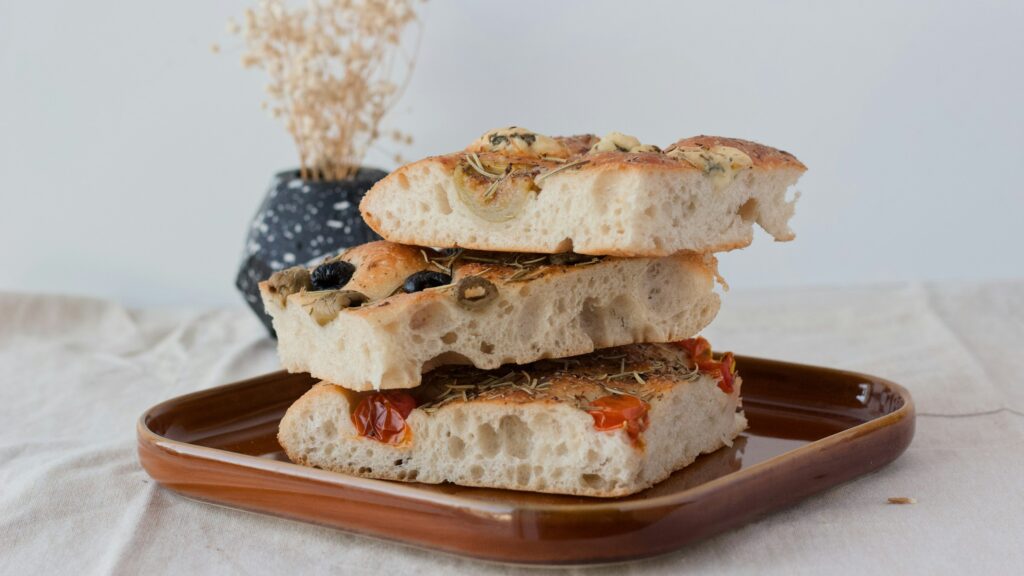
Focaccia bread is a classic Italian flatbread known for its golden crust, soft center, and rich olive oil flavor.
With its signature dimples and simple ingredients, it’s one of the most rewarding breads you can make at home.
While store-bought focaccia can be convenient, nothing compares to a freshly baked loaf straight from your own oven.
Homemade focaccia has a lighter texture, a crispier crust, and a flavor that’s hard to match.
The best part? You don’t need to be an experienced baker to make it.
This easy focaccia bread recipe walks you through each step with simple instructions and helpful tips along the way.
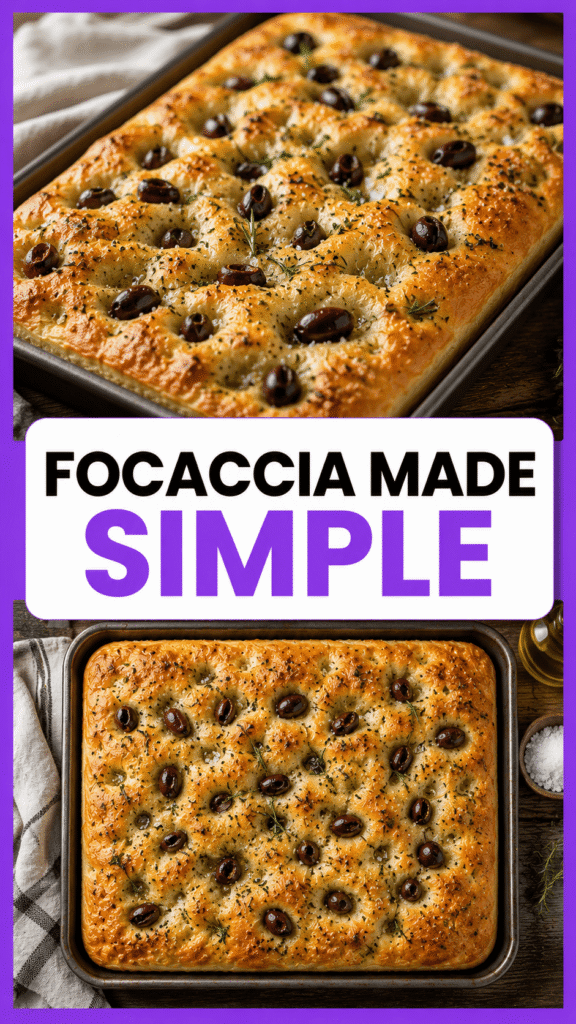
What Is Focaccia Bread?
Focaccia is a traditional Italian bread known for its soft, airy texture and golden, olive oil-rich crust.
It is often recognized by the small dimples pressed into the surface of the dough before baking.
These dimples help hold olive oil, herbs, and other toppings while creating the bread’s signature appearance.
Focaccia can be enjoyed as a side dish, sandwich bread, appetizer, or snack.
The Origins of Focaccia
Focaccia has a long history that dates back thousands of years.
Many food historians believe versions of focaccia were made by ancient civilizations before modern ovens even existed.
The bread originated in Italy, particularly in the coastal regions where olive oil was abundant and widely used in cooking.
The word “focaccia” comes from the Latin word focus, which means “hearth” or “fireplace.”
This name reflects how early versions of the bread were baked over hot stones or in the ashes of a fire.
Over time, different regions of Italy developed their own variations.
Some recipes feature rosemary and sea salt, while others include olives, onions, tomatoes, or local cheeses.
Despite these differences, the heart of focaccia remains the same: a simple dough enriched with olive oil and baked until golden and flavorful.
Today, focaccia is enjoyed worldwide and remains one of Italy’s most beloved breads.
How Focaccia Differs From Other Bread Types
At first glance, focaccia may look similar to pizza dough, but there are several important differences.
Focaccia contains more olive oil than many traditional bread recipes.
This extra oil helps create a crisp exterior while keeping the inside soft and tender.
The dough is also usually wetter than standard sandwich bread dough.
A wetter dough creates larger air pockets, giving focaccia its light and airy texture.
Unlike sandwich bread, focaccia is baked in a flat pan rather than a loaf pan.
The dough is spread out before baking, which gives it its characteristic flat shape.
The famous dimples pressed into the dough are another unique feature.
These small indentations help prevent large bubbles from forming while also creating pockets for olive oil and toppings.
Compared to crusty artisan breads, focaccia has a softer bite and a richer flavor thanks to the generous amount of olive oil used throughout the recipe.
Why Bakers Love Making Focaccia
Focaccia is one of the most beginner-friendly breads you can make at home.
The dough is forgiving and does not require advanced shaping techniques.
Even if your dough looks a little uneven, it will still bake into a beautiful loaf.
Many bakers also appreciate how versatile focaccia can be.
You can keep it simple with olive oil and sea salt or customize it with your favorite herbs, vegetables, cheeses, and seasonings.
The recipe uses basic pantry ingredients that are easy to find and affordable.
There is also something incredibly satisfying about pressing dimples into the dough before baking.
It is a simple step, but it gives the bread its classic appearance and helps build confidence for new bakers.
Perhaps the biggest reason people love making focaccia is the aroma that fills the kitchen as it bakes.
The combination of fresh bread, olive oil, and herbs creates a warm and inviting atmosphere that makes homemade baking feel truly rewarding.
Once you pull a golden pan of focaccia from the oven, it is easy to see why so many people come back to this recipe again and again.
Why You’ll Love This Focaccia Bread Recipe
- Crispy Golden Crust – A generous drizzle of olive oil helps create a beautifully crisp, golden exterior with plenty of flavor in every bite.
- Soft and Airy Interior – The dough bakes up light and fluffy with a tender crumb and the signature air pockets that make focaccia so satisfying.
- Simple Pantry Ingredients – This recipe uses basic ingredients like flour, yeast, water, olive oil, and salt that you may already have on hand.
- Beginner-Friendly Method – No special baking skills are required, making this a great recipe for first-time bread bakers.
- Highly Customizable Toppings – You can keep it classic with rosemary and sea salt or add your favorite herbs, vegetables, cheeses, and seasonings.
Ingredients You’ll Need
For the Dough
- 4 cups (500g) bread flour or all-purpose flour – Forms the base of the dough and gives the bread its structure.
- 1¾ cups (420ml) warm water – Helps hydrate the dough and activate the yeast.
- 2¼ teaspoons (7g or 1 packet) instant yeast – Allows the dough to rise and develop a light, airy texture.
- ¼ cup (60ml) olive oil – Adds flavor and helps create a soft crumb.
- 2 teaspoons salt – Enhances the flavor of the bread.
- 1 teaspoon sugar (optional) – Gives the yeast a small boost and can help with browning.
For the Topping
- 2 tablespoons extra virgin olive oil – Brushed over the dough before baking for a rich flavor and crisp crust.
- 1 teaspoon flaky sea salt – Adds texture and enhances the overall taste.
- 1 tablespoon fresh rosemary, chopped – Provides a classic focaccia flavor and aroma.
Optional Toppings
- ½ cup (75g) cherry tomatoes, halved – Adds freshness and a slight sweetness.
- 2 cloves garlic, thinly sliced – Brings extra savory flavor.
- ½ cup (75g) caramelized onions – Adds a rich, sweet depth of flavor.
- ¼ cup (25g) grated Parmesan cheese – Creates a delicious cheesy finish.
- ⅓ cup (50g) sliced olives – Adds a salty, Mediterranean-inspired touch.
- 1–2 tablespoons fresh herbs (such as thyme, oregano, basil, or parsley) – Adds color and additional flavor.
Essential Equipment
- Large Mixing Bowl – Provides enough space to mix the ingredients and allow the dough to rise comfortably.
- Measuring Cups and Spoons – Helps ensure accurate ingredient measurements for consistent results.
- 9×13-Inch Baking Pan – Gives the focaccia its classic thickness and shape while promoting even baking.
- Dough Scraper (Optional) – Makes it easier to handle sticky dough and transfer it to the baking pan.
- Cooling Rack – Allows air to circulate around the bread after baking, helping maintain a crisp crust.
How to Make Focaccia Bread
Step 1 – Activate the Yeast
Pour the warm water into a large mixing bowl.
Add the instant yeast and optional sugar to the water.
Stir gently until combined.
Let the mixture sit for 5 minutes.
If you are using active dry yeast instead of instant yeast, this resting time helps confirm that the yeast is active and ready to work.
You may notice a light layer of foam forming on the surface, which is a good sign that the yeast is alive.
Step 2 – Mix the Dough
Add the flour, salt, and olive oil to the bowl.
Mix everything together with a wooden spoon or spatula until no dry flour remains.
The dough will feel sticky and slightly wet.
This is exactly what you want for soft and airy focaccia.
Avoid adding extra flour unless the dough is extremely difficult to handle.
Cover the bowl and let the dough rest for 10 to 15 minutes to allow the flour to fully absorb the water.
Step 3 – First Rise
Cover the bowl with plastic wrap, a lid, or a clean kitchen towel.
Place it in a warm, draft-free spot.
Allow the dough to rise for about 1 to 2 hours.
The dough should roughly double in size.
This rising period gives the yeast time to create air pockets that make the bread light and fluffy.
If your kitchen is cool, the rise may take a little longer.
Be patient and let the dough guide the timing.
Step 4 – Transfer Dough to Pan
Generously coat a 9×13-inch baking pan with olive oil.
This step helps prevent sticking and contributes to a crisp, flavorful crust.
Gently transfer the risen dough into the prepared pan.
Try not to press out all of the air that has developed during the first rise.
Lightly stretch the dough toward the corners of the pan.
If it springs back and resists stretching, let it rest for 10 minutes before trying again.
Step 5 – Second Rise
Cover the pan loosely with plastic wrap or a clean towel.
Let the dough rise again for 30 to 45 minutes.
During this time, the dough will become puffier and fill more of the pan.
This second rise helps create the soft texture and airy crumb that focaccia is known for.
While the dough rises, preheat your oven to 425°F (220°C).
Step 6 – Create the Signature Dimples
Lightly coat your fingertips with olive oil.
Press your fingers gently into the surface of the dough.
Create small indentations across the entire pan.
Press firmly enough to reach close to the bottom of the dough without tearing it.
These dimples help hold the olive oil and toppings while giving the focaccia its classic appearance.
This is one of the most enjoyable parts of the process, so have fun with it.
Step 7 – Add Olive Oil and Toppings
Drizzle the extra virgin olive oil evenly over the dimpled dough.
Make sure some of the oil settles into the indentations.
Sprinkle the flaky sea salt across the surface.
Add the chopped rosemary and any additional toppings you would like to use.
Try to distribute toppings evenly so every slice gets plenty of flavor.
Simple toppings often produce the best results, so there is no need to overdo it.
Step 8 – Bake Until Golden Brown
Place the pan on the center rack of the preheated oven.
Bake for 20 to 25 minutes.
The focaccia is ready when the top is golden brown, and the edges look crisp.
Your kitchen will smell incredible as the bread bakes.
If the top is browning too quickly, loosely cover it with foil for the remaining baking time.
Step 9 – Cool and Serve
Remove the focaccia from the oven and let it rest in the pan for about 5 minutes.
Carefully transfer it to a cooling rack.
Allow it to cool slightly before slicing.
This short cooling period helps the texture settle and makes the bread easier to cut.
Serve warm on its own or alongside soups, salads, pasta dishes, or your favorite sandwich fillings.
Enjoy every bite of your homemade focaccia and take pride in what you’ve baked.
Tips for Perfect Focaccia Every Time
Use High-Quality Olive Oil
Olive oil is one of the main flavors in focaccia, so using a good-quality oil can make a noticeable difference.
Choose an extra virgin olive oil with a fresh, pleasant flavor rather than one that tastes stale or bitter.
Since olive oil is used in the dough, on the pan, and on top of the bread, its flavor carries through every bite.
You do not need the most expensive bottle on the shelf, but selecting a quality olive oil will help your focaccia taste richer and more authentic.
Don’t Skip the Second Rise
The second rise may seem like an easy step to shorten, but it plays an important role in the final texture.
This extra resting time allows the dough to become lighter and develop more air pockets.
Skipping it can lead to bread that feels dense and heavy.
A properly risen dough will look puffy and slightly expanded before it goes into the oven.
Giving the dough enough time to rise is one of the simplest ways to improve your results.
Keep the Dough Well Hydrated
Focaccia dough should be softer and stickier than many other bread doughs.
The higher amount of water helps create the airy texture and open crumb that make focaccia so appealing.
It can be tempting to add extra flour when the dough feels sticky.
Try to resist that urge whenever possible.
A slightly sticky dough is usually a sign that you are on the right track.
Using lightly oiled hands when handling the dough is often more helpful than adding additional flour.
Be Generous With the Dimples
The dimples are more than just a decorative feature.
They help distribute olive oil across the surface and create the classic look that focaccia is known for.
Press your fingertips firmly into the dough to create deep indentations across the entire pan.
Do not worry if the dough deflates slightly during this step.
The dough will puff back up as it bakes.
Creating plenty of dimples helps ensure every piece has great texture and flavor.
Avoid Overbaking
Focaccia should be golden brown on the outside while remaining soft and tender inside.
Leaving it in the oven for too long can dry out the bread and make it less enjoyable.
Start checking for doneness near the lower end of the recommended baking time.
Look for a deep golden color around the edges and a lightly browned top.
If you are unsure, it is usually better to remove the bread a minute early than a few minutes late.
The focaccia will continue to settle as it cools, giving you a soft interior and a perfectly crisp crust.
Common Focaccia Mistakes to Avoid
Using Water That Is Too Hot
Water temperature plays an important role in helping yeast do its job.
If the water is too hot, it can kill the yeast before the dough has a chance to rise.
When this happens, the dough may stay flat and dense no matter how long you wait.
Warm water should feel comfortably warm to the touch, not hot.
A temperature between 100°F and 110°F (38°C to 43°C) is usually ideal.
If you do not have a thermometer, test the water with your finger.
It should feel warm but never uncomfortable.
Starting with the right water temperature gives your dough the best chance of rising properly.
Adding Too Much Flour
One of the most common mistakes beginners make is adding extra flour to sticky focaccia dough.
Unlike many bread recipes, focaccia dough is supposed to be soft and somewhat sticky.
Adding too much flour can make the dough heavy and dry.
The finished bread may lose the airy texture that makes focaccia so enjoyable.
If the dough feels difficult to handle, lightly oil your hands instead of reaching for more flour.
A wetter dough may seem unusual at first, but it is one of the secrets to achieving a light and fluffy interior.
Trust the process and resist the temptation to keep adding flour.
Underproofing the Dough
Proofing simply means allowing the dough enough time to rise.
When dough is underproofed, it has not developed enough air pockets.
The result is bread that feels dense and lacks the soft texture that focaccia is known for.
A properly proofed dough should look noticeably larger and puffier than when it started.
Rising times can vary depending on the temperature of your kitchen.
Instead of watching the clock alone, pay attention to how the dough looks.
Giving the dough enough time to rise is one of the easiest ways to improve your final result.
Not Oiling the Pan Properly
Olive oil does more than prevent sticking.
It helps create the golden, slightly crisp bottom crust that makes focaccia so delicious.
Using too little oil can cause the bread to stick to the pan and make it harder to remove after baking.
A lightly coated pan is usually not enough for focaccia.
Be generous when greasing the pan with olive oil.
The oil helps the dough bake evenly while adding extra flavor to every slice.
A well-oiled pan can make a noticeable difference in both texture and appearance.
Baking at the Wrong Temperature
Oven temperature has a direct impact on how your focaccia turns out.
If the oven is too cool, the bread may bake unevenly and develop a pale crust.
If the oven is too hot, the outside can brown too quickly while the inside remains undercooked.
Preheating the oven fully before baking is an important step that should never be skipped.
Most focaccia recipes bake best at a relatively high temperature, which helps create a crisp exterior and soft interior.
If your oven tends to run hot or cold, an oven thermometer can be a helpful tool.
A properly heated oven gives your focaccia the best chance of baking up golden, airy, and full of flavor.
Delicious Focaccia Variations
One of the best things about focaccia is how easy it is to customize.
Once you master the basic recipe, you can experiment with different flavors and toppings to create something new every time you bake.
Rosemary and Sea Salt Focaccia
Rosemary and sea salt is the classic focaccia combination that many people know and love.
Fresh rosemary adds an earthy, fragrant flavor that pairs perfectly with olive oil.
Flaky sea salt enhances the taste of the bread without overpowering it.
This variation is simple, elegant, and works well with almost any meal.
Serve it alongside soups, pasta dishes, salads, or a charcuterie board.
If you are making focaccia for the first time, this is an excellent place to start.
Garlic Parmesan Focaccia
Garlic Parmesan focaccia is a flavorful option that always disappears quickly.
Thinly sliced or minced garlic adds a rich, savory taste throughout the bread.
A sprinkle of grated Parmesan creates a golden, slightly crisp topping as it bakes.
The combination of cheese, garlic, and olive oil produces a bold flavor that feels comforting and satisfying.
This variation is especially delicious served with pasta, marinara sauce, or a bowl of warm soup.
For even more flavor, add a small amount of chopped parsley after baking.
Tomato Basil Focaccia
Tomato basil focaccia brings fresh Mediterranean flavors to every bite.
Halved cherry tomatoes become soft and slightly sweet as they roast in the oven.
Fresh basil adds brightness and complements the tomatoes beautifully.
The juicy tomatoes also help keep the top of the bread moist and flavorful.
This variation looks beautiful when served and adds plenty of color to the table.
It is a wonderful choice for summer gatherings or light lunches.
Olive and Herb Focaccia
Olive and herb focaccia is perfect for anyone who enjoys bold, savory flavors.
Sliced green or black olives add a pleasant salty bite.
Fresh herbs such as oregano, thyme, or rosemary bring extra aroma and depth.
The combination creates a bread that feels rustic and full of character.
This variation pairs particularly well with cheeses, roasted vegetables, and Italian-inspired meals.
If you enjoy Mediterranean flavors, this version is worth trying.
Cheese-Stuffed Focaccia
Cheese-stuffed focaccia takes this bread to a whole new level.
Instead of placing all the toppings on the surface, a layer of cheese is tucked inside the dough.
Mozzarella works especially well because it melts beautifully and creates a soft, stretchy center.
To make this version, divide the dough into two layers and place the cheese between them before the second rise.
As the bread bakes, the cheese becomes warm and gooey inside.
This variation is ideal when you want something extra indulgent for family dinners, parties, or special occasions.
Once you try homemade cheese-stuffed focaccia, it may become one of your favorite versions of this classic Italian bread.
What to Serve With Focaccia Bread
- Soups and Stews – The soft interior and crisp crust make focaccia perfect for dipping into hearty soups and rich stews.
- Pasta Dishes – Serve focaccia alongside your favorite pasta recipes to soak up flavorful sauces and complete the meal.
- Charcuterie Boards – Focaccia pairs beautifully with cured meats, cheeses, olives, nuts, and fresh fruit.
- Salads – A slice of focaccia adds substance and flavor to fresh green salads, Caesar salads, and Mediterranean-style salads.
- Sandwiches – Use focaccia as sandwich bread for a delicious combination of crispy edges and a soft, chewy center.
How to Store Focaccia Bread
Room Temperature Storage
Fresh focaccia is best enjoyed within the first day or two after baking.
Once the bread has cooled completely, store it in an airtight container, resealable bag, or wrap it tightly in plastic wrap.
Keeping air away from the bread helps prevent it from drying out.
Store the focaccia at room temperature in a cool, dry place away from direct sunlight.
Properly stored focaccia will usually stay fresh for up to 2 days.
If your kitchen is particularly warm, check the bread regularly to ensure it remains fresh.
Refrigeration Tips
Refrigeration is generally not the best option for focaccia.
Cold temperatures can cause bread to become stale more quickly.
If you need to store focaccia for more than a couple of days, refrigeration can be used as a short-term solution.
Wrap the bread tightly or place it in an airtight container before refrigerating.
This helps reduce moisture loss and prevents the bread from absorbing odors from other foods.
Allow refrigerated focaccia to come to room temperature before serving or reheating.
A quick warm-up in the oven can also help restore some of its original texture.
Freezing Instructions
Freezing is the best way to store focaccia for longer periods.
Once the bread has cooled completely, cut it into individual portions if desired.
Wrapping smaller portions separately makes it easier to thaw only what you need.
Wrap each piece tightly in plastic wrap and then place it inside a freezer-safe bag or container.
This extra layer of protection helps prevent freezer burn.
Properly stored focaccia can maintain good quality in the freezer for up to 3 months.
Labeling the package with the date can help you keep track of freshness.
Reheating for Best Texture
Reheating focaccia is an easy way to bring back its soft interior and crisp crust.
For the best results, warm the bread in a 350°F (175°C) oven for 5 to 10 minutes.
The gentle heat helps refresh the texture without drying out the bread.
If the bread was frozen, allow it to thaw before reheating.
Avoid microwaving focaccia whenever possible.
While it will warm the bread quickly, it can also make the texture chewy or rubbery.
A few minutes in the oven can make leftover focaccia taste surprisingly close to freshly baked.
Can You Make Focaccia Dough Ahead of Time?
Yes, focaccia dough can be made ahead of time, and many bakers find that this method produces even better results.
The easiest approach is the overnight refrigerator method, where the dough is mixed, covered tightly, and placed in the refrigerator after the initial mixing stage.
As the dough rests in the refrigerator, it continues to rise slowly, which is known as slow fermentation.
This extended resting period allows the yeast more time to develop flavor, resulting in bread that tastes richer and more complex than dough that rises quickly at room temperature.
Slow fermentation can also improve the texture of the finished focaccia by creating a lighter crumb and more distinct air pockets throughout the bread.
Many bakers appreciate this method because it breaks the recipe into manageable steps and reduces preparation time on baking day.
When you are ready to bake, remove the dough from the refrigerator and let it sit at room temperature for about 30 to 60 minutes.
This helps take the chill off the dough and makes it easier to stretch into the baking pan.
Once the dough has relaxed, transfer it to the oiled pan, gently spread it out, and continue with the second rise as directed in the recipe.
After the dough becomes puffy, create the signature dimples, add your olive oil and toppings, and bake as usual.
Making focaccia dough ahead of time is a simple way to fit homemade bread into a busy schedule while often improving both flavor and texture.
If you enjoy planning ahead, this method is well worth trying and may quickly become your preferred way to make focaccia.
Final Thoughts
This focaccia bread recipe works because it combines simple ingredients, easy techniques, and plenty of flavor to create a bread that looks impressive without being difficult to make.
If you’re new to bread baking, don’t be afraid to give it a try because focaccia is one of the most forgiving and rewarding breads for beginners.
Once you’ve mastered the basic recipe, have fun experimenting with different herbs, cheeses, vegetables, and toppings to make it your own.
Every batch is an opportunity to discover a new favorite combination and build confidence in the kitchen.
FAQs
What flour is best for focaccia bread?
Bread flour is often the best choice because it creates a chewier texture and stronger structure, but all-purpose flour also works well and produces delicious results.
Why is my focaccia dense instead of airy?
Dense focaccia is usually caused by underproofing, using too much flour, or not allowing the dough enough time to rise and develop air pockets.
Can I make focaccia without a stand mixer?
Yes, focaccia can easily be mixed by hand with a spoon or spatula since the dough does not require extensive kneading.
How do I know when focaccia is fully baked?
Focaccia is done when the top is golden brown, the edges are crisp, and the bottom sounds slightly hollow when tapped.
Can I freeze homemade focaccia?
Yes, focaccia freezes well for up to 3 months when wrapped tightly and stored in a freezer-safe container or bag.
What toppings work best on focaccia bread?
Popular toppings include rosemary, sea salt, garlic, cherry tomatoes, olives, caramelized onions, Parmesan cheese, and fresh herbs.
Why do you dimple focaccia dough?
Dimples help distribute olive oil across the surface, prevent large air bubbles from forming, and create focaccia’s signature appearance.
Is focaccia bread vegan?
Most traditional focaccia recipes are naturally vegan because they are made with flour, water, yeast, olive oil, and salt, but always check additional toppings for non-vegan ingredients.
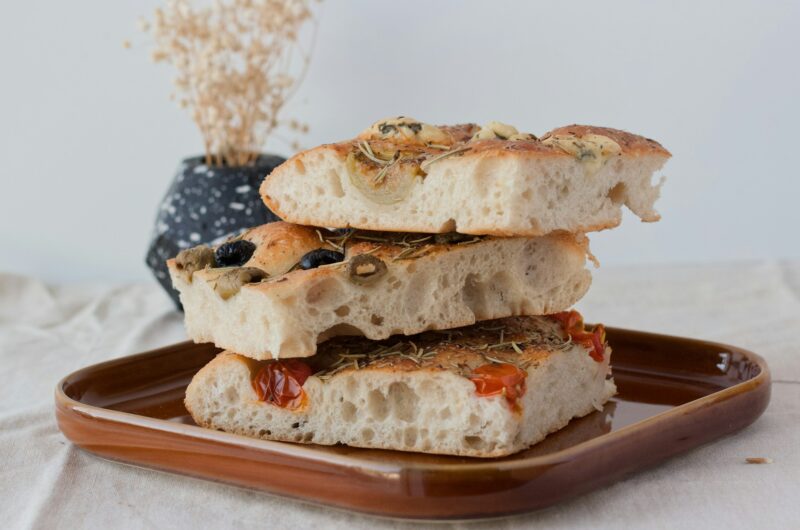
Focaccia Bread Recipe: Easy Homemade Italian Bread
Cuisine: ItalianDifficulty: Easy12
Slices15
minutes25
minutes2
hours40
minutesThis easy homemade focaccia bread is soft, airy, and full of flavor with a golden crust, olive oil, rosemary, and flaky sea salt.
Ingredients
4 cups (500g) bread flour or all-purpose flour
1¾ cups (420ml) warm water
2¼ teaspoons instant yeast
¼ cup (60ml) olive oil
2 teaspoons salt
1 teaspoon sugar (optional)
2 tablespoons extra virgin olive oil (for topping)
1 tablespoon fresh rosemary, chopped
1 teaspoon flaky sea salt
Directions
- Mix the warm water, yeast, and sugar in a large bowl.
- Add the flour, salt, and olive oil, then mix until a sticky dough forms.
- Cover and let the dough rise for 1 to 2 hours, or until doubled in size.
- Transfer the dough to a well-oiled 9×13-inch baking pan and gently spread it out.
- Let the dough rise again for 30 to 45 minutes.
- Dimple the dough with your fingertips, then drizzle with olive oil and sprinkle with rosemary and sea salt.
- Bake at 425°F (220°C) for 20 to 25 minutes, or until golden brown.
- Cool slightly, slice, and serve.
Notes
- A sticky dough creates the best light and airy texture.
- For extra flavor, refrigerate the dough overnight before baking.
- Store leftovers in an airtight container for up to 2 days or freeze for up to 3 months.


Hi, I’m Sorenna Blythe, the baker and writer behind Mix Whisk Bake. I share simple, reliable recipes and honest kitchen moments to help home bakers bake with confidence and joy. When I’m not testing new treats, you’ll find me sipping coffee and dreaming up my next bake.


