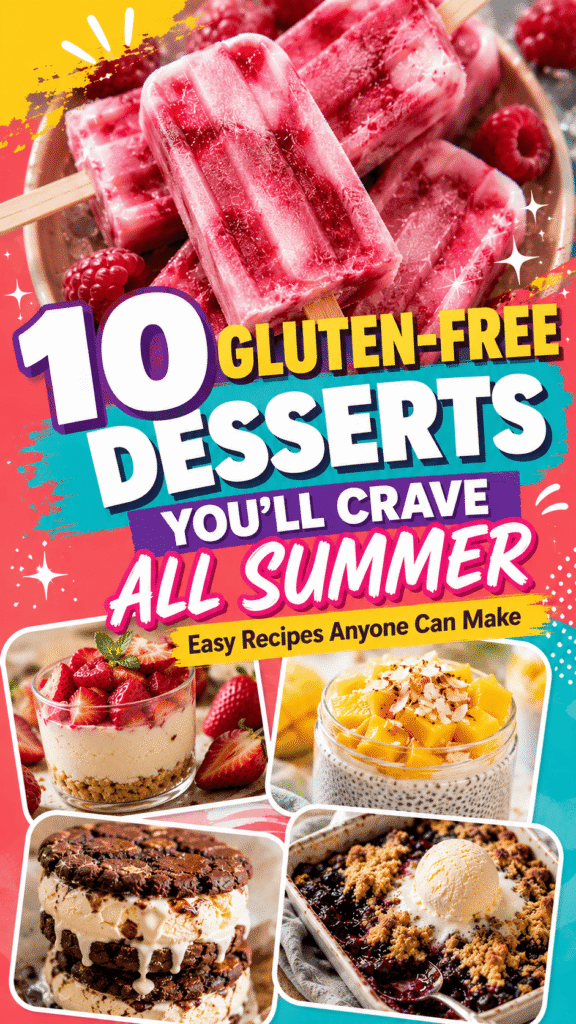
Summer desserts should be simple, refreshing, and easy to enjoy on warm days.
That’s exactly what you’ll find here.
These gluten-free desserts are light, creamy, fruity, and full of flavor without needing complicated ingredients or extra work.
From frozen desserts to fresh fruit favorites, every recipe is easy to follow and perfect for beginners too.
Grab your ingredients, have fun with it, and enjoy every bite of summer.

1. No-Bake Strawberry Cheesecake Cups
Why You’ll Love It
These strawberry cheesecake cups are cool, creamy, and packed with fresh berry flavor.
Since they’re completely no-bake, they’re perfect for hot summer days when you don’t want to turn on the oven.
They also look beautiful served in small glasses or jars, making them great for parties, BBQs, and family desserts.
Ingredients
For the Crust
- 1 ½ cups gluten-free graham cracker crumbs
- 4 tablespoons melted butter
- 2 tablespoons brown sugar
For the Cheesecake Filling
- 8 ounces cream cheese, softened
- 1 cup heavy whipping cream
- ⅓ cup powdered sugar
- 1 teaspoon vanilla extract
For the Strawberry Layer
- 2 cups fresh strawberries, chopped
- 2 tablespoons sugar
- 1 teaspoon lemon juice
Instructions
Step 1: Prepare the Strawberry Mixture
Add the chopped strawberries, sugar, and lemon juice to a bowl. Stir well and let the mixture sit for about 15 minutes. This helps the strawberries release their juices and creates a sweeter topping.
Step 2: Make the Crust
In a medium bowl, mix the gluten-free graham cracker crumbs, melted butter, and brown sugar until the crumbs look evenly coated.
Spoon a few tablespoons into the bottom of each dessert cup and lightly press down.
Step 3: Make the Cheesecake Filling
In a large bowl, beat the cream cheese, powdered sugar, and vanilla until smooth and creamy.
In a separate bowl, whip the heavy cream until stiff peaks form. Gently fold the whipped cream into the cream cheese mixture until fully combined.
Step 4: Assemble the Cups
Layer the cheesecake filling over the crust, then add a spoonful of strawberries. Repeat the layers if desired.
Chill the cups in the refrigerator for at least 2 hours before serving.
Optional Variations
Blueberry Topping
Swap the strawberries for fresh blueberries mixed with a little sugar and lemon juice.
Chocolate Drizzle
Drizzle melted chocolate over the top before serving for a richer dessert.
Dairy-Free Option
Use dairy-free cream cheese, coconut cream, and vegan butter for an easy dairy-free version.
2. Gluten-Free Lemon Bars
Why You’ll Love It
These lemon bars are bright, buttery, and full of fresh citrus flavor.
The soft crust pairs perfectly with the creamy lemon filling, creating a dessert that feels light but still satisfying.
Ingredients
For the Crust
- 1 cup gluten-free all-purpose flour
- ¼ cup powdered sugar
- ½ cup cold butter, cubed
- ¼ teaspoon salt
For the Lemon Filling
- 3 large eggs
- 1 cup granulated sugar
- 2 tablespoons gluten-free flour
- ½ cup fresh lemon juice
- 1 tablespoon lemon zest
For Topping
- Powdered sugar for dusting
Instructions
Step 1: Prepare the Pan
Preheat your oven to 350°F (175°C). Line an 8×8-inch baking pan with parchment paper.
Step 2: Make the Crust
In a mixing bowl, combine the gluten-free flour, powdered sugar, and salt. Cut in the cold butter using a fork or pastry cutter until crumbly.
Press the mixture firmly into the prepared pan.
Bake for 15 minutes or until lightly golden.
Step 3: Make the Filling
While the crust bakes, whisk together the eggs, sugar, gluten-free flour, lemon juice, and lemon zest until smooth.
Pour the filling over the warm crust.
Step 4: Bake
Bake for 18–22 minutes or until the center is set.
Let the bars cool completely before chilling in the refrigerator for at least 1 hour.
Dust with powdered sugar before slicing.
Tips For Success
Use Fresh Lemon Juice
Fresh lemons give the bars a brighter and fresher flavor than bottled juice.
Chill Before Cutting
Cold lemon bars slice more cleanly and hold their shape better.
Don’t Overbake
The center should still have a slight jiggle when removed from the oven.
3. Watermelon Berry Fruit Pizza
Why You’ll Love It
This fruit pizza is colorful, juicy, and incredibly refreshing on hot summer days.
It’s naturally gluten-free, easy to customize, and fun for both kids and adults to decorate.
Ingredients
- 1 large round watermelon slice
- ½ cup strawberries, sliced
- ½ cup blueberries
- ½ cup raspberries
- ½ cup blackberries
- ½ cup vanilla Greek yogurt
- 1 tablespoon honey
Instructions
Step 1: Prepare the Watermelon Base
Cut a large round slice of watermelon about 1 to 1½ inches thick. Pat the surface dry with paper towels to remove excess moisture.
Step 2: Add the Yogurt Layer
Spread the vanilla Greek yogurt evenly over the watermelon slice, leaving a small border around the edges.
Step 3: Decorate With Fruit
Arrange the strawberries, blueberries, raspberries, and blackberries on top in any pattern you like.
Step 4: Finish and Serve
Drizzle honey over the top just before serving.
Slice into wedges like a pizza and enjoy immediately.
Decoration Ideas
Mint Leaves
Add fresh mint for extra freshness and color.
Coconut Flakes
Sprinkle shredded coconut on top for a tropical twist.
Honey Drizzle
A light drizzle of honey adds extra sweetness and shine.
4. Frozen Chocolate Banana Pops
Why You’ll Love It
These frozen banana pops are cold, creamy, and coated in rich chocolate.
They’re easy to make with just a few simple ingredients and are perfect for kids, parties, or quick summer snacks.
Ingredients
- 3 ripe bananas
- 1 ½ cups semi-sweet chocolate chips
- 1 tablespoon coconut oil
- 6 popsicle sticks
Instructions
Step 1: Prepare the Bananas
Peel the bananas and cut each one in half. Insert a popsicle stick into the flat end of each banana piece.
Place the bananas on a parchment-lined tray and freeze for about 1 hour.
Step 2: Melt the Chocolate
Add the chocolate chips and coconut oil to a microwave-safe bowl. Heat in 20-second intervals, stirring between each, until smooth.
Step 3: Dip the Bananas
Dip each frozen banana into the melted chocolate and gently turn to coat evenly.
Let the extra chocolate drip off before placing the banana back onto the tray.
Step 4: Add Toppings
Immediately sprinkle on your favorite toppings before the chocolate hardens.
Freeze for another 30 minutes before serving.
Topping Ideas
Crushed Nuts
Chopped peanuts, almonds, or pecans add crunch and flavor.
Sprinkles
Colorful sprinkles make these extra fun for kids and parties.
Shredded Coconut
Unsweetened coconut adds a light tropical flavor.
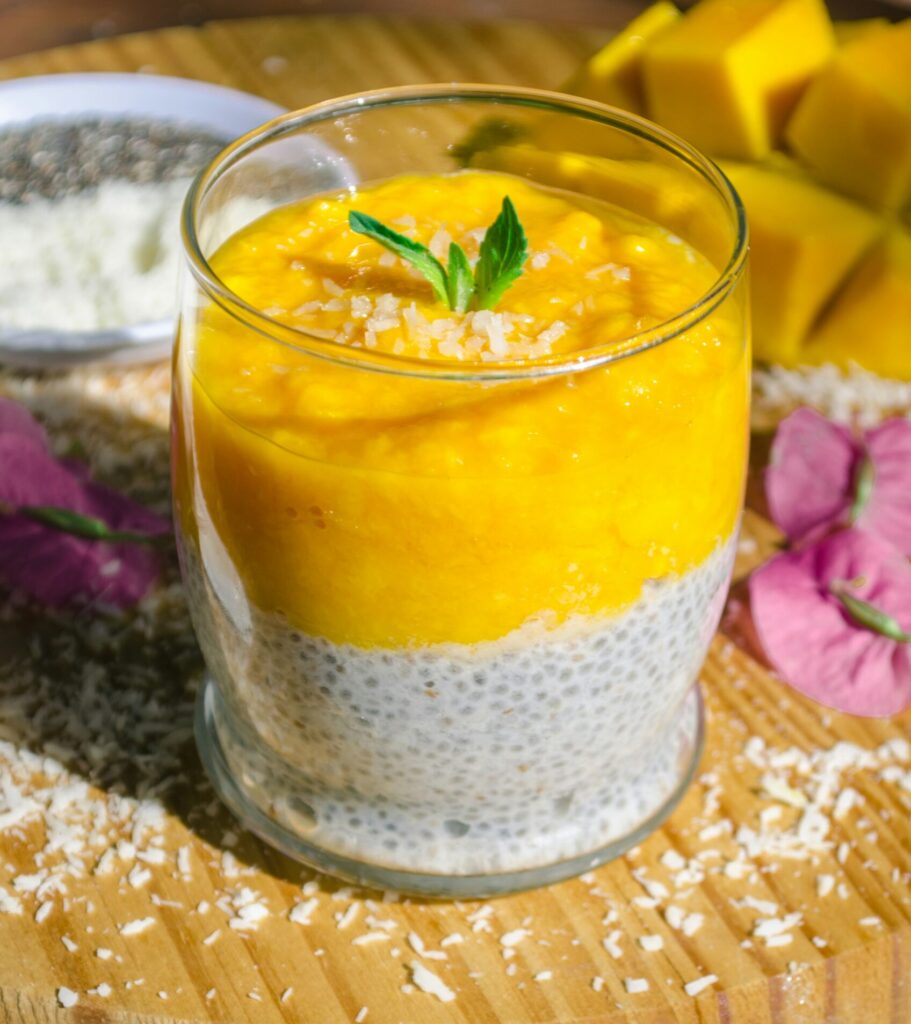
5. Coconut Mango Chia Pudding
Why You’ll Love It
This chia pudding is creamy, refreshing, and packed with tropical mango flavor.
It’s light enough for hot days but still filling enough to enjoy as a snack or dessert.
Ingredients
- 1 cup canned coconut milk
- ¼ cup chia seeds
- 2 tablespoons maple syrup or honey
- 1 teaspoon vanilla extract
- 1 large ripe mango, diced
- Toasted coconut flakes for topping
Instructions
Step 1: Mix the Chia Pudding
In a medium bowl, whisk together the coconut milk, chia seeds, maple syrup, and vanilla extract.
Let the mixture sit for 5 minutes, then stir again to prevent clumping.
Step 2: Chill
Cover and refrigerate for at least 4 hours or overnight until thick and pudding-like.
Step 3: Assemble
Spoon the chia pudding into serving glasses and top with diced mango.
Finish with toasted coconut flakes before serving.
Storage Tips
Refrigerate Properly
Store the pudding in an airtight container in the refrigerator for up to 4 days.
Add Fruit Before Serving
For the freshest texture, add the mango just before serving.
Stir Before Eating
If the pudding thickens too much after chilling, stir in a splash of coconut milk.
6. Gluten-Free Peach Crisp
Why You’ll Love It
This peach crisp is warm, cozy, and filled with juicy summer peaches.
The crisp oat topping adds the perfect crunch, especially when served with cold vanilla ice cream.
Ingredients
For the Peach Filling
- 6 cups fresh peaches, sliced
- ⅓ cup brown sugar
- 1 tablespoon cornstarch
- 1 teaspoon vanilla extract
- 1 teaspoon cinnamon
- 1 tablespoon lemon juice
For the Crisp Topping
- 1 cup certified gluten-free rolled oats
- ¾ cup gluten-free all-purpose flour
- ½ cup brown sugar
- ½ teaspoon cinnamon
- ½ cup cold butter, cubed
Instructions
Step 1: Prepare the Filling
Preheat the oven to 350°F (175°C).
Add the sliced peaches, brown sugar, cornstarch, vanilla, cinnamon, and lemon juice to a large bowl. Toss until evenly coated.
Pour the mixture into a greased baking dish.
Step 2: Make the Topping
In another bowl, combine the oats, gluten-free flour, brown sugar, and cinnamon.
Cut in the cold butter using a fork or pastry cutter until crumbly.
Sprinkle the topping evenly over the peaches.
Step 3: Bake
Bake for 35–40 minutes or until the topping is golden brown and the peach filling is bubbling around the edges.
Let cool slightly before serving.
Expert Tips
Best Peaches To Use
Fresh ripe peaches work best because they become soft and juicy while baking. Yellow peaches usually give the sweetest flavor.
How To Keep Topping Crisp
Use cold butter and avoid covering the crisp while it cools. This helps the topping stay crunchy instead of soft.
7. Raspberry Yogurt Popsicles
Why You’ll Love It
These raspberry yogurt popsicles are creamy, fruity, and incredibly refreshing on warm summer days.
They’re naturally gluten-free, easy to make, and perfect to keep in the freezer for quick treats.
Ingredients
- 2 cups fresh or frozen raspberries
- 1 ½ cups vanilla Greek yogurt
- 3 tablespoons honey
- 1 teaspoon vanilla extract
Instructions
Step 1: Blend the Raspberry Mixture
Add the raspberries, honey, and vanilla extract to a blender. Blend until mostly smooth.
For a smoother popsicle, strain the mixture through a fine mesh sieve to remove the seeds.
Step 2: Mix With Yogurt
In a bowl, gently stir the raspberry mixture into the Greek yogurt. Leave a few swirls for a marbled look if desired.
Step 3: Fill the Molds
Pour the mixture into popsicle molds and insert sticks.
Freeze for at least 5 hours or until fully firm.
Step 4: Serve
Run warm water over the outside of the molds for a few seconds to help release the popsicles.
Flavor Variations
Mixed Berry
Use a combination of raspberries, blueberries, and strawberries.
Strawberry Vanilla
Swap the raspberries for fresh strawberries and add extra vanilla.
Mango Yogurt
Use diced mango blended with yogurt for a tropical version.
8. Key Lime Pie Parfaits
Why You’ll Love It
These parfaits are creamy, tangy, and packed with fresh lime flavor.
They’re simple to assemble and look beautiful served in small glasses for parties or summer dinners.
Ingredients
For the Filling
- 8 ounces cream cheese, softened
- 1 cup sweetened condensed milk
- ⅓ cup key lime juice
- 1 teaspoon lime zest
- 1 cup whipped cream
For the Layers
- 1 ½ cups gluten-free graham cracker crumbs
- 2 tablespoons melted butter
Optional Garnish
- Lime slices
- Extra whipped cream
Instructions
Step 1: Prepare the Crumb Layer
In a small bowl, combine the gluten-free graham cracker crumbs and melted butter.
Step 2: Make the Lime Filling
In a large bowl, beat the cream cheese until smooth.
Add the sweetened condensed milk, key lime juice, and lime zest. Mix until creamy.
Fold in the whipped cream gently until combined.
Step 3: Assemble the Parfaits
Spoon a layer of crumbs into serving glasses, followed by the lime filling.
Repeat the layers until the glasses are full.
Step 4: Chill
Refrigerate for at least 2 hours before serving.
Top with whipped cream or lime slices if desired.
Serving Suggestions
Serve Chilled
These parfaits taste best cold straight from the refrigerator.
Add Fresh Fruit
Top with berries or sliced kiwi for extra color and flavor.
Use Small Dessert Glasses
Clear glasses help show off the pretty layers.
9. Flourless Chocolate Ice Cream Sandwiches
Why You’ll Love It
These ice cream sandwiches are rich, chewy, and full of chocolate flavor.
The flourless cookies stay soft even after freezing, making them perfect for creamy ice cream filling.
Ingredients
For the Cookies
- 2 cups powdered sugar
- ¾ cup cocoa powder
- 2 large egg whites
- 1 teaspoon vanilla extract
- ¼ teaspoon salt
For the Filling
- 1 pint vanilla ice cream, slightly softened
Instructions
Step 1: Prepare the Cookies
Preheat the oven to 350°F (175°C). Line baking sheets with parchment paper.
In a bowl, mix the powdered sugar, cocoa powder, and salt.
Add the egg whites and vanilla extract. Stir until a thick batter forms.
Step 2: Bake
Scoop small spoonfuls of batter onto the baking sheet, spacing them apart.
Bake for 10–12 minutes. The cookies should look shiny with slightly cracked tops.
Cool completely before assembling.
Step 3: Assemble the Sandwiches
Spread or scoop softened ice cream onto the flat side of one cookie.
Top with another cookie and gently press together.
Step 4: Freeze
Freeze the sandwiches for at least 2 hours before serving.
Make-Ahead Tips
Freeze Individually
Wrap each sandwich in plastic wrap to keep them fresh.
Let Them Soften Slightly
Allow the sandwiches to sit at room temperature for 2–3 minutes before eating for the best texture.
Try Different Ice Cream Flavors
Chocolate, strawberry, or mint chip all work well here.
10. Gluten-Free Blueberry Cobbler
Why You’ll Love It
This blueberry cobbler is packed with juicy berries and topped with a soft golden crust.
It’s cozy enough for cool summer evenings but still light and fruity enough for warm weather.
Ingredients
For the Blueberry Filling
- 5 cups fresh blueberries
- ½ cup granulated sugar
- 1 tablespoon cornstarch
- 1 tablespoon lemon juice
- 1 teaspoon vanilla extract
For the Cobbler Topping
- 1 cup gluten-free all-purpose flour
- ¼ cup granulated sugar
- 1 teaspoon baking powder
- ¼ teaspoon salt
- ½ cup milk
- 4 tablespoons melted butter
Instructions
Step 1: Prepare the Filling
Preheat the oven to 350°F (175°C).
In a bowl, mix the blueberries, sugar, cornstarch, lemon juice, and vanilla extract.
Pour the mixture into a greased baking dish.
Step 2: Make the Topping
In another bowl, whisk together the gluten-free flour, sugar, baking powder, and salt.
Stir in the milk and melted butter until combined.
Drop spoonfuls of the batter over the blueberry filling.
Step 3: Bake
Bake for 35–40 minutes or until the topping is golden brown and the berries are bubbling.
Allow the cobbler to cool slightly before serving.
Optional Add-Ins
Lemon Zest
Add 1 teaspoon of lemon zest for a brighter flavor.
Cinnamon
Mix a small pinch of cinnamon into the topping for warmth.
Vanilla Ice Cream
Serve warm cobbler with a scoop of vanilla ice cream for the perfect summer dessert.
Tips For Making Gluten-Free Desserts
Making gluten-free desserts at home can feel intimidating at first, especially if you’re new to gluten-free baking.
The good news is that it’s often much simpler than people expect.
With a few smart ingredient choices and easy kitchen habits, you can make desserts that taste just as delicious, soft, creamy, and satisfying as traditional versions.
Summer desserts are also one of the easiest places to start.
Many chilled desserts, fruit-based treats, and frozen recipes naturally work well without gluten, which means less stress and more room to have fun in the kitchen.
Choose Certified Gluten-Free Ingredients
Not every ingredient that looks gluten-free is completely safe for people avoiding gluten.
Some products can be processed in facilities where cross-contact happens, especially oats, baking mixes, and packaged toppings.
When shopping, look for labels that clearly say “Certified Gluten-Free.” This is especially important for:
- Rolled oats
- Graham crackers
- Baking powder
- Chocolate chips
- Sprinkles
- Cookie crumbs
Using certified products helps give you peace of mind and keeps your desserts safe for guests or family members with gluten sensitivities.
If you’re baking for beginners or kids, don’t overcomplicate the ingredient list.
Simple recipes using fruit, yogurt, cream cheese, chocolate, and gluten-free flour blends are often the easiest and most reliable.
Prevent Cross-Contamination
Even if your ingredients are gluten-free, crumbs and leftover flour from other foods can still cause problems.
A few quick kitchen habits can make a big difference.
Wash mixing bowls, baking pans, measuring cups, and utensils well before starting.
If you regularly bake with wheat flour, wipe down counters carefully too. Flour dust can stay behind longer than you might think.
Using parchment paper in baking pans is another easy trick. It keeps desserts cleaner and also makes cleanup faster.
If you’re serving guests with gluten allergies or sensitivities, it helps to keep gluten-free desserts on separate plates or trays during parties and gatherings.
Keep Desserts Light For Summer
Summer desserts taste best when they feel cool, fresh, and easy to enjoy after a warm day.
Heavy desserts can sometimes feel too rich in hot weather, so lighter ingredients work beautifully here.
Fresh fruit is one of the easiest ways to add natural sweetness and bright flavor.
Strawberries, peaches, blueberries, raspberries, watermelon, lemons, and mangoes all work especially well in summer desserts.
Citrus flavors like lemon and lime also help desserts taste lighter and more refreshing. Even a little zest can make a big difference.
For creamy desserts, ingredients like yogurt, whipped cream, coconut milk, and chilled cheesecake fillings create a rich texture without feeling overly heavy.
Keeping desserts cold before serving also improves both flavor and texture, especially for puddings, parfaits, popsicles, and no-bake treats.
Most importantly, don’t worry about making everything perfect.
Gluten-free desserts are meant to be fun, colorful, and easy to share.
Start simple, follow the recipes step by step, and enjoy the process along the way.
Recommended Tools
- Popsicle Molds – Perfect for making homemade frozen desserts like yogurt popsicles and fruit pops with easy cleanup.
- Glass Dessert Cups – Great for serving layered desserts like parfaits and cheesecake cups while showing off the beautiful layers.
- Mixing Bowls – Helpful for preparing fillings, batters, toppings, and fruit mixtures quickly and easily.
- 8×8 Baking Pan – The ideal size for baking desserts like lemon bars, cobblers, and fruit crisps.
- Hand Mixer – Makes it easier to whip cream, blend cheesecake fillings, and create smooth dessert mixtures.
Final Thoughts
Gluten-free summer desserts can be simple, refreshing, and full of flavor without needing complicated ingredients or extra work.
From fruity frozen treats to creamy no-bake desserts, there’s something here for every warm-weather craving.
Try a few recipes throughout the season and have fun making them your own with different fruits and toppings.
FAQs
What desserts are naturally gluten-free?
Fruit-based desserts, puddings, flourless chocolate desserts, and many frozen treats are naturally gluten-free.
Can I make these desserts dairy-free too?
Yes. Many recipes can be adapted using coconut milk, dairy-free yogurt, or vegan cream cheese.
What gluten-free flour works best for desserts?
1-to-1 gluten-free baking flour blends are usually the easiest and most reliable option for beginners.
How do I store gluten-free summer desserts?
Most chilled desserts should be stored in airtight containers in the refrigerator until ready to serve.

Hi, I’m Sorenna Blythe, the baker and writer behind Mix Whisk Bake. I share simple, reliable recipes and honest kitchen moments to help home bakers bake with confidence and joy. When I’m not testing new treats, you’ll find me sipping coffee and dreaming up my next bake.