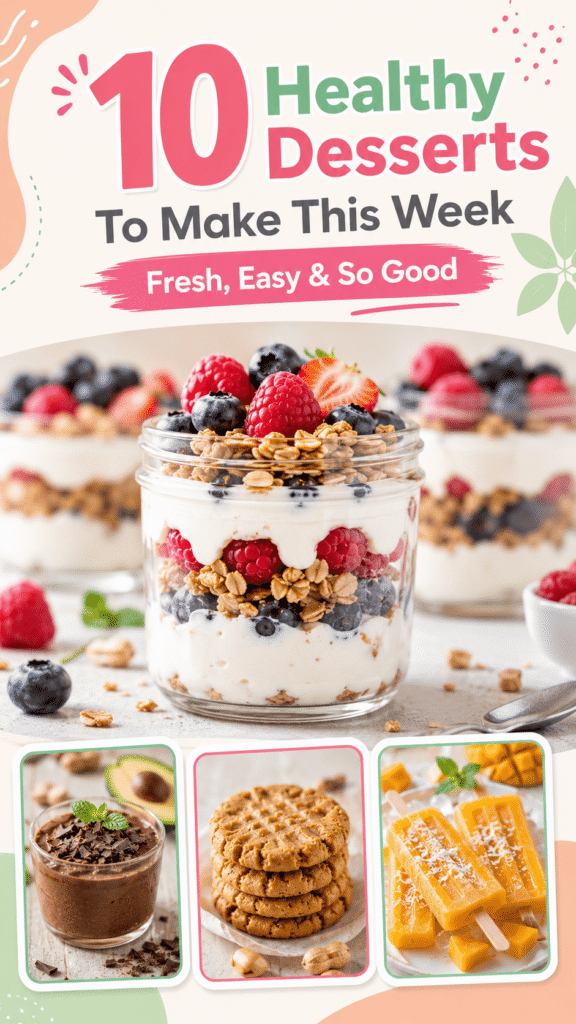
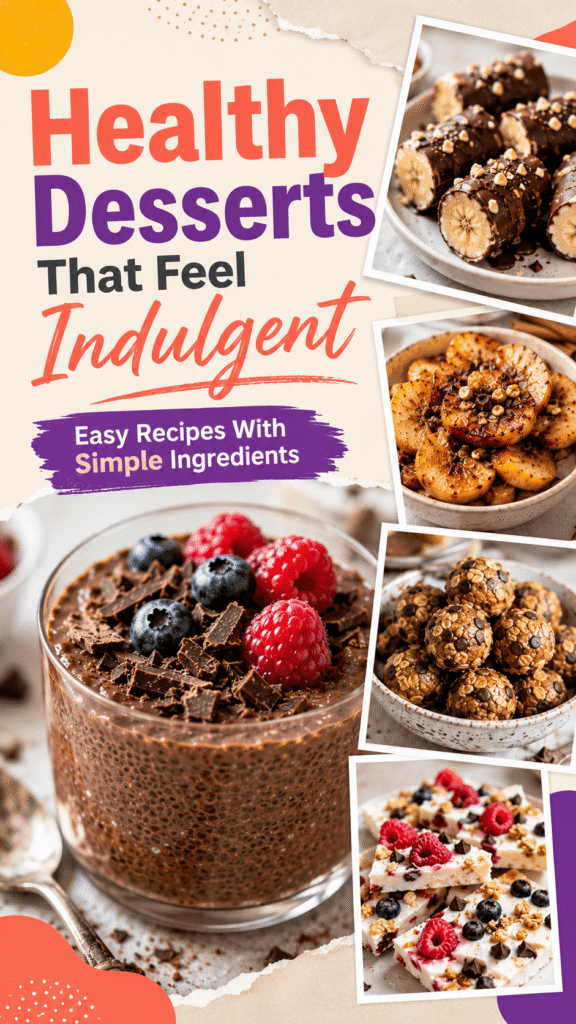
Dessert doesn’t have to feel heavy or loaded with sugar to be delicious.
With the right ingredients, you can enjoy sweet treats that feel fresh, satisfying, and easy to make at home.
These guilt-free dessert ideas use simple ingredients, natural sweetness, and lighter options that still deliver plenty of flavor.
You’ll find creamy frozen treats, fruity favorites, chocolatey bites, and easy no-bake recipes perfect for everyday cravings.
Even better, most are beginner-friendly and come together without much effort.
1. Strawberry Banana Nice Cream
This strawberry banana nice cream is creamy, naturally sweet, and incredibly easy to make.
Frozen bananas create a soft ice cream-like texture, while strawberries add fresh fruity flavor and a beautiful pink color.
It’s the perfect quick dessert for warm days or whenever you want something sweet without putting in much effort.
Why You’ll Love It
- Naturally sweetened with fruit
- Easy dairy-free dessert
- Ready in about 10 minutes
- Smooth, creamy texture
- Great for both kids and adults
Ingredients
- 3 ripe bananas, sliced and frozen
- 1 ½ cups frozen strawberries
- 2–3 tablespoons milk of choice (almond, oat, coconut, or regular milk)
- 1 teaspoon vanilla extract
- 1 teaspoon honey or maple syrup (optional)
Instructions
Step 1: Freeze the Fruit
Slice the bananas and place them in a freezer-safe container. Freeze for at least 3–4 hours or until fully frozen.
Step 2: Blend Everything Together
Add the frozen bananas, frozen strawberries, vanilla extract, and milk to a food processor or high-speed blender.
Blend until smooth and creamy. Stop occasionally to scrape down the sides if needed.
Step 3: Adjust the Texture
If the mixture looks too thick, add another tablespoon of milk. Blend again until the texture becomes creamy and soft like ice cream.
Step 4: Serve
Serve immediately for a soft-serve texture, or freeze for 30–60 minutes if you prefer a firmer scoopable dessert.
Optional Variations
- Add a spoonful of Greek yogurt for extra creaminess
- Blend in a little cocoa powder for a chocolate-strawberry flavor
- Add fresh blueberries or raspberries
- Sprinkle mini dark chocolate chips on top
Serving Tips
Serve in chilled bowls or cones for an ice cream shop feel.
Fresh strawberry slices and crushed nuts make easy toppings that add extra texture and flavor.
2. Greek Yogurt Berry Parfaits
These Greek yogurt berry parfaits are light, creamy, and packed with fresh flavor.
Layers of yogurt, juicy berries, and crunchy granola create a simple dessert that feels both refreshing and satisfying.
They also work perfectly as a healthy snack or quick breakfast.
Why You’ll Love It
- High in protein
- No baking needed
- Great for meal prep
- Fresh and colorful
- Easy to customize
Ingredients
- 2 cups plain or vanilla Greek yogurt
- 1 tablespoon honey or maple syrup
- 1 teaspoon vanilla extract
- 1 cup strawberries, sliced
- 1 cup blueberries
- ½ cup raspberries
- 1 cup granola
- Fresh mint leaves for garnish (optional)
Instructions
Step 1: Prepare the Yogurt
In a bowl, mix the Greek yogurt with honey and vanilla extract until smooth.
Step 2: Layer the Ingredients
Spoon a layer of yogurt into serving glasses or jars.
Add a layer of berries, followed by a layer of granola.
Step 3: Repeat the Layers
Repeat the layers until the glasses are full. Finish with extra berries and granola on top.
Step 4: Serve
Serve immediately for the best crunch, or chill for 15–20 minutes before serving.
Optional Variations
- Use coconut yogurt for a dairy-free version
- Add chia seeds or flaxseeds for extra nutrition
- Swap berries for mango, peaches, or kiwi
- Drizzle melted dark chocolate on top
Serving Tips
For meal prep, store the granola separately and add it just before serving so it stays crunchy.
3. Dark Chocolate Covered Frozen Bananas
These dark chocolate-covered frozen bananas are cool, creamy, and coated in rich chocolate.
They taste like a frozen dessert bar but are made with simple ingredients you probably already have at home.
They’re fun to make and even more fun to customize.
Why You’ll Love It
- Naturally sweet and satisfying
- Perfect for hot weather
- Easy to customize with toppings
- Minimal ingredients required
- Great make-ahead dessert
Ingredients
- 3 bananas
- 1 cup dark chocolate chips
- 1 tablespoon coconut oil
- ¼ cup chopped peanuts or almonds
- 2 tablespoons shredded coconut
- 2 tablespoons mini chocolate chips (optional)
Instructions
Step 1: Prepare the Bananas
Peel the bananas and cut them in half. Insert popsicle sticks or wooden skewers into each piece.
Place them on a parchment-lined tray and freeze for 1–2 hours.
Step 2: Melt the Chocolate
Add the dark chocolate chips and coconut oil to a microwave-safe bowl.
Microwave in 20-second intervals, stirring between each, until smooth and fully melted.
Step 3: Dip the Bananas
Dip each frozen banana piece into the melted chocolate, coating it evenly.
Let any extra chocolate drip off before placing the banana back onto the tray.
Step 4: Add Toppings
Immediately sprinkle chopped nuts, coconut, or mini chocolate chips over the bananas before the chocolate hardens.
Step 5: Freeze Again
Return the bananas to the freezer for another 20–30 minutes until fully set.
Optional Variations
- Use white chocolate or peanut butter drizzle
- Roll the bananas in crushed pretzels or granola
- Add cinnamon to the melted chocolate
- Use almond butter instead of coconut oil for richness
Serving Tips
Let the bananas sit at room temperature for 2–3 minutes before eating so they soften slightly and become extra creamy inside.
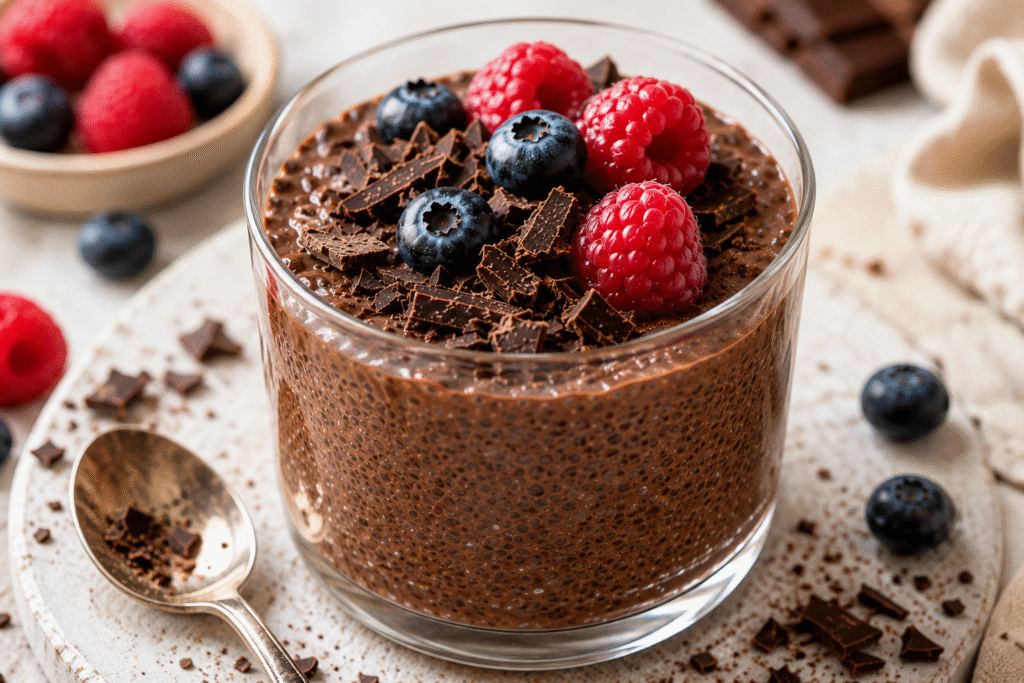
4. Chia Seed Chocolate Pudding
This chia seed chocolate pudding is rich, creamy, and packed with chocolate flavor while still feeling light and wholesome.
The chia seeds naturally thicken the pudding, creating a smooth texture that tastes surprisingly indulgent.
It’s an easy make-ahead dessert that works perfectly for busy weekdays or late-night chocolate cravings.
Why You’ll Love It
- Easy make-ahead dessert
- Rich chocolate flavor
- Naturally gluten-free
- Made with simple pantry ingredients
- Great for healthy snacking or dessert
Ingredients
- 2 cups milk of choice (almond, oat, coconut, or regular milk)
- ½ cup chia seeds
- 3 tablespoons unsweetened cocoa powder
- 2–3 tablespoons maple syrup or honey
- 1 teaspoon vanilla extract
- Pinch of salt
Instructions
Step 1: Mix the Ingredients
In a medium bowl or jar, add the milk, cocoa powder, maple syrup, vanilla extract, and salt.
Whisk well until the cocoa powder fully blends into the milk, and no lumps remain.
Step 2: Add the Chia Seeds
Stir in the chia seeds and mix thoroughly so they are evenly distributed.
Let the mixture sit for 5 minutes, then stir again to prevent clumping.
Step 3: Chill the Pudding
Cover the bowl or jar and refrigerate for at least 4 hours, or overnight for the best texture.
The pudding will thicken as the chia seeds absorb the liquid.
Step 4: Stir and Serve
Give the pudding a final stir before serving. If it feels too thick, add a splash of milk to loosen the texture.
Optional Variations
- Add a spoonful of peanut butter for a richer flavor
- Mix in mini dark chocolate chips
- Top with sliced bananas or strawberries
- Use cinnamon or espresso powder for extra depth
Serving Tips
Serve chilled with whipped coconut cream, fresh berries, or chopped nuts for extra texture and flavor.
5. Baked Cinnamon Apples
These baked cinnamon apples are soft, warm, and filled with cozy flavor.
The apples become naturally sweet as they bake, while cinnamon and honey create a simple dessert that feels comforting and homemade.
They’re perfect for colder days when you want something sweet without making a complicated dessert.
Why You’ll Love It
- Warm and comforting
- Naturally sweetened
- Easy one-pan dessert
- Perfect for fall and winter
- Beginner-friendly recipe
Ingredients
- 4 medium apples
- 2 tablespoons honey or maple syrup
- 1 teaspoon ground cinnamon
- ¼ teaspoon nutmeg
- 1 tablespoon melted butter or coconut oil
- ¼ cup chopped walnuts or pecans (optional)
- 2 tablespoons raisins (optional)
Instructions
Step 1: Prepare the Apples
Preheat your oven to 180°C (350°F).
Wash, core, and slice the apples into wedges or thick slices.
Step 2: Season the Apples
Place the apples into a baking dish.
Drizzle with honey and melted butter, then sprinkle cinnamon and nutmeg over the top.
Add nuts or raisins if using.
Step 3: Bake
Toss everything gently to coat the apples evenly.
Bake for 25–30 minutes, stirring halfway through, until the apples become soft and caramelized around the edges.
Step 4: Serve Warm
Remove from the oven and let cool slightly before serving.
Optional Variations
- Add rolled oats for an apple crisp texture
- Use pears instead of apples
- Drizzle with almond butter before serving
- Add a splash of vanilla extract for extra flavor
Serving Tips
Serve warm on its own or with Greek yogurt, vanilla yogurt, or a scoop of nice cream for a comforting dessert.
6. Peanut Butter Banana Energy Bites
These peanut butter banana energy bites are soft, chewy, and naturally sweet.
They taste like a treat but are made with simple ingredients that keep you feeling satisfied.
Since they’re completely no-bake, they come together quickly and are great for meal prep.
Why You’ll Love It
- No baking required
- Naturally sweetened
- Great for grab-and-go snacking
- Easy to make ahead
- Kid-friendly and freezer-friendly
Ingredients
- 1 ripe banana, mashed
- 1 cup rolled oats
- ½ cup peanut butter
- 2 tablespoons honey or maple syrup
- ¼ cup mini dark chocolate chips
- 1 tablespoon chia seeds or flaxseeds
- ½ teaspoon cinnamon
- 1 teaspoon vanilla extract
Instructions
Step 1: Mix the Ingredients
In a large bowl, combine the mashed banana, peanut butter, honey, vanilla extract, and cinnamon.
Stir until smooth.
Step 2: Add the Dry Ingredients
Add the oats, chia seeds, and chocolate chips.
Mix until everything is fully combined and the mixture becomes thick enough to roll.
Step 3: Shape the Energy Bites
Scoop about 1 tablespoon of mixture at a time and roll into small balls using your hands.
Place the bites onto a parchment-lined plate or tray.
Step 4: Chill
Refrigerate for 20–30 minutes to help them firm up before serving.
Optional Variations
- Use almond butter or cashew butter instead of peanut butter
- Add shredded coconut for extra texture
- Mix in chopped nuts or dried fruit
- Add cocoa powder for a chocolate version
Serving Tips
Store the energy bites in an airtight container in the fridge for up to 1 week or freeze them for longer storage.
They make an easy snack straight from the freezer.
7. Coconut Mango Popsicles
These coconut mango popsicles are creamy, fruity, and incredibly refreshing on hot days.
Sweet mango blends perfectly with rich coconut milk to create a smooth frozen treat that tastes tropical and light at the same time.
They’re simple to make and perfect for keeping in the freezer all summer long.
Why You’ll Love It
- Naturally dairy-free
- Bright tropical flavor
- Easy homemade dessert
- Refreshing for warm weather
- Made with simple ingredients
Ingredients
- 2 cups frozen or fresh mango chunks
- 1 cup full-fat coconut milk
- 2 tablespoons honey or maple syrup
- 1 teaspoon vanilla extract
- 1 tablespoon lime juice
Instructions
Step 1: Blend the Ingredients
Add the mango, coconut milk, honey, vanilla extract, and lime juice to a blender.
Blend until completely smooth and creamy.
Step 2: Fill the Popsicle Molds
Pour the mixture evenly into popsicle molds.
Insert popsicle sticks into each mold.
Step 3: Freeze
Freeze for at least 4–6 hours, or until fully solid.
Step 4: Remove and Serve
Run the molds under warm water for a few seconds to help release the popsicles easily.
Serve immediately.
Optional Variations
- Add shredded coconut for texture
- Swirl in strawberry puree before freezing
- Use pineapple instead of mango
- Add a pinch of chili-lime seasoning for a sweet-spicy twist
Serving Tips
Store popsicles in a freezer-safe bag or container once frozen so they stay fresh and easy to grab whenever you want a quick dessert.
8. Flourless Peanut Butter Cookies
These flourless peanut butter cookies are soft, chewy, and packed with rich peanut butter flavor.
With only a few simple ingredients, they’re one of the easiest desserts to make when you need something quick and satisfying.
They’re naturally gluten-free and perfect for beginner bakers.
Why You’ll Love It
- Gluten-free friendly
- Simple pantry ingredients
- Easy beginner recipe
- Soft and chewy texture
- Ready in under 30 minutes
Ingredients
- 1 cup peanut butter
- ½ cup brown sugar or coconut sugar
- 1 large egg
- 1 teaspoon vanilla extract
- ½ teaspoon baking soda
- ¼ cup mini dark chocolate chips (optional)
Instructions
Step 1: Preheat the Oven
Preheat your oven to 175°C (350°F).
Line a baking tray with parchment paper.
Step 2: Make the Cookie Dough
In a medium bowl, combine the peanut butter, sugar, egg, vanilla extract, and baking soda.
Mix until a thick dough forms.
Fold in the chocolate chips if using.
Step 3: Shape the Cookies
Scoop tablespoon-sized portions of dough onto the prepared baking tray.
Flatten each cookie slightly with a fork to create the classic crisscross pattern.
Step 4: Bake
Bake for 8–10 minutes, or until the edges are lightly golden.
The cookies may look soft at first, but will firm up as they cool.
Step 5: Cool and Serve
Let the cookies cool on the tray for 10 minutes before transferring them to a wire rack.
Optional Variations
- Use almond butter for a different flavor
- Add cinnamon for warmth
- Stir in chopped peanuts for crunch
- Drizzle melted dark chocolate over the cookies
Serving Tips
These cookies taste even better slightly warm.
Pair them with cold milk, almond milk, or coffee for an easy dessert or snack.
9. Frozen Yogurt Bark with Berries
Frozen yogurt bark is creamy, refreshing, and packed with colorful toppings.
It’s a fun and easy dessert that combines tangy yogurt with sweet berries and crunchy toppings for the perfect balance of flavor and texture.
This recipe is great for meal prep and easy snacking straight from the freezer.
Why You’ll Love It
- Easy to customize
- Refreshing frozen texture
- Great make-ahead dessert
- Light but satisfying
- Perfect for summer snacking
Ingredients
- 2 cups Greek yogurt
- 2 tablespoons honey or maple syrup
- 1 teaspoon vanilla extract
- ½ cup sliced strawberries
- ½ cup blueberries
- ¼ cup raspberries
- ¼ cup granola
- 2 tablespoons mini dark chocolate chips
Instructions
Step 1: Prepare the Yogurt Base
In a bowl, mix the Greek yogurt, honey, and vanilla extract until smooth.
Step 2: Spread the Yogurt
Line a baking tray or plate with parchment paper.
Spread the yogurt mixture evenly into a rectangle about 1 cm thick.
Step 3: Add the Toppings
Scatter the strawberries, blueberries, raspberries, granola, and chocolate chips evenly over the yogurt.
Press the toppings down gently so they stick.
Step 4: Freeze
Place the tray in the freezer for at least 3–4 hours, or until completely firm.
Step 5: Break Into Pieces
Remove from the freezer and break the bark into smaller pieces before serving.
Optional Variations
- Use coconut yogurt for a dairy-free option
- Add sliced bananas or kiwi
- Sprinkle chia seeds or coconut flakes on top
- Drizzle peanut butter before freezing
Serving Tips
Keep the yogurt bark stored in a freezer-safe container and serve straight from the freezer for the best texture.
10. Avocado Chocolate Mousse
This avocado chocolate mousse is rich, silky, and surprisingly creamy.
The avocado creates a smooth texture while cocoa powder and sweetener give it a deep chocolate flavor without needing heavy cream.
It’s a quick blender dessert that feels indulgent while still using simple ingredients.
Why You’ll Love It
- Ultra creamy texture
- Naturally dairy-free
- Rich chocolate flavor
- Quick and easy blender recipe
- Made with wholesome ingredients
Ingredients
- 2 ripe avocados
- ¼ cup unsweetened cocoa powder
- ¼ cup maple syrup or honey
- ¼ cup milk of choice
- 1 teaspoon vanilla extract
- Pinch of salt
- Dark chocolate shavings or berries for topping
Instructions
Step 1: Prepare the Avocados
Cut the avocados in half, remove the pits, and scoop the flesh into a blender or food processor.
Step 2: Blend the Ingredients
Add the cocoa powder, maple syrup, milk, vanilla extract, and salt.
Blend until completely smooth and creamy.
Scrape down the sides as needed to ensure everything blends evenly.
Step 3: Adjust the Texture
If the mousse seems too thick, add another splash of milk and blend again until silky smooth.
Step 4: Chill Before Serving
Transfer the mousse to serving bowls and refrigerate for at least 30 minutes for the best texture and flavor.
Optional Variations
- Add espresso powder for a mocha flavor
- Blend in melted dark chocolate for extra richness
- Add peanut butter for a chocolate-peanut butter version
- Top with crushed nuts or coconut flakes
Serving Tips
Serve chilled with fresh berries, whipped coconut cream, or shaved dark chocolate for an elegant but easy dessert.
Tips For Making Guilt-Free Desserts
- Use naturally sweet fruits whenever possible — Bananas, berries, mangoes, and dates add natural sweetness while also bringing fresh flavor and texture to desserts.
- Choose dark chocolate over milk chocolate — Dark chocolate usually contains less sugar and gives desserts a richer, deeper chocolate taste.
- Add protein with Greek yogurt or nuts — Ingredients like Greek yogurt, peanut butter, almonds, and chia seeds help make desserts more filling and satisfying.
- Use frozen fruit for creamy textures — Frozen bananas, berries, and mangoes blend into smooth, ice cream-like desserts without needing heavy cream.
- Keep portions balanced and satisfying — A smaller portion made with wholesome ingredients can still fully satisfy a sweet craving without feeling overly heavy.
Final Thoughts
Enjoying dessert doesn’t have to mean making things complicated or giving up your favorite sweet treats.
Simple ingredient swaps and naturally sweet flavors can turn everyday desserts into something both satisfying and lighter at the same time.
Save a few favorites, have fun experimenting, and enjoy making desserts that taste just as good as they feel.
FAQs
What makes a dessert “guilt-free”?
Guilt-free desserts are usually made with lighter ingredients, less added sugar, and more wholesome foods like fruit, yogurt, oats, nuts, and dark chocolate.
They’re designed to feel satisfying without being overly heavy.
Can I make these desserts dairy-free?
Yes. Many of these recipes can easily be made dairy-free by using coconut yogurt, almond milk, oat milk, or coconut milk instead of regular dairy products.
Are these desserts good for meal prep?
Absolutely. Recipes like chia pudding, energy bites, frozen yogurt bark, and popsicles store well in the fridge or freezer, making them great for preparing ahead of time.
Can I use natural sweeteners?
Yes. Honey, maple syrup, mashed bananas, and dates are all great natural sweetener options that add flavor while keeping desserts simple and delicious.

Hi, I’m Sorenna Blythe, the baker and writer behind Mix Whisk Bake. I share simple, reliable recipes and honest kitchen moments to help home bakers bake with confidence and joy. When I’m not testing new treats, you’ll find me sipping coffee and dreaming up my next bake.