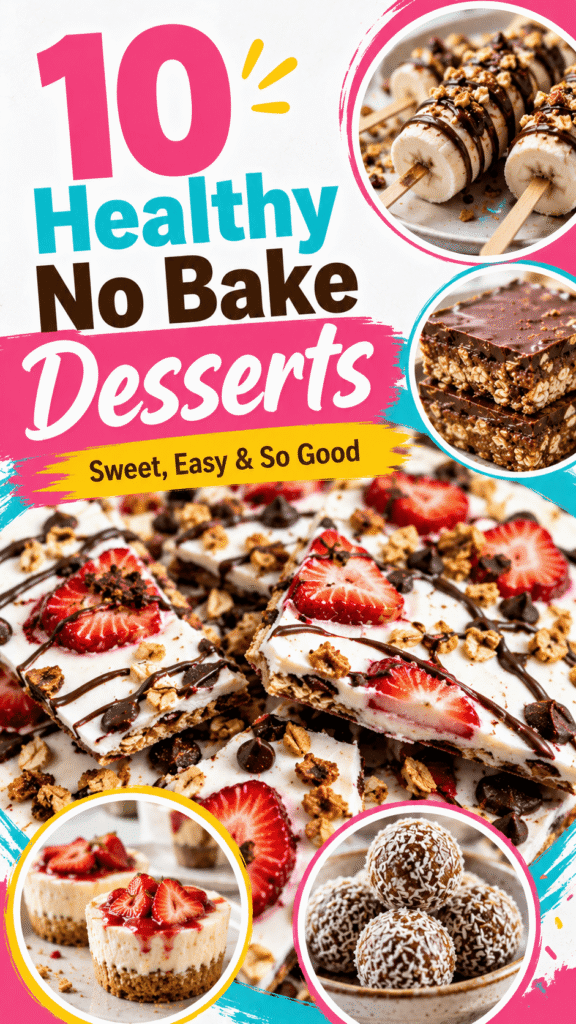
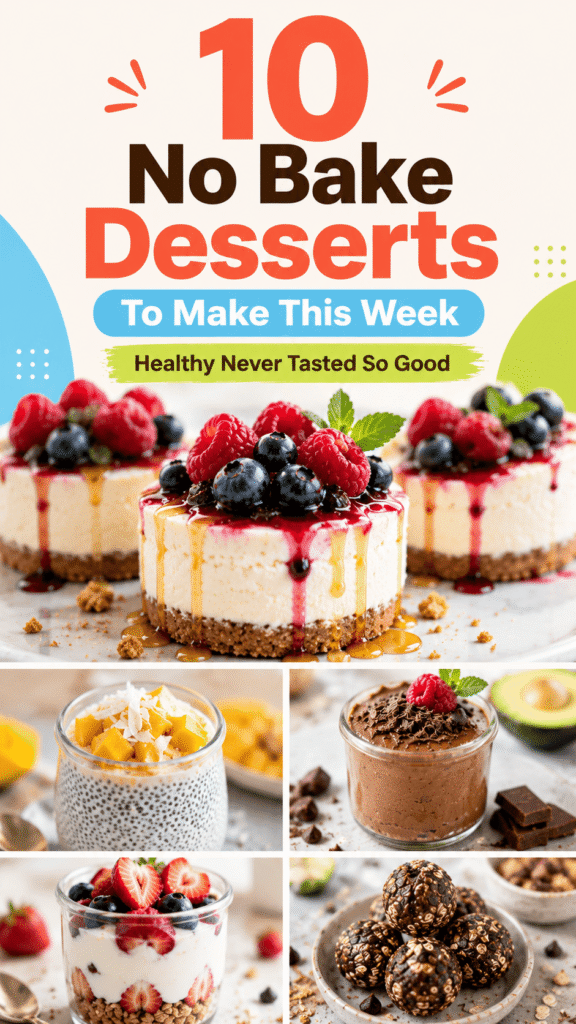
Some days, you just want something sweet without turning on the oven.
That’s where these healthy no-bake desserts come in.
They’re quick, simple, and perfect for warm afternoons, busy weekdays, or late-night cravings.
The best part? Healthy desserts can still taste rich, creamy, and completely satisfying.
With ingredients like fresh fruit, yogurt, oats, nuts, and dark chocolate, you can make treats that feel indulgent while keeping things lighter and wholesome.
These recipes are easy to follow, beginner-friendly, and made with minimal prep.
1. Chocolate Peanut Butter Energy Bites
Why You’ll Love This Recipe
These little energy bites are perfect when you want something sweet but still filling.
They come together in minutes, store well in the fridge, and make an easy snack for busy days.
The combination of peanut butter, oats, and dark chocolate gives them a rich cookie-dough-like flavor without needing any baking.
Ingredients
- 1 ½ cups rolled oats
- ½ cup natural peanut butter
- ⅓ cup honey or maple syrup
- 2 tablespoons chia seeds
- ⅓ cup mini dark chocolate chips
- 1 teaspoon vanilla extract
- Pinch of salt
Instructions
Step 1: Mix The Ingredients
In a large mixing bowl, combine the rolled oats, chia seeds, chocolate chips, and salt.
Add the peanut butter, honey, and vanilla extract. Stir everything together until fully combined. The mixture should feel slightly sticky but easy to roll.
Step 2: Roll Into Balls
Use a spoon or small cookie scoop to portion the mixture. Roll into bite-sized balls using your hands.
If the mixture feels too sticky, place it in the fridge for 10–15 minutes before rolling.
Step 3: Chill Until Firm
Place the energy bites on a tray or plate lined with parchment paper. Refrigerate for at least 30 minutes until firm.
Serve chilled or store for later.
Helpful Tips
- Store in an airtight container in the fridge for up to 1 week.
- Almond butter works well if you want to switch things up.
- Add shredded coconut or chopped nuts for extra texture.
- For a sweeter flavor, use honey instead of maple syrup.
2. Greek Yogurt Berry Parfaits
Why You’ll Love This Recipe
These parfaits are creamy, fresh, and incredibly easy to make.
They feel fancy enough for guests but are simple enough for a quick weekday dessert.
The layers of yogurt, berries, and crunchy granola create the perfect balance of textures.
Ingredients
- 2 cups plain or vanilla Greek yogurt
- 1 ½ cups mixed berries (strawberries, blueberries, raspberries, or blackberries)
- 1 cup granola
- 2 tablespoons honey
- 1 teaspoon vanilla extract (optional)
Instructions
Step 1: Prepare The Yogurt
In a small bowl, stir the vanilla extract into the Greek yogurt if using.
Wash and slice larger berries like strawberries into smaller pieces.
Step 2: Layer The Parfaits
Spoon a layer of yogurt into serving glasses or jars.
Add a layer of berries, followed by a layer of granola. Repeat the layers until the glasses are filled.
Step 3: Finish And Serve
Drizzle honey over the top just before serving for extra sweetness.
Serve immediately for the crunchiest granola texture.
Helpful Tips
- Frozen berries work well if fresh berries are not in season.
- Add chia seeds or flaxseeds for extra nutrition.
- Assemble just before serving to keep the granola crisp.
- Mason jars make these parfaits great for meal prep.
3. No-Bake Chocolate Oat Bars
Why You’ll Love This Recipe
These bars are rich, chewy, and taste like a treat from a bakery. They use simple pantry ingredients and require almost no effort.
They’re great for dessert, snacks, or even a quick grab-and-go bite during the day.
Ingredients
- 2 cups rolled oats
- ¾ cup natural peanut butter
- ⅓ cup maple syrup
- ¼ cup coconut oil
- 1 cup dark chocolate chips
- 1 teaspoon vanilla extract
- Pinch of salt
Instructions
Step 1: Make The Oat Base
Line an 8×8-inch baking dish or container with parchment paper.
In a saucepan over low heat, melt the peanut butter, maple syrup, and coconut oil together. Stir until smooth.
Remove from the heat and mix in the vanilla extract and salt.
Add the rolled oats and stir until fully coated.
Step 2: Press Into The Pan
Transfer the oat mixture into the prepared pan. Press it down firmly into an even layer using the back of a spoon or spatula.
Step 3: Add The Chocolate Layer
Melt the dark chocolate chips in the microwave in short intervals or over a double boiler.
Spread the melted chocolate evenly over the oat layer.
Step 4: Chill Until Firm
Place the bars in the refrigerator for about 1–2 hours, or until fully set.
Slice into squares or bars before serving.
Helpful Tips
- Keep the bars refrigerated for the best texture.
- Cut into smaller squares for easy portion control.
- Sprinkle flaky sea salt on top for extra flavor.
- Use almond butter or cashew butter if preferred.
4. Frozen Banana Yogurt Pops
Why You’ll Love This Recipe
These frozen banana pops are creamy, refreshing, and perfect for warm days.
They taste like a fun frozen dessert while using simple, wholesome ingredients.
Kids love them, and they’re easy to customize with different toppings and flavors.
Ingredients
- 3 medium bananas
- 1 cup Greek yogurt
- ½ cup mixed berries or ¼ cup peanut butter
- ¼ cup dark chocolate chips
- 1 teaspoon coconut oil
- 2 tablespoons crushed nuts or granola (optional)
- Popsicle sticks
Instructions
Step 1: Prepare The Bananas
Peel the bananas and cut them in half crosswise.
Insert popsicle sticks into the flat ends and place the bananas on a parchment-lined tray.
Step 2: Coat With Yogurt
If using berries, mash them lightly and stir them into the Greek yogurt. You can also swirl in peanut butter for a different flavor.
Dip each banana into the yogurt mixture or spoon the yogurt over the bananas until evenly coated.
Step 3: Add Toppings
Sprinkle crushed nuts, granola, or extra berries over the yogurt coating while it’s still soft.
Step 4: Drizzle With Chocolate
Melt the dark chocolate chips with the coconut oil in the microwave using short intervals, stirring until smooth.
Drizzle the melted chocolate over the yogurt-coated bananas.
Step 5: Freeze Until Solid
Place the tray in the freezer for at least 3–4 hours, or until fully frozen.
Serve straight from the freezer.
Helpful Tips
- Popsicle sticks make them easier and less messy to eat.
- Crushed almonds, peanuts, or granola add a delicious crunch.
- Freeze the bananas first for an extra-thick yogurt coating.
- Store in a freezer-safe container for up to 2 weeks.
5. Healthy Cheesecake Cups
Why You’ll Love This Recipe
These cheesecake cups are creamy, lightly sweet, and incredibly easy to make.
They have all the flavor of classic cheesecake without needing an oven.
Individual servings also make them perfect for parties, meal prep, or quick desserts during the week.
Ingredients
- 1 cup Greek yogurt
- 8 ounces softened cream cheese
- 3 tablespoons honey
- 1 teaspoon vanilla extract
- 1 cup graham cracker crumbs
- 2 tablespoons melted butter
- 1 cup fresh berries or sliced fruit
Instructions
Step 1: Make The Crumb Layer
In a small bowl, combine the graham cracker crumbs and melted butter until the crumbs are evenly coated.
Spoon a layer of crumbs into the bottom of small jars or dessert cups.
Step 2: Prepare The Cheesecake Filling
In a mixing bowl, beat the softened cream cheese until smooth.
Add the Greek yogurt, honey, and vanilla extract. Mix until creamy and fully combined.
Step 3: Assemble The Cups
Spoon the cheesecake filling over the graham cracker layer.
Repeat the layers if desired for a layered dessert look.
Step 4: Chill Before Serving
Refrigerate the cheesecake cups for at least 1 hour before serving to help them firm up slightly.
Top with fresh fruit just before serving.
Helpful Tips
- Mason jars work perfectly for easy storage and serving.
- Fresh strawberries, blueberries, or raspberries add great flavor.
- For a lighter texture, fold in a little whipped topping.
- Keep refrigerated until ready to enjoy.
6. Coconut Chia Pudding
Why You’ll Love This Recipe
This chia pudding is creamy, lightly sweet, and incredibly simple to make.
It’s perfect for meal prep because it gets better as it chills.
The coconut milk gives it a rich texture while the chia seeds add fiber and help keep you full longer.
Ingredients
- ¼ cup chia seeds
- 1 cup canned coconut milk
- 1 tablespoon maple syrup
- 1 teaspoon vanilla extract
- Fresh fruit for topping
Instructions
Step 1: Mix The Ingredients
In a medium bowl or jar, whisk together the coconut milk, maple syrup, and vanilla extract.
Add the chia seeds and stir well until evenly distributed.
Step 2: Refrigerate
Cover the bowl or jar and refrigerate for at least 4 hours, preferably overnight.
Stir the mixture again after the first 15 minutes, then once more after another 15 minutes to help prevent clumping.
Step 3: Serve With Toppings
Once thickened, spoon the pudding into serving bowls or jars.
Top with fresh fruit before serving.
Helpful Tips
- Mango, pineapple, and berries pair beautifully with coconut flavor.
- Adjust the sweetness by adding more or less maple syrup.
- Use light coconut milk for a lighter texture.
- Store in the fridge for up to 4 days for easy make-ahead desserts.
7. Avocado Chocolate Mousse
Why You’ll Love This Recipe
This chocolate mousse is rich, creamy, and surprisingly wholesome.
The avocado creates a silky texture without needing heavy cream, while cocoa powder gives it a deep chocolate flavor.
It’s an easy dessert that feels indulgent but is made with simple ingredients.
Ingredients
- 2 ripe avocados
- ¼ cup unsweetened cocoa powder
- ¼ cup maple syrup
- 1 teaspoon vanilla extract
- 2–3 tablespoons milk of choice
- Pinch of salt
- Fresh berries or shaved dark chocolate for topping
Instructions
Step 1: Blend The Ingredients
Add the avocados, cocoa powder, maple syrup, vanilla extract, milk, and salt to a blender or food processor.
Blend until completely smooth and creamy. Scrape down the sides as needed to make sure everything is fully combined.
Step 2: Chill The Mousse
Spoon the mousse into serving bowls or glasses.
Refrigerate for at least 30 minutes to help the texture firm up, and the flavors blend together.
Step 3: Add Toppings And Serve
Top with fresh berries, shaved dark chocolate, or chopped nuts before serving.
Serve chilled.
Helpful Tips
- Use very ripe avocados for the smoothest texture and mildest flavor.
- Blend thoroughly so the mousse becomes extra creamy.
- Add a little extra maple syrup if you prefer a sweeter dessert.
- A splash of espresso can deepen the chocolate flavor beautifully.
8. Strawberry Banana Icebox Cake
Why You’ll Love This Recipe
This icebox cake is light, creamy, and perfect for warm weather.
As it chills, the graham crackers soften into cake-like layers, making every bite deliciously smooth.
It’s simple to prepare and always a crowd-pleaser at gatherings.
Ingredients
- 1 box whole-grain graham crackers
- 2 cups Greek yogurt whipped topping, or whipped Greek yogurt mixture
- 2 cups sliced strawberries
- 2 bananas, sliced
- 1 teaspoon vanilla extract
- 1 tablespoon honey (optional)
Instructions
Step 1: Prepare The Yogurt Mixture
In a bowl, stir the vanilla extract and honey into the Greek yogurt mixture if using.
Step 2: Create The First Layer
Place a layer of graham crackers at the bottom of a loaf pan or small baking dish.
Spread a layer of the yogurt mixture over the crackers, then add sliced strawberries and bananas.
Step 3: Repeat The Layers
Continue layering graham crackers, yogurt mixture, and fruit until the dish is filled. Finish with a layer of yogurt and fruit on top.
Step 4: Chill Until Softened
Cover and refrigerate for at least 4–6 hours, or overnight for the best texture.
Slice and serve chilled.
Helpful Tips
- Making it ahead gives the graham crackers time to soften perfectly.
- A loaf pan creates neat, easy-to-slice layers.
- Add blueberries for extra color and flavor.
- Keep refrigerated until ready to serve.
9. Almond Coconut Date Balls
Why You’ll Love This Recipe
These date balls are naturally sweet, soft, and packed with flavor.
They make a great snack, quick dessert, or healthy treat to keep in the fridge.
Since dates provide natural sweetness, there’s no need for refined sugar.
Ingredients
- 1 cup Medjool dates, pitted
- 1 cup almonds
- ½ cup unsweetened coconut flakes
- 1 teaspoon vanilla extract
- Pinch of salt
- Extra coconut flakes for coating
Instructions
Step 1: Blend The Ingredients
Add the dates, almonds, coconut flakes, vanilla extract, and salt to a food processor.
Blend until the mixture becomes sticky and starts to hold together when pressed between your fingers.
Step 2: Roll Into Balls
Scoop small portions of the mixture and roll them into bite-sized balls using your hands.
Step 3: Coat With Coconut
Roll each ball in extra coconut flakes until evenly coated.
Step 4: Chill Before Serving
Place the date balls in the refrigerator for about 20–30 minutes to firm up slightly before serving.
Helpful Tips
- Add 1 tablespoon of cocoa powder for a chocolate version.
- If the mixture feels dry, add 1–2 extra dates.
- Store in the fridge for up to 1 week.
- Freeze extras for an easy make-ahead snack.
10. Frozen Chocolate Covered Yogurt Bark
Why You’ll Love This Recipe
This frozen yogurt bark is creamy, crunchy, and incredibly refreshing.
It’s easy to customize with your favorite toppings and makes a fun healthy dessert for both kids and adults.
The combination of yogurt, fruit, and dark chocolate creates the perfect sweet bite.
Ingredients
- 2 cups Greek yogurt
- ¼ cup dark chocolate chips
- 1 teaspoon coconut oil
- 1 cup sliced strawberries
- ¼ cup chopped nuts or granola
- 1 tablespoon honey (optional)
Instructions
Step 1: Prepare The Yogurt Base
Line a tray or baking sheet with parchment paper.
Spread the Greek yogurt into an even layer about ½-inch thick.
Step 2: Add The Toppings
Scatter the sliced strawberries and nuts or granola evenly over the yogurt.
Step 3: Drizzle The Chocolate
Melt the dark chocolate chips and coconut oil together until smooth.
Drizzle the melted chocolate over the yogurt and toppings.
Step 4: Freeze Until Firm
Place the tray in the freezer for 3–4 hours, or until completely frozen.
Break the bark into pieces before serving.
Helpful Tips
- Parchment paper makes removal quick and easy.
- Store the bark in a freezer-safe container.
- Try different fruits like blueberries, raspberries, or mango.
- Let the bark sit at room temperature for 1–2 minutes before eating for the best texture.
Healthy No-Bake Dessert Tips
Best Ingredients To Keep On Hand
Having a few healthy pantry staples ready makes no-bake desserts much easier to throw together.
Most of these ingredients work in several recipes, so you can mix and match based on what you already have at home.
Here are some of the best ingredients to keep stocked:
- Rolled oats for texture and added fiber
- Greek yogurt for creamy, protein-packed desserts
- Nut butters like peanut butter or almond butter for richness and flavor
- Fresh fruit for natural sweetness and freshness
- Chia seeds for pudding, texture, and extra nutrition
- Dark chocolate for a richer flavor with less sweetness
Keeping these basics on hand makes it simple to create quick desserts without needing a long shopping list.
Storage Tips
Most healthy no-bake desserts store very well, which makes them great for meal prep and busy weeks.
Proper storage also helps maintain the best texture and flavor.
- Keep most no-bake desserts refrigerated until ready to serve
- Store treats in airtight containers to help them stay fresh longer
- Freeze desserts like yogurt bark, banana pops, and energy bites for extended storage
- If layering desserts with granola, add the granola just before serving, so it stays crunchy
Always check the texture before serving, especially with frozen desserts.
Letting them sit at room temperature for a few minutes can make them easier to enjoy.
Easy Healthy Swaps
One of the best things about no-bake desserts is how easy they are to customize.
Simple ingredient swaps can make recipes lighter while still keeping them delicious and satisfying.
Try these easy healthier swaps:
- Use maple syrup or honey instead of refined sugar
- Choose dark chocolate instead of milk chocolate for a richer flavor
- Replace whipped cream with Greek yogurt for extra protein and creaminess
- Swap regular cream cheese with reduced-fat cream cheese if preferred
- Use unsweetened coconut flakes to reduce added sugar
Small changes can make a big difference while still giving you desserts that taste rich, creamy, and satisfying.
Final Thoughts
Healthy no-bake desserts really can be simple, satisfying, and full of flavor.
With a few wholesome ingredients and a little fridge time, you can make treats that feel special without spending hours in the kitchen.
Try a few different recipes for quick snacks, easy party desserts, or make-ahead treats during the week.
Don’t be afraid to mix in your favorite fruits, toppings, or flavors to make them your own.
Save this post for later and let me know which healthy no-bake dessert you’re excited to try first.
FAQs
Are no-bake desserts healthy?
Yes, many no-bake desserts can be healthy when made with wholesome ingredients like fruit, oats, yogurt, nuts, and natural sweeteners.
How long do no-bake desserts last?
Most no-bake desserts stay fresh in the fridge for 3–5 days. Frozen desserts can last several weeks when stored properly.
Can I make these desserts dairy-free?
Absolutely. Use dairy-free options like coconut yogurt, almond milk yogurt, or dairy-free cream cheese alternatives.
What sweeteners work best?
Honey, maple syrup, dates, and mashed bananas are all great natural sweeteners for healthy desserts.

Hi, I’m Sorenna Blythe, the baker and writer behind Mix Whisk Bake. I share simple, reliable recipes and honest kitchen moments to help home bakers bake with confidence and joy. When I’m not testing new treats, you’ll find me sipping coffee and dreaming up my next bake.