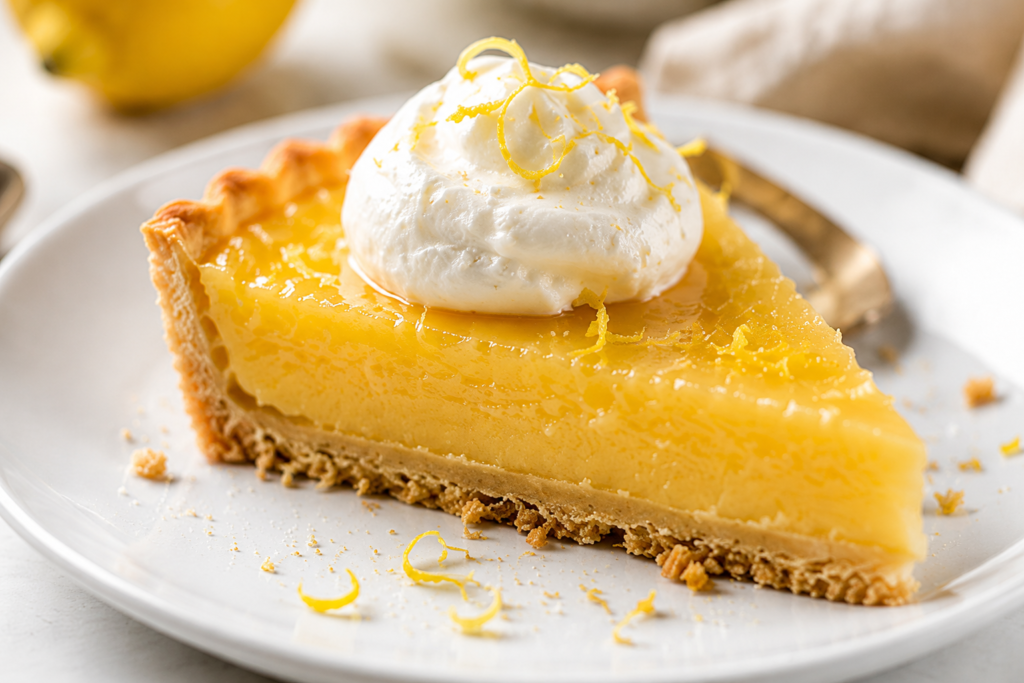
There’s something so refreshing about a homemade lemon curd tart.
It’s bright, creamy, and packed with fresh lemon flavor that tastes like sunshine in every bite.
This easy recipe combines a buttery tart crust with a smooth, silky lemon filling for the perfect balance of sweet and tangy.
The best part? You don’t need fancy ingredients or advanced baking skills to make it.
If you can whisk and stir, you can absolutely make this tart.
Why You’ll Love This Easy Lemon Curd Tart
- Smooth and creamy lemon curd filling – The silky texture melts in your mouth and gives every bite a rich, luscious feel.
- Sweet, tangy, and refreshing flavor – Fresh lemon juice adds the perfect bright citrus taste without being too overpowering.
- Simple ingredients you may already have at home – This recipe uses basic baking staples, making it easy to whip up anytime.
- Elegant dessert for parties, brunches, and holidays – The beautiful golden filling and crisp crust make it look impressive with very little effort.
- Can be made ahead of time – Prepare it in advance and chill until ready to serve for an easy stress-free dessert.

What Is Lemon Curd Tart?
Lemon curd tart is a classic dessert made with a crisp buttery crust filled with smooth lemon curd, a creamy citrus filling made from fresh lemon juice, sugar, eggs, and butter.
Lemon curd has a rich, silky texture that feels soft and creamy on the spoon, while fresh lemon juice gives it a bright flavor that tastes both sweet and tangy at the same time.
The filling is bold enough to feel refreshing, but still smooth and balanced, which is why this dessert is loved by so many people during spring and summer.
One of the best parts of a lemon curd tart is the contrast between the creamy filling and the crust underneath it.
The tart shell is usually made with butter, flour, and a little sugar, creating a lightly sweet crust that is crisp, tender, and full of rich flavor.
That buttery crust helps balance the sharp citrus taste and gives the tart a satisfying bite in every slice.
Even though it looks elegant and bakery-worthy, lemon curd tart is surprisingly simple to make at home, which makes it a great dessert for beginners who want something impressive without too much stress.
Ingredients You’ll Need
For the Tart Crust
- 1 1/4 cups all-purpose flour
- 1/4 cup powdered sugar
- 1/2 cup unsalted butter, cold and cubed
- 1 large egg yolk
- 1 teaspoon vanilla extract
- 1/4 teaspoon salt
For the Lemon Curd Filling
- 3/4 cup fresh lemon juice
- 1 tablespoon lemon zest
- 3/4 cup granulated sugar
- 3 large eggs
- 1/2 cup unsalted butter, cut into pieces
Optional Toppings
- 1/2 cup whipped cream
- 1/2 cup fresh berries
- Fresh mint leaves for garnish
- Light dusting of powdered sugar
Kitchen Tools Needed
- 9-inch tart pan – Helps create the classic tart shape with neat, fluted edges and an easy-to-remove base.
- Mixing bowls – Useful for preparing both the tart dough and the lemon curd filling.
- Medium saucepan – Needed for gently cooking the lemon curd until smooth and thickened.
- Whisk – Helps blend the ingredients evenly and keeps the lemon curd silky without lumps.
- Fine mesh strainer – Strains out zest and any cooked egg bits for an extra smooth filling.
- Measuring cups and spoons – Makes it easy to measure ingredients accurately for the best texture and flavor.
How to Make Easy Lemon Curd Tart
Step 1: Prepare the Tart Crust
Start by adding the flour, powdered sugar, and salt to a mixing bowl, then stir everything together until evenly combined.
Add the cold cubed butter and work it into the flour mixture using your fingertips or a pastry cutter until the texture looks crumbly, similar to coarse sand with small butter pieces throughout.
Keeping the butter cold is important because it helps create a tender, flaky crust once baked.
Mix in the egg yolk and vanilla extract, then gently stir until the dough starts coming together.
If the dough feels a little dry, you can add a small splash of cold water, but only enough to help it hold together when pressed.
Form the dough into a flat disc, wrap it tightly, and place it in the refrigerator for at least 30 minutes so it becomes easier to roll out and keeps its shape while baking.
Step 2: Bake the Tart Shell
Lightly flour your work surface and roll the chilled dough into a circle large enough to fit your tart pan.
Carefully press the dough into the pan, making sure it fits into the corners and sides evenly without stretching it too much.
Trim any extra dough from the edges for a clean finish.
Use a fork to gently poke small holes across the bottom of the crust, which is called docking, and this helps prevent air bubbles while baking.
Line the crust with parchment paper and fill it with baking beans, rice, or pie weights to keep the crust from puffing up in the oven.
Bake until the edges turn lightly golden and the crust looks dry and set.
Remove the weights and parchment, then bake for a few more minutes if needed to give the bottom a light golden color.
Set the tart shell aside and let it cool completely before adding the filling.
Step 3: Make the Lemon Curd
In a saucepan, whisk together the eggs, sugar, fresh lemon juice, and lemon zest until smooth and fully combined.
Place the pan over low heat and cook gently while whisking constantly to keep the eggs from scrambling.
After several minutes, the mixture will slowly thicken into a creamy curd that coats the back of a spoon.
Be patient during this step because rushing with high heat can make the texture grainy instead of silky.
Once thickened, remove the pan from the heat and stir in the butter a few pieces at a time until fully melted and smooth.
The butter adds richness and gives the lemon curd its glossy, velvety texture.
For an extra smooth filling, pour the curd through a fine mesh strainer to remove the zest and any tiny bits of cooked egg.
Step 4: Assemble the Tart
Pour the warm lemon curd into the cooled tart shell slowly and evenly.
Use the back of a spoon or a small spatula to gently smooth the top so the filling looks neat and even.
At this stage, the tart already looks beautiful with its bright yellow filling and crisp golden crust.
Step 5: Chill Before Serving
Place the tart in the refrigerator and chill until the filling is fully set and firm enough to slice cleanly.
This usually takes a few hours, but the wait is worth it because the flavor and texture become even better once chilled.
Right before serving, you can add whipped cream, fresh berries, mint leaves, or a light dusting of powdered sugar for a simple finishing touch.
Slice carefully and enjoy the creamy lemon filling with the buttery crust in every bite.
Tips for the Best Lemon Curd Tart
Use Fresh Lemons for the Brightest Flavor
Fresh lemons make a huge difference in both the flavor and aroma of the tart.
Fresh lemon juice tastes brighter, cleaner, and more natural than bottled juice, which can sometimes taste dull or slightly bitter.
Using fresh lemon zest also adds extra citrus flavor because the oils in the peel are packed with freshness.
When zesting lemons, only grate the yellow outer layer and avoid the white part underneath, since it can taste bitter.
Don’t Overcook the Curd
Lemon curd thickens slowly, so gentle heat and patience are the keys to success.
Keep the heat low and whisk constantly to help the mixture cook evenly and stay smooth.
If the heat is too high, the eggs can cook too quickly and create a lumpy texture instead of a creamy filling.
The curd is ready when it becomes thick enough to coat the back of a spoon while still looking glossy and silky.
As soon as it reaches that stage, remove it from the heat to keep it from overcooking.
Chill the Tart Fully Before Slicing
It may be tempting to cut into the tart right away, but chilling is what gives the filling its perfect texture.
A fully chilled tart slices much more neatly and holds its shape better when served.
The flavors also deepen and become more balanced after a few hours in the refrigerator.
For the best results, chill the tart until the filling feels firm and fully set in the center.
Use Cold Butter for a Flaky Crust
Cold butter is one of the secrets to a tender tart crust with a light flaky texture.
As the cold butter melts in the oven, it creates small pockets in the dough that help the crust bake up crisp and delicate.
If the butter becomes too soft before baking, the crust can turn dense instead of flaky.
Keeping the dough chilled before baking also helps the tart shell hold its shape nicely in the oven.
Strain the Curd for a Smooth Finish
Passing the lemon curd through a fine mesh strainer is a small step that makes a big difference in texture.
Straining removes the lemon zest and any tiny bits of cooked egg, leaving the filling extra smooth and creamy.
This simple step gives the tart a polished bakery-style finish that looks just as good as it tastes.
Easy Variations to Try
- Berry Lemon Tart – Top the tart with fresh strawberries, raspberries, or blueberries for extra sweetness and a beautiful pop of color.
- Coconut Lemon Tart – Sprinkle toasted coconut on top to add a light crunch and delicious tropical flavor.
- Mini Lemon Tarts – Make individual tartlets for parties, brunches, or easy grab-and-serve desserts.
- Graham Cracker Crust Version – Swap the traditional tart crust for a graham cracker crust for a quicker and slightly sweeter option.
What to Serve with Lemon Curd Tart
- Hot tea – A warm cup of tea pairs beautifully with the bright citrus flavor and makes the dessert feel extra cozy.
- Coffee – The rich, bold flavor of coffee balances the sweet and tangy lemon filling perfectly.
- Fresh fruit salad – Light fresh fruit adds extra freshness and complements the tart’s creamy texture.
- Vanilla ice cream – A scoop of vanilla ice cream adds cool creaminess that tastes amazing with the zesty lemon curd.
- Whipped cream – Soft whipped cream adds a light, airy finish and helps balance the tart citrus flavor.
How to Store Lemon Curd Tart
In the Refrigerator
Lemon curd tart should always be stored in the refrigerator because the filling is made with eggs and butter.
Once the tart has fully cooled and set, cover it loosely with plastic wrap or place it in an airtight container to help keep it fresh.
Storing it covered also prevents the tart from absorbing other smells from the refrigerator.
The tart will stay fresh for up to 4 days while still keeping its creamy texture and bright lemon flavor.
For the best texture, serve the tart chilled or let it sit at room temperature for a few minutes before slicing.
If you added whipped cream or fresh fruit on top, the tart is usually best enjoyed within the first couple of days since the toppings can soften over time.
Can You Freeze It?
Yes, lemon curd tart freezes surprisingly well, which makes it a great make-ahead dessert for busy days or special occasions.
For the best results, freeze the tart without whipped cream, berries, or other toppings because they can become watery after thawing.
Place the tart in the freezer until firm, then wrap it tightly to protect it from freezer burn and help preserve the texture.
When stored properly, the tart can be frozen for up to 2 months.
To thaw, move the tart to the refrigerator and let it defrost slowly and gently overnight.
Avoid thawing it at room temperature because the filling can become too soft too quickly.
Once thawed, add fresh toppings if desired and serve chilled for the best flavor and texture.
Common Mistakes to Avoid
- Overheating the lemon curd – Cooking the curd over high heat can cause the eggs to scramble and create a lumpy texture instead of a smooth filling.
- Using bottled lemon juice – Fresh lemon juice gives the tart a brighter, fresher flavor that bottled juice usually cannot match.
- Filling a warm crust – Adding the curd to a hot crust can soften the pastry and make the tart less crisp.
- Skipping chill time – Chilling the tart fully helps the filling set properly and makes slicing much cleaner and easier.
Final Thoughts
This easy lemon curd tart is the perfect mix of bright citrus flavor, creamy filling, and buttery crust, making it a dessert that feels both fresh and comforting.
It’s simple enough for a relaxed weekend bake but beautiful enough to serve at parties, brunches, and special gatherings.
Have fun making it your own by trying different toppings, fresh berries, or even a new crust variation.
Once you take that first creamy, tangy bite, this tart may quickly become one of your favorite homemade desserts.
FAQs
Can I use store-bought lemon curd?
Yes, store-bought lemon curd works well if you want a quicker and easier version.
How do I know when lemon curd is thick enough?
The curd is ready when it coats the back of a spoon and looks smooth and glossy.
Can I make this tart ahead of time?
Yes, this tart is perfect for making a day ahead since it needs time to chill and set.
Do I need a tart pan?
No, you can also use a pie dish if you do not have a tart pan.
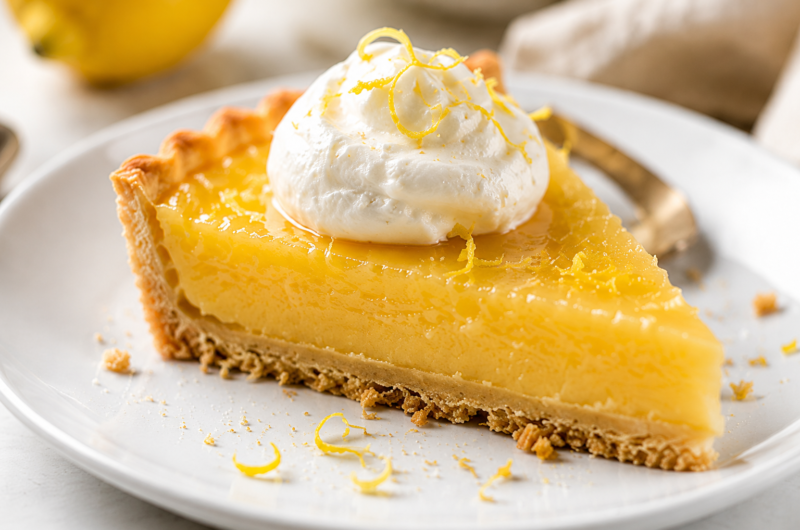
Easy Lemon Curd Tart – Bright, Creamy & Perfect for Any Occasion
Difficulty: Easy8
Slices20
minutes25
minutes45
minutesThis easy lemon curd tart has a buttery crust and a smooth, creamy lemon filling with the perfect balance of sweet and tangy flavor.
Ingredients
- For the Crust
1 1/4 cups all-purpose flour
1/4 cup powdered sugar
1/2 cup unsalted butter, cold and cubed
1 egg yolk
1 teaspoon vanilla extract
1/4 teaspoon salt
- For the Lemon Filling
3/4 cup fresh lemon juice
1 tablespoon lemon zest
3/4 cup granulated sugar
3 eggs
1/2 cup unsalted butter
Directions
- Preheat the oven to 350°F (175°C).
- Mix flour, powdered sugar, and salt, then cut in cold butter until crumbly.
- Add egg yolk and vanilla, then mix until a dough forms. Chill for 30 minutes.
- Roll out the dough, press it into a tart pan, and bake until lightly golden.
- In a saucepan, whisk together eggs, sugar, lemon juice, and zest over low heat until thickened.
- Stir in butter until smooth, then strain the curd for a silky texture.
- Pour the lemon curd into the cooled tart shell and smooth the top.
- Chill until fully set before slicing and serving.
Notes
- Use fresh lemons for the brightest flavor.
- Chill the tart completely for cleaner slices.
- Add whipped cream or fresh berries before serving if desired.


Hi, I’m Sorenna Blythe, the baker and writer behind Mix Whisk Bake. I share simple, reliable recipes and honest kitchen moments to help home bakers bake with confidence and joy. When I’m not testing new treats, you’ll find me sipping coffee and dreaming up my next bake.


