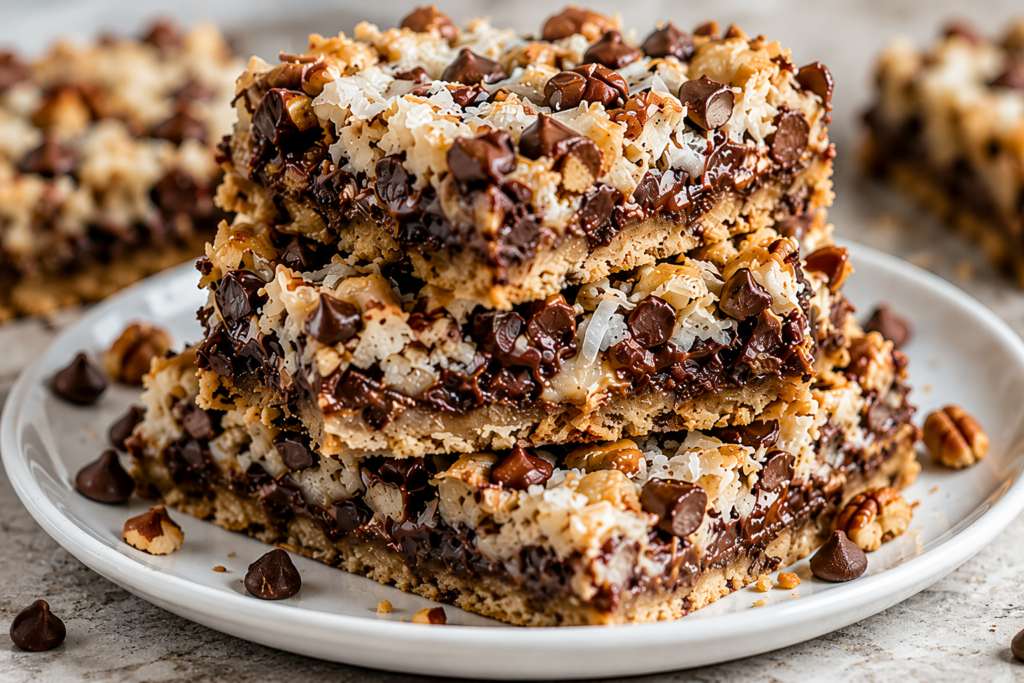
Magic cookie bars have been a favorite dessert for generations, and it’s easy to see why.
With layers of buttery graham cracker crust, sweetened condensed milk, chocolate chips, coconut, and crunchy nuts, every bite is rich, chewy, and packed with flavor.
One of the best things about this recipe is how simple it is to make.
There’s no complicated mixing or special baking skills required.
Just layer the ingredients, pop the pan in the oven, and let the magic happen.
As the bars bake, the layers come together to create a delicious treat that tastes like you spent much more time in the kitchen.
They’re easy to prepare, easy to share, and even easier to enjoy.
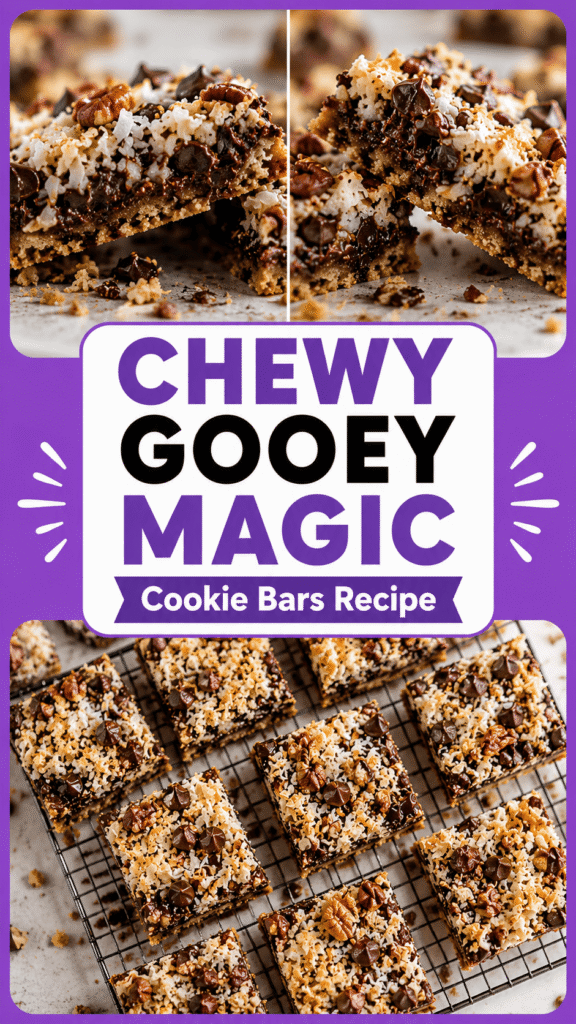
What Are Magic Cookie Bars?
Magic cookie bars are a classic layered dessert made with a graham cracker crust, sweetened condensed milk, chocolate chips, coconut, and chopped nuts.
They are often known as seven-layer bars because of the multiple ingredients stacked together before baking.
What makes them special is how simple they are to prepare.
Instead of mixing a batter or dough, you simply layer the ingredients in a baking dish and let the oven do the work.
As the bars bake, the ingredients come together to create a rich, chewy dessert with plenty of flavor and texture in every bite.
The combination of buttery crust, creamy sweetness, melted chocolate, chewy coconut, and crunchy nuts has made these bars a favorite for generations.
They are easy enough for beginner bakers yet delicious enough to impress family and friends.
The History Behind Magic Cookie Bars
Magic cookie bars became popular during the mid-1900s when home baking recipes that used pantry staples were in high demand.
The recipe gained attention because it relied on simple ingredients that many families already had on hand.
Sweetened condensed milk played an important role in the dessert’s success because it helped bind the layers together while adding sweetness and moisture.
As the recipe appeared in cookbooks, recipe cards, and family gatherings, it quickly earned a place in many kitchens.
Families loved that the bars were easy to make, produced a large batch, and stayed fresh for several days.
Children could help layer the ingredients, making the recipe a fun baking project for all ages.
Over the years, countless variations have been created, but the original version remains one of the most beloved desserts for parties, bake sales, holidays, and everyday treats.
Why They’re Called “Magic”
The name comes from the way the dessert transforms during baking.
At first, the ingredients are simply layered one on top of another.
Once the pan goes into the oven, the sweetened condensed milk moves through the layers and helps everything come together naturally.
The chocolate melts into pockets of rich sweetness.
The coconut becomes lightly toasted and fragrant.
The graham cracker crust turns golden and sturdy enough to support the toppings.
No complicated techniques are needed, yet the finished bars look and taste like a carefully crafted dessert.
The texture is part of the magic too.
Each bite combines a buttery crust, chewy coconut, smooth chocolate, and crunchy nuts.
The layers remain distinct while blending beautifully together.
This balance of flavors and textures is what makes magic cookie bars so memorable and why they continue to be a favorite generation after generation.
Why You’ll Love This Magic Cookie Bars Recipe
- Easy beginner-friendly dessert – No special baking skills are needed, making this recipe perfect for both new and experienced bakers.
- Minimal prep work – Simply layer the ingredients in the pan and let the oven handle the rest.
- Uses pantry staples – Most of the ingredients are common baking essentials that you may already have at home.
- Rich, chewy, and customizable – Every bite is packed with flavor, and you can easily swap ingredients to create your own variation.
- Great make-ahead dessert – These bars store well and taste just as delicious the next day, making them ideal for planning ahead.
Ingredients You’ll Need
For the Graham Cracker Crust
- 1½ cups graham cracker crumbs – Creates a buttery, slightly crunchy base for the bars.
- ½ cup (113 g) unsalted butter, melted – Helps bind the crumbs together and adds rich flavor.
For the Magic Layers
- 1 can (14 ounces / 396 g) sweetened condensed milk – Holds the layers together and provides sweetness.
- 1 cup semi-sweet chocolate chips – Adds rich chocolate flavor throughout the bars.
- 1 cup butterscotch chips – Brings a sweet, caramel-like flavor that complements the chocolate.
- 1⅓ cups sweetened shredded coconut – Adds chewiness and a lightly toasted coconut flavor.
- 1 cup chopped pecans or walnuts – Provides crunch and balances the sweetness of the other ingredients.
Ingredient Notes and Substitutions
If you’re missing an ingredient or want to try a different flavor combination, these simple substitutions work well without changing the overall texture of the bars.
Crust Alternatives
- Vanilla wafer crumbs – Create a sweeter, lighter-flavored crust that pairs beautifully with chocolate and coconut.
- Digestive biscuit crumbs – Offer a slightly less sweet base with a rich, buttery flavor.
- Chocolate cookie crumbs – Add an extra layer of chocolate flavor and make the bars even more indulgent.
Mix-In Variations
- White chocolate chips – Provide a creamy sweetness and pair especially well with coconut.
- Peanut butter chips – Add a rich peanut butter flavor that complements the chocolate layers.
- Toffee bits – Bring a buttery caramel crunch to every bite.
- Dried fruit – Chopped dried cranberries, cherries, or raisins add a chewy texture and a touch of natural sweetness.
Nut-Free Options
- Seeds – Pumpkin seeds or sunflower seeds add crunch without using nuts.
- Extra chocolate chips – A simple way to add more texture and flavor while keeping the recipe nut-free.
- Additional coconut – Increases the chewy texture and coconut flavor without changing the structure of the bars.
Kitchen Tools Needed
- 9×13-inch baking dish – Provides the ideal size for evenly layered bars and consistent baking.
- Mixing bowl – Used to combine the graham cracker crumbs and melted butter for the crust.
- Measuring cups – Helps ensure accurate ingredient portions for the best texture and flavor.
- Spatula – Useful for pressing the crust firmly into the pan and spreading ingredients evenly.
- Parchment paper – Makes it easy to lift the bars out of the pan and creates cleaner slices with less sticking.
How to Make Magic Cookie Bars
Step 1: Prepare the Baking Pan
Preheat your oven to 350°F (175°C), so it is fully heated before the bars go in.
Lightly grease a 9×13-inch baking dish to help prevent sticking.
For even easier removal, line the pan with parchment paper and leave a little overhang on the sides.
The parchment paper acts like handles, making it simple to lift the bars out after they have cooled.
Taking a minute to prepare the pan properly will make serving and cleanup much easier later.
Step 2: Make the Graham Cracker Crust
Place 1½ cups graham cracker crumbs and ½ cup melted unsalted butter in a mixing bowl.
Stir until all of the crumbs are evenly coated and the mixture resembles wet sand.
Pour the mixture into the prepared baking dish.
Use the back of a spoon, a spatula, or the bottom of a measuring cup to press the crumbs into an even layer.
Pay special attention to the corners so the crust bakes evenly from edge to edge.
A firmly packed crust creates a sturdy base that holds the bars together once sliced.
Step 3: Add the Sweetened Condensed Milk
Pour one 14-ounce can of sweetened condensed milk evenly over the crust.
Try to distribute it across the entire surface instead of pouring it all in one spot.
Use a spatula if needed to gently spread it into any uncovered areas.
This layer is what gives magic cookie bars their signature soft, chewy texture.
As the bars bake, the condensed milk seeps through the layers and helps bind everything together.
It also adds the rich sweetness that makes these bars so irresistible.
Step 4: Layer the Remaining Ingredients
Sprinkle 1 cup semi-sweet chocolate chips evenly over the condensed milk.
Add 1 cup butterscotch chips, making sure they are spread across the pan for balanced flavor in every bite.
Scatter 1⅓ cups sweetened shredded coconut over the top.
Finish with 1 cup chopped pecans or walnuts.
Try to distribute each ingredient evenly rather than piling it in the center.
An even layer ensures every square contains the perfect combination of flavors and textures.
Gently press the toppings down with the back of a spatula.
This small step helps the ingredients stick together during baking.
Step 5: Bake Until Golden
Place the baking dish on the center oven rack.
Bake for 25 to 30 minutes, or until the top is lightly golden.
The coconut should appear toasted around the edges.
The bars should look set rather than wet in the center.
Avoid overbaking, as this can make the bars dry and overly firm.
If the edges are turning golden and the center no longer looks liquid, the bars are ready to come out of the oven.
Remember that they will continue to firm up as they cool.
Step 6: Cool Completely Before Slicing
Set the baking dish on a wire rack and allow the bars to cool completely.
This step is important because the layers need time to set.
Cutting the bars while they are still warm can cause them to fall apart and lose their shape.
For the cleanest slices, allow the bars to cool to room temperature.
If you have extra time, chill them in the refrigerator for 30 to 60 minutes before cutting.
Use a sharp knife and wipe it clean between cuts for neat, bakery-style squares.
Once sliced, the bars are ready to serve and enjoy.
Expert Tips for Perfect Magic Cookie Bars
Avoid Overbaking
One of the most common mistakes is leaving the bars in the oven for too long.
Magic cookie bars should be removed once the top is lightly golden and the center looks set.
The bars will continue to firm up as they cool.
Overbaking can dry out the condensed milk layer and make the bars harder than intended.
Keep an eye on the coconut near the end of the baking time.
If the coconut is golden and the edges are slightly browned, the bars are usually ready.
When in doubt, it’s better to remove them a minute early than a few minutes late.
Create Even Layers
Evenly distributing each ingredient helps ensure every square has the perfect balance of flavors.
Take a moment to spread the chocolate chips, butterscotch chips, coconut, and nuts across the entire pan.
Avoid dumping ingredients into one area and leaving gaps in others.
Uniform layers also help the bars bake more consistently.
Each bite should include a little bit of everything.
A few extra seconds spent arranging the toppings can make a noticeable difference in the finished dessert.
Use Parchment for Easy Removal
Lining the baking dish with parchment paper is a small step that makes serving much easier.
Leave a little parchment hanging over two sides of the pan.
Once the bars have cooled, simply lift the entire slab out of the dish.
This makes slicing cleaner and helps prevent the bars from sticking to the pan.
It also reduces the risk of breaking the edges while removing individual pieces.
If you regularly bake bar desserts, this is a technique worth using every time.
Chill Before Cutting for Cleaner Squares
Patience pays off when it comes to slicing magic cookie bars.
Although it can be tempting to cut into them while they are still warm, waiting produces much better results.
After the bars reach room temperature, place them in the refrigerator for 30 to 60 minutes.
The chilled layers become firmer and easier to cut cleanly.
Use a sharp knife and wipe the blade between cuts if needed.
This simple trick creates neat, bakery-style squares that look just as good as they taste.
If you’re serving the bars at a party or bake sale, chilling them first can make a big difference in presentation.
Common Mistakes to Avoid
- Using too much condensed milk – Excess condensed milk can make the bars overly sweet and prevent them from setting properly.
- Cutting while warm – Warm bars are soft and can fall apart, so allow them to cool completely before slicing.
- Uneven crust thickness – A crust that is thicker in some areas may bake unevenly and affect the texture of the bars.
- Overloading toppings – Adding too many mix-ins can make the bars difficult to hold together and harder to cut cleanly.
Fun Variations to Try
- Chocolate Lover’s Magic Bars – Add extra chocolate chips and chocolate cookie crumbs for an even richer chocolate flavor.
- Peanut Butter Magic Bars – Replace the butterscotch chips with peanut butter chips for a delicious peanut butter and chocolate combination.
- Holiday Magic Cookie Bars – Mix in festive candies or seasonal sprinkles to make the bars perfect for celebrations.
- Salted Caramel Magic Bars – Add caramel bits and a light sprinkle of flaky sea salt for a sweet-and-salty twist.
- Tropical Coconut Magic Bars – Include chopped dried pineapple and extra coconut for a bright, tropical flavor.
How to Store Magic Cookie Bars
Room Temperature Storage
If you plan to eat the bars within a few days, room temperature storage works perfectly.
Allow the bars to cool completely before storing them.
Place them in an airtight container to prevent them from drying out.
You can stack the bars in layers if needed.
Place a sheet of parchment paper or wax paper between layers to prevent sticking.
Store the container in a cool, dry place away from direct sunlight and heat.
When stored properly, magic cookie bars typically stay fresh for up to 3 days at room temperature.
Refrigerating for Longer Freshness
For longer storage, the refrigerator is an excellent option.
Place the cooled bars in an airtight container or wrap them tightly to prevent them from absorbing odors from other foods.
Refrigeration helps maintain freshness and keeps the bars firm.
This can be especially helpful during warmer months when desserts tend to soften more quickly.
Magic cookie bars can usually be stored in the refrigerator for up to 1 week.
Before serving, you can enjoy them straight from the fridge or let them sit at room temperature for a few minutes if you prefer a softer texture.
Freezing Instructions
Magic cookie bars freeze surprisingly well and are perfect for making ahead.
Start by allowing the bars to cool completely.
Cut them into individual squares before freezing for easier serving later.
Wrap each bar tightly in plastic wrap or place layers of bars between sheets of parchment paper in a freezer-safe container.
This helps prevent freezer burn and keeps the bars from sticking together.
Label the container with the date so you know when they were stored.
Magic cookie bars can be frozen for up to 3 months.
When you’re ready to enjoy them, transfer the bars to the refrigerator or let them thaw at room temperature for about 30 to 60 minutes.
Once thawed, they will be ready to serve with the same delicious flavor and chewy texture you expect from freshly baked bars.
Make-Ahead Tips
Magic cookie bars are an excellent make-ahead dessert because their flavor and texture hold up beautifully over time.
In fact, many people find that the bars taste even better the next day after the layers have had time to fully set and blend together.
If you’re preparing them for a party, holiday gathering, bake sale, or family event, baking them a day in advance can help reduce stress on the day of serving.
Once the bars have finished baking, allow them to cool completely in the pan.
Resist the temptation to cut them too soon, as cooling helps the layers firm up and creates cleaner slices.
After the bars have cooled, cover the pan tightly with plastic wrap or transfer the bars to an airtight container.
If you plan to serve them within a day or two, storing them at room temperature in a cool, dry place works well.
For longer freshness or warmer climates, place the covered bars in the refrigerator.
If stacking multiple layers of bars in a container, place parchment paper between the layers to prevent sticking.
For the neatest presentation, consider chilling the bars overnight and slicing them just before serving.
This simple step helps create sharp, clean edges and makes the bars easier to handle.
Final Thoughts
Magic cookie bars have remained a favorite for generations because they are easy to make, incredibly delicious, and packed with rich, chewy layers of flavor.
The best part is how simple it is to make them your own by swapping in your favorite chips, nuts, or other mix-ins.
Grab your ingredients, preheat the oven, and enjoy the magic of this classic dessert for yourself.
FAQs
Can I Make Magic Cookie Bars Without Coconut?
Yes. Simply leave out the coconut or replace it with extra chocolate chips, toffee bits, or chopped nuts for added texture.
Why Are My Magic Cookie Bars Falling Apart?
This usually happens when the bars are cut before they have fully cooled or if the crust was not pressed firmly into the pan.
Can I Freeze Magic Cookie Bars?
Yes. Store them in an airtight container or freezer-safe bag for up to 3 months and thaw before serving.
How Long Do Magic Cookie Bars Stay Fresh?
They stay fresh for up to 3 days at room temperature and up to 1 week when stored in the refrigerator.
Can I Use Different Types of Chocolate Chips?
Absolutely. Milk chocolate, dark chocolate, white chocolate, peanut butter chips, or a combination of several varieties all work well.
Do Magic Cookie Bars Need to Be Refrigerated?
No. They can be stored at room temperature for a few days, but refrigeration helps them stay fresh longer and makes them easier to slice.
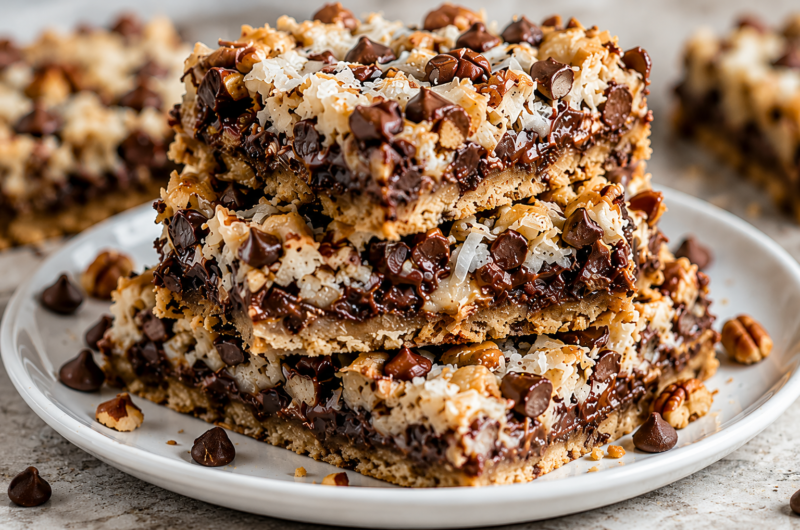
Magic Cookie Bars: The Ultimate Gooey, Layered Dessert
Difficulty: Easy16
Bars10
minutes30
minutes40
minutesThese Magic Cookie Bars are rich, chewy, and loaded with chocolate chips, coconut, and crunchy nuts on a buttery graham cracker crust. They’re quick to prepare and perfect for any occasion.
Ingredients
1½ cups graham cracker crumbs
½ cup unsalted butter, melted
1 (14-ounce) can sweetened condensed milk
1 cup semi-sweet chocolate chips
1 cup butterscotch chips
1⅓ cups sweetened shredded coconut
1 cup chopped pecans or walnuts
Directions
- Preheat oven to 350°F (175°C) and line a 9×13-inch baking dish with parchment paper.
- Mix the graham cracker crumbs and melted butter, then press into the bottom of the pan.
- Pour the sweetened condensed milk evenly over the crust.
- Sprinkle the chocolate chips, butterscotch chips, coconut, and nuts evenly over the top.
- Gently press the toppings down with a spatula.
- Bake for 25–30 minutes or until lightly golden.
- Cool completely before slicing into bars and serving.
Notes
- Chill the bars before slicing for cleaner cuts.
- Store in an airtight container for up to 3 days at room temperature or 1 week in the refrigerator.
- Easily customize with white chocolate chips, peanut butter chips, or dried fruit.

Hi, I’m Sorenna Blythe, the baker and writer behind Mix Whisk Bake. I share simple, reliable recipes and honest kitchen moments to help home bakers bake with confidence and joy. When I’m not testing new treats, you’ll find me sipping coffee and dreaming up my next bake.


