There’s something special about mini tarts.
They’re small, beautiful, and easy to serve, which makes them perfect for parties, holidays, brunches, or even a simple weekend treat at home.
This collection is filled with flavors everyone loves.
You’ll find fruity favorites, rich chocolate tarts, creamy cheesecake fillings, and classic bakery-style desserts that look impressive without being difficult to make.
Many of these recipes are beginner-friendly too, so don’t worry if you’re new to baking.
The best part? Mini tarts feel extra special without requiring a lot of effort.
A few simple ingredients and a good tart shell can turn into a dessert that looks straight from a bakery window.
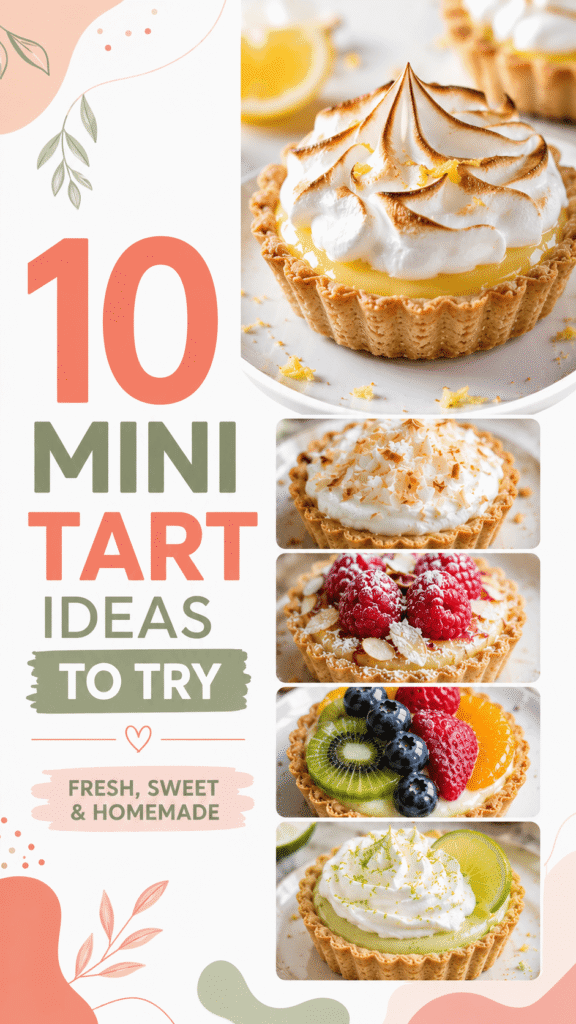
1. Mini Strawberry Cheesecake Tarts
These mini strawberry cheesecake tarts are creamy, fresh, and simple to make.
The crisp tart shells, smooth cheesecake filling, and juicy strawberries create a dessert that feels both elegant and comforting.
They’re perfect for parties, brunches, or make-ahead treats for the weekend.
Ingredients
For The Tart Shells
- 12 mini tart shells, baked and cooled
- 1/2 cup graham cracker crumbs
For The Cheesecake Filling
- 8 oz cream cheese, softened
- 1/4 cup powdered sugar
- 1 tsp vanilla extract
- 1/2 cup heavy cream
For The Topping
- 1 cup fresh strawberries, sliced
Instructions
Step 1: Make The Filling
In a large bowl, beat the cream cheese, powdered sugar, and vanilla until smooth.
Step 2: Add The Cream
In a separate bowl, whip the heavy cream until soft peaks form. Fold it gently into the cream cheese mixture.
Step 3: Fill The Tart Shells
Sprinkle a small amount of graham cracker crumbs into each tart shell. Spoon or pipe the cheesecake filling into the shells.
Step 4: Add Strawberries
Top each tart with sliced fresh strawberries.
Step 5: Chill Before Serving
Place the tarts in the refrigerator for at least 1 hour before serving for the best texture.
Helpful Tips
- Chill the tarts before serving for cleaner bites.
- Use fresh strawberries for the best flavor and texture.
- Pipe the filling for a bakery-style look.
2. Mini Lemon Meringue Tarts
These mini lemon meringue tarts are bright, creamy, and full of fresh citrus flavor.
The sweet toasted meringue balances the tangy lemon filling perfectly, making these little desserts both refreshing and beautiful.
Ingredients
For The Tart Shells
- 12 mini butter tart shells, baked and cooled
For The Lemon Filling
- 3/4 cup lemon curd
- 2 tbsp fresh lemon juice
For The Meringue
- 2 egg whites
- 1/4 cup granulated sugar
- 1/4 tsp cream of tartar
Instructions
Step 1: Fill The Tart Shells
Spoon the lemon curd into the cooled tart shells. Smooth the tops gently.
Step 2: Make The Meringue
In a clean bowl, beat the egg whites and cream of tartar until foamy. Slowly add the sugar while mixing until stiff glossy peaks form.
Step 3: Add The Meringue
Pipe or spoon the meringue onto each tart.
Step 4: Toast The Tops
Use a kitchen torch to lightly toast the meringue until golden brown. If you do not have a torch, place the tarts under a broiler for 1 to 2 minutes while watching closely.
Step 5: Chill And Serve
Refrigerate the tarts for 30 minutes before serving.
Helpful Tips
- Chill the lemon filling before adding the meringue.
- Torch lightly for soft golden peaks.
- Fresh lemon juice adds a brighter flavor.
3. Mini Chocolate Ganache Tarts
These mini chocolate ganache tarts are rich, smooth, and surprisingly easy to make.
The creamy chocolate filling paired with a crisp crust creates a dessert that feels fancy without requiring much effort.
Ingredients
For The Tart Shells
- 12 mini tart shells, baked and cooled
For The Ganache Filling
- 1 cup dark chocolate chips
- 1/2 cup heavy cream
- 1 tbsp butter
- 1 tbsp cocoa powder
Optional Toppings
- Sea salt flakes
- Chocolate shavings
Instructions
Step 1: Heat The Cream
In a small saucepan, heat the heavy cream until warm but not boiling.
Step 2: Make The Ganache
Pour the warm cream over the chocolate chips. Let sit for 2 minutes, then stir until smooth. Mix in the butter and cocoa powder.
Step 3: Fill The Tart Shells
Pour the chocolate ganache evenly into the tart shells.
Step 4: Chill
Place the tarts in the refrigerator for at least 1 hour until set.
Step 5: Garnish And Serve
Sprinkle with sea salt flakes or chocolate shavings before serving.
Helpful Tips
- Serve slightly chilled for the best texture.
- Use good-quality dark chocolate for a richer flavor.
- Add fresh berries for extra color and freshness.
4. Mini Fruit Tarts
Mini fruit tarts are colorful, fresh, and always impressive on a dessert table.
The creamy vanilla filling and glossy fruit topping make these tarts feel like classic bakery treats everyone loves.
Ingredients
For The Tart Shells
- 12 mini tart shells, baked and cooled
For The Pastry Cream
- 1 cup whole milk
- 2 egg yolks
- 1/4 cup granulated sugar
- 2 tbsp cornstarch
- 1 tsp vanilla extract
For The Fruit Topping
- 1 kiwi, sliced
- 1/2 cup strawberries, sliced
- 1/2 cup blueberries
- 2 apricots, sliced
Optional Glaze
- 2 tbsp apricot jam
- 1 tsp water
Instructions
Step 1: Make The Pastry Cream
In a saucepan, heat the milk until warm. In a bowl, whisk egg yolks, sugar, and cornstarch together. Slowly add the warm milk while whisking.
Step 2: Cook The Filling
Return the mixture to the saucepan and cook over medium heat until thickened. Stir in vanilla extract and let cool completely.
Step 3: Fill The Tart Shells
Spoon the cooled pastry cream into the tart shells.
Step 4: Add Fresh Fruit
Arrange the fruit neatly on top of each tart.
Step 5: Add Glaze
Warm the apricot jam with water and lightly brush it over the fruit for shine.
Helpful Tips
- Assemble close to serving time for the freshest texture.
- Dry fruit gently before adding to prevent soggy tarts.
- Mix different fruits for extra color.
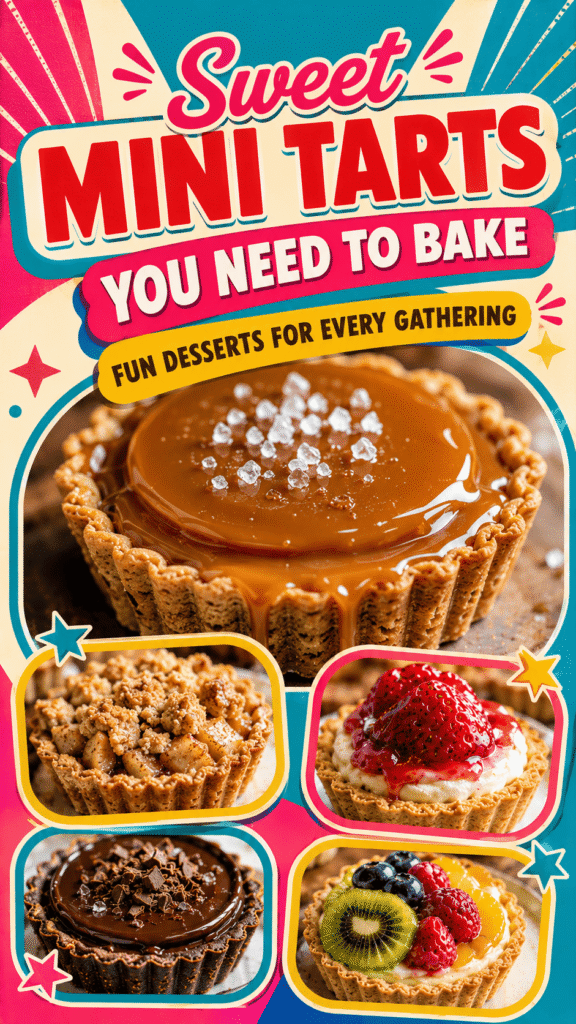
5. Mini Salted Caramel Tarts
These mini salted caramel tarts are rich, buttery, and filled with smooth caramel flavor.
The flaky crust and touch of sea salt make every bite sweet, balanced, and completely irresistible.
Ingredients
For The Tart Shells
- 12 mini tart shells, baked and cooled
For The Caramel Filling
- 1 cup granulated sugar
- 6 tbsp butter
- 1/2 cup heavy cream
- 1/4 cup brown sugar
- 1 tsp vanilla extract
For The Topping
- Sea salt flakes
- Optional chocolate drizzle
Instructions
Step 1: Make The Caramel
In a saucepan over medium heat, melt the granulated sugar until golden brown, stirring gently.
Step 2: Add Butter And Cream
Carefully stir in the butter, then slowly add the heavy cream. Mix until smooth.
Step 3: Finish The Filling
Stir in brown sugar and vanilla extract. Let the caramel cool slightly.
Step 4: Fill The Tart Shells
Pour the caramel into the tart shells.
Step 5: Chill And Decorate
Refrigerate the tarts for 1 hour until set. Sprinkle with sea salt flakes and drizzle with chocolate if desired.
Helpful Tips
- Let the caramel cool slightly before filling the shells.
- Do not overcook the sugar, or the caramel may taste bitter.
- A small sprinkle of sea salt makes the flavor pop even more.
6. Mini Key Lime Tarts
These mini key lime tarts are creamy, bright, and packed with fresh citrus flavor.
They’re light enough for warm weather but still rich and satisfying.
The Graham crust adds the perfect buttery crunch to every bite.
Ingredients
For The Graham Crust
- 1 1/2 cups graham cracker crumbs
- 5 tbsp melted butter
- 2 tbsp granulated sugar
For The Filling
- 1 can (14 oz) sweetened condensed milk
- 1/2 cup key lime juice
- 1 tsp lime zest
- 2 egg yolks
For The Topping
- 1/2 cup whipped cream
- Extra lime zest for garnish
Instructions
Step 1: Prepare The Crust
Preheat the oven to 350°F (175°C). Mix graham cracker crumbs, melted butter, and sugar together until combined.
Step 2: Shape The Crust
Press the mixture into mini tart pans or muffin liners. Bake for 8 minutes, then let cool slightly.
Step 3: Make The Filling
In a bowl, whisk together the sweetened condensed milk, key lime juice, lime zest, and egg yolks until smooth.
Step 4: Fill And Bake
Pour the filling into the crusts and bake for 10 minutes.
Step 5: Chill And Decorate
Cool completely, then refrigerate for at least 2 hours. Top with whipped cream and extra lime zest before serving.
Helpful Tips
- Fresh lime juice gives the best flavor.
- Chill well for cleaner slices and a firmer filling.
- Add thin lime slices for a pretty finish.
7. Mini Nutella Tarts
These mini Nutella tarts are rich, creamy, and incredibly easy to make.
The chocolatey hazelnut filling paired with a crisp crust creates a dessert that both kids and adults love.
Ingredients
For The Chocolate Crust
- 12 mini chocolate tart shells or chocolate cookie crusts
For The Filling
- 1 cup Nutella
- 4 oz cream cheese, softened
- 1/4 cup heavy cream
For The Topping
- 1/4 cup chopped hazelnuts
- Whipped cream, optional
Instructions
Step 1: Make The Filling
In a medium bowl, beat the Nutella and cream cheese together until smooth.
Step 2: Add Cream
Mix in the heavy cream until light and creamy.
Step 3: Fill The Tart Shells
Spoon the filling evenly into the tart shells and smooth the tops.
Step 4: Chill
Refrigerate the tarts for at least 1 hour until firm.
Step 5: Garnish And Serve
Top with chopped hazelnuts and whipped cream before serving if desired.
Helpful Tips
- Chill before serving for the best texture.
- Use toasted hazelnuts for extra flavor.
- Add chocolate shavings for a bakery-style finish.
8. Mini Raspberry Almond Tarts
These mini raspberry almond tarts are buttery, fruity, and full of cozy homemade flavor.
The sweet raspberry filling and soft almond taste work beautifully together in every bite.
Ingredients
For The Tart Dough
- 12 mini butter tart shells
For The Filling
- 1/2 cup raspberry jam
- 1/2 tsp almond extract
- 1/4 cup sliced almonds
Optional Topping
- Powdered sugar for dusting
Instructions
Step 1: Prepare The Filling
In a small bowl, stir together the raspberry jam and almond extract.
Step 2: Fill The Tart Shells
Spoon the raspberry mixture into the tart shells.
Step 3: Add Almonds
Sprinkle sliced almonds over the top of each tart.
Step 4: Bake
Bake at 350°F (175°C) for 12 to 15 minutes until lightly golden.
Step 5: Cool And Finish
Let cool completely, then dust lightly with powdered sugar before serving.
Helpful Tips
- Toast the almonds first for extra crunch and flavor.
- Use seedless raspberry jam for a smoother filling.
- These taste even better the next day.
9. Mini Apple Crumble Tarts
These mini apple crumble tarts are warm, cozy, and perfect for fall baking.
The cinnamon apples and buttery crumble topping make them feel comforting and homemade in the best way.
Ingredients
For The Tart Shells
- 12 mini tart shells
For The Apple Filling
- 2 apples, peeled and diced
- 1/4 cup brown sugar
- 1 tsp cinnamon
- 1 tbsp butter
For The Crumble Topping
- 1/3 cup flour
- 1/4 cup rolled oats
- 3 tbsp brown sugar
- 3 tbsp cold butter
Instructions
Step 1: Cook The Apples
In a skillet over medium heat, cook the apples, brown sugar, cinnamon, and butter for 5 to 7 minutes until softened.
Step 2: Make The Crumble
In a bowl, mix flour, oats, and brown sugar. Cut in the cold butter until crumbly.
Step 3: Fill The Tart Shells
Spoon the apple mixture into the tart shells.
Step 4: Add Crumble
Sprinkle the crumble topping over each tart.
Step 5: Bake
Bake at 350°F (175°C) for 15 to 18 minutes until golden brown.
Helpful Tips
- Firm apples hold their shape better while baking.
- Serve warm for the best flavor.
- Add vanilla ice cream for an extra cozy dessert.
10. Mini Coconut Cream Tarts
These mini coconut cream tarts are smooth, creamy, and full of tropical flavor.
The toasted coconut topping adds extra texture and makes these little desserts feel bakery-worthy without much effort.
Ingredients
For The Tart Shells
- 12 mini tart shells, baked and cooled
For The Coconut Filling
- 1 cup coconut milk
- 1 package vanilla pudding mix
- 1/2 tsp vanilla extract
For The Topping
- 1 cup whipped cream
- 1/3 cup toasted coconut flakes
Instructions
Step 1: Make The Filling
In a bowl, whisk together the coconut milk, pudding mix, and vanilla extract until thick and creamy.
Step 2: Fill The Tart Shells
Spoon the coconut filling into the tart shells and smooth the tops.
Step 3: Chill
Refrigerate for at least 2 hours until set.
Step 4: Add Toppings
Top each tart with whipped cream and toasted coconut flakes before serving.
Helpful Tips
- Chill well before serving for the best texture.
- Toast the coconut flakes for a deeper flavor.
- Add white chocolate shavings for extra sweetness.
Tips For Making Perfect Mini Tarts
Mini tarts may look fancy, but they’re actually very approachable once you know a few simple tricks.
Small details can make a big difference, especially when it comes to the crust and filling.
Choose The Right Tart Shells
The tart shell is the base of the entire dessert, so choosing the right one matters.
A good shell should be buttery, slightly crisp, and strong enough to hold the filling without falling apart.
Homemade tart shells give you the most flavor and texture.
They also let you control the sweetness and thickness of the crust. If you enjoy baking from scratch, homemade shortcrust pastry is worth trying.
It creates that classic bakery-style bite that feels rich and flaky.
Store-bought tart shells are still a great option, especially if you want to save time.
They work well for quick desserts, parties, or beginner bakers who want an easier starting point.
Many pre-made shells bake up crisp and taste delicious once filled and chilled.
Shortcrust Pastry Tips
Shortcrust pastry sounds complicated, but it’s actually one of the simplest doughs to make. The key is keeping the butter cold.
Cold butter creates little pockets in the dough, which helps give the crust a tender and flaky texture.
Try not to overmix the dough. Once the flour and butter come together, stop mixing.
Overworking the dough can make the crust tough instead of light and crisp.
If the dough feels sticky, chill it before rolling. Even 20 to 30 minutes in the refrigerator can make it much easier to handle.
Chilled dough also keeps its shape better while baking.
Prevent Soggy Crusts
One of the most common mini tart problems is a soft or soggy crust. Thankfully, it’s easy to avoid with a few simple steps.
Blind baking is one of the best ways to keep tart shells crisp. This simply means baking the crust before adding the filling.
It helps remove extra moisture and gives the shell a firmer texture.
To blind bake, line the tart shells with parchment paper and add baking beans, rice, or dried beans to weigh the dough down.
Bake until the edges are lightly golden, then remove the weights and bake a few more minutes so the bottoms can finish crisping up.
Cooling the tart shells completely before filling is just as important. Warm shells create steam, and that extra moisture can soften the crust quickly.
Let the shells cool fully on a wire rack before adding creamy or fruity fillings.
Easy Decorating Ideas
Mini tarts already look beautiful because of their size, but simple decorations can make them feel even more special.
The best part is that you do not need complicated piping skills or fancy tools.
Fresh fruit is one of the easiest and prettiest toppings. Strawberries, blueberries, raspberries, kiwi slices, and mango all add bright color and freshness.
Try arranging the fruit neatly on top for a bakery-style finish.
Chocolate drizzle is another easy upgrade. Melt a little chocolate and drizzle it lightly over the tarts using a spoon or small piping bag.
Dark, milk, or white chocolate all work well, depending on the flavor of the tart.
A light dusting of powdered sugar can instantly make homemade desserts look elegant.
It works especially well on fruit tarts, almond tarts, and apple crumble tarts.
Whipped cream swirls add softness and height to mini tarts. You can spoon it on casually or pipe it for a cleaner look.
Even simple whipped cream makes the desserts feel extra inviting and homemade.
Most importantly, have fun with the process. Mini tarts do not need to look perfect to be impressive.
A slightly rustic tart with fresh toppings and a crisp crust still feels thoughtful, beautiful, and delicious.
Best Occasions For Serving Mini Tarts
- Birthday Parties
Mini tarts are easy to serve and look beautiful on dessert tables. Their small size lets guests try different flavors without feeling too full. - Baby Showers
These bite-sized desserts fit perfectly with elegant shower themes. Fruit tarts, lemon tarts, and cheesecake tarts are especially popular for spring and pastel-colored celebrations. - Afternoon Tea
Mini tarts pair wonderfully with tea or coffee. Their delicate size and pretty presentation make them feel classic and inviting without being overly heavy. - Holiday Dessert Trays
Adding a mix of mini tarts to holiday dessert platters creates variety and color. Chocolate, caramel, apple crumble, and coconut cream tarts work especially well during festive gatherings. - Summer Gatherings
Fresh fruit tarts and key lime tarts are refreshing choices for warm-weather parties, cookouts, and outdoor dinners. Their light flavors feel perfect for sunny days. - Bake Sales
Mini tarts are easy to package, transport, and serve. Their bakery-style appearance also helps them stand out on busy bake sale tables. - Brunch Tables
Smaller desserts work beautifully at brunch because guests can enjoy something sweet without it feeling too heavy early in the day. - Wedding Showers And Dessert Bars
Mini tarts add elegance and variety to dessert spreads. Offering several flavors gives guests more options and creates a beautiful display. - Family Gatherings
These little desserts are easy to share and fun for all ages. Kids love the smaller portions, while adults enjoy trying different flavors. - Weekend Baking Projects
Mini tarts are also perfect when you simply want a fun baking project at home. They feel special without requiring complicated decorating skills.
Final Thoughts
Mini tarts are one of the easiest ways to create desserts that feel both fun and impressive.
From fruity favorites and creamy cheesecake tarts to rich chocolate and cozy apple crumble flavors, there’s something here for every season and occasion.
Do not be afraid to mix flavors and try your own combinations too.
Fresh berries in summer, warm spices in fall, or bright citrus during spring can make these little desserts feel new every time you bake them.
Most importantly, enjoy the process. Mini tarts are made for sharing, celebrating, and bringing people together around the table.
FAQs
Can mini tarts be made ahead of time?
Yes, most mini tarts can be made 1 to 2 days ahead. Store them in an airtight container in the refrigerator until ready to serve.
For the freshest texture, add fruit toppings and whipped cream shortly before serving.
How do you keep tart shells crisp?
Blind bake the tart shells before filling them and allow them to cool completely first.
Avoid adding warm fillings, since extra moisture can soften the crust quickly.
Can mini tarts be frozen?
Yes, many mini tarts freeze well, especially chocolate, caramel, cheesecake, and fruit-free varieties.
Wrap them tightly and freeze for up to 2 months. Thaw in the refrigerator before serving.
What pans are best for mini tarts?
Mini tart pans create cleaner edges and a more classic bakery-style look.
Muffin pans are also a great option and work well if you want something simple and beginner-friendly.

Hi, I’m Sorenna Blythe, the baker and writer behind Mix Whisk Bake. I share simple, reliable recipes and honest kitchen moments to help home bakers bake with confidence and joy. When I’m not testing new treats, you’ll find me sipping coffee and dreaming up my next bake.


