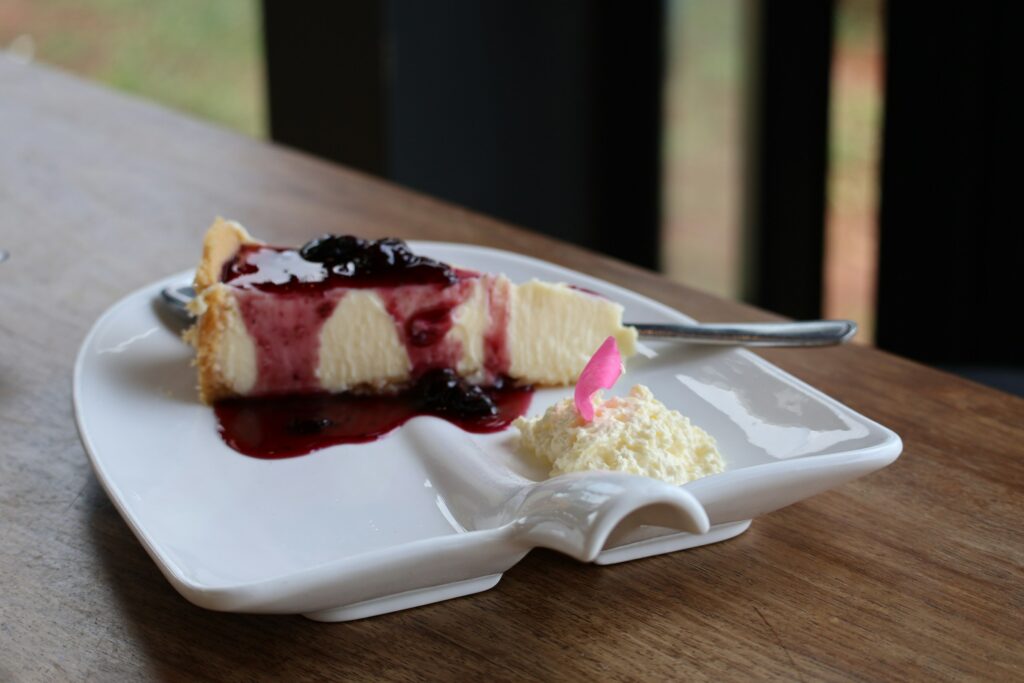
When it’s too hot to turn on the oven, this no-bake blueberry cheesecake is exactly what you need.
It’s cool, creamy, and packed with fresh blueberry flavor that tastes like summer in every bite.
This recipe is simple to follow and doesn’t require any baking skills.
The filling turns out smooth and rich, while the buttery crust holds everything together perfectly.
The homemade blueberry topping adds just the right balance of sweetness and freshness.
I’ll guide you through each step so you can make it with confidence, even if it’s your first cheesecake.
By the end, you’ll have a beautiful, crowd-pleasing dessert that’s easy to make and even easier to love.
Why You’ll Love This No-Bake Blueberry Cheesecake
No oven required
You don’t need to turn on the oven at all, which makes this recipe perfect for warm days or when you want to keep things simple.
Everything comes together with basic mixing and chilling. It’s a great option when you want a homemade dessert without the extra heat or effort.
Perfect for beginners
If you’ve never made cheesecake before, this is a great place to start.
There’s no worrying about cracks, water baths, or overbaking.
Each step is straightforward, and I’ll guide you through it so you can feel confident from start to finish.
Just take your time, and you’ll do great.
Light, creamy texture
This cheesecake is smooth and creamy, but not heavy.
The whipped cream folded into the filling gives it a soft, airy feel that melts in your mouth.
It’s rich enough to feel like a treat, yet light enough that you’ll want another slice.
Great make-ahead dessert
This is one of those desserts that actually gets better as it sits.
Making it ahead gives the cheesecake time to set properly and develop flavor.
You can prepare it the day before and have one less thing to worry about when serving.
Customizable toppings
While the blueberry topping is fresh and delicious, you can easily switch things up.
Try strawberries, raspberries, or even a mix of fruits.
You can also add a drizzle of chocolate or a few crushed nuts for extra texture.
It’s a flexible recipe that you can make your own.
Ingredients You’ll Need
For the Crust
- 200g graham crackers or digestive biscuits (about 2 cups crushed)
- 100g (½ cup) unsalted butter, melted
- 2 tablespoons sugar (optional, for a slightly sweeter crust)
For the Cheesecake Filling
- 450g cream cheese, softened (full-fat works best for a smooth texture)
- 120g (1 cup) powdered sugar
- 1 teaspoon vanilla extract
- 1 tablespoon lemon juice (optional, but brightens the flavor)
- 240ml (1 cup) cold whipping cream (or 1 cup whipped topping)
For the Blueberry Topping
- 2 cups (about 250g) fresh or frozen blueberries
- 80g (⅓ cup) sugar
- 1 tablespoon lemon juice
- 1 tablespoon cornstarch
- 2 tablespoons water
Tip: Measure everything before you start. It makes the process smoother and helps you stay relaxed while assembling the cheesecake.
Kitchen Tools Required
- Mixing bowls
Use at least two bowls. One for the crust and one for the filling. A larger bowl makes mixing easier and less messy. - Electric mixer or whisk
An electric mixer helps you get a smooth, lump-free filling quickly. If you’re using a whisk, it will take a bit more effort, but it works just fine. Just make sure your cream cheese is very soft. - Springform pan or dish (20–23 cm / 8–9 inch)
A springform pan makes it easy to remove the cheesecake cleanly. If you don’t have one, use a regular dish. Just slice and serve directly from it. - Saucepan
You’ll need this to cook the blueberry topping. Choose a small to medium saucepan so everything heats evenly. - Spatula
A spatula helps you fold the filling gently and spread it smoothly into the pan. It’s also great for scraping every bit of mixture because nothing goes to waste.
Tip: Set everything out before you start. It keeps the process calm and helps you move from step to step without rushing.
How to Make No-Bake Blueberry Cheesecake (Step-by-Step)
Step 1: Prepare the Crust
Start by crushing your biscuits into fine crumbs.
You can use a food processor for speed, or place them in a sealed bag and crush with a rolling pin.
Aim for a sand-like texture so the crust holds together well.
Pour in the melted butter and mix until all the crumbs are evenly coated. The mixture should feel slightly wet and hold its shape when pressed.
Transfer the mixture into your pan. Press it down firmly using the back of a spoon or the bottom of a glass.
Take a moment here because pressing it tightly helps the crust stay solid when sliced. Place it in the fridge to chill while you prepare the filling.
Step 2: Make the Cheesecake Filling
Add the softened cream cheese to a bowl and beat it until smooth. This step is important.
A smooth base means a creamy final texture, so don’t rush it.
Add the powdered sugar, vanilla extract, and lemon juice. Mix until everything is well combined and silky.
In a separate bowl, whip the cream until soft peaks form.
This means the cream should hold its shape but still look soft, not stiff.
Gently fold the whipped cream into the cream cheese mixture using a spatula.
Take your time and fold, not stir, to keep the mixture light and airy.
Step 3: Assemble the Cheesecake
Remove the crust from the fridge. Spoon the filling over it and spread it out evenly.
Use a spatula to smooth the top.
You don’t need perfection here. Just aim for a level surface so it sets properly.
Step 4: Prepare Blueberry Topping
Add the blueberries, sugar, and lemon juice to a saucepan.
Cook over medium heat, stirring occasionally, until the berries soften and release their juices.
In a small bowl, mix the cornstarch with water to create a slurry (a simple thickening liquid).
Pour this into the blueberry mixture and stir as it cooks.
You’ll see it thicken into a glossy sauce within a minute or two.
Remove from heat and let it cool completely. This step matters.
Adding a warm topping can soften the cheesecake, so give it time to cool.
Step 5: Chill and Set
Place the assembled cheesecake in the fridge and let it chill for at least 4–8 hours.
Overnight is even better if you have the time. This allows the filling to firm up and slice cleanly.
Once fully set, spoon the cooled blueberry topping over the cheesecake just before serving.
Slice, serve, and enjoy every creamy, fruity bite.
You’ve just made a beautiful no-bake dessert.
Tips for the Perfect No-Bake Cheesecake
- Use full-fat cream cheese (450g / 2 blocks)
Full-fat cream cheese gives the cheesecake a rich, stable texture that sets properly. Low-fat versions can make the filling too soft and less creamy. - Chill long enough for proper setting (at least 4–8 hours, ideally overnight)
This step is key. The filling needs time to firm up so you get clean slices. If it still looks soft in the center, give it more time in the fridge. - Don’t overmix the filling (mix just until smooth and combined)
Overmixing can make the filling too loose and affect how well it sets. Once everything is smooth and creamy, stop mixing. - Let the topping cool completely (about 20–30 minutes at room temperature)
Adding warm topping can melt or soften the cheesecake layer. Make sure your blueberry topping is fully cooled before spreading it on top.
Variations & Substitutions
No Gelatin Version
This recipe already sets beautifully without gelatin, which keeps things simple and beginner-friendly.
The structure comes from the combination of cream cheese and whipped cream.
As long as you chill it long enough, it will hold its shape well when sliced.
If your cheesecake feels a little soft, don’t worry, because it usually just needs more time in the fridge.
Giving it a full overnight chill makes a big difference.
Gluten-Free Crust Option
You can easily make this cheesecake gluten-free by swapping the biscuits for gluten-free cookies or crackers.
Use the same quantity and follow the same steps.
Make sure the crumbs are fine and mix well with the butter so the crust holds together.
Press it firmly into the pan to avoid crumbling later.
Once chilled, it will be just as sturdy and delicious.
Vegan Alternative (Plant-Based Cream Cheese & Cream)
To make a vegan version, use plant-based cream cheese and dairy-free whipping cream.
Choose ones that are thick and designed for desserts, as they tend to set better.
Whip the dairy-free cream until soft and fluffy, then fold it gently into the vegan cream cheese mixture.
The texture may be slightly lighter, but it will still be creamy and satisfying.
Chill it well to help it firm up properly.
Different Fruit Toppings
Blueberries are a classic, but you can easily change the flavor to suit your taste or what you have on hand.
The method stays the same, so just swap the fruit.
- Strawberries: Sweet and slightly tangy, great for a bright, fresh topping
- Mango: Smooth and tropical, perfect for a summer twist
- Raspberries: A little tart, which balances the creamy filling nicely
You can even mix fruits for more depth of flavor.
Whatever you choose, cook it the same way and let it cool before adding it on top.
Storage & Make-Ahead Tips
This cheesecake stores really well, which makes it perfect for planning ahead and enjoying later without stress.
Once it’s fully set, cover it tightly with plastic wrap or place it in an airtight container and keep it in the fridge; this prevents it from drying out and stops it from absorbing other fridge smells.
It will stay fresh and creamy for up to 3–4 days, and the texture actually holds up nicely during that time.
If you want to make it further in advance, you can freeze it without the blueberry topping for the best results.
Wrap the cheesecake (or individual slices) well in plastic wrap, then add a layer of foil to protect it from freezer burn. It can be frozen for up to 1 month.
When you’re ready to serve, transfer it to the fridge and let it thaw slowly overnight. This helps keep the texture smooth and prevents excess moisture.
Add the topping just before serving for the best look and flavor.
Serving Suggestions
When you’re ready to serve, keep it simple and let the cheesecake shine while adding a few fresh touches for extra appeal.
A handful of fresh blueberries on top adds color and reinforces the flavor, while a few mint leaves give a clean, bright finish that makes each slice look fresh and inviting.
If you’d like a little extra indulgence, a light swirl of whipped cream around the edges or on each slice works beautifully without overpowering the dessert.
For clean slices, use a sharp knife and wipe it between cuts.
This small step makes a big difference in presentation.
This cheesecake fits almost any occasion.
It’s especially perfect for warm-weather gatherings like summer parties, braais, or casual get-togethers where you want something cool and refreshing.
It also works well for birthdays or holidays when you need a dessert you can make ahead and serve with ease.
However you present it, keep it chilled until just before serving so it stays firm, creamy, and ready to impress.
Common Mistakes to Avoid
- Runny filling (not enough chilling): Chill for at least 4–8 hours so the cheesecake sets properly and slices cleanly.
- Crust falling apart: Use 200g crushed biscuits + 100g melted butter and press firmly to help it hold together.
- Overly sweet topping: Stick to about 80g (⅓ cup) sugar and add a little lemon juice to balance the sweetness.
Final Thoughts
This no-bake blueberry cheesecake is simple, creamy, and full of fresh flavor, with no oven needed.
With a buttery crust, smooth filling, and bright topping, it’s a dessert you can make with confidence.
Give it a try and make it your own.
FAQs
Can I make no-bake blueberry cheesecake ahead of time?
Yes, it’s best made a day in advance.
How long does it need to chill?
At least 4–8 hours, preferably overnight.
Can I use frozen blueberries?
Yes, they work perfectly for the topping.
Do I need gelatin for no-bake cheesecake?
No, this recipe sets with whipped cream.
Can I freeze no-bake cheesecake?
Yes, freeze without topping for best results.
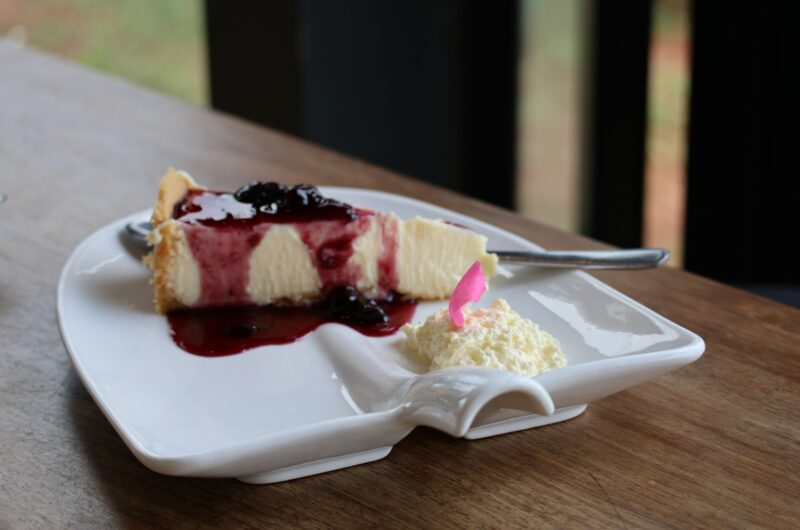
No-Bake Blueberry Cheesecake (Easy, Creamy & Foolproof)
Difficulty: Easy8
Slices20
minutes10
minutes6
hoursA creamy, no-bake cheesecake with a buttery biscuit crust and fresh blueberry topping—simple, refreshing, and perfect for any occasion.
Ingredients
- Crust:
200g graham crackers or digestive biscuits (crushed)
100g (½ cup) melted butter
2 tbsp sugar (optional)
- Filling:
450g cream cheese (softened)
120g (1 cup) powdered sugar
1 tsp vanilla extract
1 tbsp lemon juice (optional)
240ml (1 cup) whipping cream
- Topping:
2 cups (250g) blueberries
80g (⅓ cup) sugar
1 tbsp lemon juice
1 tbsp cornstarch + 2 tbsp water
Directions
- Mix crushed biscuits with melted butter. Press into a pan and chill.
- Beat cream cheese until smooth. Add sugar, vanilla, and lemon juice.
- Whip cream, then gently fold it into the mixture.
- Spread filling over the crust and smooth the top.
- Cook blueberries, sugar, and lemon juice. Add cornstarch slurry and thicken. Cool completely.
- Chill cheesecake for 4–8 hours or overnight.
- Add topping before serving, slice, and enjoy.
Notes
- Chill overnight for the best texture and clean slices.
- Make sure the topping is fully cooled before adding.
- Use full-fat cream cheese for a firm, creamy result.

Hi, I’m Sorenna Blythe, the baker and writer behind Mix Whisk Bake. I share simple, reliable recipes and honest kitchen moments to help home bakers bake with confidence and joy. When I’m not testing new treats, you’ll find me sipping coffee and dreaming up my next bake.


