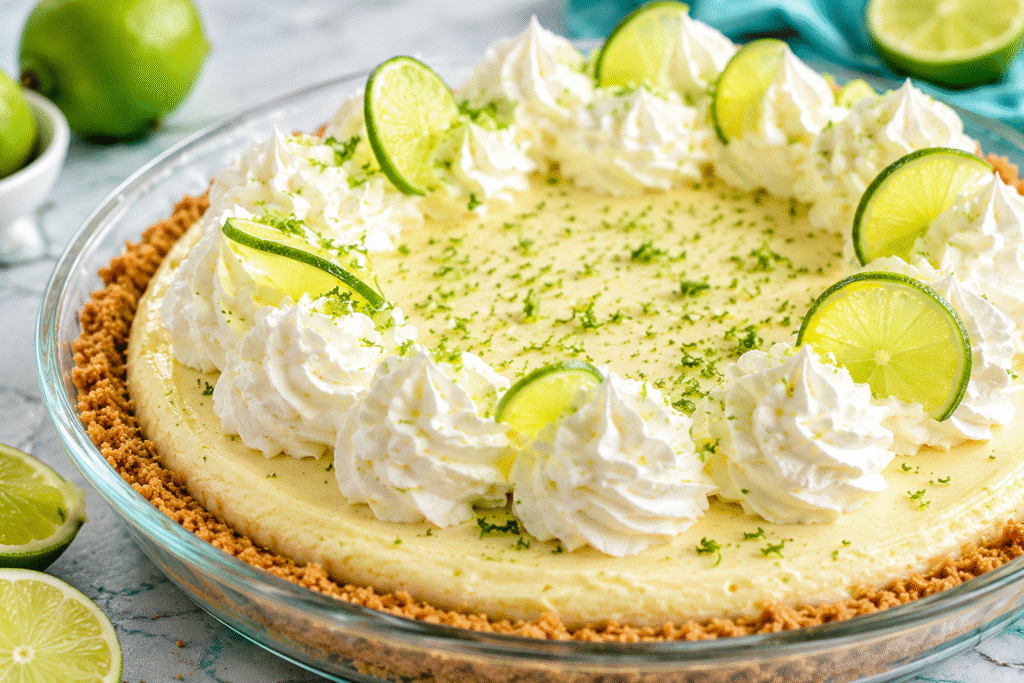
There’s something so nice about a dessert that comes together without turning on the oven.
On hot summer days or busy weekends, this No-Bake Key Lime Pie is the kind of recipe you’ll want to keep on repeat.
It’s cool, creamy, refreshing, and packed with bright citrus flavor in every bite.
The filling is smooth and tangy with just the right amount of sweetness, while the buttery graham cracker crust adds the perfect crunch.
Even better, you only need a handful of simple ingredients to make it.
This recipe is great for beginners because it’s easy to prepare and hard to mess up. Just mix, chill, and enjoy.
It’s perfect for summer parties, backyard BBQs, holidays, or anytime you need a simple make-ahead dessert that always impresses.
Why You’ll Love This No-Bake Key Lime Pie
- Quick and easy to prepare – Simple steps and minimal prep make this recipe perfect for busy days.
- No oven required – A great dessert for warm weather when you want to keep the kitchen cool.
- Creamy, smooth, and refreshing – Every bite is light, silky, and packed with fresh lime flavor.
- Perfect balance of sweet and tart – The rich filling and bright citrus create a delicious flavor combination.
- Great make-ahead dessert – Prepare it in advance and let the refrigerator do the work.
- Beginner-friendly recipe – Easy ingredients and simple instructions make this perfect for first-time bakers.

What Is Key Lime Pie?
Key lime pie is a classic American dessert that originally became popular in the Florida Keys, where fresh key limes were easy to find and widely used in local recipes.
Traditional key lime pie is known for its smooth citrus filling, buttery crust, and bright, tangy flavor that feels both rich and refreshing at the same time.
Key limes are smaller than regular limes and have a slightly more intense flavor with a mix of tartness and natural sweetness that gives the pie its signature taste.
Regular limes can still work well in this recipe if key limes are hard to find, so there’s no need to stress if your grocery store doesn’t carry them.
The classic version of key lime pie is usually baked briefly to help the filling set, but this no-bake version makes things much simpler while keeping the same creamy texture and fresh lime flavor people love.
Instead of using the oven, the filling chills in the refrigerator until firm, making the recipe easier, faster, and perfect for warm days when you want a homemade dessert without heating up the kitchen.
It’s a great option for beginners because the steps are simple and the results still feel special enough for holidays, parties, or weekend treats.
Ingredients You’ll Need
For the Graham Cracker Crust
- 2 cups graham cracker crumbs – Creates a buttery and slightly crunchy base for the pie.
- ½ cup unsalted butter, melted – Helps bind the crust together and adds rich flavor.
- 2 tablespoons granulated sugar – Adds a touch of sweetness to balance the tangy filling.
For the No-Bake Key Lime Filling
- 16 ounces cream cheese, softened – Gives the filling its smooth and creamy texture.
- 1 can (14 ounces) sweetened condensed milk – Adds sweetness and helps create a silky filling.
- ½ cup key lime juice – Brings the bright and refreshing citrus flavor.
- 1 tablespoon lime zest – Adds extra fresh lime flavor and aroma.
- 1 cup heavy whipping cream – Makes the filling light, fluffy, and creamy.
Optional Toppings
- Whipped cream – Adds a light and creamy finishing touch.
- Thin lime slices – Perfect for a fresh and colorful garnish.
- Extra lime zest – Adds more citrus flavor and a pop of color.
- 2 tablespoons crushed graham crackers – Sprinkle on top for extra crunch and texture.
Kitchen Tools Needed
- Mixing bowls – You’ll need a few bowls for preparing the crust, whipping the cream, and mixing the filling.
- Hand mixer or stand mixer – Helps create a smooth, creamy filling and perfectly whipped cream with less effort.
- Measuring cups and spoons – Makes it easy to measure ingredients accurately for the best texture and flavor.
- 9-inch pie dish – The perfect size for shaping and serving your no-bake key lime pie.
- Rubber spatula – Useful for folding ingredients together gently and scraping every bit of filling into the pie crust.
How To Make No-Bake Key Lime Pie
Step 1: Prepare the Graham Cracker Crust
Start by adding the graham cracker crumbs, sugar, and melted butter to a mixing bowl.
Stir everything together until the crumbs are evenly coated and resemble wet sand.
This helps the crust hold together once chilled.
Pour the mixture into a 9-inch pie dish and press it down firmly using the bottom of a measuring cup or glass.
Take a little extra time to press the crumbs evenly across the bottom and slightly up the sides of the dish for a sturdy crust that slices neatly later.
Place the crust in the refrigerator while you prepare the filling.
Chilling helps the butter firm up so the crust stays crisp and holds its shape.
Step 2: Make the Creamy Key Lime Filling
In a large mixing bowl, beat the softened cream cheese until completely smooth.
This step is important because it creates the creamy base for the filling and prevents lumps.
Once smooth, add the sweetened condensed milk, key lime juice, and lime zest.
Continue mixing until the filling becomes thick, silky, and fully combined.
The lime juice naturally helps thicken the mixture while adding that fresh citrus flavor key lime pie is known for.
If you want a slightly stronger lime taste, you can add a little extra zest here.
The filling should look creamy and smooth with a pale green tint.
Step 3: Fold in Whipped Cream
In a separate bowl, whip the heavy cream until stiff peaks form.
This simply means the whipped cream stands up firmly when the beaters are lifted.
Be careful not to overwhip, or the texture can become grainy.
Gently fold the whipped cream into the key lime mixture using a rubber spatula.
Folding means slowly mixing without stirring too hard so the filling stays light and fluffy.
This step gives the pie its soft, airy texture and makes every bite feel creamy and refreshing.
Step 4: Assemble the Pie
Remove the chilled crust from the refrigerator and pour the filling into the prepared pie shell.
Use a spatula to spread the filling evenly all the way to the edges.
Smooth the top so the pie looks neat and even before chilling.
At this stage, the pie already smells fresh and citrusy, which makes it hard to wait, but the chilling time is what helps everything set properly.
Step 5: Chill Until Set
Place the pie in the refrigerator for at least 4 to 6 hours, or overnight if possible.
The extra chilling time gives the filling a firmer texture and makes slicing much easier.
Once fully chilled, garnish with whipped cream, lime slices, extra zest, or crushed graham crackers before serving.
The final result is cool, creamy, and packed with bright lime flavor in every bite.
Tips For The Best No-Bake Key Lime Pie
- Use fresh key lime juice for the best flavor – Fresh juice gives the pie a brighter and more natural citrus taste than bottled juice.
- Chill long enough for clean slices – Letting the pie fully set in the refrigerator helps it hold its shape when sliced.
- Don’t overmix the whipped cream – Overmixing can make the filling dense instead of light and fluffy.
- Use full-fat cream cheese for a creamy texture – Full-fat cream cheese creates a richer, smoother filling that sets better.
- Add extra zest for a stronger citrus flavor – A little extra lime zest adds more freshness and boosts the tangy flavor.
Recipe Variations
Mini No Bake Key Lime Pies
Turn this recipe into individual desserts by using muffin tins, cupcake liners, or mini tart pans instead of a full pie dish.
These mini versions are great for parties, BBQs, and holidays because they’re easy to serve and look extra cute on a dessert table.
Simply divide the crust mixture and filling evenly between each cup, then chill until firm.
They also set a little faster than a full-sized pie, which is a nice bonus when you’re short on time.
Coconut Key Lime Pie
If you love tropical flavors, adding coconut is an easy way to give this pie a fun twist.
Mix toasted coconut into the graham cracker crust for extra texture, or sprinkle it over the top before serving for a little crunch.
The sweet coconut pairs perfectly with the bright lime flavor and makes the pie taste even more refreshing.
You can also add a small splash of coconut extract to the filling if you want a stronger coconut flavor without changing the texture.
Frozen Key Lime Pie
For an extra cold and creamy dessert, place the finished pie in the freezer instead of the refrigerator.
This creates a texture similar to a frozen cream pie or soft ice cream cake.
Let the pie sit at room temperature for about 10 to 15 minutes before slicing so it softens slightly.
This version is especially perfect for hot summer days and makes the lime flavor taste even more refreshing.
Gluten-Free Version
Making this recipe gluten-free is simple and still just as delicious.
Replace the regular graham crackers with gluten-free graham crackers or gluten-free cookie crumbs for the crust.
The filling ingredients are naturally gluten-free, so the crust is the only part that needs adjusting.
It’s an easy swap that allows more people to enjoy the dessert without sacrificing flavor or texture.
What To Serve With Key Lime Pie
- Fresh berries – Strawberries, raspberries, or blueberries add a sweet and refreshing contrast to the tangy pie.
- Iced coffee – A cold coffee pairs perfectly with the creamy citrus flavor and balances the sweetness.
- Lemonade – A chilled glass of lemonade keeps the dessert light, bright, and extra refreshing.
- Coconut whipped cream – Adds a soft tropical flavor that works beautifully with the lime filling.
- Tropical fruit salad – Fresh pineapple, mango, and kiwi make a colorful and refreshing side for summer gatherings.
How To Store No-Bake Key Lime Pie
Refrigerator Storage
No Bake Key Lime Pie stores very well in the refrigerator, which makes it perfect for preparing ahead of time.
Once the pie has fully set, cover it tightly with plastic wrap, foil, or a pie container to keep it fresh and prevent it from absorbing any refrigerator odors.
Store the pie in the refrigerator for up to 4 days for the best texture and flavor.
The filling stays creamy and smooth, while the crust remains firm enough to slice easily.
If you plan to add whipped cream or fresh garnishes, it’s best to add them right before serving so everything looks fresh and bright.
Keeping the pie chilled at all times also helps it hold its shape, especially on warm days.
Freezing Instructions
This pie also freezes beautifully if you want to save leftovers or prepare dessert well in advance.
After the pie has fully chilled and set, wrap it tightly in plastic wrap and then add a layer of foil to help protect it from freezer burn.
You can freeze the entire pie or individual slices for easier serving later.
Store it in the freezer for up to 2 months. When you’re ready to enjoy it, transfer the pie to the refrigerator and let it thaw overnight.
This slower thawing process helps the filling stay creamy instead of becoming watery.
For a firmer texture, you can even serve the pie slightly frozen, especially during hot summer weather.
Common Mistakes To Avoid
- Using too much lime juice – Adding extra juice can make the filling too thin and prevent the pie from setting properly.
- Not chilling long enough – The pie needs enough time in the refrigerator to become firm and easy to slice.
- Overwhipping the cream – Whipping the cream too much can create a grainy texture instead of a light and fluffy filling.
- Using low-fat ingredients that affect texture – Full-fat cream cheese and heavy cream help create the rich, creamy consistency this pie is known for.
Final Thoughts
This no-bake key lime pie is the kind of dessert that feels special without requiring a lot of work.
It’s creamy, refreshing, easy to make, and perfect for everything from summer parties to simple weekend treats at home.
You can keep it classic or make it your own with different toppings, extra citrus, or fun flavor twists.
Most importantly, have fun with it and enjoy the process.
Once you take that first cold and creamy bite, you’ll see why this recipe is always a crowd favorite.
If you loved it, share it with friends and family so they can enjoy a slice too.
FAQs
Can I use regular limes instead of key limes?
Yes, regular limes work well if key limes are unavailable. The flavor will be slightly different but still fresh and delicious.
How long does no-bake key lime pie need to chill?
The pie should chill for at least 4 to 6 hours, but overnight is best for the firmest texture and clean slices.
Can I make this pie ahead of time?
Absolutely. This pie is perfect for making a day in advance since it needs time to chill and set properly.
Can I freeze no-bake key lime pie?
Yes, you can freeze the pie for up to 2 months. Thaw it in the refrigerator before serving.
Why didn’t my pie set properly?
This usually happens if the pie didn’t chill long enough or if too much lime juice was added to the filling.
No Bake Key Lime Pie – Creamy, Easy & Perfect For Summer
Difficulty: Easy4
servings20
minutes4
hours20
minutesThis No Bake Key Lime Pie is creamy, refreshing, and packed with bright citrus flavor with a buttery graham cracker crust. Perfect for warm days, parties, or an easy make-ahead dessert.
Ingredients
- For the Crust
2 cups graham cracker crumbs
½ cup melted butter
2 tablespoons sugar
- For the Filling
16 ounces cream cheese, softened
1 can (14 ounces) sweetened condensed milk
½ cup key lime juice
1 tablespoon lime zest
1 cup heavy whipping cream
Directions
- In a bowl, mix graham cracker crumbs, melted butter, and sugar until combined. Press firmly into a 9-inch pie dish and chill.
- Beat the cream cheese until smooth. Add sweetened condensed milk, key lime juice, and lime zest. Mix until creamy.
- In a separate bowl, whip the heavy cream until stiff peaks form. Gently fold it into the lime mixture.
- Pour the filling into the prepared crust and smooth the top evenly.
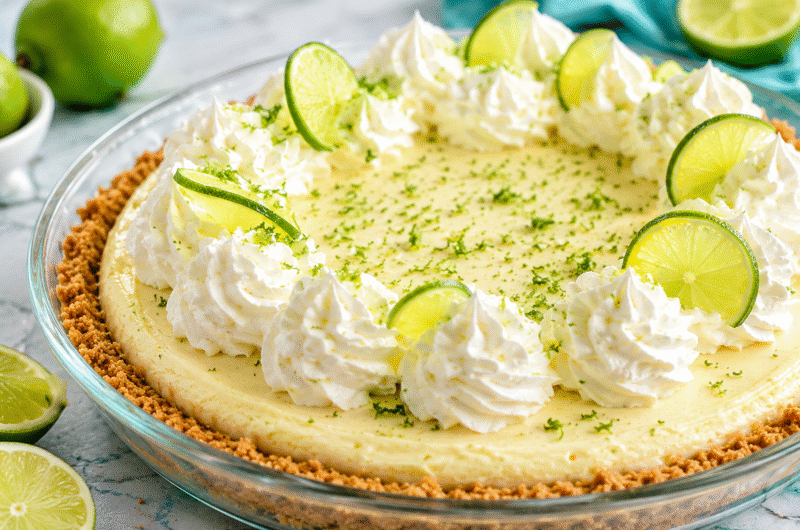
- Refrigerate for at least 4 hours or overnight until fully set. Garnish with whipped cream and lime slices before serving.
Notes
- Fresh key lime juice gives the best flavor.
- Chill overnight for cleaner slices and a firmer texture.
- Store covered in the refrigerator for up to 4 days.


Hi, I’m Sorenna Blythe, the baker and writer behind Mix Whisk Bake. I share simple, reliable recipes and honest kitchen moments to help home bakers bake with confidence and joy. When I’m not testing new treats, you’ll find me sipping coffee and dreaming up my next bake.


