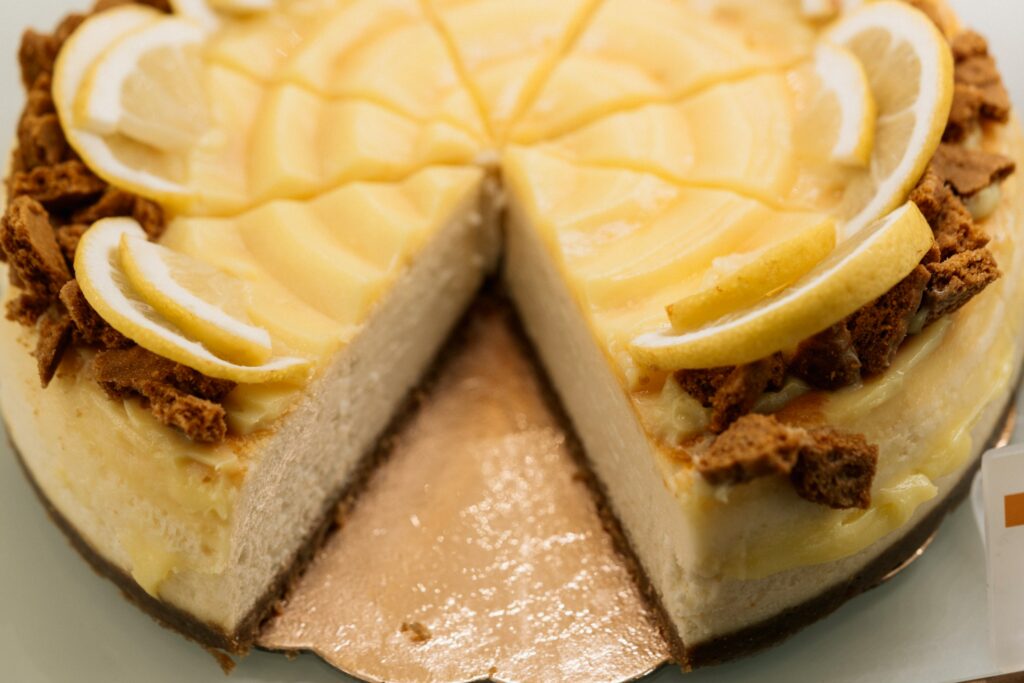
Craving something sweet, fresh, and a little zesty? This easy no-bake lemon cheesecake is cool, creamy, and full of bright lemon flavor with no oven needed.
It comes together quickly with simple ingredients, so you don’t need much experience to get it right.
Just mix, chill, and let the fridge do the work.
This is the kind of dessert you can rely on for warm days, family get-togethers, or when you need something impressive at the last minute.
Light, refreshing, and easy to slice—once you make it, you’ll keep coming back to it.
IWhy You’ll Love This No-Bake Lemon Cheesecake
No Oven Required
You don’t need to turn on the oven at all, which makes this recipe perfect for warm days or small kitchens.
Everything comes together with simple mixing and chilling.
If you’ve ever felt unsure about baking temperatures or timing, this takes that stress away completely.
Light, Creamy, and Refreshing Flavor
Each bite is smooth and creamy with a bright lemon kick that keeps it from feeling heavy.
The citrus balances the richness of the cream cheese, so it tastes fresh rather than overly sweet.
It’s the kind of dessert you can enjoy even after a big meal.
Quick Prep Time
You can have this ready for the fridge in a short amount of time.
The steps are simple and easy to follow—no complicated techniques or long prep work.
Just mix, assemble, and let it chill while you get on with your day.
Make-Ahead Friendly
This cheesecake actually gets better as it sits, which makes it ideal for planning ahead.
You can prepare it the night before and have a fully set, ready-to-serve dessert waiting for you.
It’s a great option when you want to stay organized without rushing at the last minute.
Simple, Accessible Ingredients
You’ll only need a handful of easy-to-find ingredients, most of which you may already have at home.
There’s nothing fancy or hard to track down. If you can grab cream cheese, lemons, and a few basics, you’re all set to make this confidently.
Ingredients Needed
For the Crust
- 1 ½ cups (150g) crushed graham crackers or biscuits – finely crushed for a firm base
- ½ cup (115g) melted butter – helps bind the crumbs together
- 2 tablespoons sugar (optional) – adds a light sweetness to the crust
Tip: If your biscuits are already sweet, you can skip the extra sugar.
For the Lemon Cheesecake Filling
- 450g (16 oz) cream cheese, softened – gives a smooth, creamy texture
- 1 can (397g) sweetened condensed milk or ¾ cup (90g) powdered sugar – for sweetness and structure
- ½ cup (120ml) fresh lemon juice – adds that bright, tangy flavor
- 1 tablespoon lemon zest – boosts the lemon taste without extra liquid
- 1 teaspoon vanilla extract – rounds out the flavor
- 1 cup (240ml) whipped cream or whipped topping – makes the filling light and airy
Tip: Fresh lemon juice gives the best flavor, but bottled can work if needed.
Optional Toppings
- Lemon slices or wedges – for a fresh, decorative finish
- Extra whipped cream – adds a soft, creamy touch on top
- ¼ cup lemon curd – for a stronger lemon flavor
- ½ cup fresh berries (strawberries, blueberries, or raspberries) – adds color and a natural sweetness
You can keep it simple or dress it up—both ways taste amazing.
Equipment Needed
- Mixing bowls (2–3 sizes)
You’ll need at least one large bowl for the filling and a smaller one for the crust. Having a few on hand keeps things organized and easy to manage. - Hand mixer or stand mixer
This helps you get the cream cheese smooth and lump-free. A hand mixer works perfectly fine, but if you have a stand mixer, it makes the process even easier. - Springform pan (8–9 inch) or a similar dish
A springform pan is ideal because it lets you release the cheesecake cleanly. If you don’t have one, a regular dish or pie pan will still work—just slice and serve straight from it. - Spatula
Use this to fold in the whipped cream gently and to smooth out the top. It helps keep the filling light and even. - Measuring cups and spoons
Accurate measuring makes a big difference in texture and flavor, so it’s worth taking a moment to measure properly.
Tip: If you’re new to this, don’t stress about having the “perfect” tools. Simple kitchen basics will get the job done just fine.
How to Make No-Bake Lemon Cheesecake (Step-by-Step)
Step 1: Prepare the Crust
Start by crushing your biscuits or graham crackers into fine crumbs.
You can use a food processor for a quick result, or place them in a sealed bag and crush with a rolling pin.
Aim for a sand-like texture so the crust holds together well.
Pour the crumbs into a bowl and mix in the melted butter until everything is evenly coated.
The mixture should feel slightly damp and hold its shape when pressed.
Transfer the mixture into your pan. Press it down firmly using the back of a spoon or the bottom of a glass.
Take your time here because an even, compact base makes slicing much easier later.
Place the crust in the fridge for about 20–30 minutes to set.
This helps it firm up before adding the filling.
Step 2: Make the Lemon Cheesecake Filling
In a large bowl, beat the softened cream cheese until smooth. This step matters, so don’t rush it.
You’re looking for a creamy texture with no lumps.
Add your sweetened condensed milk (or powdered sugar) and vanilla extract.
Mix until fully combined and silky.
Pour in the fresh lemon juice and add the zest.
The mixture will start to thicken slightly as the lemon reacts with the cream cheese. This is exactly what you want.
Gently fold in the whipped cream using a spatula. Take your time and use light motions to keep the mixture airy.
This is what gives the cheesecake its soft, creamy texture.
Step 3: Assemble the Cheesecake
Take your chilled crust out of the fridge. Spoon the filling over the base and spread it evenly.
Use a spatula to smooth the top.
You don’t need perfection. Just aim for an even layer so it sets nicely.
Step 4: Chill Until Set
Place the cheesecake in the fridge and let it chill for at least 4–6 hours.
If you have the time, leaving it overnight gives the best results.
This step is key. The filling needs time to firm up so it slices cleanly and holds its shape.
Step 5: Add Toppings & Serve
Once set, add your toppings just before serving.
A few lemon slices, a swirl of whipped cream, or some fresh berries can make it look extra special.
Slice with a sharp knife, wiping it clean between cuts for neat edges.
Serve chilled and enjoy every creamy, zesty bite because you’ve just made a beautiful dessert with ease!
Tips for the Best No-Bake Cheesecake
Use Full-Fat Cream Cheese for the Best Texture
Full-fat cream cheese gives you a rich, smooth filling that sets properly.
Lower-fat versions tend to be softer and can leave your cheesecake slightly runny.
Let the cream cheese sit at room temperature before mixing so it blends easily and stays lump-free.
Don’t Skip the Chilling Time
Chilling isn’t just a waiting step, as it’s what helps the cheesecake firm up and hold its shape.
If you cut into it too soon, the filling will be too soft. Give it at least 4–6 hours, or overnight if you can.
The extra time makes a big difference in both texture and flavor.
Adjust the Lemon Flavor to Taste
Lemon can be as bold or as gentle as you like.
Start with the suggested amount, then taste the filling before folding in the whipped cream.
If you want more tang, add a little extra juice or zest.
Just go slowly because too much liquid can affect how well the cheesecake sets.
Avoid Overmixing the Whipped Cream
When folding in the whipped cream, use gentle strokes and take your time.
Overmixing can knock out the air, making the filling dense instead of light and creamy.
Think of it as combining, not stirring.
This small step helps create that soft, airy texture everyone loves.
Variations & Substitutions
No Condensed Milk Version
If you don’t have sweetened condensed milk, you can still make this cheesecake with great results.
Use powdered sugar instead for sweetness and structure.
Start with about ¾ cup and adjust slightly to taste.
The texture will still be creamy, just a little lighter.
Make sure your cream cheese is smooth before adding the sugar so it blends evenly without any graininess.
Gluten-Free Crust Option
You can easily make the crust gluten-free by swapping regular biscuits for gluten-free ones.
Most stores carry good options that crush and hold together just like the classic version.
Mix them with melted butter the same way and press firmly into the pan.
No extra changes needed, which makes this a simple swap without extra effort.
Keto or Low-Carb Variation
For a lower-carb version, replace the biscuit base with a mix of almond flour and melted butter.
Add a small amount of a low-carb sweetener if you like a slightly sweet crust.
In the filling, use a sugar-free sweetener instead of condensed milk or powdered sugar.
Choose one that blends smoothly to avoid a grainy texture.
The result is still creamy and satisfying, just with fewer carbs.
Lime Cheesecake Alternative
If you enjoy a slightly sharper citrus flavor, lime works beautifully here.
Simply swap the lemon juice and zest for fresh lime.
The method stays exactly the same, but the taste shifts to something a bit more bold and tangy.
It’s a nice way to change things up without learning a new recipe.
Mini Cheesecake Cups
For individual servings, divide the crust and filling into small cups or jars.
This is perfect for parties or when you want easy, grab-and-go desserts.
They chill faster than a full cheesecake and are simple to serve.
No slicing needed. Just add toppings and enjoy.
Storage & Make-Ahead Tips
This cheesecake stores beautifully, which makes it perfect for planning ahead.
Keep it covered in the fridge, either with plastic wrap or in an airtight container, to prevent it from drying out or picking up other flavors.
It will stay fresh and creamy for up to 4–5 days, making it a great option to prepare in advance for busy weeks or upcoming events.
If you’d like to freeze it, place the fully set cheesecake (whole or sliced) in the freezer until firm, then wrap it tightly in plastic wrap and a layer of foil or store it in a freezer-safe container.
It can be frozen for up to 2 months without losing its texture.
When you’re ready to enjoy it, let it thaw slowly in the fridge for a few hours or overnight. This helps it keep its smooth, creamy consistency.
For best results, add any fresh toppings after thawing so they stay vibrant and fresh.
Common Mistakes to Avoid
- Runny filling (not enough chilling) – Cutting too early prevents the cheesecake from setting properly, so always allow enough chill time.
- Overly soft crust – Not pressing the crust firmly or skipping the chill step can cause it to crumble when sliced.
- Too much lemon juice affecting texture – Adding excess liquid can stop the filling from firming up and make it too soft.
- Not softening cream cheese – Cold cream cheese doesn’t blend smoothly and can leave lumps in your filling.
Serving Suggestions
- Pair with tea or coffee – The creamy texture and bright lemon flavor balance perfectly with a warm drink.
- Perfect for summer gatherings – Its cool, refreshing taste makes it ideal for hot days and outdoor events.
- Great as a light dessert after heavy meals – The citrusy finish feels fresh and not too rich, even after a big meal.
Final Thoughts
This no-bake lemon cheesecake keeps things simple while delivering a smooth, creamy texture and a fresh, zesty flavor.
It’s easy to make, easy to serve, and always a crowd-pleaser.
Give it a try and see how quickly it comes together!
FAQs
Yes, this recipe sets naturally using cream cheese and whipped cream, so gelatin isn’t needed.
It usually takes 4–6 hours in the fridge, but overnight gives the best results.
Yes, but fresh lemon juice gives a brighter, more natural flavor.
It may need more chilling time, or the filling could have too much liquid.
Yes, you can freeze it for up to 2 months and thaw it in the fridge before serving.
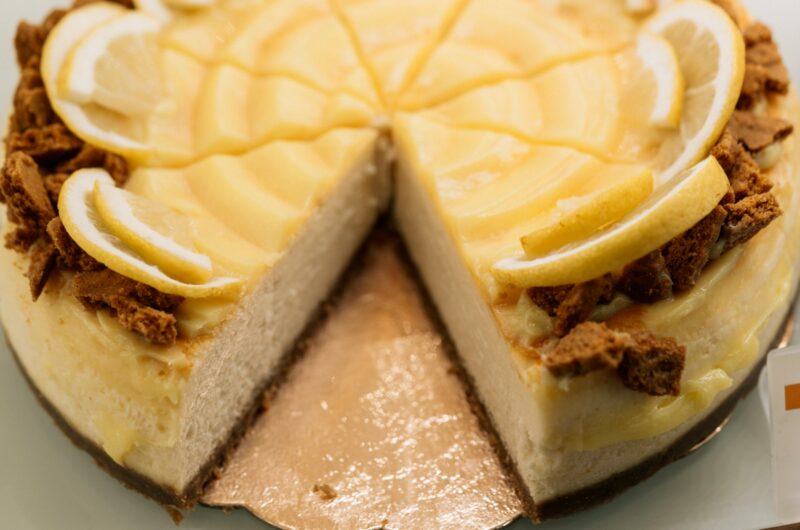
No Bake Lemon Cheesecake (Creamy, Tangy & Ready in Minutes!)
Difficulty: Easy8
Slices15
minutes6
hoursA creamy, tangy no-bake lemon cheesecake with a buttery crust—simple to make and perfect for any occasion.
Ingredients
1 ½ cups crushed graham crackers or biscuits
½ cup melted butter
450g cream cheese, softened
1 can (397g) sweetened condensed milk
½ cup fresh lemon juice
1 tablespoon lemon zest
1 teaspoon vanilla extract
1 cup whipped cream
Directions
- Mix crushed biscuits with melted butter, then press firmly into a pan. Chill for 20–30 minutes.
- Beat cream cheese until smooth, then mix in condensed milk and vanilla.
- Add lemon juice and zest, mixing until slightly thickened.
- Gently fold in whipped cream until light and smooth.
- Pour filling over the crust and smooth the top.
- Refrigerate for 4–6 hours or until set.
- Slice, serve, and enjoy chilled.
Notes
- Make sure the cream cheese is softened to avoid lumps.
- Chill overnight for the best texture.
- Adjust lemon juice to taste, but don’t add too much or it may not set properly.

Hi, I’m Sorenna Blythe, the baker and writer behind Mix Whisk Bake. I share simple, reliable recipes and honest kitchen moments to help home bakers bake with confidence and joy. When I’m not testing new treats, you’ll find me sipping coffee and dreaming up my next bake.


