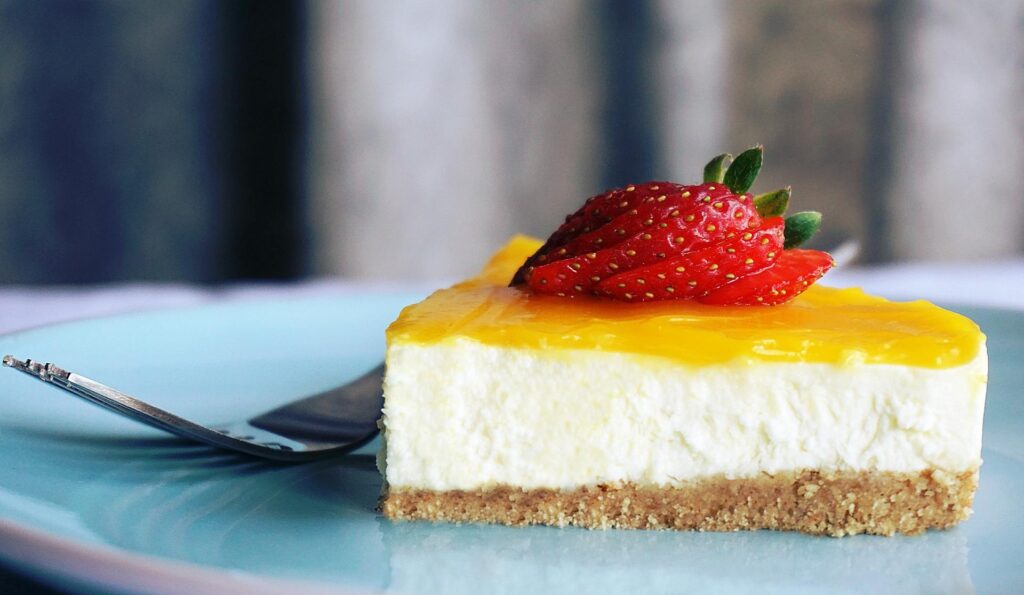
Craving something sweet, creamy, and refreshing without turning on the oven? This no-bake mango cheesecake is exactly what you need.
Mango brings a bright, tropical flavor that pairs beautifully with smooth, rich cream cheese.
It’s light, fruity, and just indulgent enough to feel special without being heavy.
The best part? It’s simple to make with basic ingredients and no baking required.
If you’re new to cheesecakes, don’t worry, I’ll guide you through each step so you can make it with confidence and enjoy every bite.
Why You’ll Love This No-Bake Mango Cheesecake
No baking required (great for hot days)
You don’t need to turn on the oven at all.
That alone makes this recipe a winner, especially on warm days when the kitchen heats up quickly.
Everything comes together with simple mixing and chilling.
If you’ve ever felt nervous about baking, this is a great place to start because there’s less that can go wrong.
Light, creamy, and refreshing
This cheesecake has a soft, silky texture that melts in your mouth.
It’s rich enough to feel like a treat, but the mango keeps it fresh and not too heavy.
Each bite feels balanced.
If you prefer desserts that aren’t overly sweet, you’ll really enjoy this one.
Uses fresh or canned mango
You can use whatever you have on hand.
Fresh ripe mango gives the best natural flavor, but canned mango puree works just as well and saves time.
If using fresh mango, make sure it’s soft and sweet for the best result.
A quick taste test helps.
If it’s delicious on its own, it will shine in the cheesecake.
Make-ahead friendly dessert
This cheesecake actually needs time to chill, so it’s perfect to prepare in advance.
You can make it the night before and let it set in the fridge while you relax.
The texture improves as it firms up, which makes slicing easier and cleaner.
Perfect for parties or special occasions
It looks beautiful without much effort.
A smooth top and a few mango slices are all you need for a simple, elegant finish.
It’s easy to slice and serve, making it ideal for gatherings.
And because it’s chilled, it’s always a refreshing option on the dessert table.
Ingredients Needed
Here’s everything you’ll need.
Keep your ingredients at room temperature, where possible, because it helps everything mix smoothly and gives you a creamier result.
A. Crust
- 200g biscuits (digestive or graham crackers), crushed into fine crumbs
- 100g unsalted butter, melted
Tip: Crush the biscuits as finely as you can. A smooth crumb helps the base hold together better when chilled.
B. Cheesecake Filling
- 400g cream cheese, softened
- 1 cup (240ml) mango puree (fresh or canned)
- 1 cup (240ml) whipping cream, cold
- ½ cup (100g) sugar (adjust to taste depending on mango sweetness)
- 2 teaspoons gelatin powder + 3 tablespoons water (optional, for a firmer set)
or - 1½ teaspoons agar-agar powder (vegetarian alternative)
Tip: If your mango is very sweet, you can slightly reduce the sugar. Taste as you go, as it makes a big difference.
C. Mango Topping (Optional)
- ¾ cup (180ml) mango puree
- 1 teaspoon gelatin powder + 2 tablespoons water (optional, for a glossy set layer)
- Fresh mango slices, for garnish
Tip: This layer is optional, but it adds a beautiful finish and extra mango flavor.
Equipment Needed
- Springform pan or cake tin (20–22cm / 8–9 inch)
A springform pan makes it much easier to remove the cheesecake cleanly. If you’re using a regular cake tin, line it with baking paper so you can lift it out without breaking the base. - Mixing bowls (2–3 medium-sized)
You’ll need separate bowls for the crust, filling, and whipped cream. This keeps things organized and helps you work more easily. - Electric mixer or whisk
An electric mixer makes the filling smooth and fluffy with less effort. If you’re using a whisk, it will still work. Just take your time and whisk well to avoid lumps. - Blender (for mango puree)
If you’re using fresh mango, a blender helps you get a smooth, lump-free puree. If your puree is already smooth, you can skip this step. - Spatula
A spatula is perfect for folding ingredients gently and scraping down the sides of the bowl so nothing goes to waste.
Tip: Set everything out before you start. Having your tools ready makes the process feel easier and more enjoyable.
How to Make No-Bake Mango Cheesecake (Step-by-Step)
Take your time with each step.
Nothing here is complicated, and a steady pace will give you the best results.
Step 1: Prepare the Crust
Start by crushing your biscuits into fine crumbs.
You can use a food processor for speed, or place them in a sealed bag and crush them with a rolling pin.
Aim for a texture like sand, as this helps the base hold together well.
Pour in the melted butter and mix until all the crumbs are evenly coated.
The mixture should feel slightly wet and hold together when pressed.
Transfer it into your pan and press it down firmly into an even layer.
Use the back of a spoon or a flat glass to smooth it out.
Place it in the fridge for at least 20–30 minutes so it can firm up while you prepare the filling.
Step 2: Make the Mango Puree
If you’re using fresh mango, peel and chop it into chunks.
Blend until smooth and thick. This should look like a silky sauce with no lumps.
If your puree feels fibrous, strain it through a sieve.
This step gives your cheesecake a smoother texture, especially important for a clean, creamy finish.
Step 3: Prepare the Filling
In a mixing bowl, beat the cream cheese until it becomes smooth and creamy.
This step is important because any lumps here will carry through to the final dessert.
Add the sugar and mango puree, then mix until everything is well combined.
The mixture should look glossy and evenly colored.
In a separate bowl, whip the cream until soft peaks form.
This means the cream holds its shape but still looks soft and airy.
Gently fold the whipped cream into the mango mixture using a spatula.
Take your time here and fold slowly to keep the mixture light and fluffy.
Step 4: Add Gelatin (Optional)
If you’re using gelatin, sprinkle it over water and let it sit for a few minutes to bloom (this just means it absorbs the water and softens).
Gently heat it until fully dissolved, then let it cool slightly.
Pour it into the filling and mix quickly but gently to combine.
This step helps the cheesecake set more firmly, especially useful in warmer weather.
Step 5: Assemble the Cheesecake
Take your chilled crust out of the fridge.
Pour the filling over the base and spread it evenly.
Use a spatula to smooth the top.
A gentle tap of the pan on the counter can help remove air bubbles and level the surface.
Step 6: Chill
Place the cheesecake in the fridge and let it set for at least 4–6 hours.
Overnight is even better if you have the time.
You’ll know it’s ready when the center feels firm to the touch.
This step is key, so don’t rush it because proper chilling gives you clean slices and the perfect texture.
Step 7: Add Mango Topping
If you’re adding a topping, pour the mango layer gently over the set cheesecake.
Spread it evenly to cover the surface.
Return it to the fridge for another 1–2 hours, or until the top layer is fully set.
Before serving, you can add fresh mango slices for a simple, beautiful finish.
Tips for the Perfect Mango Cheesecake
Use ripe, sweet mangoes for the best flavor
The flavor of this cheesecake depends heavily on your mangoes.
Choose ones that are soft, fragrant, and naturally sweet.
If a mango tastes good on its own, it will taste even better in your dessert.
If your mango is slightly tart, you can balance it with a little extra sugar.
Always taste your puree before adding it to the filling. It’s a small step that makes a big difference.
Do not overmix the filling
Once your ingredients are combined, avoid mixing too much.
Overmixing can make the filling too soft and may affect how well it sets.
When folding in the whipped cream, use gentle motions.
Think of it as lifting and turning the mixture rather than stirring.
This keeps the texture light and airy.
Chill long enough for clean slices
Chilling is not just a step because it’s what gives your cheesecake structure.
If you cut it too soon, it may look soft or messy.
Give it at least 4–6 hours, but overnight is best if you can wait.
When ready, use a sharp knife and wipe it clean between slices for neat, bakery-style cuts.
Use full-fat cream cheese for creaminess
Full-fat cream cheese gives you that rich, smooth texture that makes cheesecake so satisfying.
Lower-fat versions can work, but they often result in a softer, less creamy finish.
Let your cream cheese sit at room temperature before mixing.
This helps it blend smoothly and prevents lumps in your filling.
Variations to Try
No gelatin version (whipped cream stabilized)
If you prefer not to use gelatin, you can still get a lovely set cheesecake.
The key is to whip your cream well so it holds soft but steady peaks, then fold it gently into the filling.
This gives the structure you need without any added setting agent.
The texture will be slightly softer, so make sure to chill it longer—overnight is best.
When slicing, use a sharp knife and keep your cuts gentle.
It may not be as firm, but it will still taste just as creamy and delicious.
Vegan mango cheesecake (use plant-based cream cheese)
You can easily make this recipe dairy-free.
Swap regular cream cheese for a plant-based version, and use coconut cream or a non-dairy whipping cream instead.
Choose a thick, rich alternative for the best results.
Some vegan creams are lighter, so chilling time becomes even more important here.
The flavor stays bright and fruity, and the texture can still be wonderfully smooth with the right ingredients.
Coconut mango cheesecake (add coconut cream)
For a tropical twist, add coconut cream to the filling.
You can replace part of the whipping cream with coconut cream or add a few tablespoons for extra richness.
The coconut flavor pairs beautifully with mango and gives the cheesecake a slightly deeper, more indulgent taste.
If you enjoy tropical desserts, this version is worth trying.
Mini mango cheesecake cups
If you want something easy to serve, turn this recipe into individual cups.
Use small glasses, jars, or cupcake liners and layer the crust and filling inside.
They chill faster and are perfect for parties or quick desserts.
Plus, there’s no slicing needed. Just grab a spoon and enjoy.
This is also a great option if you’re making them ahead of time for guests.
Storage & Make-Ahead Tips
This cheesecake stores beautifully, which makes it a great option when you want to plan ahead or save leftovers.
Keep it covered in the fridge, and it will stay fresh for up to 3–4 days; use an airtight container or wrap the pan well so it doesn’t absorb any fridge odors.
If you’d like to store it longer, you can freeze it for up to 1 month.
Just place it in the freezer once fully set, and wrap it tightly in plastic wrap, followed by foil to protect the texture.
For best results, freeze it without fresh fruit on top and add the garnish later after thawing.
When you’re ready to enjoy it, transfer the cheesecake to the fridge and let it thaw slowly overnight; this gentle thaw keeps the texture smooth and creamy.
Avoid thawing at room temperature, as it can become too soft.
If you’re making it ahead for a gathering, preparing it the day before works perfectly—the flavor settles, the texture firms up nicely, and you’ll have one less thing to worry about on the day.
Serving Suggestions
Serve this cheesecake well chilled straight from the fridge, as the cool temperature keeps the texture firm, smooth, and easy to slice.
For clean pieces, use a sharp knife and wipe it between cuts because it makes a noticeable difference in presentation.
Keep the toppings simple so the mango flavor shines: add fresh mango slices for sweetness and color, a few mint leaves for a light, fresh touch, or a small swirl of whipped cream if you want something extra.
If you’re serving guests, you can plate each slice with a little extra mango on the side for a more polished look.
This dessert pairs beautifully with a warm cup of tea or coffee, which balances the sweetness, or you can lean into the tropical feel and serve it with a chilled fruit juice or mango drink.
However you serve it, keep it cold and simple, as this cheesecake really speaks for itself.
Common Mistakes to Avoid
- Using unripe mango (affects flavor) – Unripe mango can taste sour and dull, so always choose soft, sweet mangoes for the best flavor.
- Not chilling long enough – Cutting too early can make the cheesecake messy, so give it enough time to fully set in the fridge.
- Adding too much liquid puree – Extra liquid can make the filling too soft, so keep the puree thick and balanced.
- Skipping stabilizer when needed – In warmer conditions, skipping gelatin or agar can prevent the cheesecake from setting properly.
Final Thoughts
This no-bake mango cheesecake is simple to make, full of fresh flavor, and perfect when you want something special without the effort of baking.
With just a few steps and a little patience while it chills, you’ll have a dessert that looks beautiful and tastes even better.
FAQs
Yes, you can skip gelatin and rely on whipped cream for structure, though it will be softer.
Typically 4–6 hours, but overnight chilling is best.
Yes, canned puree works well and saves time.
Yes, it freezes well for up to a month.
It may need more chilling time or a stabilizer like gelatin.
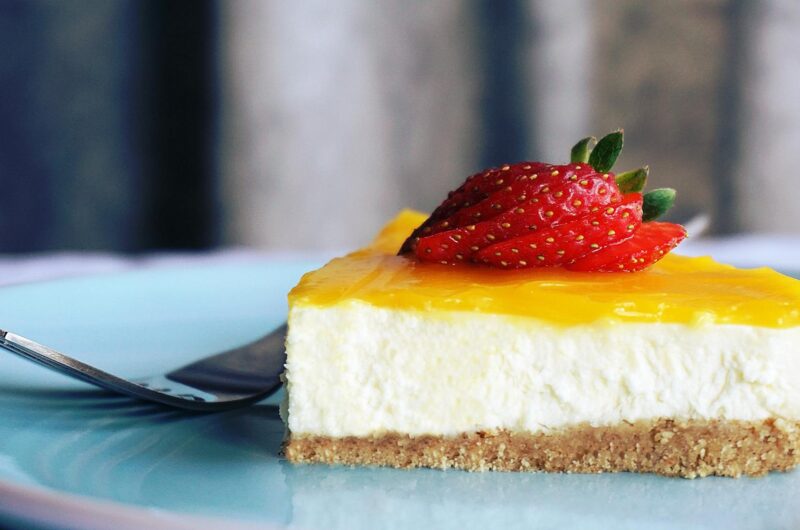
No-Bake Mango Cheesecake Recipe (Creamy, Easy & Delicious)
Difficulty: Easy8
Slices20
minutes6
hoursA smooth, creamy mango cheesecake with a buttery biscuit base—no oven needed and perfect for a refreshing dessert.
Ingredients
200g biscuits (digestive or graham crackers), crushed
100g butter, melted
400g cream cheese, softened
1 cup (240ml) mango puree
1 cup (240ml) whipping cream
½ cup (100g) sugar
2 tsp gelatin + 3 tbsp water (optional)
Fresh mango slices (optional, for topping)
Directions
- Mix crushed biscuits with melted butter, press into a pan, and chill for 20–30 minutes.
- Beat cream cheese until smooth, then mix in sugar and mango puree.
- Whip cream until soft peaks form, then gently fold into the mixture.
- (Optional) Dissolve gelatin and mix it into the filling.
- Pour filling over the crust and smooth the top.
- Chill for 4–6 hours or until fully set.
- Add mango topping or fresh slices before serving if desired.
Notes
- Use ripe, sweet mangoes for the best flavor.
- Chill overnight for cleaner slices and better texture.
- Skip gelatin for a softer, mousse-like cheesecake.

Hi, I’m Sorenna Blythe, the baker and writer behind Mix Whisk Bake. I share simple, reliable recipes and honest kitchen moments to help home bakers bake with confidence and joy. When I’m not testing new treats, you’ll find me sipping coffee and dreaming up my next bake.


