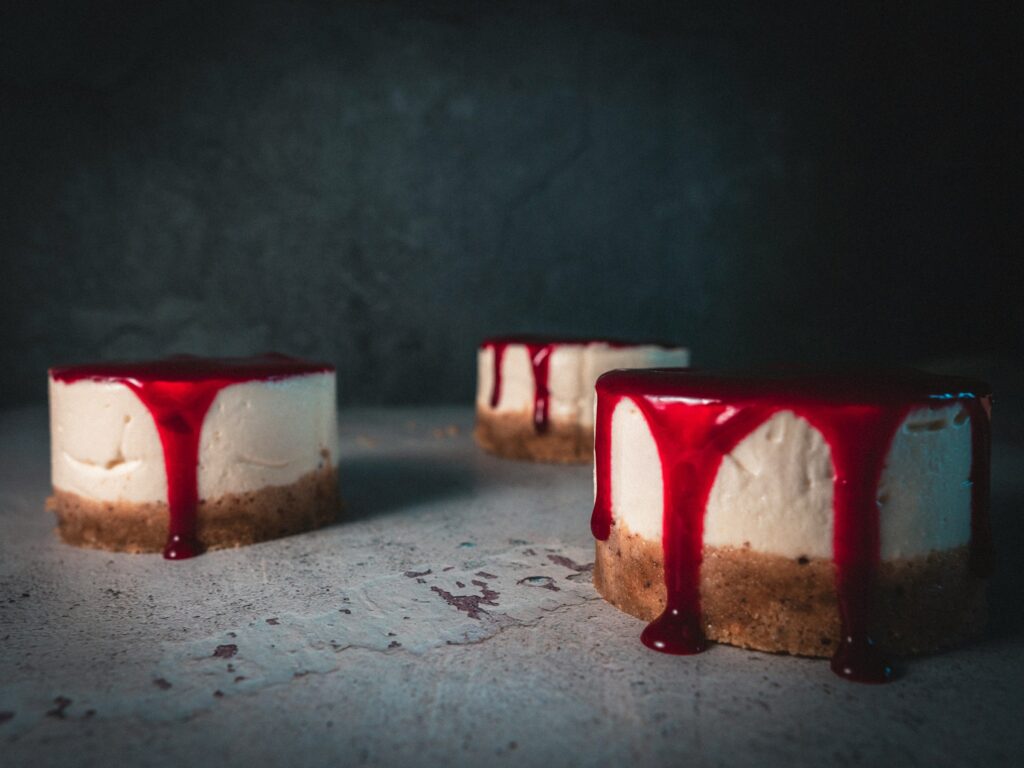
Craving cheesecake but don’t want to turn on the oven? These no-bake mini cheesecakes are the perfect solution.
They’re creamy, lightly sweet, and come together with simple ingredients you probably already have.
You’ll love how easy they are to make. Just mix, layer, and chill—no baking, no stress.
Plus, the mini size makes them perfect for sharing (or keeping all to yourself).
If you’re new to baking, this is a great place to start.
Follow the steps, take your time, and you’ll end up with a dessert that looks impressive but feels effortless.
Why You’ll Love These No-Bake Mini Cheesecakes
- No oven required – Perfect for warm days when you want a cool, fuss-free dessert.
- Quick and beginner-friendly – Simple steps make this recipe easy, even if you’re new to baking.
- Perfect individual portions – Mini cheesecakes are great for serving without slicing or mess.
- Easy to customize with toppings – Add your favorite fruits, sauces, or cookies to make them your own.
- Great for parties, holidays, or everyday treats – They look impressive but are easy enough for any day.
What Are No-Bake Mini Cheesecakes?
No-bake mini cheesecakes are a simple, creamy dessert made without using an oven.
Instead of baking, the filling sets in the fridge.
This gives them a smooth and slightly lighter texture that still feels rich and satisfying.
The biggest difference between baked and no-bake cheesecakes is how they firm up.
Baked cheesecakes use eggs and heat, which create a dense, firm texture.
No-bake versions skip the eggs and rely on whipped cream or similar ingredients to help them set.
This makes them quicker to prepare and much more forgiving, especially if you’re just starting out.
The mini size makes them even better.
You don’t need to slice anything, and each portion is neat and ready to serve.
They’re perfect for sharing at gatherings or enjoying at home without overthinking portions.
Ingredients You’ll Need
For the Crust
- 1 cup graham cracker crumbs – forms the base and gives a nice crunch
- 4 tablespoons (60g) melted butter – helps bind the crumbs together
- 2 tablespoons sugar (optional) – adds a little extra sweetness if you like
For the Cheesecake Filling
- 8 oz (225g) cream cheese, softened – the main ingredient for a smooth, creamy texture
- 1/2 cup powdered sugar – sweetens the filling without making it grainy
- 1 teaspoon vanilla extract – adds a warm, classic flavor
- 1 cup heavy whipping cream – whipped to make the filling light and fluffy
Optional Toppings
- 1/2 cup fresh berries – strawberries, blueberries, or raspberries for freshness
- 1/4 cup chocolate sauce – for a rich, sweet drizzle
- 1/4 cup caramel sauce – adds a buttery sweetness
- 1/3 cup lemon curd – for a bright, tangy twist
- 1/2 cup crushed cookies – great for extra texture and flavor
Tip: You can mix and match toppings depending on what you have at home.
Kitchen Tools Required
- Muffin tin or cupcake pan – Holds the cheesecakes and helps them keep their shape while setting
- Cupcake liners – Makes it easy to remove each cheesecake without sticking or breaking
- Mixing bowls – You’ll need one for the crust and one for the filling to keep things organized
- Hand or stand mixer – Helps create a smooth, lump-free filling with the right creamy texture
- Spoon or piping bag – Use a spoon for simplicity or a piping bag for a cleaner, neater finish
How to Make No-Bake Mini Cheesecakes (Step-by-Step)
Step 1 – Prepare the Crust
Start by combining the graham cracker crumbs, melted butter, and sugar in a bowl.
Mix until the texture looks like damp sand and holds together when pressed.
This step is simple, but take a moment to make sure everything is evenly coated so the crust doesn’t fall apart later.
Spoon the mixture into your lined muffin pan, then press it down firmly using the back of a spoon or the bottom of a glass.
A firm, even base will help your cheesecakes hold their shape once set.
Step 2 – Make the Cheesecake Filling
Place the softened cream cheese in a mixing bowl and beat it until smooth and creamy.
This is important because any lumps now will show in the final texture, so keep mixing until it looks silky.
Add the powdered sugar and vanilla extract, then mix again until fully combined.
In a separate bowl, whip the heavy cream until it forms soft peaks, which means it holds its shape but still looks light and fluffy.
Gently fold the whipped cream into the cream cheese mixture using a spatula.
Take your time here and avoid overmixing, as this keeps the filling airy and smooth.
Step 3 – Assemble the Cheesecakes
Spoon or pipe the filling over each prepared crust.
If you want a neater finish, a piping bag works well, but a spoon does the job just fine.
Fill each liner evenly, then lightly smooth the tops with the back of a spoon or a small spatula.
Don’t worry about making them perfect. Just aim for an even surface so they set nicely.
Step 4 – Chill Until Set
Place the tray in the refrigerator and let the cheesecakes chill for at least 3–4 hours.
If you have the time, letting them sit overnight gives the best results.
This step is where everything comes together, so try not to rush it.
The filling will firm up as it chills, making the cheesecakes easy to remove and serve.
Step 5 – Add Toppings & Serve
Once the cheesecakes are fully set, you can add your favorite toppings just before serving.
Fresh berries, chocolate drizzle, or a spoonful of caramel all work beautifully.
Keep it simple or mix a few flavors—it’s completely up to you.
Serve them chilled, and enjoy the creamy texture and crisp base in every bite.
Tips for the Best Mini Cheesecakes
Use Room Temperature Cream Cheese
Start with cream cheese that’s soft and at room temperature.
This makes it much easier to mix and helps you get a smooth, lump-free filling.
If it’s too cold, it won’t blend well and can leave small lumps that are hard to fix later.
A simple tip is to take it out of the fridge about 30 minutes before you begin.
Don’t Overmix the Filling
Mix just until everything is smooth and combined.
Overmixing, especially after adding the whipped cream, can knock out the air that gives the filling its light texture.
Fold gently and stop once it looks creamy and even.
A few extra seconds of mixing can make a difference, so go easy here.
Chill Long Enough for Proper Setting
Give your cheesecakes enough time in the fridge to fully set.
This step is key for getting that firm, sliceable texture.
If they’re taken out too soon, they may feel soft and lose their shape.
Aim for at least 3–4 hours, but overnight chilling gives the best results and makes serving easier.
Use Full-Fat Ingredients for Best Texture
Full-fat cream cheese and cream give the richest flavor and the smoothest texture.
Lower-fat options can work, but they often result in a softer filling that doesn’t hold as well.
If you want that classic creamy bite, stick with full-fat ingredients for the most reliable results.
Flavor Variations to Try
- Strawberry swirl mini cheesecakes – Swirl in strawberry puree for a fresh, fruity flavor and a pretty finish.
- Chocolate mini cheesecakes – Add melted chocolate or cocoa powder for a rich, indulgent twist.
- Lemon mini cheesecakes – Mix in lemon juice and zest for a bright, tangy taste.
- Oreo mini cheesecakes – Fold in crushed Oreos or use them as a base for a cookies-and-cream version.
- Peanut butter mini cheesecakes – Blend in peanut butter for a smooth, nutty flavor that pairs well with chocolate.
How to Store No-Bake Mini Cheesecakes
To keep your mini cheesecakes fresh and tasting their best, store them in an airtight container in the refrigerator, where they will stay good for up to 4–5 days.
This helps prevent them from drying out and keeps the texture smooth and creamy.
If you’d like to store them for longer, you can freeze them for up to 2 months, which is a great option if you’re making them ahead of time for an event or simply saving a batch for later.
Just place them in a sealed container and, if possible, keep toppings separate so they stay fresh.
When you’re ready to enjoy them, transfer the cheesecakes to the fridge and let them thaw slowly for a few hours or overnight.
This gentle thawing keeps the texture just right and avoids any unwanted sogginess.
Common Mistakes to Avoid
- Not chilling long enough – The cheesecakes won’t fully set and may lose their shape when removed.
- Using low-fat cream cheese – Results in a softer texture that doesn’t hold as well.
- Runny filling from overmixing – Overmixing can break down the structure and make the filling too loose.
- Skipping liners (can stick to pan) – Without liners, the cheesecakes can stick and be difficult to remove cleanly.
Serving Suggestions
For the best experience, serve your mini cheesecakes well chilled, as this keeps the texture firm, creamy, and easy to handle.
Taking them out just before serving helps them hold their shape and taste fresher.
They pair beautifully with a warm drink like coffee or tea, which balances the sweetness and makes each bite feel even more satisfying, especially if you’re enjoying them as a dessert or afternoon treat.
These mini cheesecakes are also perfect for birthdays, parties, and holidays because they’re easy to serve, look neat on a tray, and don’t require slicing, making them a stress-free option when you’re hosting or sharing with others.
Final Thoughts
These no-bake mini cheesecakes are simple, creamy, and easy to make from start to finish.
You don’t need special skills or an oven. Just a few ingredients and a little patience while they chill.
Have fun with the toppings and make them your own.
Try new flavors, mix combinations, and see what you enjoy most.
FAQs
Yes, they must be chilled to set properly.
Typically 3–4 hours, but overnight is best.
Yes, they freeze well for up to 2 months.
Absolutely, they’re perfect for making a day in advance.
Digestive biscuits or crushed cookies work well.
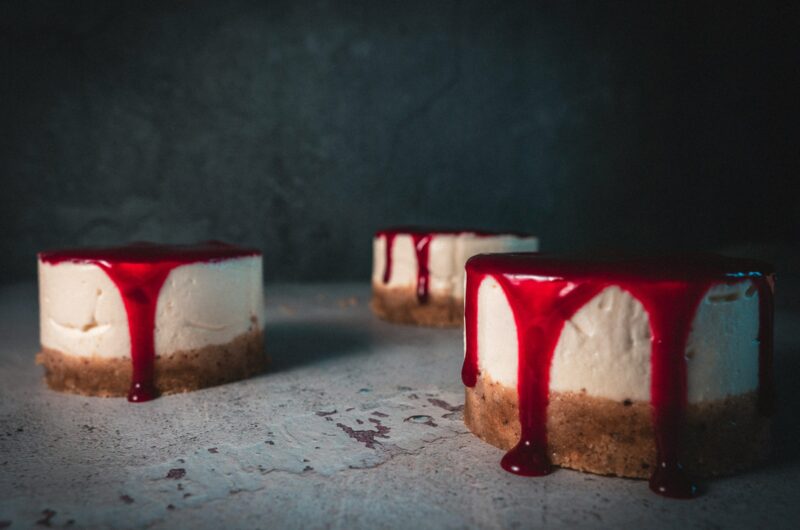
No-Bake Mini Cheesecakes Recipe (Easy, Creamy & Perfect)
Difficulty: Easy12
Cheesecakes15
minutes4
hoursCreamy, no-bake mini cheesecakes with a buttery crust—simple to make and perfect for any occasion.
Ingredients
1 cup graham cracker crumbs
4 tbsp (60g) melted butter
2 tbsp sugar (optional)
8 oz (225g) cream cheese, softened
1/2 cup powdered sugar
1 tsp vanilla extract
1 cup heavy whipping cream
Directions
- Mix graham cracker crumbs, melted butter, and sugar. Press into a lined muffin pan.
- Beat cream cheese until smooth. Add powdered sugar and vanilla, then mix well.
- Whip heavy cream separately until soft peaks form, then gently fold it into the mixture.
- Spoon or pipe filling over crusts and smooth the tops.
- Chill in the fridge for 3–4 hours or until set.
Notes
- Make sure the cream cheese is soft to avoid lumps.
- Chill overnight for the best texture.
- Add toppings just before serving for the freshest flavor.

Hi, I’m Sorenna Blythe, the baker and writer behind Mix Whisk Bake. I share simple, reliable recipes and honest kitchen moments to help home bakers bake with confidence and joy. When I’m not testing new treats, you’ll find me sipping coffee and dreaming up my next bake.


