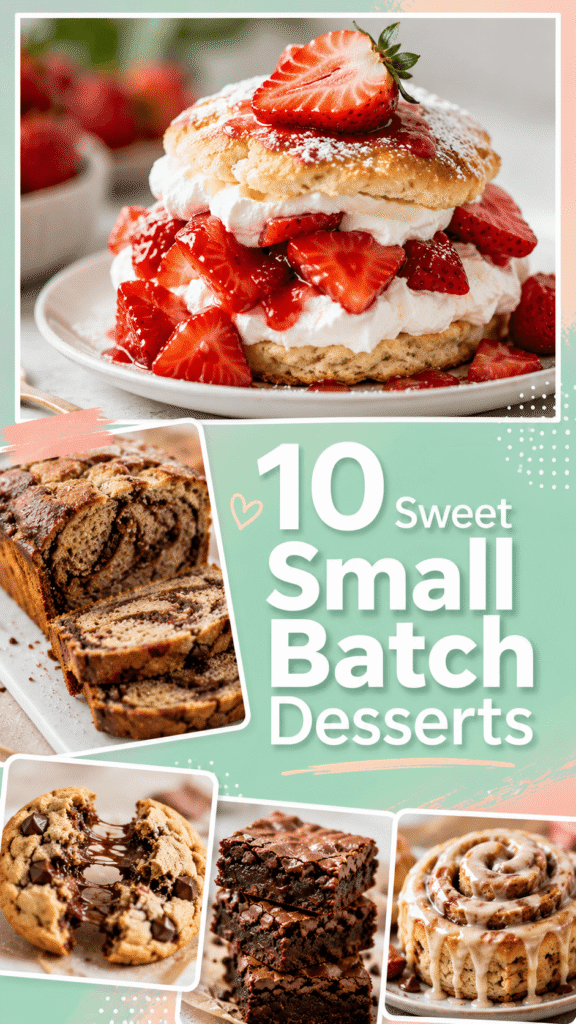
Sometimes you want something sweet without making a huge dessert or filling the kitchen with leftovers.
That’s where small-batch desserts come in.
They’re perfect for small households, cozy nights at home, or those moments when you just want a quick homemade treat.
These recipes are simple, comforting, and great for beginners.
You’ll find everything from rich chocolate desserts to fresh fruity favorites, all made in smaller portions that are easy to bake and even easier to enjoy.
Why You’ll Love Small Batch Desserts
- Less waste – You can enjoy a homemade dessert without ending up with too many leftovers.
- Faster prep and baking times – Smaller recipes come together quickly, making baking feel simple and stress-free.
- Fewer ingredients needed – Most small batch desserts use basic pantry staples you likely already have at home.
- Great for weeknight baking – These easy desserts are perfect when you want something sweet after dinner without spending hours in the kitchen.
- Perfect for testing new dessert recipes – Small batches let you try new flavors and ideas without committing to a full-sized dessert.
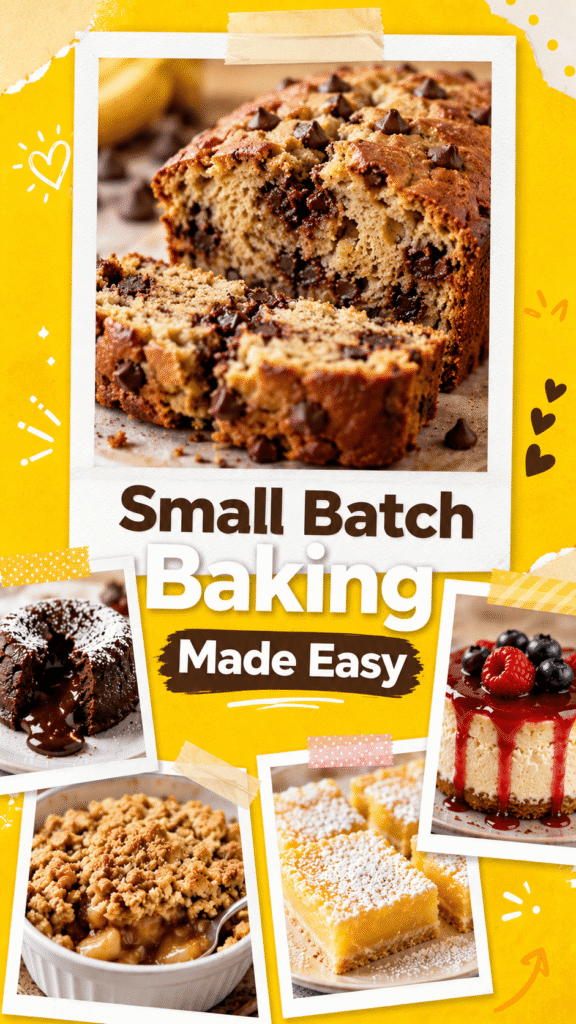
Essential Tips for Small Batch Baking
Use Smaller Baking Pans
Using the right pan size helps small desserts bake evenly and keeps the texture soft and delicious.
Best options include:
- Mini loaf pans
- Ramekins
- 6-inch cake pans
- Muffin tins
Measure Carefully
Small batch recipes rely on accurate measurements since even a little extra flour or sugar can change the final texture.
Measuring carefully helps your desserts turn out soft, moist, and balanced every time.
Don’t Overbake
Small desserts usually bake faster than full-sized recipes, so keep an eye on them during the last few minutes.
Checking early helps prevent dry cookies, cakes, and brownies.
Store Properly
Keep leftovers fresh by storing them in airtight containers.
Most baked desserts stay soft at room temperature for a couple of days, while cream-based desserts should be refrigerated.
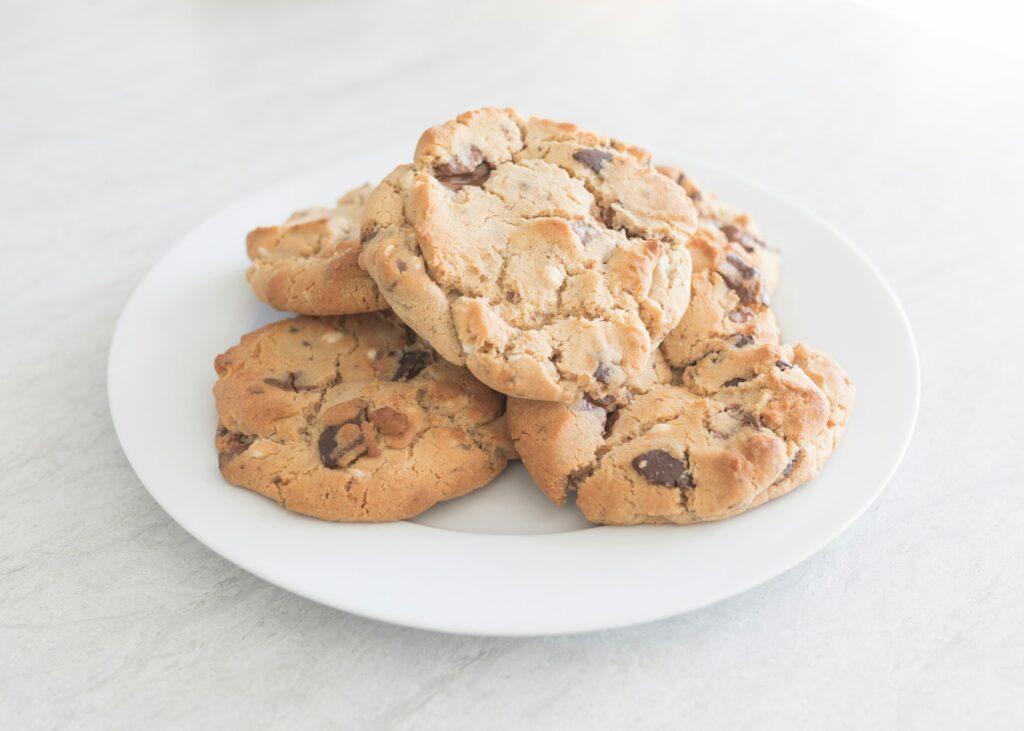
1. Small Batch Chocolate Chip Cookies
These small batch chocolate chip cookies are soft in the center, lightly crisp around the edges, and filled with melty chocolate in every bite.
They’re perfect when you want fresh cookies without baking a huge batch.
The dough comes together quickly with simple ingredients, making this recipe great for beginners and busy weeknights alike.
This recipe makes about 6 to 8 cookies, depending on size.
Ingredients
- 4 tablespoons unsalted butter, melted
- ¼ cup brown sugar
- 2 tablespoons granulated sugar
- 1 teaspoon vanilla extract
- 1 egg yolk
- ½ cup all-purpose flour
- ¼ teaspoon baking soda
- Pinch of salt
- ⅓ cup chocolate chips
Instructions
Mix the Wet Ingredients
In a medium bowl, whisk together the melted butter, brown sugar, and granulated sugar until smooth. Add the vanilla extract and egg yolk, then mix until creamy and fully combined.
Add the Dry Ingredients
Stir in the flour, baking soda, and salt. Mix gently just until no dry streaks remain. Fold in the chocolate chips.
Try not to overmix the dough. Mixing too much can make the cookies less soft after baking.
Scoop and Bake
Scoop small portions of dough onto a lined baking sheet, leaving space between each cookie. Bake at 350°F (175°C) for 9 to 11 minutes, or until the edges look lightly golden.
The centers may look slightly soft when you remove them from the oven. That’s completely normal. They will continue to set as they cool.
Helpful Tips
- For extra gooey cookies, add a few extra chocolate chips on top before baking.
- Chill the dough for 15 minutes if you want thicker cookies.
- Let the cookies cool on the baking sheet for a few minutes before moving them.
2. Mini Brownie Recipe
These mini brownies are rich, fudgy, and deeply chocolatey without requiring a full pan.
They’re ideal for quick dessert cravings and taste amazing warm with a scoop of ice cream or a drizzle of chocolate sauce.
This recipe makes about 4 small brownies.
Ingredients
- 4 tablespoons unsalted butter
- ¼ cup granulated sugar
- 2 tablespoons brown sugar
- 3 tablespoons cocoa powder
- 1 egg
- ¼ teaspoon vanilla extract
- ¼ cup all-purpose flour
- Pinch of salt
- ¼ cup chocolate chunks
Instructions
Prepare the Brownie Batter
Melt the butter in a microwave-safe bowl or small saucepan. Whisk in the granulated sugar, brown sugar, and cocoa powder until smooth.
Add the egg and vanilla extract, then whisk again until glossy.
Add the Dry Ingredients
Fold in the flour and salt. Stir gently until combined, then mix in the chocolate chunks.
The batter will be thick, which helps create that fudgy texture.
Bake the Brownies
Spread the batter into a greased or parchment-lined small baking dish or loaf pan. Bake at 350°F (175°C) for 18 to 22 minutes.
The center should still look slightly soft when done. Avoid overbaking if you want fudgy brownies instead of cakey ones.
Let the brownies cool for at least 10 minutes before slicing.
Helpful Tips
- Sprinkle flaky salt on top for extra flavor.
- Use dark chocolate chunks for a richer taste.
- A toothpick should come out with moist crumbs, not completely clean.
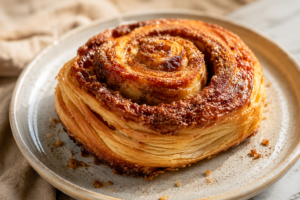
3. Small Batch Cinnamon Rolls
These small batch cinnamon rolls are soft, fluffy, and filled with warm cinnamon sugar goodness.
They’re topped with a creamy icing that melts into every swirl.
Since the recipe makes a smaller amount, it’s perfect for cozy mornings or weekend baking without too many leftovers.
This recipe makes about 4 cinnamon rolls.
Ingredients
For the Dough
- 1 cup all-purpose flour
- 1 tablespoon granulated sugar
- ½ teaspoon instant yeast
- Pinch of salt
- ⅓ cup warm milk
- 2 tablespoons unsalted butter, melted
For the Filling
- 2 tablespoons brown sugar
- 1 teaspoon ground cinnamon
- 1 tablespoon softened butter
For the Cream Cheese Icing
- 2 tablespoons cream cheese, softened
- 1 tablespoon butter, softened
- ¼ cup powdered sugar
- Splash of milk
Instructions
Make the Dough
In a bowl, combine the flour, sugar, yeast, and salt. Stir in the warm milk and melted butter until a soft dough forms.
Knead the dough for about 5 minutes until smooth. Cover and let it rest for 30 to 45 minutes, or until slightly puffy.
Roll and Fill
Roll the dough into a small rectangle on a lightly floured surface. Spread the softened butter over the top, then sprinkle with brown sugar and cinnamon.
Roll the dough tightly into a log and slice into 4 rolls.
Bake the Cinnamon Rolls
Place the rolls into a greased baking dish and bake at 350°F (175°C) for 18 to 22 minutes, or until lightly golden on top.
Add the Icing
Mix the cream cheese, butter, powdered sugar, and milk until smooth. Spread over the warm cinnamon rolls before serving.
Helpful Tips
- Warm milk helps the yeast activate properly, but it should not be too hot.
- If your kitchen feels cold, let the dough rise in a slightly warm oven that is turned off.
- Serve the rolls warm for the softest texture and best flavor.
4. Mini Cheesecake
This mini cheesecake is smooth, creamy, and packed with classic cheesecake flavor in a perfectly small size.
The buttery graham cracker crust adds just the right amount of crunch, while the rich filling stays soft and velvety after chilling.
It’s a great dessert for beginners because the recipe is simple and doesn’t require complicated steps.
This small batch version makes about 2 to 4 servings, depending on slice size.
Ingredients
For the Crust
- ½ cup graham cracker crumbs
- 2 tablespoons melted butter
- 1 tablespoon granulated sugar
For the Cheesecake Filling
- 8 ounces cream cheese, softened
- ¼ cup granulated sugar
- 1 teaspoon vanilla extract
- 1 egg
- 2 tablespoons sour cream
Instructions
Prepare the Crust
In a small bowl, mix the graham cracker crumbs, melted butter, and sugar until the texture looks like wet sand.
Press the mixture firmly into the bottom of a lined or greased 6-inch pan or small baking dish. Use the back of a spoon or the bottom of a glass to flatten it evenly.
Bake the crust at 325°F (163°C) for 5 minutes, then let it cool slightly.
Make the Cheesecake Filling
In another bowl, beat the softened cream cheese until smooth. Add the sugar and vanilla extract, then mix again until creamy.
Add the egg and sour cream. Stir gently until fully combined and smooth.
Try not to overmix the batter once the egg is added. Too much mixing can create air bubbles and lead to cracks while baking.
Bake and Chill
Pour the filling over the crust and smooth the top.
Bake for 25 to 30 minutes, or until the edges look set while the center still has a slight jiggle. Turn off the oven and let the cheesecake sit inside with the door slightly open for about 10 minutes.
Cool completely, then refrigerate for at least 3 hours before serving.
Helpful Tips
- Room temperature cream cheese blends much more smoothly.
- Chill the cheesecake overnight for the best texture.
- Top with berries, caramel sauce, or whipped cream for extra flavor.
5. Small Batch Peanut Butter Blondies
These peanut butter blondies are soft, chewy, and full of rich peanut butter flavor in every bite.
They have slightly crisp edges with a tender center that stays moist for days.
Since this recipe makes a small batch, it’s perfect for quick dessert cravings without filling the kitchen with leftovers.
They also come together in one bowl, which makes cleanup easy.
This recipe makes about 4 to 6 blondies.
Ingredients
- ¼ cup unsalted butter, melted
- ¼ cup creamy peanut butter
- ⅓ cup brown sugar
- 1 egg yolk
- 1 teaspoon vanilla extract
- ½ cup all-purpose flour
- Pinch of salt
- ¼ teaspoon baking powder
- ¼ cup chocolate chips (optional)
Instructions
Mix the Batter
In a medium bowl, whisk together the melted butter, peanut butter, and brown sugar until smooth and creamy.
Add the egg yolk and vanilla extract, then stir until fully combined.
Add the Dry Ingredients
Mix in the flour, salt, and baking powder. Stir gently until a soft batter forms.
If you like a little extra chocolate flavor, fold in the chocolate chips at this stage.
Bake the Blondies
Spread the batter evenly into a greased or parchment-lined small baking pan.
Bake at 350°F (175°C) for 18 to 22 minutes, or until the top looks lightly golden and the center is just set.
Let the blondies cool before slicing, so they hold their shape properly.
Helpful Tips
- Avoid overbaking to keep the blondies soft and chewy.
- A small sprinkle of flaky salt on top balances the sweetness nicely.
- Natural peanut butter can work, but creamy regular peanut butter gives the softest texture.
6. Mini Apple Crisp
This mini apple crisp is warm, cozy, and filled with soft cinnamon apples under a buttery oat topping.
It tastes like comfort food in dessert form and fills the kitchen with an amazing homemade smell while baking.
The recipe is simple enough for beginner bakers and works beautifully for small family desserts or quiet evenings at home.
This recipe makes about 2 to 4 servings.
Ingredients
For the Apple Filling
- 2 medium apples, peeled and diced
- 1 tablespoon brown sugar
- ½ teaspoon ground cinnamon
- 1 teaspoon lemon juice
For the Crumble Topping
- ¼ cup rolled oats
- ¼ cup all-purpose flour
- 2 tablespoons brown sugar
- 2 tablespoons cold butter, cubed
- Pinch of salt
Instructions
Prepare the Apple Filling
Place the diced apples into a small baking dish. Toss them with brown sugar, cinnamon, and lemon juice until evenly coated.
The lemon juice helps brighten the flavor and keeps the apples from turning too soft while baking.
Make the Crumble Topping
In a separate bowl, combine the oats, flour, brown sugar, and salt.
Add the cold butter and use your fingers or a fork to mix everything together until crumbly. Small buttery pieces throughout the topping help create that classic crisp texture.
Assemble and Bake
Sprinkle the crumble topping evenly over the apples.
Bake at 350°F (175°C) for 30 to 35 minutes, or until the apples are bubbling and the topping looks golden brown.
Let the crisp cool slightly before serving.
Helpful Tips
- Firm apples like Honeycrisp or Granny Smith hold their shape best.
- Serve warm with vanilla ice cream for an extra cozy dessert.
- If the topping browns too quickly, loosely cover the dish with foil near the end of baking.
7. Small Batch Lava Cakes
These small batch lava cakes are rich, soft, and filled with warm melted chocolate in the center.
They look impressive, but they’re surprisingly easy to make at home.
The outside bakes into a delicate chocolate cake while the center stays gooey and smooth.
This recipe is perfect for date nights, celebrations, or those moments when you want a bakery-style dessert without making a full cake. It makes 2 lava cakes.
Ingredients
- 2 ounces dark chocolate, chopped
- 4 tablespoons unsalted butter
- 1 egg
- 1 egg yolk
- 2 tablespoons granulated sugar
- 2 tablespoons all-purpose flour
- Pinch of salt
- ½ teaspoon vanilla extract
Instructions
Melt the Chocolate and Butter
Place the chopped dark chocolate and butter into a microwave-safe bowl. Heat in short 20-second bursts, stirring between each one, until smooth and glossy.
Let the mixture cool slightly so it doesn’t scramble the eggs later.
Prepare the Batter
In another bowl, whisk together the egg, egg yolk, sugar, vanilla extract, and salt until slightly lighter in color.
Pour in the melted chocolate mixture and stir gently until combined.
Add the flour and fold it in just until no dry streaks remain.
Bake the Lava Cakes
Grease two ramekins well and divide the batter evenly between them.
Bake at 425°F (220°C) for 10 to 12 minutes. The edges should look set while the centers still feel soft.
Let the cakes sit for 1 minute before carefully turning them onto plates.
Helpful Tips
- Don’t overbake or the molten center will disappear.
- Greasing the ramekins well helps the cakes release easily.
- Serve immediately while the centers are still warm and gooey.
- A dusting of powdered sugar or a scoop of vanilla ice cream makes them even better.
8. Mini Lemon Bars
These mini lemon bars are bright, buttery, and packed with fresh lemon flavor.
The soft citrus filling pairs perfectly with the tender shortbread crust underneath.
They’re sweet, tangy, and refreshing without being too heavy.
Since this is a small batch recipe, it’s great when you want homemade lemon bars without a huge tray sitting on the counter for days.
This recipe makes about 6 small bars.
Ingredients
For the Shortbread Crust
- ½ cup all-purpose flour
- 2 tablespoons granulated sugar
- 4 tablespoons cold butter, cubed
For the Lemon Filling
- 1 egg
- ¼ cup granulated sugar
- 2 tablespoons fresh lemon juice
- 1 teaspoon lemon zest
- 1 tablespoon all-purpose flour
Optional Topping
- Powdered sugar for dusting
Instructions
Prepare the Crust
In a bowl, combine the flour and sugar. Add the cold butter and use a fork or your fingers to work it into the mixture until crumbly.
Press the mixture into a lined small baking dish.
Bake at 350°F (175°C) for 12 to 15 minutes, or until lightly golden around the edges.
Make the Lemon Filling
While the crust bakes, whisk together the egg, sugar, lemon juice, lemon zest, and flour until smooth.
Fresh lemon juice gives the bars the brightest flavor, so it’s worth squeezing a fresh lemon if possible.
Bake the Lemon Bars
Pour the filling over the warm crust and return the pan to the oven.
Bake for another 12 to 15 minutes, or until the center looks set and no longer jiggles.
Cool completely before slicing. Dust with powdered sugar just before serving.
Helpful Tips
- Chill the bars for cleaner slices.
- Use fresh lemon zest for a stronger citrus flavor.
- Don’t overbake the filling, or it can lose its soft texture.
9. Small Batch Strawberry Shortcake
This small batch strawberry shortcake is light, fresh, and perfect for spring or summer baking.
Fluffy homemade shortcakes are layered with juicy strawberries and soft whipped cream for a dessert that feels simple but special.
The recipe is easy to follow and works beautifully for beginner bakers. It makes about 4 shortcakes.
Ingredients
For the Strawberries
- 1 cup sliced strawberries
- 1 tablespoon granulated sugar
For the Shortcakes
- 1 cup all-purpose flour
- 1 tablespoon granulated sugar
- 1 teaspoon baking powder
- Pinch of salt
- 3 tablespoons cold butter, cubed
- ⅓ cup heavy cream
- ½ teaspoon vanilla extract
For the Whipped Cream
- ½ cup heavy cream
- 1 tablespoon powdered sugar
- ½ teaspoon vanilla extract
Instructions
Prepare the Strawberries
Mix the sliced strawberries with the sugar in a bowl. Let them sit for about 15 to 20 minutes.
This helps the strawberries release their natural juices and creates a sweet syrup for the shortcakes.
Make the Shortcakes
In a bowl, whisk together the flour, sugar, baking powder, and salt.
Cut in the cold butter until the mixture looks crumbly. Stir in the heavy cream and vanilla extract until a soft dough forms.
Pat the dough into a thick circle and cut out shortcakes using a biscuit cutter or glass.
Bake at 400°F (204°C) for 12 to 15 minutes, or until lightly golden.
Make the Whipped Cream and Assemble
Whip the heavy cream, powdered sugar, and vanilla extract until soft peaks form.
Slice the cooled shortcakes in half, then layer with strawberries and whipped cream.
Helpful Tips
- Keep the butter cold for soft, flaky shortcakes.
- Don’t overwork the dough, or the shortcakes may become dense.
- Assemble just before serving for the freshest texture.
10. Mini Banana Bread
This mini banana bread is soft, moist, and packed with cozy banana flavor.
It’s a wonderful way to use up ripe bananas without making a full-sized loaf.
The texture stays tender, and the warm cinnamon adds extra comfort in every bite.
This recipe is simple, reliable, and perfect for beginner bakers.
It makes 1 mini loaf or about 4 slices.
Ingredients
- 1 ripe banana, mashed
- ¼ cup melted butter
- ¼ cup brown sugar
- 1 egg yolk
- ½ teaspoon vanilla extract
- ½ cup all-purpose flour
- ¼ teaspoon baking soda
- ¼ teaspoon ground cinnamon
- Pinch of salt
Instructions
Mix the Batter
In a medium bowl, mash the banana until mostly smooth.
Whisk in the melted butter, brown sugar, egg yolk, and vanilla extract until combined.
Add the Dry Ingredients
Add the flour, baking soda, cinnamon, and salt. Stir gently until no dry spots remain.
The batter should look thick but easy to spread.
Bake the Banana Bread
Pour the batter into a greased mini loaf pan and smooth the top.
Bake at 350°F (175°C) for 25 to 30 minutes, or until a toothpick inserted into the center comes out clean.
Let the loaf cool slightly before slicing.
Helpful Tips
- Very ripe bananas give the best flavor and sweetness.
- Add chopped walnuts or chocolate chips for extra texture.
- Cover leftovers tightly to keep the bread soft for several days.
Easy Small Batch Dessert Variations
One of the best things about small batch desserts is how easy they are to customize.
Simple little changes can give your favorite recipes a completely new flavor without adding extra work.
Chocolate Lovers
If you enjoy rich chocolate desserts, these easy additions make every bite even more indulgent:
- Add extra chocolate chips to cookie dough, brownie batter, or blondies
- Drizzle melted chocolate over cheesecakes, banana bread, or cinnamon rolls
- Mix dark chocolate chunks into lava cakes for an even gooier center
Fruity Twists
Fresh fruit adds brightness and natural sweetness to small batch desserts.
Try these easy swaps:
- Replace strawberries with blueberries in shortcakes
- Use peaches instead of apples in crisps during summer
- Add raspberries or diced strawberries to cheesecake batter for extra flavor
Nutty Additions
Nuts add crunch and make desserts feel extra cozy and homemade.
Great options include:
- Pecans for brownies or banana bread
- Walnuts in blondies or cookies
- Sliced almonds on cheesecakes or fruit desserts
A small handful is usually enough, so the texture stays balanced without overpowering the dessert.
Best Tools for Small Batch Baking
You don’t need a kitchen full of equipment to make great small batch desserts.
A few simple tools can make baking easier, faster, and more enjoyable.
- Mixing bowls – Small and medium mixing bowls are perfect for preparing cookie dough, cake batter, and fillings without making a huge mess.
- Hand mixer – A hand mixer helps create smooth cheesecake fillings, fluffy whipped cream, and soft batters with very little effort.
- Mini baking pans – Smaller pans help desserts bake evenly and keep portion sizes manageable. Mini loaf pans, ramekins, and 6-inch cake pans are especially useful.
- Measuring spoons – Accurate measuring matters in small batch baking since even small ingredient changes can affect the texture.
- Silicone spatula – A silicone spatula makes it easy to fold batter gently, scrape bowls clean, and spread mixtures evenly into pans.
Final Thoughts
Small batch desserts make it easy to enjoy homemade treats without spending hours in the kitchen or dealing with lots of leftovers.
Whether you’re craving rich chocolate, fruity desserts, or something warm and cozy, there’s a recipe here for every mood and moment.
Don’t be afraid to try different flavors and make these recipes your own.
Small batch baking is simple, fun, and perfect for building confidence in the kitchen one dessert at a time.
FAQs
Can I double these small batch dessert recipes?
Yes, most small batch dessert recipes can easily be doubled if you need larger servings.
How should I store small batch desserts?
Store desserts in airtight containers at room temperature or in the refrigerator, depending on the recipe.
Can I freeze these desserts?
Yes, many small batch desserts freeze well and can be saved for quick treats later.
What size pan is best for small batch baking?
6-inch cake pans, mini loaf pans, ramekins, and muffin tins work especially well for small batch desserts.

Hi, I’m Sorenna Blythe, the baker and writer behind Mix Whisk Bake. I share simple, reliable recipes and honest kitchen moments to help home bakers bake with confidence and joy. When I’m not testing new treats, you’ll find me sipping coffee and dreaming up my next bake.