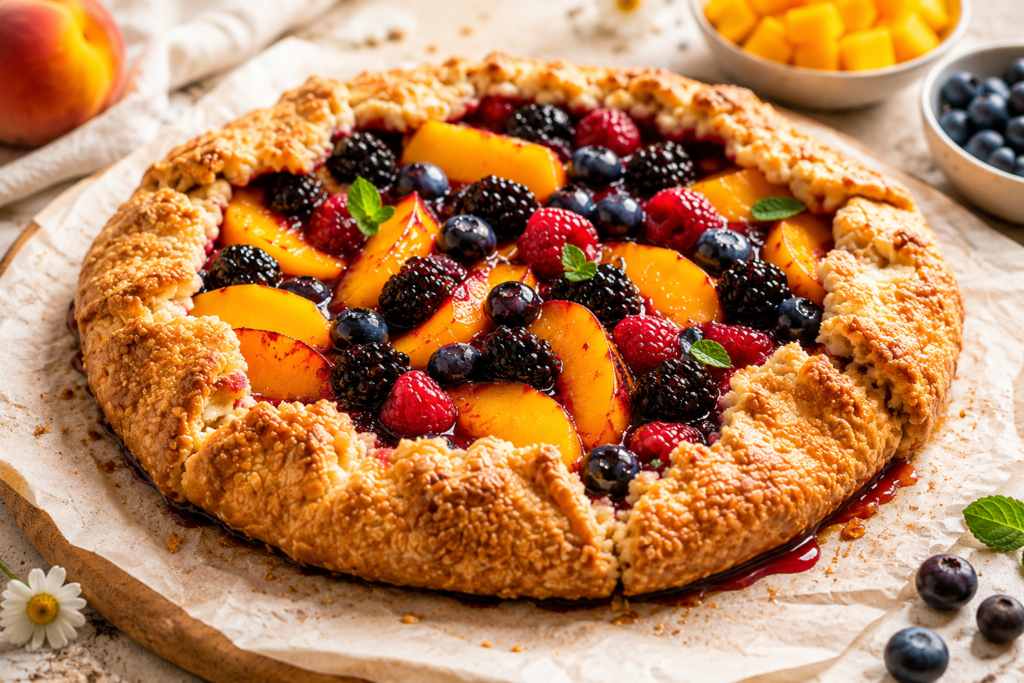
There’s something special about a homemade fruit galette in the summer.
It looks beautiful in that simple, rustic way, but it’s surprisingly easy to make, even if you’ve never baked one before.
A galette is basically a free-form pie with a flaky, buttery crust wrapped around fresh fruit.
No fancy shaping or perfect edges needed here. The relaxed style is part of the charm, which makes it perfect for beginner bakers.
This easy summer fruit galette is filled with juicy seasonal fruit and baked until golden and bubbling.
Serve it warm with a scoop of vanilla ice cream, and you’ve got a simple dessert that feels extra special without a lot of work.

What Is a Fruit Galette?
A fruit galette is a simple rustic dessert made by folding pastry dough around fresh fruit and baking it until golden and crisp.
Unlike a traditional pie, a galette does not need a pie dish, decorative crimping, or perfectly shaped edges.
Everything is meant to look relaxed and homemade, which is one of the reasons so many people love making them.
The dough is rolled out flat, the fruit is placed in the center, and the edges are gently folded over the filling to create a free-form crust.
That casual style gives the galette its beautiful rustic look without requiring advanced baking skills.
It’s the kind of dessert that feels impressive while still being very approachable for beginners.
You also do not need special equipment or fancy techniques, making it a great choice when you want an easy homemade dessert without extra stress.
Even small imperfections add character, so there’s no pressure to make it look perfect.
Once baked, the flaky buttery crust and bubbling fruit create a dessert that feels cozy, fresh, and full of summer flavor.
Why You’ll Love This Easy Summer Fruit Galette
- Easy to make with simple ingredients — You only need basic pantry staples and fresh fruit to create a beautiful homemade dessert.
- Perfect for beginners — The rustic style means there’s no need to worry about perfectly shaped crusts or complicated techniques.
- Uses fresh seasonal fruit — It’s a great way to enjoy sweet summer berries, peaches, plums, and other fresh fruit at their best.
- Great for summer gatherings — This galette is easy to serve and makes a simple but impressive dessert for family dinners, picnics, or parties.
- Customizable with different fruits — You can mix and match your favorite fruits depending on what’s in season or already in your kitchen.
- Delicious warm or chilled — Serve it fresh from the oven with ice cream or enjoy leftovers cold for an equally tasty treat.
Ingredients You’ll Need
For the Crust
- 2 ½ cups all-purpose flour — Gives the galette structure while keeping the crust tender and flaky.
- 1 cup cold unsalted butter, cubed — Cold butter creates those delicious flaky layers in the pastry.
- 2 tablespoons granulated sugar — Adds a light touch of sweetness to the crust.
- ½ teaspoon salt — Balances the flavors and enhances the buttery taste.
- 6–8 tablespoons ice water — Helps bring the dough together without making it tough.
For the Filling
- 1 cup strawberries, sliced — Adds sweetness and bright summer flavor.
- 1 cup blueberries — Brings juicy texture and natural sweetness.
- 2 peaches, sliced — Soft, sweet peaches pair perfectly with the berries.
- 1 cup blackberries — Adds a slightly tart flavor that balances the filling.
- ⅓ cup granulated sugar — Sweetens the fruit while helping create a syrupy filling.
- 2 tablespoons cornstarch — Thickens the fruit juices so the galette stays crisp instead of soggy.
- 1 tablespoon fresh lemon juice — Brightens the fruit flavors and adds freshness.
- 1 teaspoon vanilla extract — Adds warm flavor and depth to the filling.
Optional Toppings
- 1 egg beaten with 1 tablespoon water (egg wash) — Helps the crust bake up shiny and golden.
- 1 tablespoon coarse sugar — Adds a light crunch and sparkle to the crust.
- Whipped cream for serving — A soft creamy topping that pairs beautifully with warm fruit.
- Vanilla ice cream for serving — Melts into the warm galette for an extra comforting dessert.
Best Fruits for a Summer Galette
Berries
- Strawberries — Sweet, juicy strawberries soften beautifully while baking and add classic summer flavor.
- Blueberries — These small berries burst in the oven and create a rich, jammy filling.
- Raspberries — Raspberries add bright color and a slightly tart flavor that balances sweeter fruits.
- Blackberries — Their deep flavor pairs especially well with peaches, plums, and vanilla.
Stone Fruits
- Peaches — Soft, sweet peaches are one of the best choices for a warm summer galette.
- Nectarines — Similar to peaches but slightly firmer, nectarines hold their shape nicely while baking.
- Plums — Plums add a sweet-tart flavor and beautiful color to the filling.
- Apricots — These smaller stone fruits bring a light sweetness and slightly tangy finish.
Tropical Additions
- Mango — Mango adds a smooth texture and naturally sweet tropical flavor that works well with berries.
- Pineapple — Fresh pineapple gives the galette a bright, juicy twist with a little extra tanginess.
Kitchen Tools You Need
- Mixing bowls — You’ll need a few bowls for preparing the dough and tossing the fruit filling together evenly.
- Rolling pin — Helps roll the dough into a flat circle with the right thickness for a flaky crust.
- Baking sheet — A flat baking sheet gives the galette space to bake evenly and catch any bubbling fruit juices.
- Parchment paper — Prevents sticking and makes transferring and cleanup much easier.
- Pastry brush — Perfect for brushing the crust with egg wash so it bakes up golden and shiny.
How to Make an Easy Summer Fruit Galette
Step 1 — Prepare the Dough
Start by making the crust. In a large mixing bowl, whisk together the flour, sugar, and salt until evenly combined.
Add the cold cubed butter and work it into the flour using a pastry cutter, fork, or even your fingertips.
The mixture should look crumbly with small pieces of butter still visible throughout the dough.
Those little butter pockets are what create a flaky crust once baked, so there’s no need to make it perfectly smooth.
Slowly add the ice water, one tablespoon at a time, mixing gently until the dough starts coming together.
Be careful not to overmix. The dough should hold together when pressed but still feel slightly shaggy.
Shape it into a disk, wrap it tightly, and place it in the refrigerator for at least 30 minutes.
Chilling the dough helps the butter stay cold, which gives the crust a better texture and makes rolling easier later on.
Step 2 — Make the Fruit Filling
While the dough chills, prepare the fruit filling. Slice the peaches and strawberries into even pieces so everything bakes at the same rate.
Add the fruit to a large bowl along with the blueberries and blackberries.
Sprinkle in the sugar and cornstarch, then drizzle over the lemon juice and vanilla extract.
Gently toss everything together until the fruit is evenly coated.
The sugar helps draw out the natural juices, while the cornstarch thickens the filling as it bakes, so the crust stays crisp instead of soggy.
Let the fruit sit for a few minutes to allow the flavors to blend together.
This small step makes the filling taste sweeter, juicier, and more balanced.
Step 3 — Roll Out the Dough
Lightly flour your work surface and place the chilled dough in the center.
Roll it into a rough circle about 12 inches wide. Don’t worry about making it perfectly round.
A galette is meant to look rustic, and uneven edges only add to its homemade charm.
Once rolled out, carefully transfer the dough onto a parchment-lined baking sheet.
Using parchment paper makes moving the galette easier and helps prevent sticking during baking.
If the dough becomes too soft while working, place it back into the fridge for a few minutes before continuing.
Step 4 — Assemble the Galette
Spoon the fruit filling into the center of the dough, spreading it out evenly while leaving about a 2-inch border around the edges.
Avoid overfilling the galette, as too much juice can spill out during baking and make the crust soggy.
Fold the edges of the dough gently over the fruit, working your way around the galette and slightly overlapping the folds as you go.
The center should remain open so the colorful fruit stays visible.
Don’t stress about making each fold perfect. The relaxed shape is part of what makes a galette feel cozy and inviting.
Step 5 — Add Finishing Touches
Brush the exposed crust with egg wash to help it bake into a rich golden brown color.
This simple step also gives the crust a beautiful shine once baked.
Sprinkle coarse sugar over the edges for a little crunch and extra sweetness.
These finishing touches may seem small, but they make the galette look bakery-worthy with very little extra effort.
Step 6 — Bake Until Golden
Bake the galette in a preheated oven until the crust is crisp and deeply golden and the fruit filling is bubbling in the center.
The bubbling juices are a good sign that the fruit has softened and the filling has thickened properly.
Let the galette cool for a few minutes before slicing.
This gives the filling time to settle slightly, making it easier to serve.
Enjoy it warm on its own or with a scoop of vanilla ice cream for the perfect easy summer dessert.
Tips for the Best Fruit Galette
Keep Butter Cold
Cold butter is one of the biggest secrets to a flaky galette crust.
When small pieces of cold butter melt in the oven, they create little pockets of steam that give the pastry its light, crisp layers.
If the butter becomes too warm while mixing the dough, the crust can turn dense instead of flaky.
To make things easier, cut the butter into cubes before starting and keep it in the fridge until you’re ready to use it.
If your kitchen is warm, you can even chill the mixing bowl for a few minutes beforehand.
Don’t Overfill the Galette
It can be tempting to pile on extra fruit, but too much filling can make the galette difficult to fold and bake properly.
Overfilling often causes juices to spill out onto the baking sheet, which can lead to a soggy crust.
Keeping the fruit in an even layer helps the galette bake more evenly and makes slicing much easier later on.
A slightly thinner filling also allows the crust to stay crisp and golden around the edges.
Use Ripe but Firm Fruit
The best fruit for a galette is sweet, ripe, and still slightly firm to the touch.
Overripe fruit releases too much liquid while baking, which can make the filling watery.
Firm fruit holds its shape better and gives the galette a more balanced texture once baked.
If your fruit is especially juicy, adding a little extra cornstarch can help thicken the filling and keep the crust from becoming soggy.
Chill the Dough Before Baking
Even after assembling the galette, it helps to chill it for 10 to 15 minutes before baking.
This quick step firms the butter back up after handling the dough and helps the crust keep its shape in the oven.
A cold galette also bakes up with better texture and cleaner edges.
It may seem like a small detail, but it can make a noticeable difference in the final result.
Use Parchment Paper for Easy Cleanup
Lining the baking sheet with parchment paper makes the entire process simpler from start to finish.
The dough won’t stick to the pan, the galette is easier to transfer, and cleanup takes only a few minutes.
It also catches any bubbling fruit juices during baking so nothing burns onto the pan.
This is one of those small kitchen tricks that makes homemade baking feel much less stressful, especially for beginners.
Easy Variations to Try
- Mixed Berry Galette — Use only berries like strawberries, blueberries, raspberries, and blackberries for a juicy and colorful summer dessert.
- Peach Blueberry Galette — The combination of sweet peaches and bursting blueberries creates a fresh and extra juicy filling.
- Apple Berry Galette — Apples paired with berries make this galette perfect for late summer and early fall baking.
- Vegan Fruit Galette — Replace regular butter with dairy-free butter to create a simple plant-based version.
- Gluten-Free Galette — Swap the all-purpose flour for a gluten-free flour blend that works well for baking pastries.
What to Serve With Fruit Galette
- Vanilla ice cream — The cold creamy texture melts beautifully over a warm slice of fruit galette.
- Fresh whipped cream — Light homemade whipped cream adds a soft and airy finish without overpowering the fruit.
- Greek yogurt — A spoonful of Greek yogurt adds a creamy texture with a slight tang that balances the sweetness.
- Honey drizzle — A little honey over the top brings extra sweetness and a glossy finish to the dessert.
- Fresh mint — A few mint leaves add freshness and make the galette feel even brighter and more summery.
How to Store Leftovers
Room Temperature
If you plan to enjoy the galette within the same day, you can keep it covered at room temperature for up to 1 day.
Place it loosely covered with foil or plastic wrap to help protect the crust while still keeping it from becoming too soft.
This works especially well if your kitchen is cool and dry.
The crust will usually stay crispest during the first several hours after baking, making it perfect for snacking throughout the day.
Refrigerator
For longer storage, place the leftover galette in an airtight container or cover it tightly and store it in the refrigerator for up to 4 days.
Chilling helps keep the fruit fresh, especially during warmer summer weather.
The crust may soften slightly in the fridge because of the fruit juices, but the flavor will still be delicious.
If you want to bring back some crispness, warm a slice in the oven for a few minutes before serving.
A quick reheat can make leftovers taste almost freshly baked again.
Freezer
This galette also freezes well, which makes it a great make-ahead dessert option.
Let the baked galette cool completely before wrapping it tightly in plastic wrap and foil or placing it in a freezer-safe container.
Freeze for up to 2 months for the best flavor and texture.
When ready to enjoy, thaw it in the refrigerator overnight and warm it in the oven until heated through.
The crust will crisp back up nicely, and the fruit filling will stay soft and flavorful.
Final Thoughts
This easy summer fruit galette is the kind of dessert that looks beautiful without needing complicated steps or perfect baking skills.
The flaky crust, juicy fruit, and rustic style make it simple enough for beginners while still feeling special enough to share with family and friends.
One of the best things about this recipe is how flexible it is.
You can mix and match your favorite seasonal fruits and create a slightly different galette every time you bake it.
Don’t be afraid to experiment and make it your own.
FAQs
Can I use frozen fruit?
Yes, you can use frozen fruit if fresh fruit is not available. Just thaw and drain it well first to avoid excess liquid in the filling.
Do I need to peel peaches?
No, peeling peaches is optional. The skin softens while baking, but you can remove it if you prefer a smoother texture.
Why is my galette soggy?
A soggy galette is usually caused by overly juicy fruit or too much filling. Using cornstarch and avoiding overfilling helps keep the crust crisp.
Can I make the dough ahead of time?
Yes, the dough can be made up to 2 days ahead and stored in the refrigerator until ready to use.
What’s the difference between a galette and a tart?
A galette is free-form and rustic, while a tart is usually baked in a tart pan with more structured edges.
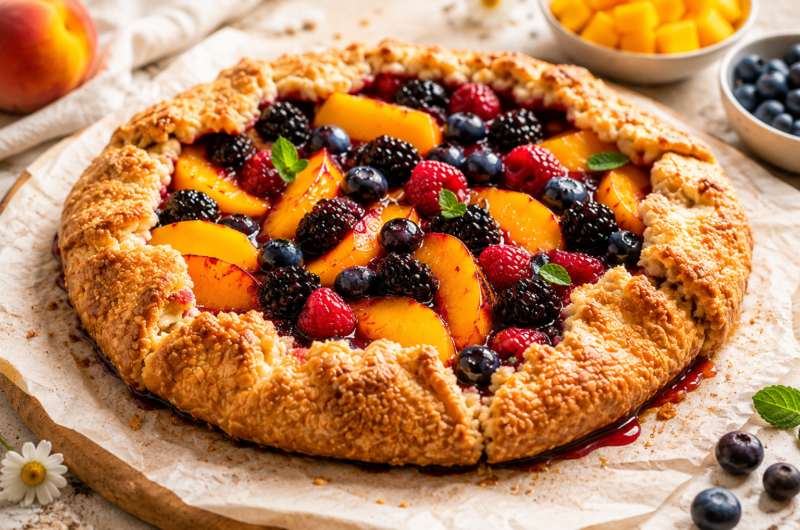
Easy Summer Fruit Galette Recipe Anyone Can Make
Difficulty: Easy7
servings20
minutes40
minutes1
hourA rustic summer fruit galette made with flaky buttery pastry and fresh juicy fruit. This simple dessert is beginner-friendly, easy to customize, and perfect served warm with ice cream.
Ingredients
- For the Crust
2 ½ cups all-purpose flour
1 cup cold unsalted butter, cubed
2 tablespoons sugar
½ teaspoon salt
6–8 tablespoons ice water
- For the Filling
1 cup sliced strawberries
1 cup blueberries
2 peaches, sliced
1 cup blackberries
⅓ cup sugar
2 tablespoons cornstarch
1 tablespoon lemon juice
1 teaspoon vanilla extract
- Optional
1 egg for egg wash
Coarse sugar for topping
Vanilla ice cream for serving
Directions
- Preheat oven to 400°F (200°C) and line a baking sheet with parchment paper.
- Mix flour, sugar, and salt in a bowl. Cut in cold butter until crumbly, then add ice water until the dough comes together. Chill for 30 minutes.
- In another bowl, toss the fruit with sugar, cornstarch, lemon juice, and vanilla extract.
- Roll the dough into a rustic circle and transfer to the prepared baking sheet.
- Spoon the fruit filling into the center, leaving a border around the edges. Fold the edges over the fruit.
- Brush the crust with egg wash and sprinkle with coarse sugar if desired.
- Bake for 35–40 minutes or until the crust is golden and the fruit is bubbling. Let cool slightly before serving.
Notes
- Keep the butter cold for the flakiest crust.
- Avoid overfilling the galette to prevent a soggy bottom.
- Serve warm with vanilla ice cream or whipped cream for the best summer dessert experience.

Hi, I’m Sorenna Blythe, the baker and writer behind Mix Whisk Bake. I share simple, reliable recipes and honest kitchen moments to help home bakers bake with confidence and joy. When I’m not testing new treats, you’ll find me sipping coffee and dreaming up my next bake.


