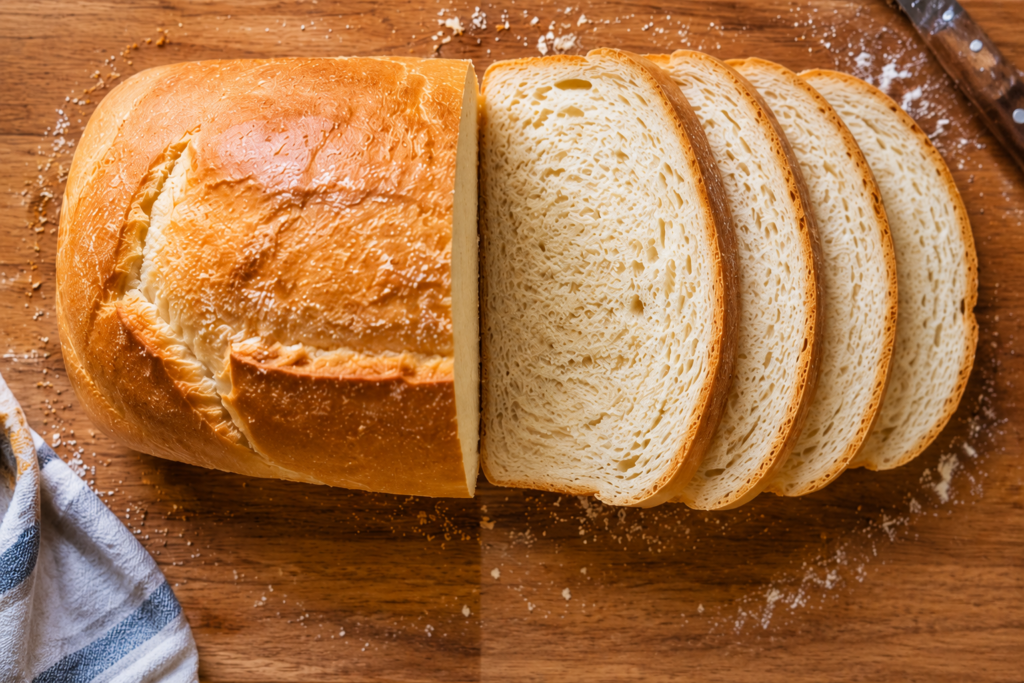
There’s something special about a loaf of homemade white sandwich bread fresh from the oven.
It’s soft, fluffy, and full of flavor without the extra ingredients often found in store-bought bread.
Making your own bread is easier than you might think, and the results are well worth it.
You get complete control over the ingredients, a fresher taste, and a loaf that’s perfect for sandwiches, toast, and everyday meals.
This simple recipe uses basic pantry staples and easy-to-follow steps to create a tender loaf with a light texture and a soft crust.
Why You’ll Love This White Sandwich Bread Recipe
- Soft and tender crumb – Every slice is light, fluffy, and easy to enjoy for sandwiches or toast.
- Simple pantry ingredients – Made with basic ingredients you likely already have in your kitchen.
- Perfect for sandwiches, toast, and French toast – Its soft texture and mild flavor make it incredibly versatile.
- Beginner-friendly recipe – Easy-to-follow steps make homemade bread baking approachable for all skill levels.
- Freezes well for meal prep – Bake a loaf ahead of time and freeze slices for quick and convenient use later.

What Is White Sandwich Bread?
White sandwich bread is a soft, light bread made primarily from white flour and designed for everyday use.
It is one of the most popular types of homemade bread because it is versatile, easy to make, and pairs well with both sweet and savory toppings.
Unlike crusty artisan loaves, white sandwich bread is baked to create a tender texture that is easy to slice and enjoyable to eat.
Its mild flavor allows the fillings, spreads, or toppings to shine while still providing the satisfying taste of freshly baked bread.
Characteristics of Traditional Sandwich Bread
Soft Texture
One of the most recognizable features of white sandwich bread is its soft texture.
The dough is typically enriched with ingredients such as milk, butter, or oil, which help keep the bread tender.
This softness makes it comfortable to bite into and ideal for everything from lunch sandwiches to breakfast toast.
A well-made loaf should feel light and pillowy while still holding its shape when sliced.
Fine Crumb Structure
The crumb refers to the inside texture of the bread.
Traditional sandwich bread has a fine, even crumb with small air pockets distributed throughout the loaf.
This creates slices that are smooth and uniform rather than filled with large holes.
A fine crumb helps spreads like butter, jam, and peanut butter stay evenly distributed without dripping through the bread.
It also makes the loaf sturdy enough to hold sandwich fillings while remaining soft and pleasant to eat.
Mild Flavor
White sandwich bread is known for its gentle, balanced flavor.
It has a slight sweetness and a rich, buttery taste without being overpowering.
Because the flavor is mild, it works well with a wide variety of foods.
Whether you are making a grilled cheese sandwich, a turkey sandwich, or a slice of cinnamon toast, the bread complements the ingredients instead of competing with them.
Easy Slicing
Another reason white sandwich bread is so popular is how easily it slices.
The soft yet structured crumb allows you to cut neat, even slices without excessive crumbling.
This is especially useful when preparing sandwiches for lunches or storing bread for later use.
Once cooled completely, a homemade loaf can be sliced as thick or thin as you like to suit your preferences.
How It Differs From Artisan Bread
Although both types of bread are delicious, white sandwich bread and artisan bread are made with different goals in mind.
Softer Crust
Artisan bread is often known for its thick, crisp, and chewy crust.
White sandwich bread, on the other hand, has a much softer crust.
This softer exterior makes the bread easier to bite into and more comfortable for everyday sandwiches.
Many bakers even brush the top of the loaf with butter after baking to keep the crust extra tender.
Higher Hydration and Enrichment
White sandwich bread often contains ingredients beyond flour, water, yeast, and salt.
Milk, butter, oil, sugar, and sometimes eggs are added to create a richer dough.
These ingredients help the bread stay soft for longer and contribute to its fluffy texture.
The result is a loaf that feels light and tender while remaining moist and flavorful.
Designed for Sandwiches and Toast
Artisan bread is usually crafted to highlight a chewy texture, open crumb, and rustic appearance.
White sandwich bread is designed with practicality in mind.
Its shape, texture, and structure make it perfect for sandwiches, toast, grilled cheese, and everyday meals.
The loaf slices evenly, stores well, and fits easily into a wide range of recipes.
For many home bakers, it is the go-to bread because it combines comfort, convenience, and great flavor in every slice.
Ingredients You’ll Need
The ingredients for this white sandwich bread recipe are simple, easy to find, and work together to create a soft, fluffy loaf with excellent flavor and texture.
- 4 cups (500g) bread flour – Bread flour contains more protein, which helps develop strong gluten for a higher rise and chewier texture.
- Alternative: Use 4 cups (480g) all-purpose flour if bread flour is unavailable. The bread will still be delicious but may be slightly softer and less lofty.
- 2¼ teaspoons (7g or 1 packet) active dry yeast – Helps the dough rise and creates a light, airy crumb.
- Alternative: Use 2¼ teaspoons (7g) instant yeast. Instant yeast can be mixed directly with the dry ingredients and does not require proofing first.
- 1 cup (240ml) warm milk – Adds richness, tenderness, and a softer crumb.
- ½ cup (120ml) warm water – Helps hydrate the dough and activate the yeast.
- Aim for a liquid temperature of 100°F to 110°F (38°C to 43°C) to encourage proper yeast activity.
- 2 tablespoons (25g) granulated sugar – Feeds the yeast, helps with browning, and adds a subtle sweetness to the bread.
- 3 tablespoons (42g) unsalted butter, softened – Adds flavor, moisture, and a soft texture.
- If using salted butter, reduce the added salt slightly.
- 1½ teaspoons (9g) salt – Enhances flavor and helps control yeast activity for a better rise and texture.
Essential Equipment
- 1 standard 9×5-inch loaf pan – Gives the bread its classic sandwich loaf shape and helps it bake evenly.
- 1 large mixing bowl – For mixing and kneading the dough.
- 1 medium bowl (optional) – Useful for proofing yeast or organizing ingredients.
- Dry measuring cups – For accurately measuring flour and other dry ingredients.
- Liquid measuring cup – For milk and water.
- Measuring spoons – For yeast, sugar, and salt.
- Stand mixer with a dough hook attachment – Makes kneading easier and saves time.
- Instant-read thermometer – Helps check liquid temperatures and bread doneness.
- 1 wire cooling rack – Allows air to circulate around the bread as it cools.
How to Make White Sandwich Bread
Making homemade white sandwich bread is a simple process that becomes easier with each loaf you bake.
Take your time with each step, and remember that bread dough doesn’t need perfection to turn out delicious.
Step 1 – Activate the Yeast
Pour the warm water into a large mixing bowl.
The water should be between 100°F and 110°F (38°C to 43°C), which feels warm but not hot to the touch.
Water that is too hot can damage the yeast and prevent the dough from rising properly.
Add the sugar and yeast to the water.
Stir gently and let the mixture sit for 5 to 10 minutes.
As the yeast activates, you should notice a layer of foam forming on the surface.
The mixture may also look bubbly and slightly creamy.
These are good signs that the yeast is alive and ready to help your bread rise.
If no bubbles or foam appear after 10 minutes, it is best to start again with fresh yeast.
Step 2 – Mix the Dough
Add the warm milk, softened butter, and salt to the activated yeast mixture.
Stir until the ingredients are well combined.
Begin adding the flour one cup at a time.
Mix after each addition to help the flour absorb the liquid evenly.
As more flour is added, the mixture will begin to form a soft dough.
The dough should feel slightly tacky but not excessively sticky.
If the dough sticks heavily to your hands, add a small amount of flour, one tablespoon at a time.
Avoid adding too much flour.
A softer dough usually produces a softer loaf.
Step 3 – Knead the Dough
Turn the dough onto a lightly floured surface.
Press the dough away from you with the heel of your hand.
Fold it back over itself and rotate it slightly.
Continue this motion for 8 to 10 minutes.
The dough will gradually become smoother, more elastic, and easier to handle.
If using a stand mixer, attach the dough hook.
Mix on low speed for about 6 to 8 minutes.
The dough should pull away from the sides of the bowl while remaining soft and flexible.
A simple way to check if the dough is ready is the windowpane test.
Gently stretch a small piece of dough between your fingers.
If it stretches into a thin sheet without tearing immediately, the gluten has developed properly, and the dough is ready for rising.
Step 4 – First Rise
Place the kneaded dough into a lightly greased bowl.
Turn the dough once so all sides are lightly coated.
Cover the bowl with a clean kitchen towel or plastic wrap.
Place it in a warm, draft-free area.
A slightly warm kitchen is ideal for proofing.
Allow the dough to rise for about 1 to 1½ hours.
The exact time may vary depending on the temperature of your kitchen.
The dough is ready when it has roughly doubled in size.
A gentle finger press should leave a slight indentation that slowly springs back.
Step 5 – Shape the Loaf
Once the dough has risen, gently press down on it to release excess gas.
Transfer it to a lightly floured work surface.
Pat the dough into a rectangle slightly shorter than your loaf pan.
Starting from the short end, roll the dough tightly into a log.
Pinch the seam closed to help maintain its shape during baking.
Place the dough seam-side down into a greased 9×5-inch loaf pan.
Shaping the dough tightly helps create a smooth loaf and a more even crumb.
Removing large air pockets during shaping also prevents large holes from appearing in the finished bread.
Step 6 – Second Rise
Cover the loaf pan loosely with a kitchen towel.
Allow the dough to rise again for 30 to 45 minutes.
During this stage, the dough should become puffy and expand noticeably.
The top of the dough should rise about 1 inch above the rim of the loaf pan.
Avoid letting the dough overproof.
If it rises too much, it may collapse during baking.
The loaf is ready for the oven when it looks light, airy, and slightly domed on top.
Step 7 – Bake the Bread
Preheat your oven to 350°F (175°C).
Place the loaf pan on the center rack for even heat distribution.
Bake for 30 to 35 minutes, or until the top is golden brown.
The bread should sound slightly hollow when tapped on the bottom.
For the most accurate results, use an instant-read thermometer.
The center of the loaf should reach an internal temperature of 190°F to 200°F (88°C to 93°C).
If the top begins browning too quickly, loosely cover it with aluminum foil during the final minutes of baking.
Step 8 – Cool Before Slicing
Remove the bread from the oven and let it rest in the pan for about 5 minutes.
Carefully transfer the loaf to a wire cooling rack.
Allow the bread to cool completely before slicing.
This step is important because the inside of the loaf continues to set as it cools.
Cutting into hot bread can create a gummy texture and make slices uneven.
Once cooled, use a sharp serrated bread knife for clean slices.
Take a moment to enjoy the aroma before serving.
Few things are as rewarding as slicing into a loaf of homemade bread that you baked from scratch.
Expert Tips for Soft and Fluffy Sandwich Bread
- Measure ingredients accurately – Proper measurements help create the right dough consistency and ensure reliable results every time.
- Don’t add too much flour – A slightly soft dough produces a lighter, fluffier loaf, while excess flour can make the bread dense and dry.
- Use room-temperature ingredients – Ingredients that aren’t too cold mix more evenly and support better yeast activity.
- Avoid overproofing – Let the dough rise until it has doubled in size, as excessive proofing can cause the loaf to collapse during baking.
- Brush with butter after baking – A light coating of melted butter keeps the crust soft and adds extra flavor.
Common Mistakes to Avoid
Dense Bread
Dense bread is one of the most common problems beginner bakers encounter.
A loaf that feels heavy often means the dough did not develop enough structure or rise properly.
One common cause is adding too much flour during mixing or kneading.
While it can be tempting to keep adding flour to reduce stickiness, too much can create a stiff dough that struggles to expand.
Insufficient kneading can also lead to dense bread.
Kneading helps build the gluten network that traps gas and creates a light texture.
If the dough is not kneaded long enough, it may not develop the strength needed for a good rise.
Another possible cause is cutting the rising time short.
The dough needs enough time to expand and become airy before baking.
When in doubt, focus on the dough’s appearance rather than the clock.
A properly risen dough should look puffy and noticeably larger than when it started.
Bread That Doesn’t Rise
Few things are more frustrating than dough that stays flat.
In many cases, the yeast is the source of the problem.
Expired yeast may no longer be active enough to lift the dough.
Always check the expiration date before starting a recipe.
Water temperature also plays an important role.
Water that is too hot can damage the yeast.
Water that is too cool may slow the yeast down significantly.
Aim for warm water between 100°F and 110°F (38°C to 43°C) for the best results.
A cold kitchen can also affect rising times.
If your kitchen is chilly, place the covered dough in a slightly warm spot away from drafts.
Patience is important during bread making.
Sometimes the dough simply needs more time to rise than expected.
Dry or Crumbly Texture
White sandwich bread should be soft and moist, not dry or crumbly.
Overbaking is a common reason bread loses moisture.
Even a few extra minutes in the oven can make a noticeable difference.
Checking the bread’s internal temperature can help prevent this problem.
Another cause is using too much flour.
A dry dough usually creates a dry loaf.
The dough should feel soft and slightly tacky rather than firm and stiff.
Improper storage can also cause bread to dry out quickly.
Once completely cooled, store the loaf in an airtight container or sealed bag to help maintain freshness.
If the bread feels dry the next day, a quick toast can often bring back some of its appeal.
Collapsed Loaf
A loaf that rises beautifully and then sinks can be disappointing.
One of the most common causes is overproofing.
When dough rises for too long, the gluten structure can weaken and lose its ability to support the loaf during baking.
The result is a loaf that collapses either in the oven or shortly after baking.
Pay close attention during the second rise.
The dough should rise until it is slightly above the rim of the loaf pan, but it should not become overly inflated.
Using too much yeast can also contribute to a collapsed loaf.
More yeast does not always mean better bread.
Following the recommended measurements usually produces the best results.
Sudden movements can sometimes affect delicate dough as well.
Handle the loaf gently when transferring it to the oven.
A little care during the final stages can help preserve the beautiful rise you’ve worked hard to achieve.
Remember that every baker experiences mistakes occasionally.
Each loaf teaches you something new, and every batch helps build confidence for the next one.
Variations to Try
One of the best things about homemade white sandwich bread is how easy it is to customize.
If you enjoy experimenting in the kitchen, these variations are great ways to make the recipe your own.
Honey White Bread
Honey white bread is a wonderful option if you prefer a touch of natural sweetness.
Replace the granulated sugar with an equal amount of honey.
The honey adds a subtle flavor that complements the rich, buttery taste of the bread without making it overly sweet.
It also helps keep the loaf soft and moist for longer.
This variation is especially delicious for toast, peanut butter sandwiches, and breakfast recipes.
If you use honey, you may need a little extra flour since honey adds additional moisture to the dough.
Start with the original recipe and adjust only if the dough feels excessively sticky.
Milk Bread Style Sandwich Loaf
For an even softer and fluffier loaf, try making a milk bread-style version.
Milk bread is known for its incredibly light texture and cloud-like crumb.
You can achieve a similar result by replacing all of the water with warm milk and adding an extra tablespoon of butter.
The finished bread will have a richer flavor and a softer bite.
This variation is perfect for sandwiches, dinner rolls, and homemade toast.
Many people also enjoy it simply with a little butter because the bread itself is so tender and flavorful.
Buttermilk Sandwich Bread
Buttermilk gives sandwich bread a slightly tangy flavor and an extra-soft texture.
Replace the milk in the recipe with the same amount of room-temperature buttermilk.
The acidity in buttermilk helps create a tender crumb while adding a subtle depth of flavor.
The finished loaf is soft enough for sandwiches but has a little more character than traditional white bread.
It pairs particularly well with savory fillings such as turkey, ham, chicken salad, and grilled cheese.
If your buttermilk is cold, allow it to come closer to room temperature before mixing the dough.
This helps the yeast perform more consistently.
Whole Wheat Blend Version
If you would like to add more whole grains while keeping the bread soft, a whole wheat blend is an excellent choice.
Replace one cup of the white flour with one cup of whole wheat flour.
This small adjustment adds a slightly nutty flavor and extra fiber without making the bread overly dense.
The loaf will still be soft enough for everyday sandwiches and toast.
Whole wheat flour absorbs more liquid than white flour.
If the dough feels dry during mixing, add a tablespoon of water or milk at a time until it becomes soft and workable.
This variation is a great middle ground for those who enjoy the flavor of whole wheat bread but still want a light texture.
Seed-Topped Sandwich Bread
Seeds add texture, flavor, and visual appeal to homemade bread.
Before baking, lightly brush the top of the loaf with water, milk, or a beaten egg.
Sprinkle your favorite seeds over the surface.
Sesame seeds, poppy seeds, sunflower seeds, and flaxseeds are all excellent options.
The seeds create a pleasant crunch while adding extra flavor to every slice.
This variation works especially well for sandwich bread because it adds interest without changing the soft interior.
For the best results, gently press the seeds onto the dough before baking, so they stay in place after the loaf is finished.
Serving Ideas
- Classic sandwiches – Use the soft slices for lunch favorites like turkey, ham, chicken salad, or peanut butter and jelly.
- Toast with butter and jam – Toast a slice until golden and top with butter and your favorite jam for a simple breakfast.
- Grilled cheese – The tender crumb and soft crust create a perfectly crisp and melty grilled cheese sandwich.
- French toast – Thick slices soak up the custard mixture beautifully while staying soft on the inside.
- Homemade croutons – Cube leftover bread and bake it with olive oil and seasonings for crunchy salad toppings.
How to Store White Sandwich Bread
Proper storage helps keep your homemade bread soft, fresh, and enjoyable for as long as possible.
Because homemade bread does not contain the preservatives found in many store-bought loaves, it is important to store it correctly.
Room Temperature Storage
Room temperature is usually the best place to store freshly baked white sandwich bread.
Before storing the loaf, allow it to cool completely.
Storing warm bread can trap moisture inside the container and create a soggy texture.
Once cooled, place the bread in an airtight container, bread box, or sealed plastic bag.
Keeping the loaf covered helps prevent it from drying out.
Store the bread in a cool, dry area away from direct sunlight and heat sources.
Under normal conditions, homemade white sandwich bread stays fresh for about 3 to 4 days at room temperature.
If you notice the bread becoming slightly firm after a few days, lightly toasting it can help restore some of its texture.
For the freshest flavor, try to enjoy the bread within the first couple of days after baking.
Refrigeration Considerations
Many people assume the refrigerator keeps bread fresh longer, but this is not always the case.
Refrigeration can actually cause bread to become stale more quickly.
The cool temperature changes the structure of the starches in the bread, leading to a firmer texture.
For this reason, refrigeration is generally not recommended for white sandwich bread.
However, there are a few exceptions.
If your kitchen is very warm or humid, refrigeration may help prevent mold growth.
If you choose to refrigerate the bread, store it in an airtight container or tightly sealed bag.
Allow refrigerated slices to come to room temperature or warm them slightly before serving for the best texture.
Freezing Instructions
Freezing is one of the best ways to preserve homemade sandwich bread.
It helps maintain freshness while allowing you to enjoy the loaf over a longer period.
For convenience, slice the bread before freezing.
Pre-sliced bread allows you to remove only the amount you need without thawing the entire loaf.
Place the slices in a freezer-safe bag or airtight container.
Remove as much excess air as possible before sealing.
Properly stored bread can remain in the freezer for up to 3 months while maintaining good quality.
When you’re ready to enjoy it, remove the desired number of slices and let them thaw at room temperature.
You can also place frozen slices directly into a toaster.
This makes homemade bread just as convenient as store-bought bread while preserving its fresh-baked flavor.
A well-stored loaf means less waste and more opportunities to enjoy your homemade bread throughout the week.
Can You Make This Bread Ahead of Time?
Yes, this white sandwich bread is an excellent make-ahead recipe, making it easy to fit homemade baking into a busy schedule.
If you want fresh bread the next day, you can use an overnight refrigeration method by preparing the dough through the first kneading stage, placing it in a lightly greased bowl, covering it tightly, and refrigerating it overnight.
The cold temperature slows down the yeast activity, allowing the dough to rise gradually while developing great flavor.
The next day, remove the dough from the refrigerator and let it sit at room temperature for about 30 to 60 minutes before shaping it.
Once shaped, place it in the loaf pan and allow it to complete its second rise before baking as directed.
You can also freeze the dough before baking if you want even more flexibility.
After the first rise, gently press down the dough, shape it into a loaf, and place it in a freezer-safe bag or airtight container.
The dough can be frozen for up to 3 months.
When you’re ready to bake, thaw the dough overnight in the refrigerator, then allow it to come to room temperature and complete its final rise before baking.
Another great option is batch baking.
Making two or three loaves at the same time requires only a little extra effort and gives you fresh bread ready for future meals.
Once the loaves have cooled completely, wrap them tightly and freeze them for later use.
Many home bakers find that keeping a spare loaf in the freezer makes meal planning much easier.
Troubleshooting Guide
Why Is My Bread Dense?
Dense bread is often caused by insufficient rising time.
If the dough does not have enough time to expand, the finished loaf can be heavy and compact.
Using expired or inactive yeast can also prevent proper rising.
Always check that your yeast becomes foamy during the activation step.
Adding too much flour is another common reason for dense bread.
The dough should feel soft and slightly tacky rather than stiff and dry.
Insufficient kneading may also contribute to a dense texture because the gluten structure has not fully developed.
For a lighter loaf, allow the dough to rise fully, knead it thoroughly, and avoid adding excess flour.
Why Is the Crust Too Hard?
A hard crust is usually the result of overbaking or moisture loss during baking.
Leaving the loaf in the oven longer than necessary can dry out the exterior and create a tougher crust.
Using an oven temperature that is too high can have a similar effect.
Checking the bread a few minutes before the recommended baking time can help prevent overbrowning.
For a softer crust, brush the top of the loaf with melted butter immediately after it comes out of the oven.
The butter adds flavor while helping keep the crust tender.
Proper storage is also important because exposed bread can become hard as it loses moisture.
Why Did My Bread Sink?
A loaf that sinks in the center is often a sign of overproofing.
When dough rises for too long, it can become weak and lose its ability to support itself during baking.
The loaf may look impressive before it goes into the oven, but it will collapse as it bakes.
Too much liquid in the dough can also affect the bread’s structure and make it unstable.
In some cases, underbaking may be responsible.
If the center of the loaf is not fully baked, it may sink as it cools.
Watch the dough carefully during the second rise and bake until the loaf reaches an internal temperature of 190°F to 200°F (88°C to 93°C).
Why Is My Bread Gummy Inside?
Gummy bread is often the result of underbaking.
Even if the crust looks golden brown, the center may need additional time in the oven.
Using a thermometer is the easiest way to confirm that the loaf is fully baked.
Another common cause is slicing the bread too soon.
Fresh bread continues to set as it cools.
Cutting into it while it is still hot can trap steam inside and create a sticky or gummy texture.
Allow the loaf to cool completely on a wire rack before slicing.
Final Thoughts
This white sandwich bread recipe is a wonderful everyday loaf that combines simple ingredients, a soft texture, and reliable results.
If you’ve never baked bread before, don’t be afraid to give it a try.
With a little patience and practice, you’ll be amazed at what you can create from scratch.
FAQs
Can I use all-purpose flour instead of bread flour?
Yes. All-purpose flour works well in this recipe, though the loaf may be slightly softer and less chewy than one made with bread flour.
How do I know when the bread is fully baked?
The loaf should be golden brown and sound slightly hollow when tapped. For the most accurate result, the internal temperature should reach 190°F to 200°F (88°C to 93°C).
Can I make this recipe without milk?
Yes. You can replace the milk with the same amount of water, although the bread may be slightly less rich and tender.
How long does homemade sandwich bread stay fresh?
When stored in an airtight container or bag at room temperature, it typically stays fresh for 3 to 4 days.
Can I freeze baked sandwich bread?
Absolutely. Allow the bread to cool completely, then wrap it tightly and freeze for up to 3 months.
Why is my bread not rising properly?
Inactive yeast, water that is too hot or too cold, or a cool proofing environment are the most common causes of poor rising.
Can I make this recipe in a bread machine?
Yes. Add the ingredients according to your bread machine manufacturer’s instructions and use the basic white bread setting.
What size loaf pan works best?
A standard 9×5-inch loaf pan is ideal for this recipe and produces the classic sandwich bread shape.
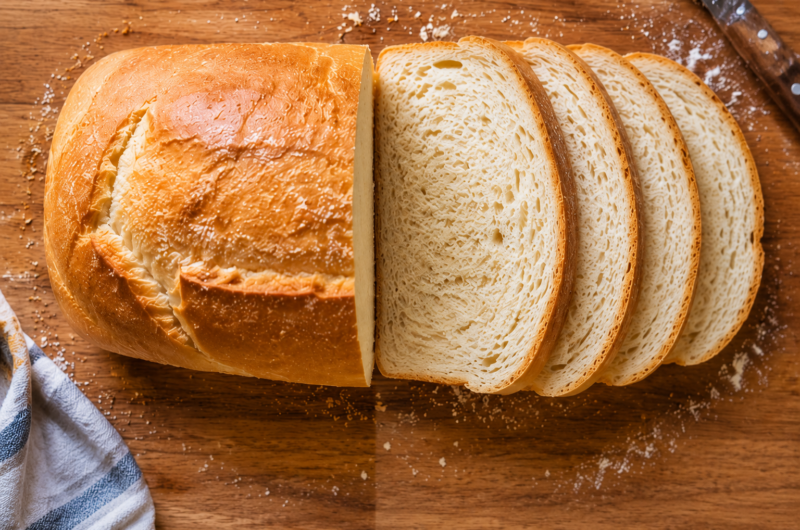
White Sandwich Bread: Soft, Fluffy, and Perfect for Every Day
Difficulty: Easy12
Slices20
minutes35
minutes2
hours25
minutesThis soft and fluffy white sandwich bread is perfect for sandwiches, toast, and everyday baking. Made with simple ingredients, it’s beginner-friendly and delivers a tender crumb with a light, golden crust.
Ingredients
4 cups (500g) bread flour
2¼ tsp (7g) active dry yeast
1 cup (240ml) warm milk
½ cup (120ml) warm water
2 tbsp sugar
3 tbsp unsalted butter, softened
1½ tsp salt
Directions
- Activate the yeast in warm water with the sugar and let it sit for 5–10 minutes until foamy.
- Add the milk, butter, salt, and flour, then mix into a soft dough.
- Knead for 8–10 minutes until smooth and elastic.
- Cover and let the dough rise until doubled, about 1–1½ hours.
- Shape into a loaf and place in a greased 9×5-inch loaf pan.
- Let it rise again for 30–45 minutes.
- Bake at 350°F (175°C) for 30–35 minutes until golden brown.
- Cool completely before slicing and serving.
Notes
- For the softest texture, avoid adding too much flour.
- Brush the top with melted butter after baking for a softer crust.
- Store at room temperature for up to 4 days or freeze for up to 3 months.


Hi, I’m Sorenna Blythe, the baker and writer behind Mix Whisk Bake. I share simple, reliable recipes and honest kitchen moments to help home bakers bake with confidence and joy. When I’m not testing new treats, you’ll find me sipping coffee and dreaming up my next bake.


